This topic provides an example of how to configure single sign-on (SSO) with PingIdentity and CloudSSO.
Background information
Suppose your company uses PingIdentity as its identity provider (IdP) to manage users. You have already set up a multi-account structure in an Alibaba Cloud Resource Directory (RD). You want to configure SSO to allow users from PingIdentity to access specific resources in specific member accounts within your resource directory.
The PingIdentity configuration steps in this topic are provided as a reference to help you understand the end-to-end configuration process for CloudSSO logon. Alibaba Cloud does not provide consulting services for PingIdentity configuration.
Step 1: Obtain the service provider (SP) metadata from CloudSSO
Log on to the CloudSSO console.
In the navigation pane on the left, click Settings.
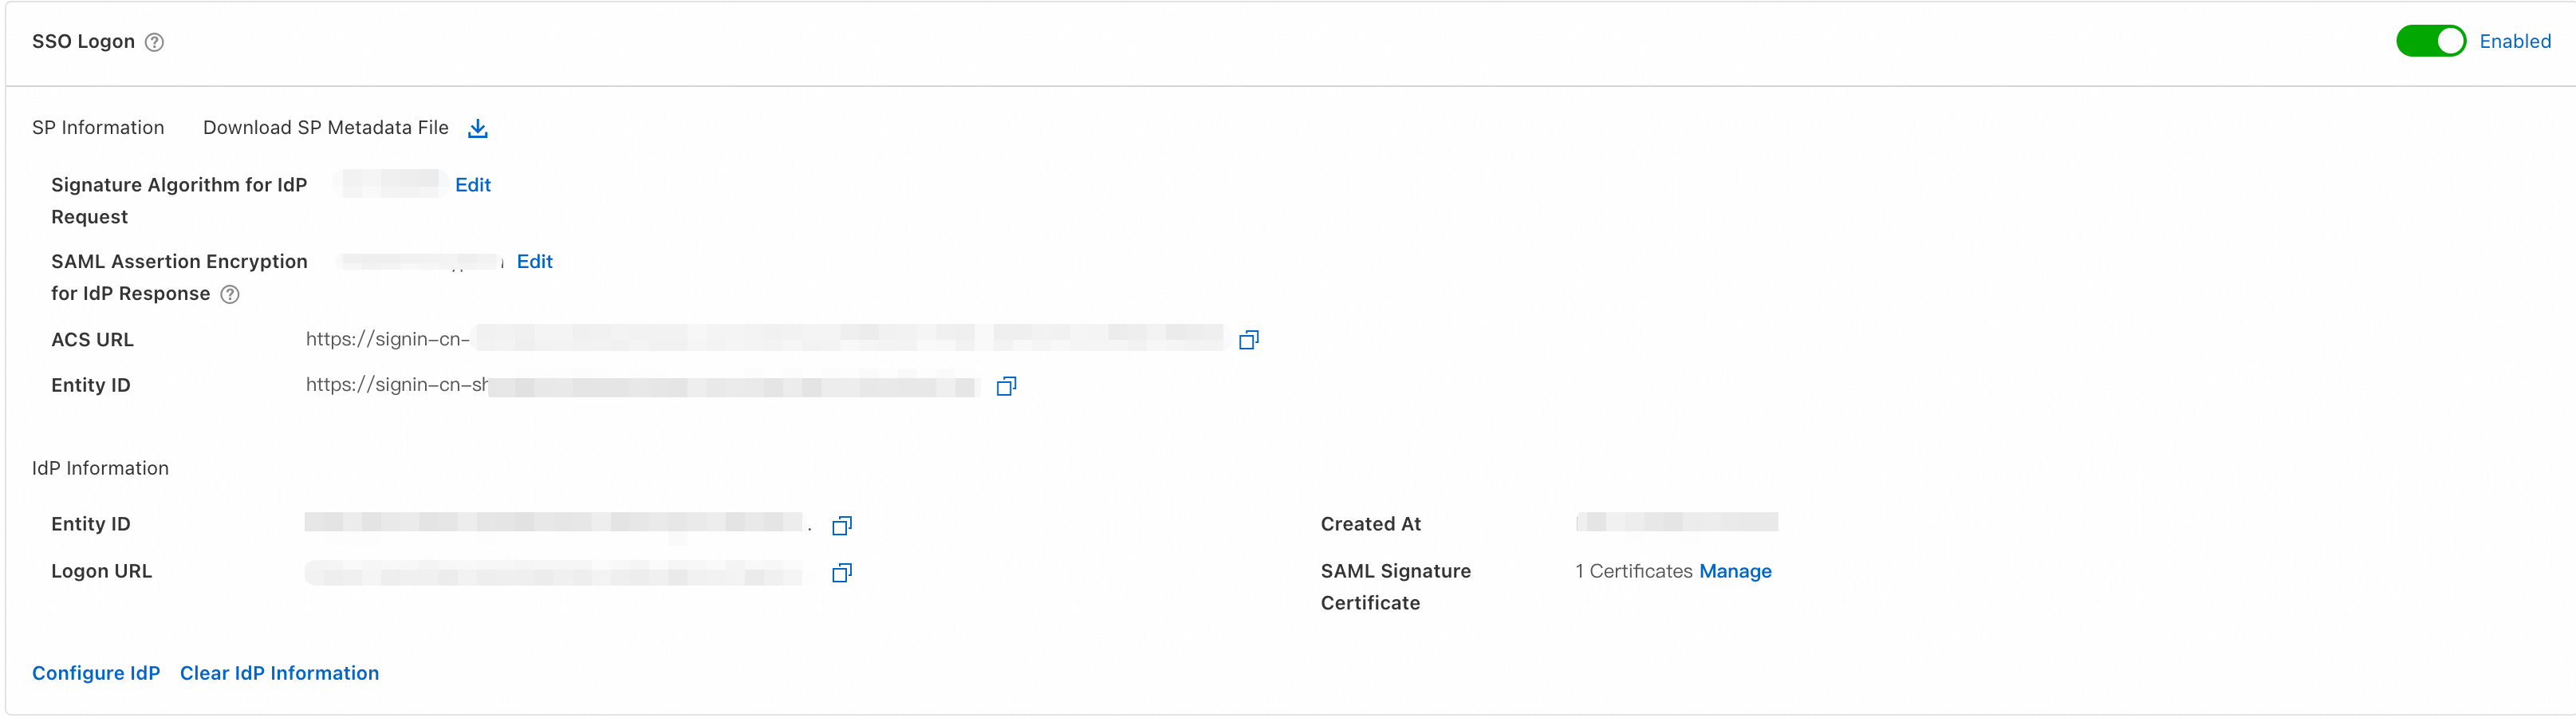
In the SSO Logon section, copy the ACS URL and Entity ID of the service provider (SP), or download and save the SP metadata file.
Step 2: Create and configure an application in PingIdentity
Log on to the PingIdentity portal and open the console.
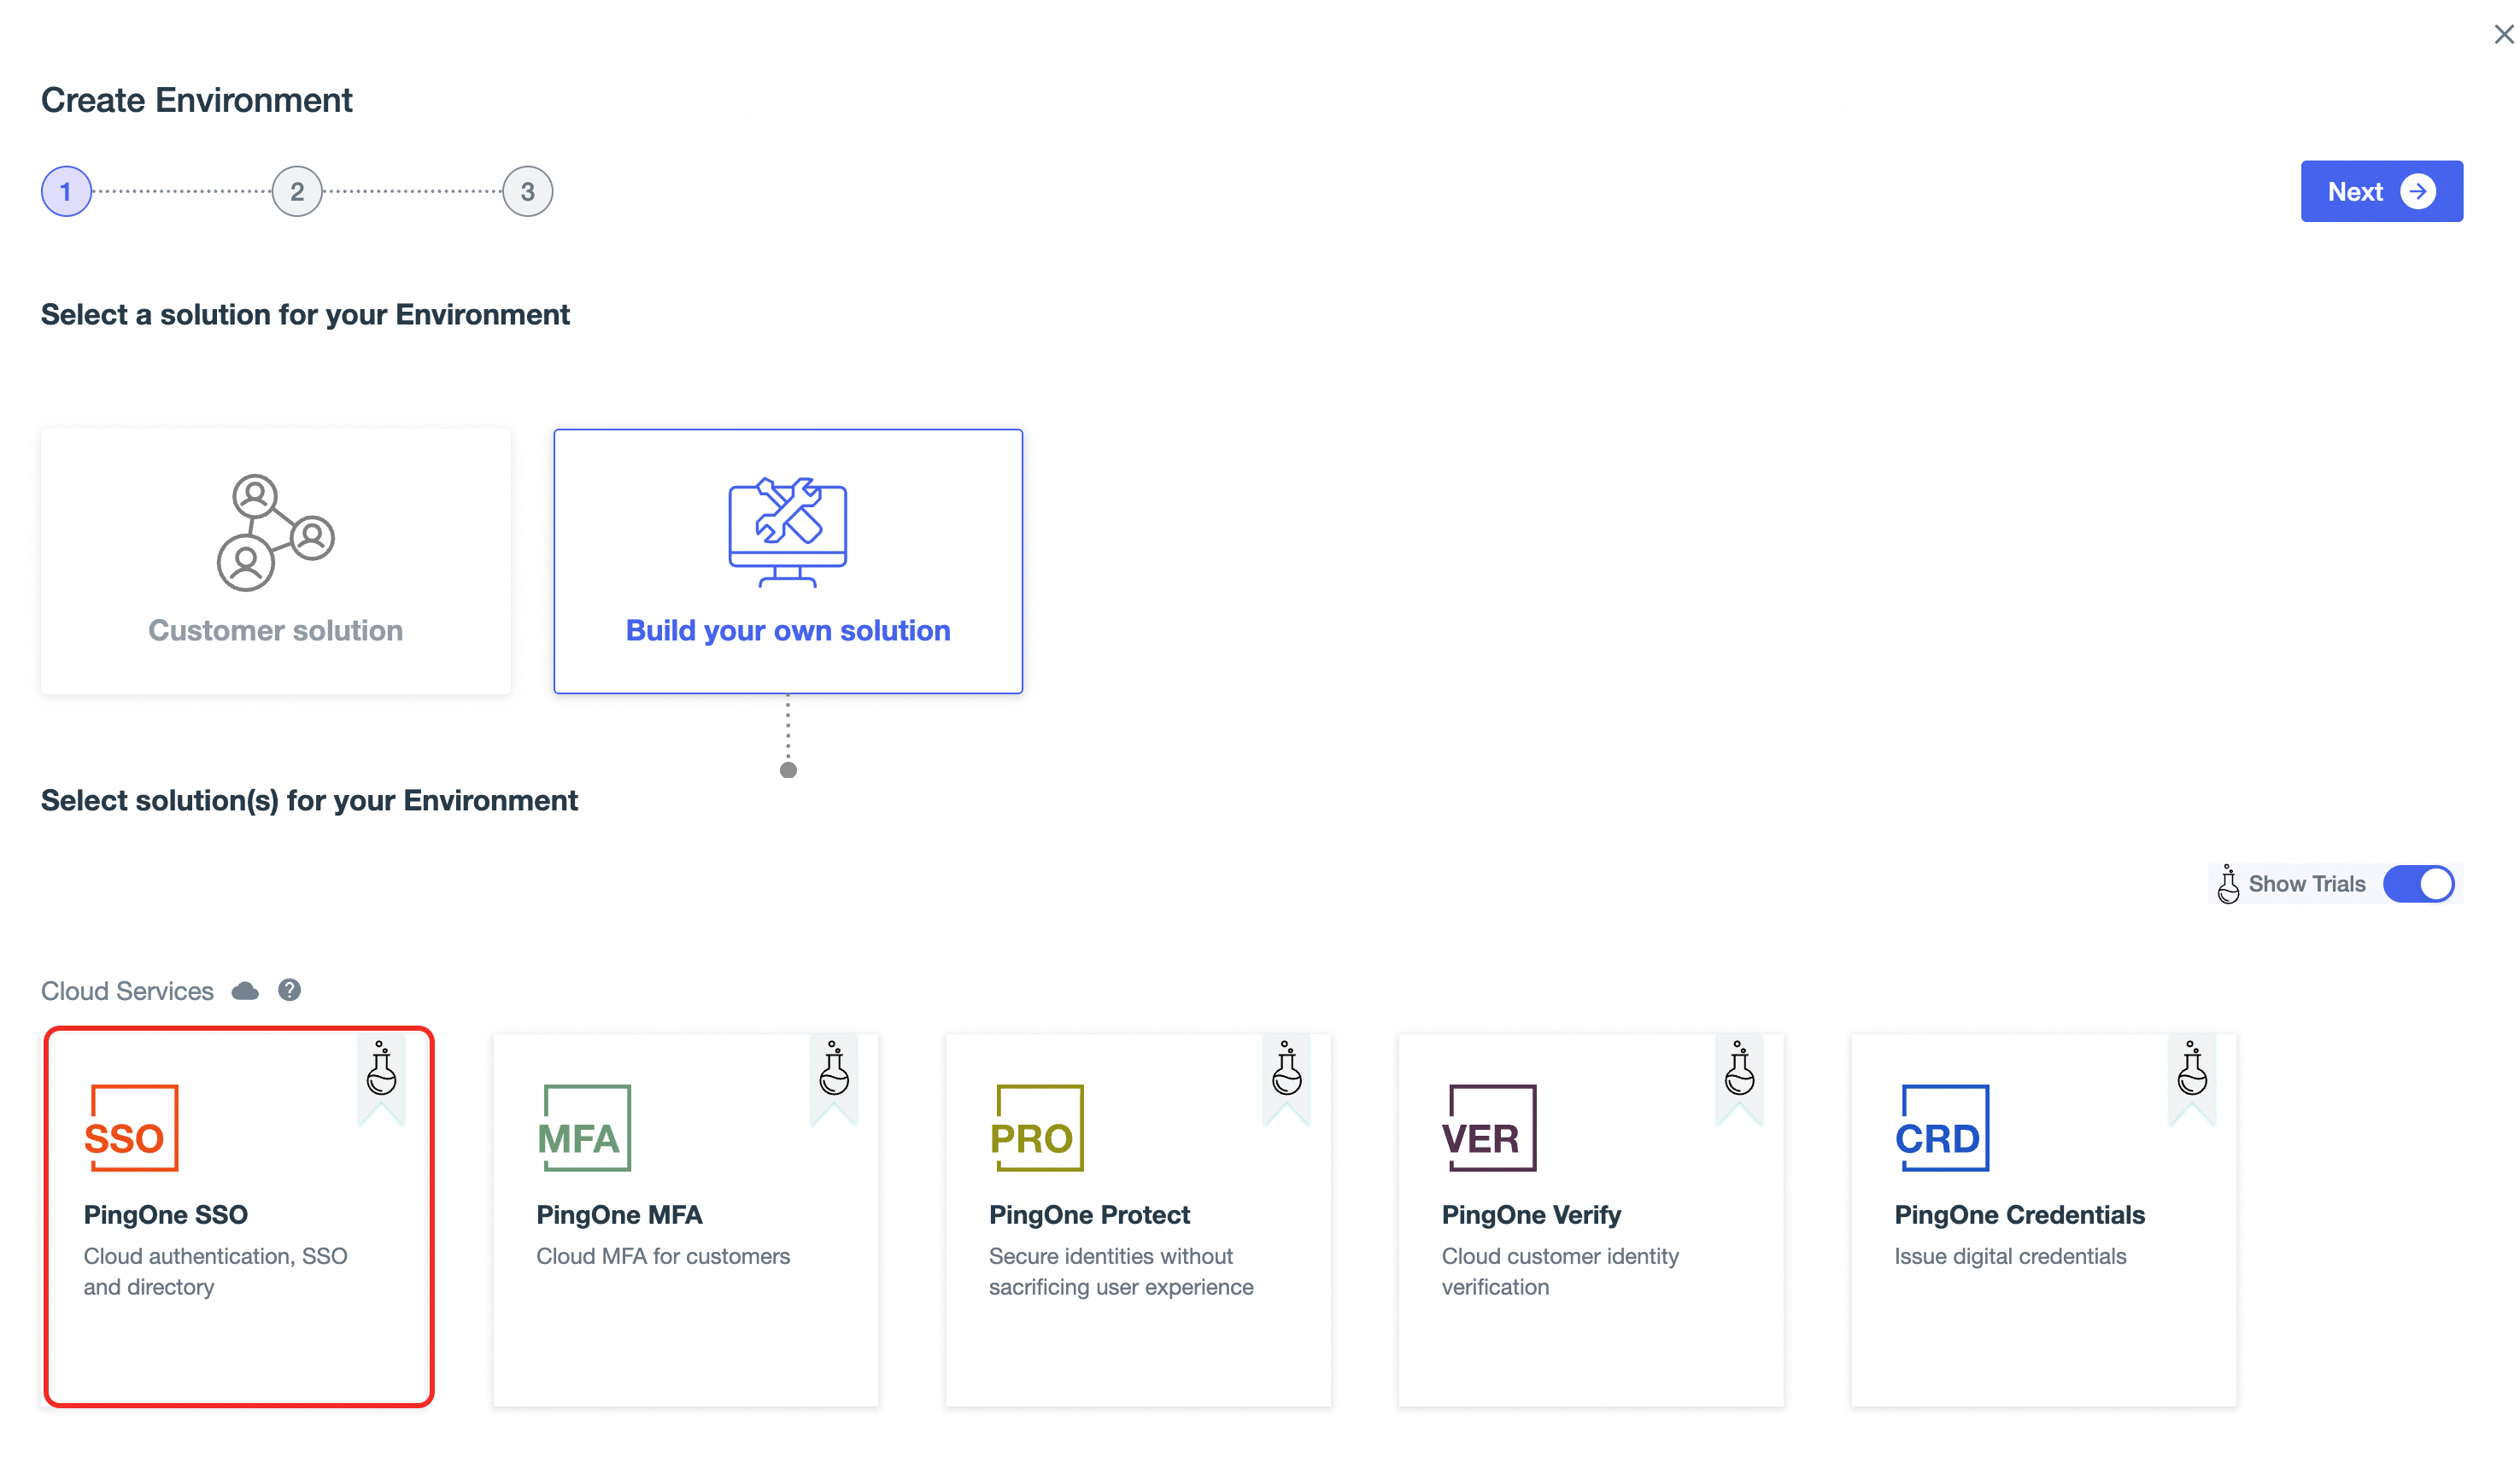
In the navigation pane on the left, select Environments.
On the Environments page, create a new Environment. The selected Cloud Service must include PingOne SSO.
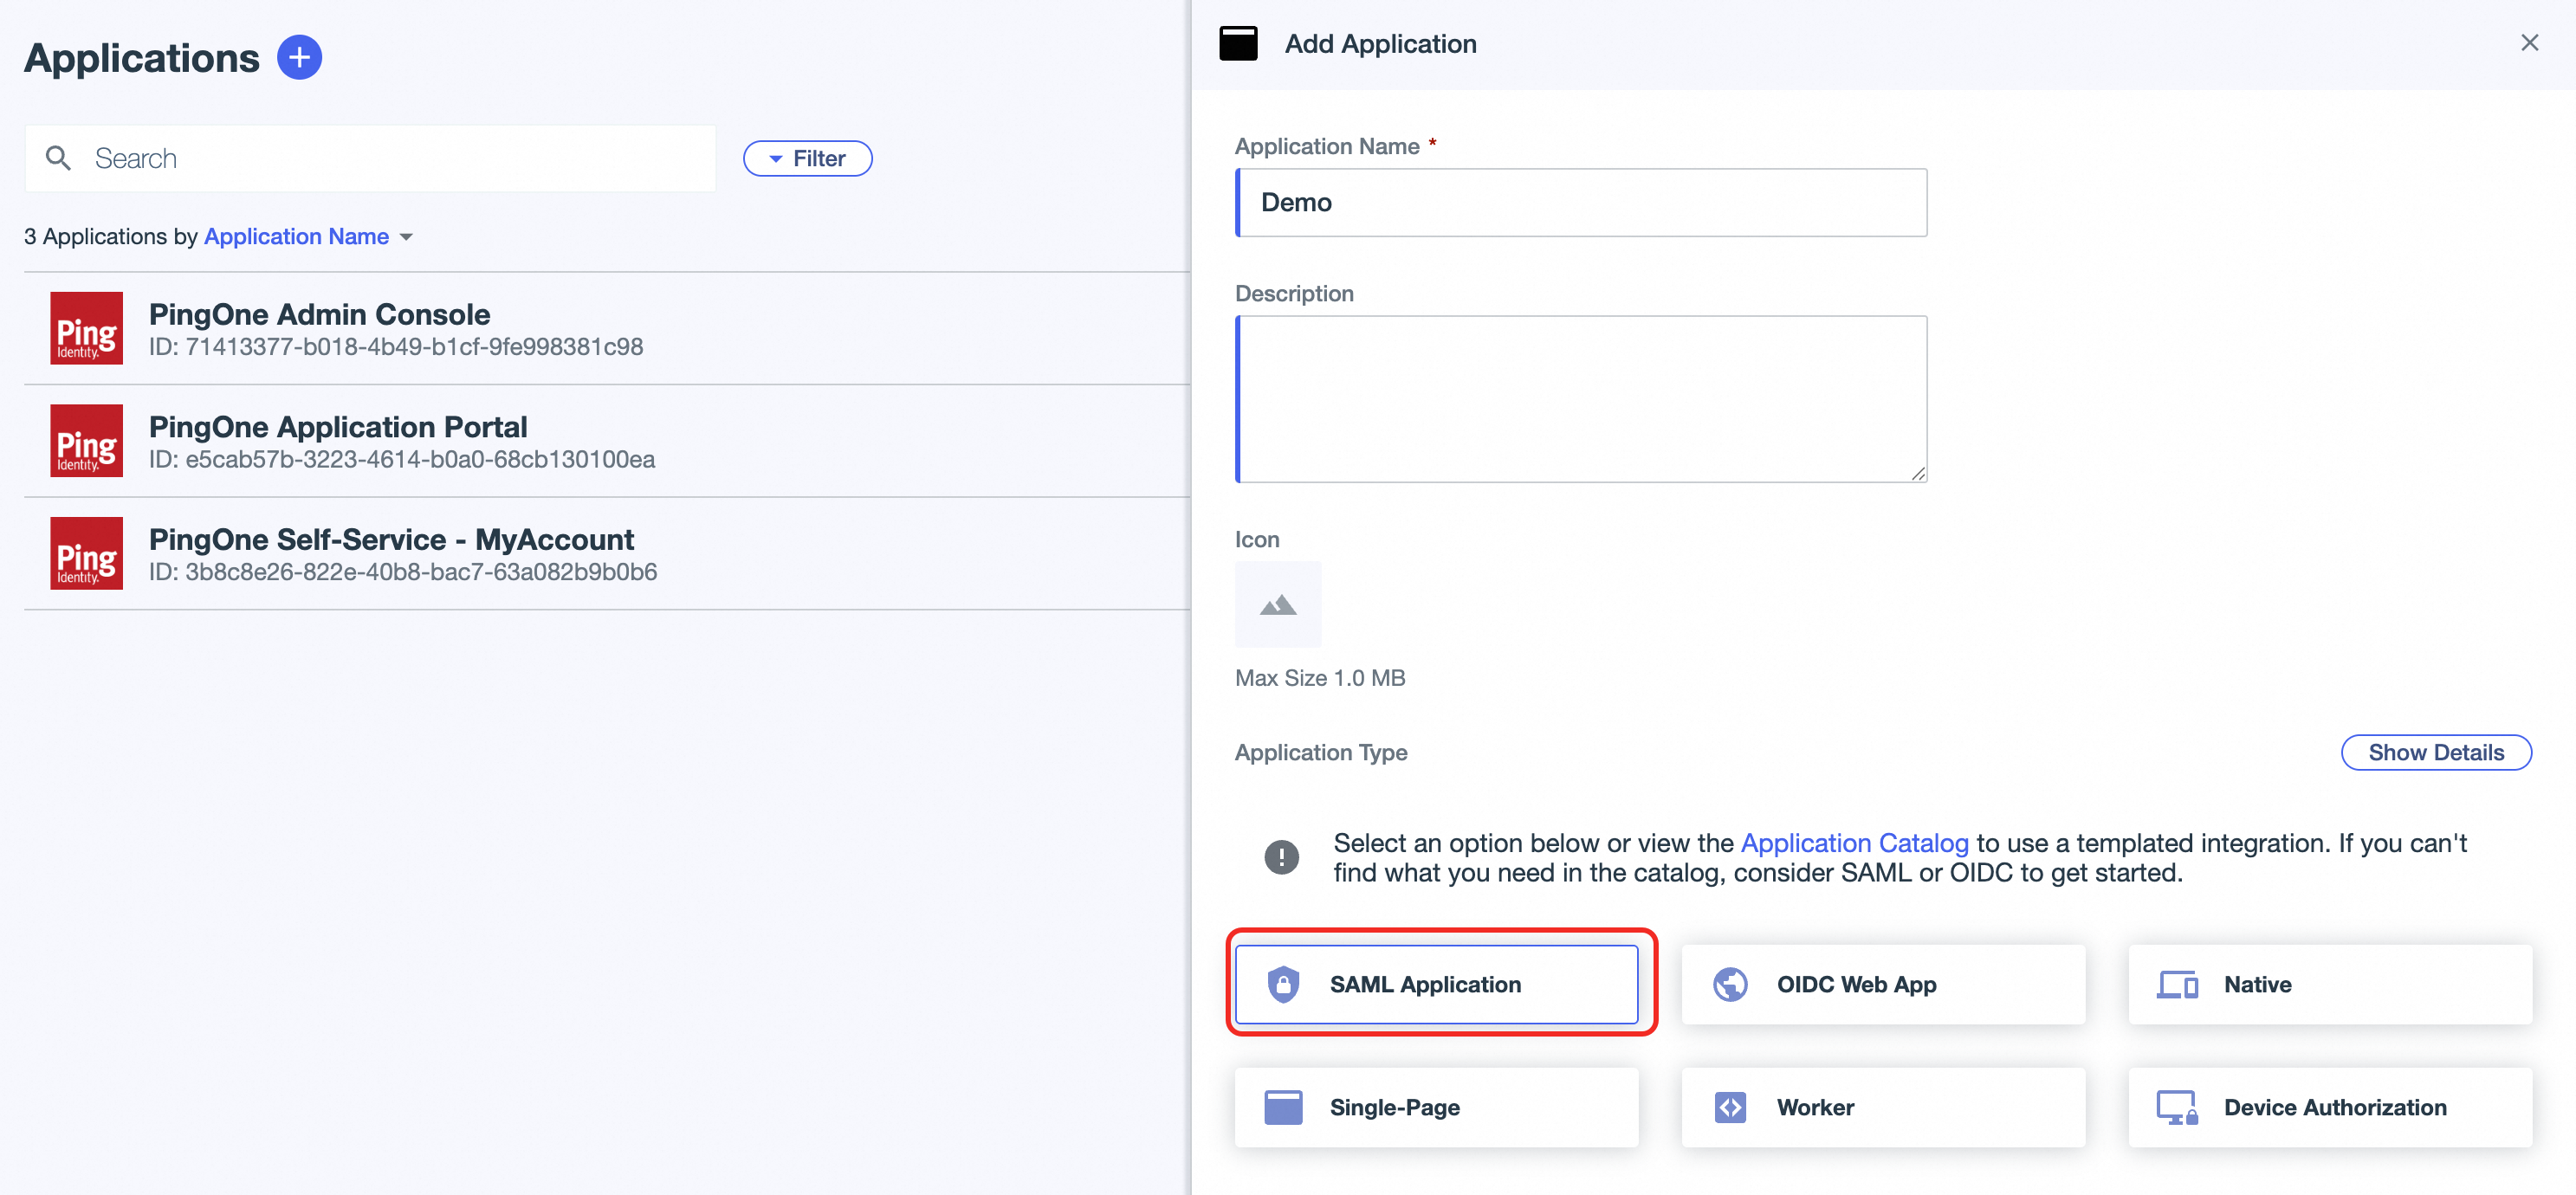
Open the new Environment. In the navigation pane on the left, select Applications > Applications.
On the Applications page, click the plus sign (+) to create an Application.
In the Application Type section, select SAML Application and then configure the application information.
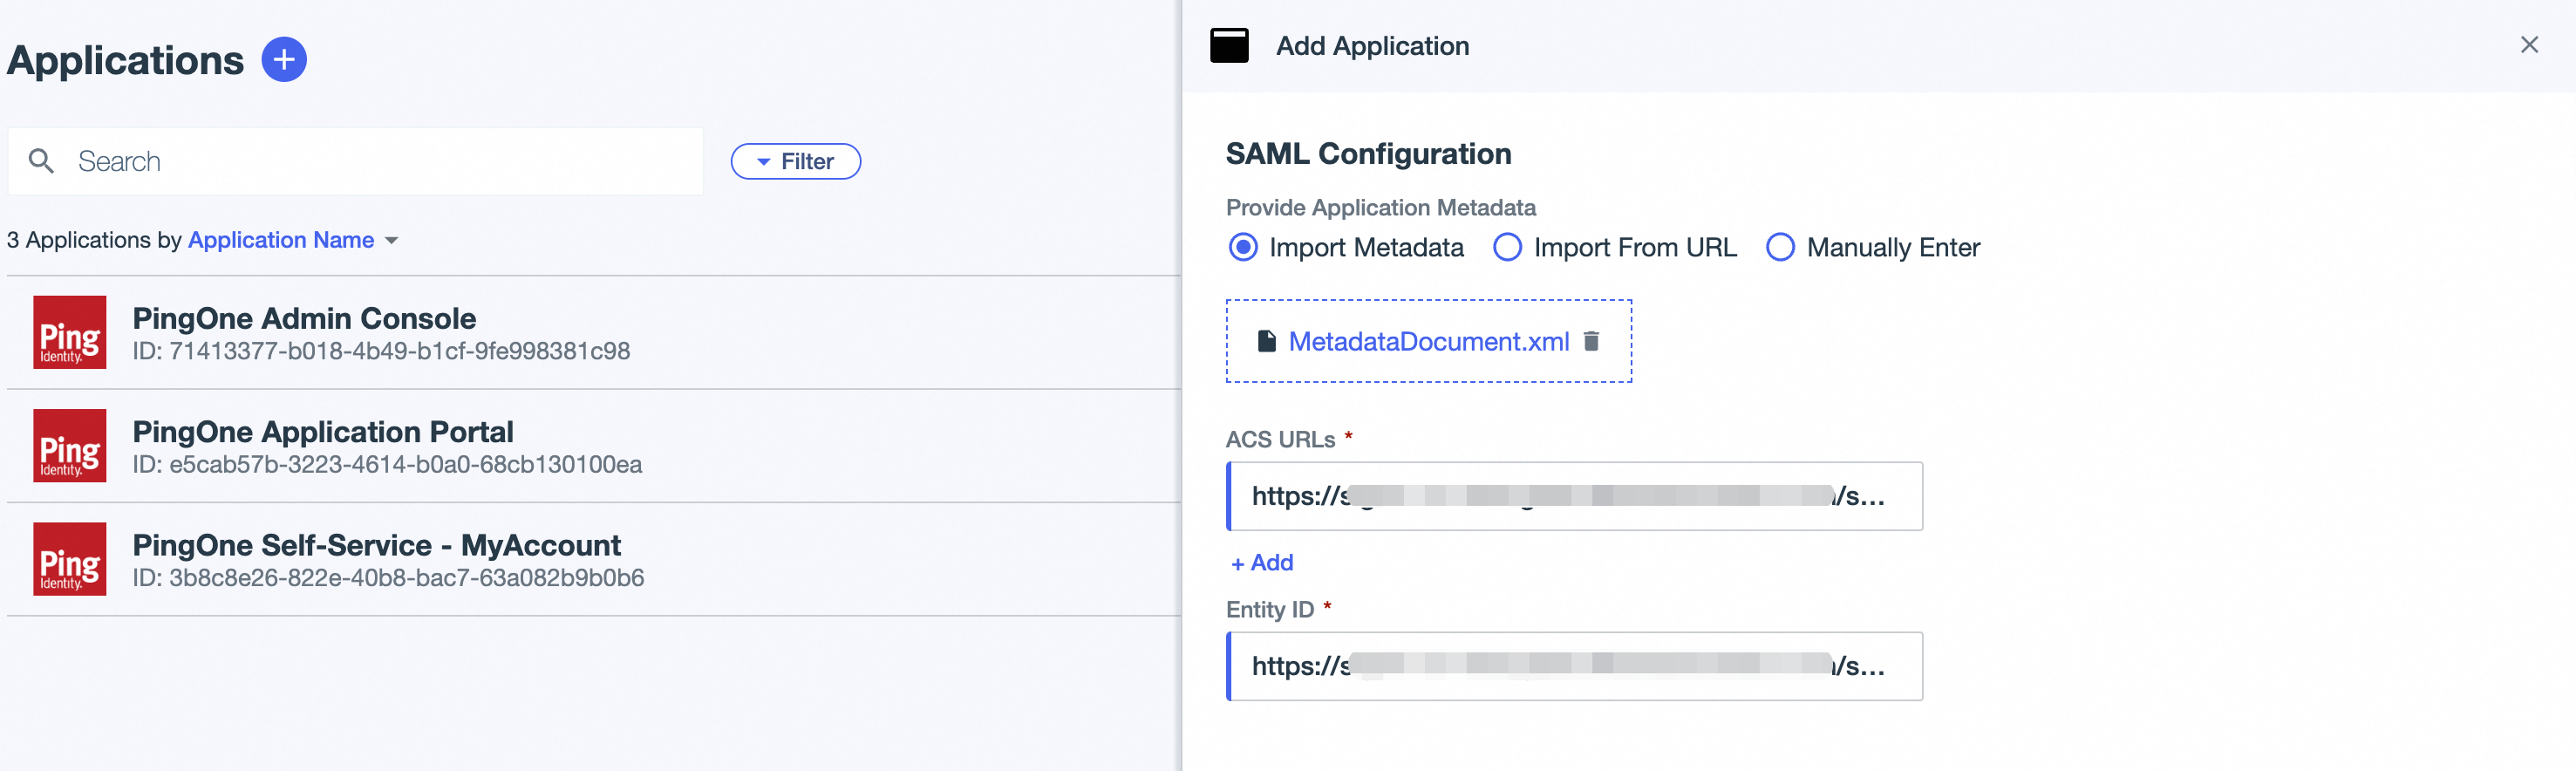
On the SAML Configuration page, select Import Metadata to upload the SP metadata file that you obtained in Step 1. Alternatively, select Manually Enter. Then, enter the ACS URL value from Step 1 in the ACS URL field and the Entity ID value from Step 1 in the Entity ID field.
Click Save.
Step 3: Obtain the identity provider (IdP) metadata from PingIdentity
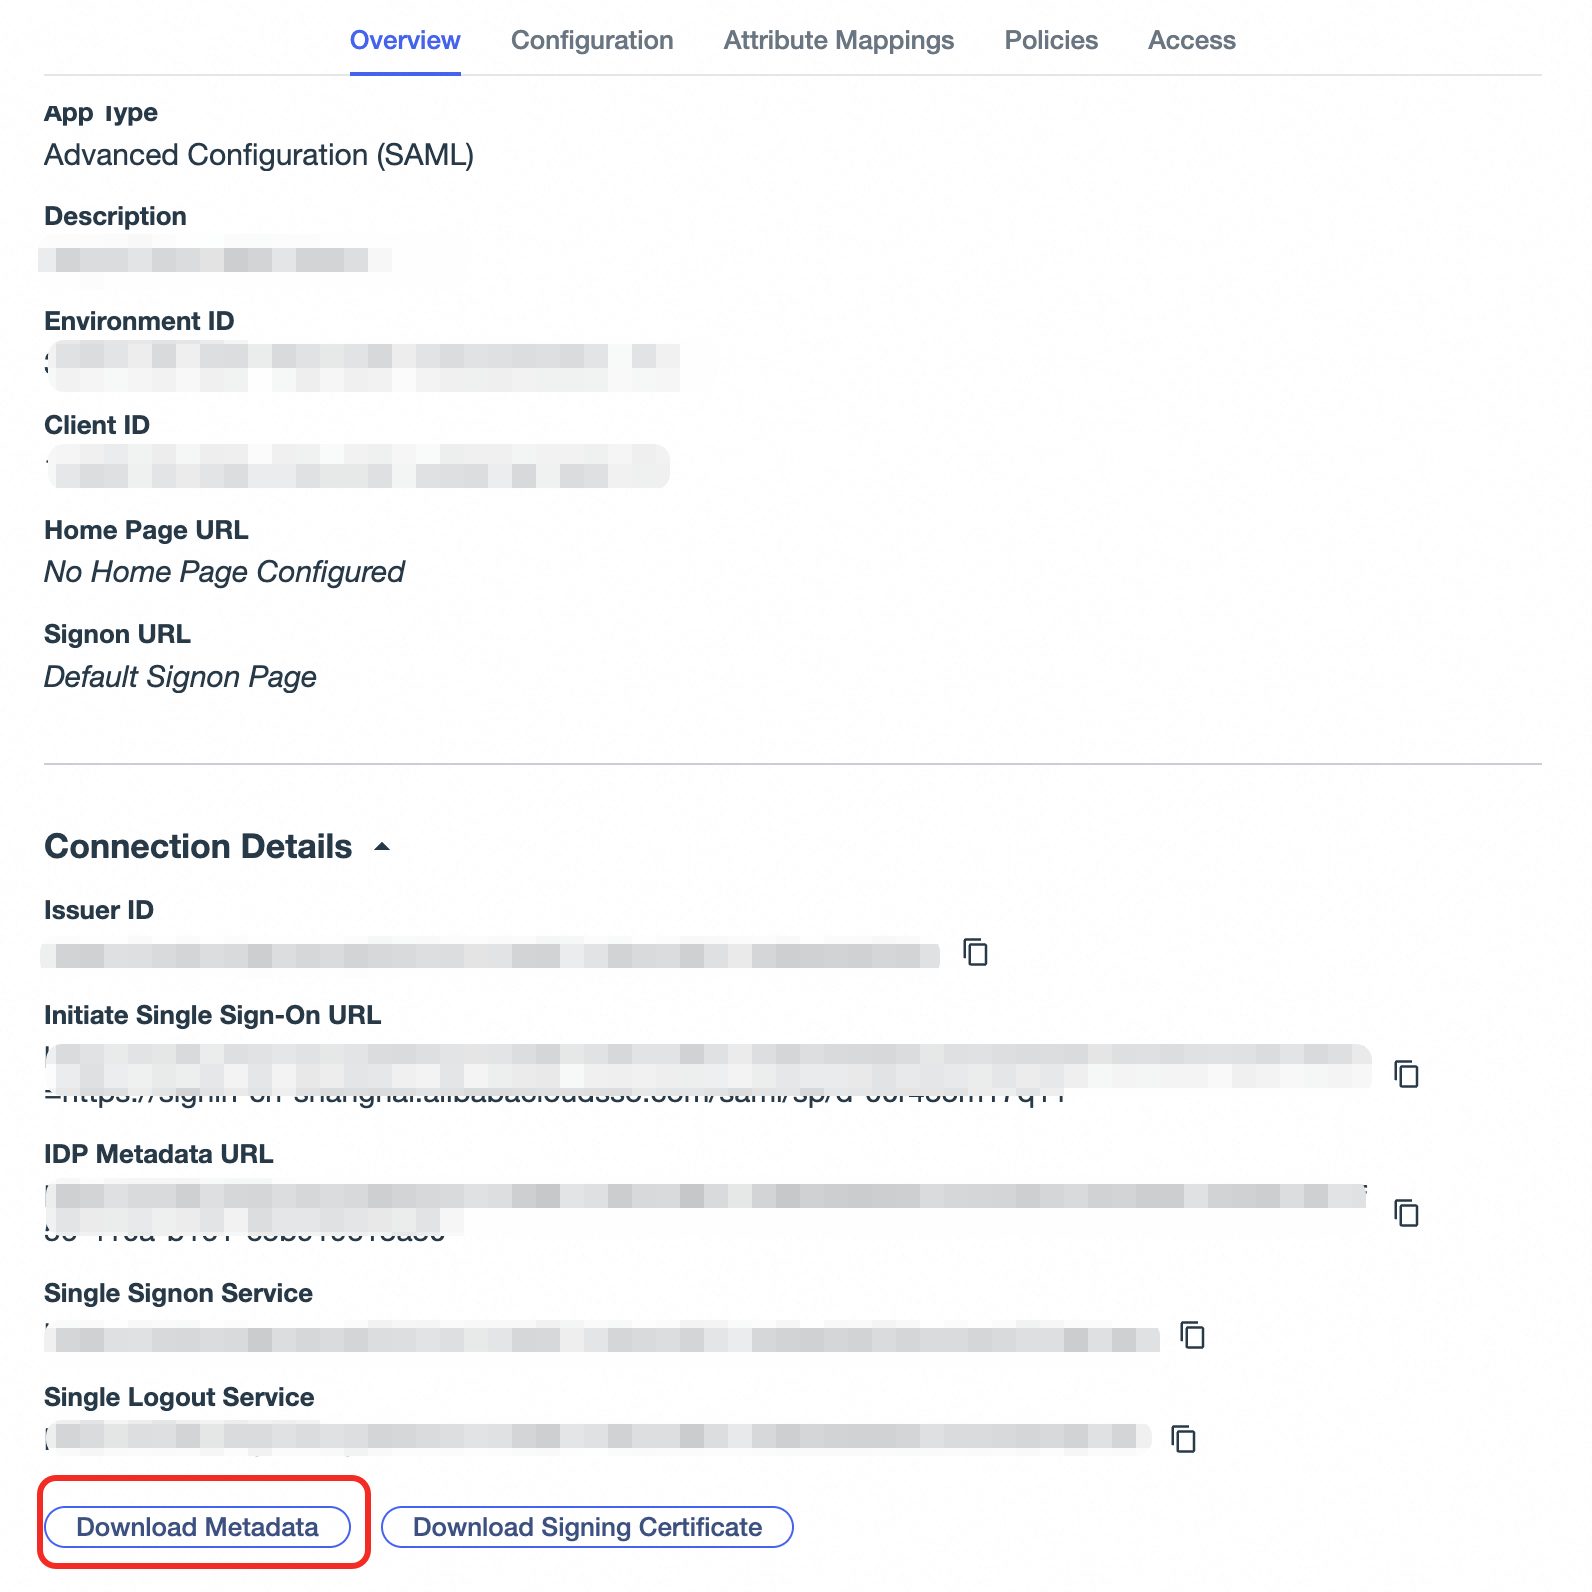
On the Application page, select the application that you created in Step 2. On the Overview tab, click Download Metadata to download and save the metadata file.
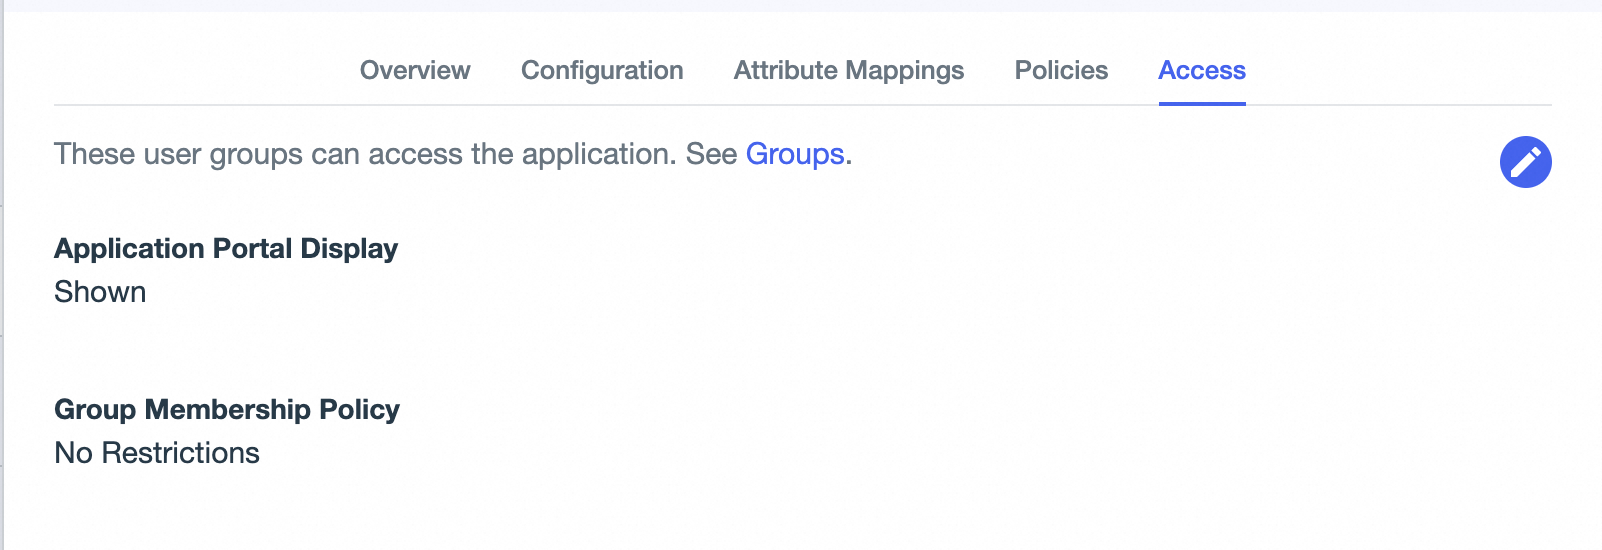
Step 4: Set group permissions for the application in PingIdentity
If no users exist, create them first.
In the navigation pane on the left, select Directory > Users.
On the Users page, create a user and assign it to the appropriate groups.
(Optional) On the Application page, select the application that you created in Step 2. On the Access tab, set the group membership policy for the application. If you set a group membership policy, only users who are members of the specified groups can log on to CloudSSO.
Step 5: Enable SSO logon in CloudSSO
In the CloudSSO console, in the navigation pane on the left, click Settings.
In the SSO Logon section, click Configure Identity Provider.
In the Configure Identity Provider dialog box, select Upload Metadata File.
Click Upload File and upload the IdP metadata file that you downloaded in Step 3.
Turn on the SSO Logon switch to enable SSO logon.
Step 6: Synchronize or create users in CloudSSO
You can synchronize users from PingIdentity to CloudSSO, or create users with the same usernames in CloudSSO. You can use one of the following methods:
Synchronize users from PingIdentity to CloudSSO (Recommended): This method is suitable if you have many users in PingIdentity. For more information, see the documentation about user synchronization.
Create users with the same usernames in CloudSSO: This method is suitable if you have only a few users in PingIdentity. For more information, see Basic operations.
(Optional) Step 7: Grant permissions to users
To allow users to access specific resources in specific member accounts of your resource directory after SSO logon, you must also create an access configuration and grant permissions to the users.
Create an access configuration in CloudSSO and define an access policy.
For more information, see Create an access configuration.
Grant permissions to users on accounts in the resource directory.
For more information, see Grant permissions on accounts in a resource directory.
Verification results
After you complete the configuration, you can initiate an SSO logon from either Alibaba Cloud or PingIdentity.
Initiate an SSO logon from Alibaba Cloud
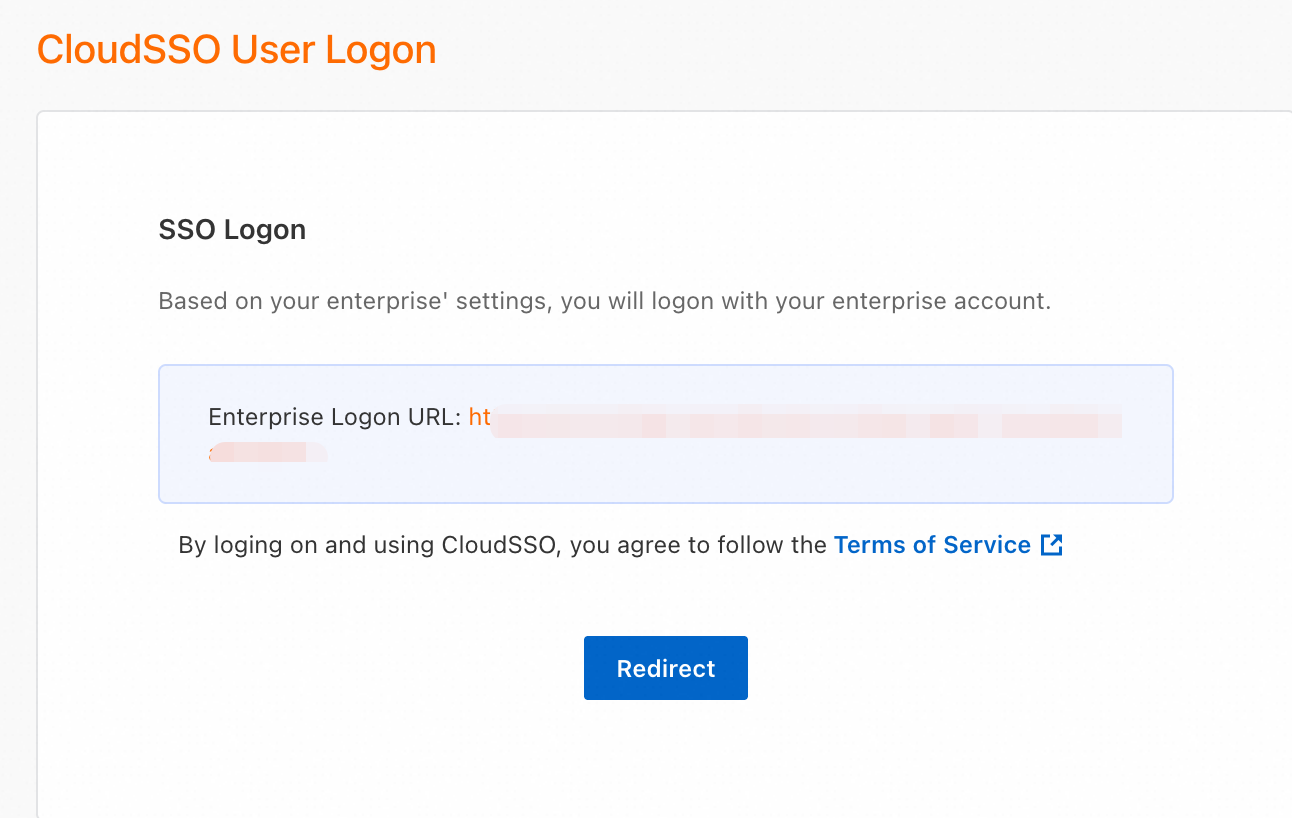
On the Overview page of the CloudSSO console, copy the user logon URL.
Open the user logon URL in a new browser.
Click Redirect. You are automatically redirected to the PingIdentity logon page.
Log on with your PingIdentity username and password. After you log on, you are automatically redirected to the specified Default RelayState page. In this example, no Default RelayState is specified, so you are redirected to the CloudSSO user portal.
Initiate an SSO logon from PingIdentity
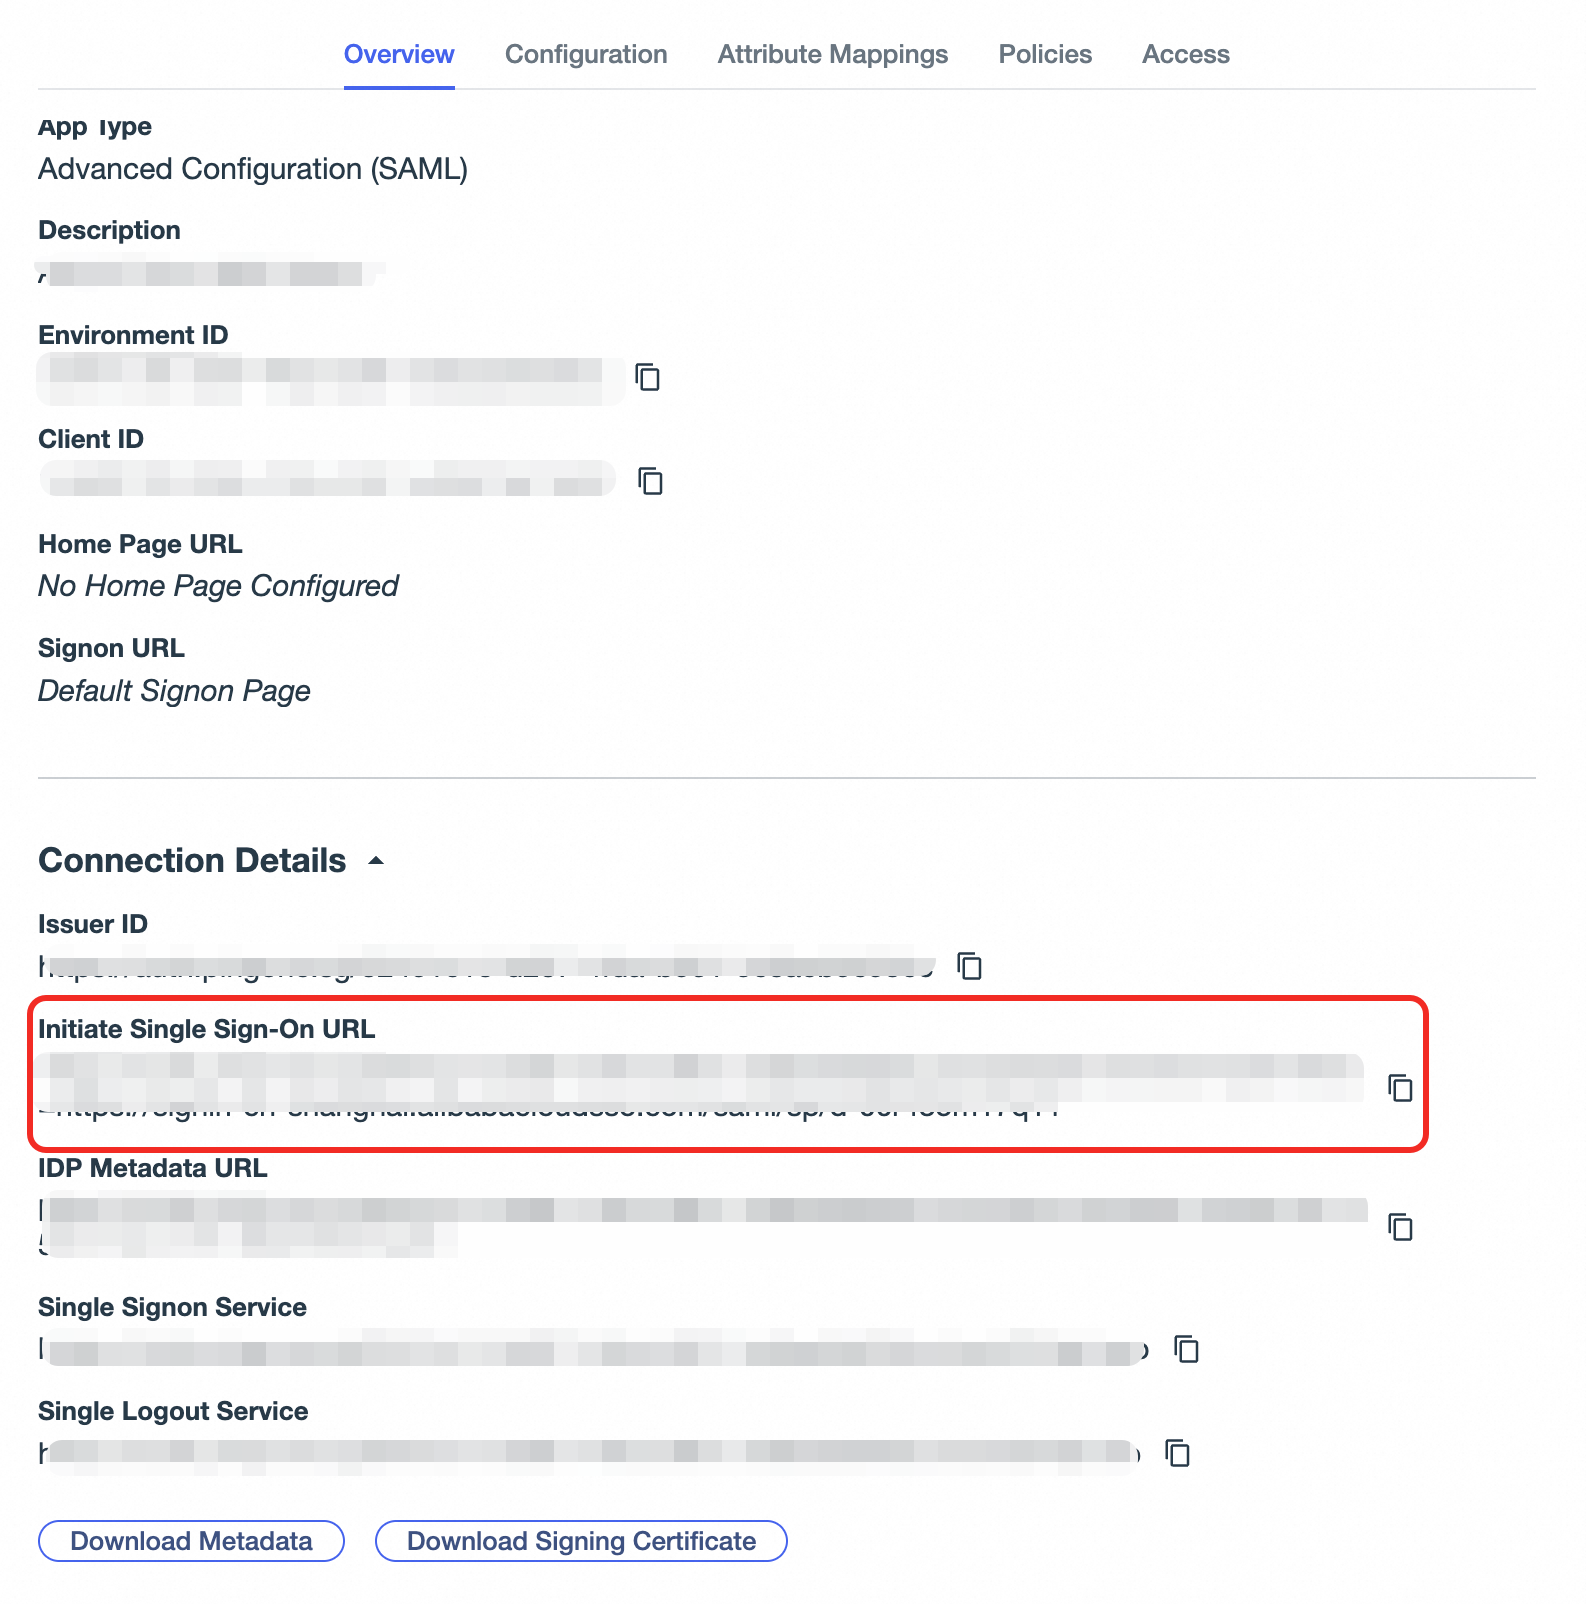
On the Applications page, select the application that you created in Step 2. On the Overview tab, copy the Initiate Single Sign-On URL.
Open the logon URL in a new browser.
Log on with your PingIdentity username and password. After you log on, you are automatically redirected to the specified Default RelayState page. In this example, no Default RelayState is specified, so you are redirected to the CloudSSO user portal.