Mount and access Network File System (NFS) protocol shares by using a Linux client.
Prerequisites
An NFS share is created. For more information, see Create a share.
Install an NFS client
Before you mount an NFS share, you must install an NFS client on the machine.
Log on to the machine.
Run the following command to install the NFS client:
The following commands install an NFS client on Ubuntu and CentOS. For more information about how to install an NFS client on other distributions, see the official NFS documentation.
If you use Ubuntu operating system, run the following command.
apt-get install nfs-commonOn the CentOS operating system, execute the following command.
yum install -y nfs-utils
Manually mount an NFS share
On the ECS instance, run the following command to mount an NFS share to a local directory of the client:
IPv4
NFSv4 protocol mount
To mount a share using an IPv4 address and the NFS v4 protocol, run the following command:
sudo mount -t nfs -o nolock,proto=tcp,rsize=1048576,wsize=1048576,hard,timeo=600,retrans=2,noresvport <ipv4_address:/share_name> <local-directory>Mounting with the NFSv3 protocol
To mount a share using an IPv4 address and the NFS v3 protocol, run the following command:
sudo mount -t nfs -o vers=3,nolock,proto=tcp,rsize=1048576,wsize=1048576,hard,timeo=600,retrans=2,noresvport <ipv4_address:/share_name> <local-directory>The parameters are described as follows:
ipv4_address:/share_name: The mount target of the storage gateway. This consists of the IPv4 address of the storage gateway and the share name. Replace these placeholders with the actual values. Find the mount target on the Shares page of the target storage gateway in the Cloud Storage Gateway console.local-directory: The local directory on the client. This can be any existing directory to which you have read and write permissions.noac: Add this parameter to the mount command if you enable the express synchronization feature and the share is part of an express synchronization group. This parameter allows the client to obtain file system metadata from the gateway in real time. You can view synchronization results on the client faster. However, this parameter affects the read and write performance of the client. Add this parameter if the client is sensitive to file changes. Do not add this parameter if the client is sensitive to read and write performance. The following is an example command:sudo mount -t nfs -o noac,lookupcache=none,nolock,proto=tcp,rsize=1048576,wsize=1048576,hard,timeo=600,retrans=2,noresvport <ipv4_address:/share_name> <local-directory>
IPv6 method
NoteOnly the China (Hohhot) region supports mounting using an IPv6 address. Make sure that the VPC and vSwitch used by the gateway support IPv6.
Before you mount a share using an IPv6 address, make sure that an IPv6 address is configured for the ECS client.
If the VPC and vSwitch of an existing gateway support IPv6, enable IPv6 in the gateway operations list to obtain the IPv6 mount target. New gateways that are created in this VPC support IPv6 by default and do not require you to explicitly enable IPv6.
NFS v4 Protocol Mounting
To mount a share using an IPv6 address and the NFS v4 protocol, run the following command:
sudo mount -t nfs -o nolock,proto=tcp,rsize=1048576,wsize=1048576,hard,timeo=600,retrans=2,noresvport <ipv6_address:/share_name> <local-directory>Mounting with the NFS v3 Protocol
To mount a share using an IPv6 address and the NFS v3 protocol, run the following command:
sudo mount -t nfs -o vers=3,nolock,proto=tcp,rsize=1048576,wsize=1048576,hard,timeo=600,retrans=2,noresvport <ipv6_address:/share_name> <local-directory>The parameters are described as follows:
ipv6_address:/share_name: The mount target for the Cloud Storage Gateway. This value consists of the IPv6 address of the gateway and the share name. Replace these placeholders with your actual values. In the Cloud Storage Gateway console, locate your storage gateway and view its mount target on the Shares page.For example,
2408:4004:ffff:ffff:ffff:ffff:ffff:ffff:/myshare.local-directory: The local directory on the client. This can be any existing directory to which you have read and write permissions.noac: Add this parameter to the mount command if you enable the express synchronization feature and the share is part of an express synchronization group. This parameter allows the client to obtain file system metadata from the gateway in real time. You can view synchronization results on the client faster. However, this parameter affects the read and write performance of the client. Add this parameter if the client is sensitive to file changes. Do not add this parameter if the client is sensitive to read and write performance. The following is an example command:sudo mount -t nfs -o noac,lookupcache=none,nolock,proto=tcp,rsize=1048576,wsize=1048576,hard,timeo=600,retrans=2,noresvport <ipv6_address:/share_name> <local-directory>
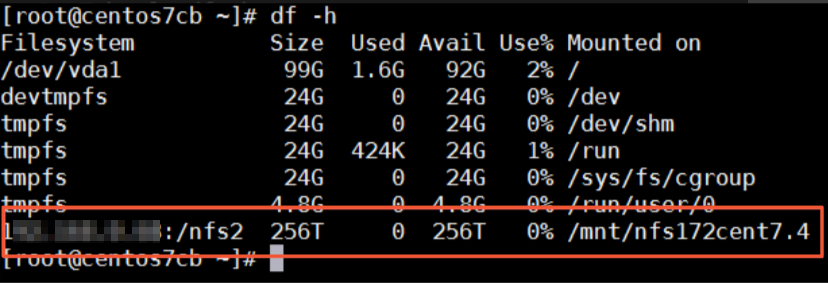
Run the df -h command to view the mount result.
If the output is similar to the following information, the NFS share is mounted.
 Note
NoteAfter the share is successfully mounted, the terminal displays the capacity of each file system that is managed by the share. OSS buckets provide unlimited storage capacity. For information about the file system capacity supported by different gateway specifications, see Specifications.
Access an NFS share
After an NFS share is mounted, access the NFS share in the same way that you access a local directory. If you have write permissions on the share, you can write data to the share. If you have read-only permissions on the share, you can only read data from the share.
A share of a gateway is synchronized with the OSS bucket associated with the share. When you perform operations on a share, the changes in the share are also applied to the associated OSS bucket.
Unmount a share
Before you execute the umount operation, check the share upload status. Unmount the share only when it is in the Upload Complete state to avoid data loss. For related questions, see Why does the sync status of the share always display "Upload Incomplete"?.
Run the umount <local-directory> command to unmount the share. <local-directory> specifies the local directory on the client where the share is mounted.
Automatically mount an NFS share (optional)
If you manually mount an NFS share to a Linux client, the NFS share mount does not persist after a client restart. Configure the Linux client to automatically mount an NFS share after an ECS instance restart by using the /etc/fstab (recommended) or /etc/rc.local file.
Before you configure a share to be automatically mounted, make sure that you have manually mounted the share. This prevents automatic mount failures after an ECS instance restart.
If you want to configure automatic mount on a CentOS 6 client, you must first complete the following steps:
Run the
chkconfig netfs oncommand to make sure that NetFS automatically starts on boot.Open the /etc/netconfig configuration file and comment out the inet6-related content.
Method 1 (recommended)
Configure the /etc/fstab file.
IPv4 Method
NFSv4 protocol mount
To mount a share using an IPv4 address and the NFS v4 protocol, add the following command to the configuration file:
<ipv4_address:/share_name> <local-directory> nfs nolock proto=tcp rsize=1048576 wsize=1048576 hard timeo=600 retrans=2 noresvport defaults 0 0NFS v3 protocol mount
To mount a share using an IPv4 address and the NFS v3 protocol, add the following command to the configuration file:
<ipv4_address:/share_name> <local-directory> nfs vers=3 nolock proto=tcp rsize=1048576 wsize=1048576 hard timeo=600 retrans=2 noresvport defaults 0 0IPv6
Mounting with the NFSv4 Protocol
To mount a share using an IPv6 address and the NFS v4 protocol, add the following command to the configuration file:
<ipv6_address:/share_name> <local-directory> nfs nolock proto=tcp rsize=1048576 wsize=1048576 hard timeo=600 retrans=2 noresvport defaults 0 0Mounting with the NFS v3 protocol
To mount a share using an IPv6 address and the NFS v3 protocol, add the following command to the configuration file:
<ipv6_address:/share_name> <local-directory> nfs vers=3 nolock proto=tcp rsize=1048576 wsize=1048576 hard timeo=600 retrans=2 noresvport defaults 0 0Run the
rebootcommand to restart the ECS instance.After the ECS instance starts, run the
df -hormountcommand to verify the mount result.ImportantRestarting an ECS instance interrupts services. Restart the ECS instance during off-peak hours.
Method 2
Before you configure the /etc/rc.local file, make sure that you have execute permission for this file and the /etc/rc.d/rc.local file. For example, on a CentOS 7.x client, users do not have execute permission for these files by default. You must manually add execute permission before you proceed with the configuration.
Configure the /etc/rc.local file.
IPv4
Mounting with the NFS v4 protocol
To mount a share using an IPv4 address and the NFS v4 protocol, add the following command to the configuration file:
sudo mount -t nfs -o nolock,proto=tcp,rsize=1048576,wsize=1048576,hard,timeo=600,retrans=2,noresvport <ipv4_address:/share_name> <local-directory>Mounting with the NFS v3 Protocol
To mount a share using an IPv4 address and the NFS v3 protocol, add the following command to the configuration file:
sudo mount -t nfs -o vers=3,nolock,proto=tcp,rsize=1048576,wsize=1048576,hard,timeo=600,retrans=2,noresvport <ipv4_address:/share_name> <local-directory>IPv6 Method
Mounting NFS v4 protocol
To mount a share using an IPv6 address and the NFS v4 protocol, add the following command to the configuration file:
sudo mount -t nfs -o nolock,proto=tcp,rsize=1048576,wsize=1048576,hard,timeo=600,retrans=2,noresvport <ipv6_address:/share_name> <local-directory>Mounting with NFS v3 Protocol
To mount a share using an IPv6 address and the NFS v3 protocol, add the following command to the configuration file:
sudo mount -t nfs -o vers=3,nolock,proto=tcp,rsize=1048576,wsize=1048576,hard,timeo=600,retrans=2,noresvport <ipv6_address:/share_name> <local-directory>Run the
rebootcommand to restart the ECS instance.After the ECS instance starts, run the
df -hormountcommand to verify the mount result.ImportantRestarting an ECS instance interrupts services. Restart the ECS instance during off-peak hours.