Network Detection and Response (NDR) uses bypass traffic mirroring to collect traffic from your cloud assets for full-traffic threat detection. Because NDR mirrors traffic passively, it does not interrupt your live services. This page explains how to provision Internet-facing and VPC private network traffic to NDR.
Use cases
Internet traffic: Assets assigned elastic IP addresses (EIPs) or public IP addresses, including Elastic Compute Service (ECS), Server Load Balancer (SLB), NAT Gateway, elastic network interfaces (ENIs), Application Load Balancer (ALB), and Network Load Balancer (NLB).
Private network traffic: All ECS assets within a virtual private cloud (VPC). NDR automatically creates the required VPC traffic mirroring and PrivateLink components.
Provision Internet traffic
Provision assets manually (recommended)
Manual provisioning lets you target specific assets and retain their traffic for threat tracing and analysis.
Start with a low-traffic EIP to validate that the system is stable before provisioning additional assets.
Prerequisites
Before you begin, ensure that you have:
Assets assigned EIPs or public IP addresses (ECS, SLB, NAT Gateway, ENI, ALB, or NLB)
Access to the NDR console
Steps
Log in to the NDR console.
In the left navigation pane, click Access Management.
On the Internet tab, click Manual Access.
In the Manual Access panel, select the assets to provision, and then click Confirm Access.
Provision all assets at once
Bulk provisioning non-intrusively replicates all north-south traffic passing through associated EIPs to and from Alibaba Cloud. Use this method when you need full traffic retention for compliance or when you are not sure which services are at risk.
Bulk provisioning may generate a large volume of traffic. Perform this operation during off-peak hours.
In the left navigation pane, click Access Management.
On the Internet tab, click Full Access.
In the Actions dialog box, click OK.
View and manage provisioned assets
After provisioning, NDR continuously monitors your assets with full-traffic threat detection. The Access Management list shows the following fields for each asset: IP, Instance ID/Name, Asset Type/Region, Associated Asset, Protocol/Port, Status, and Collected At.
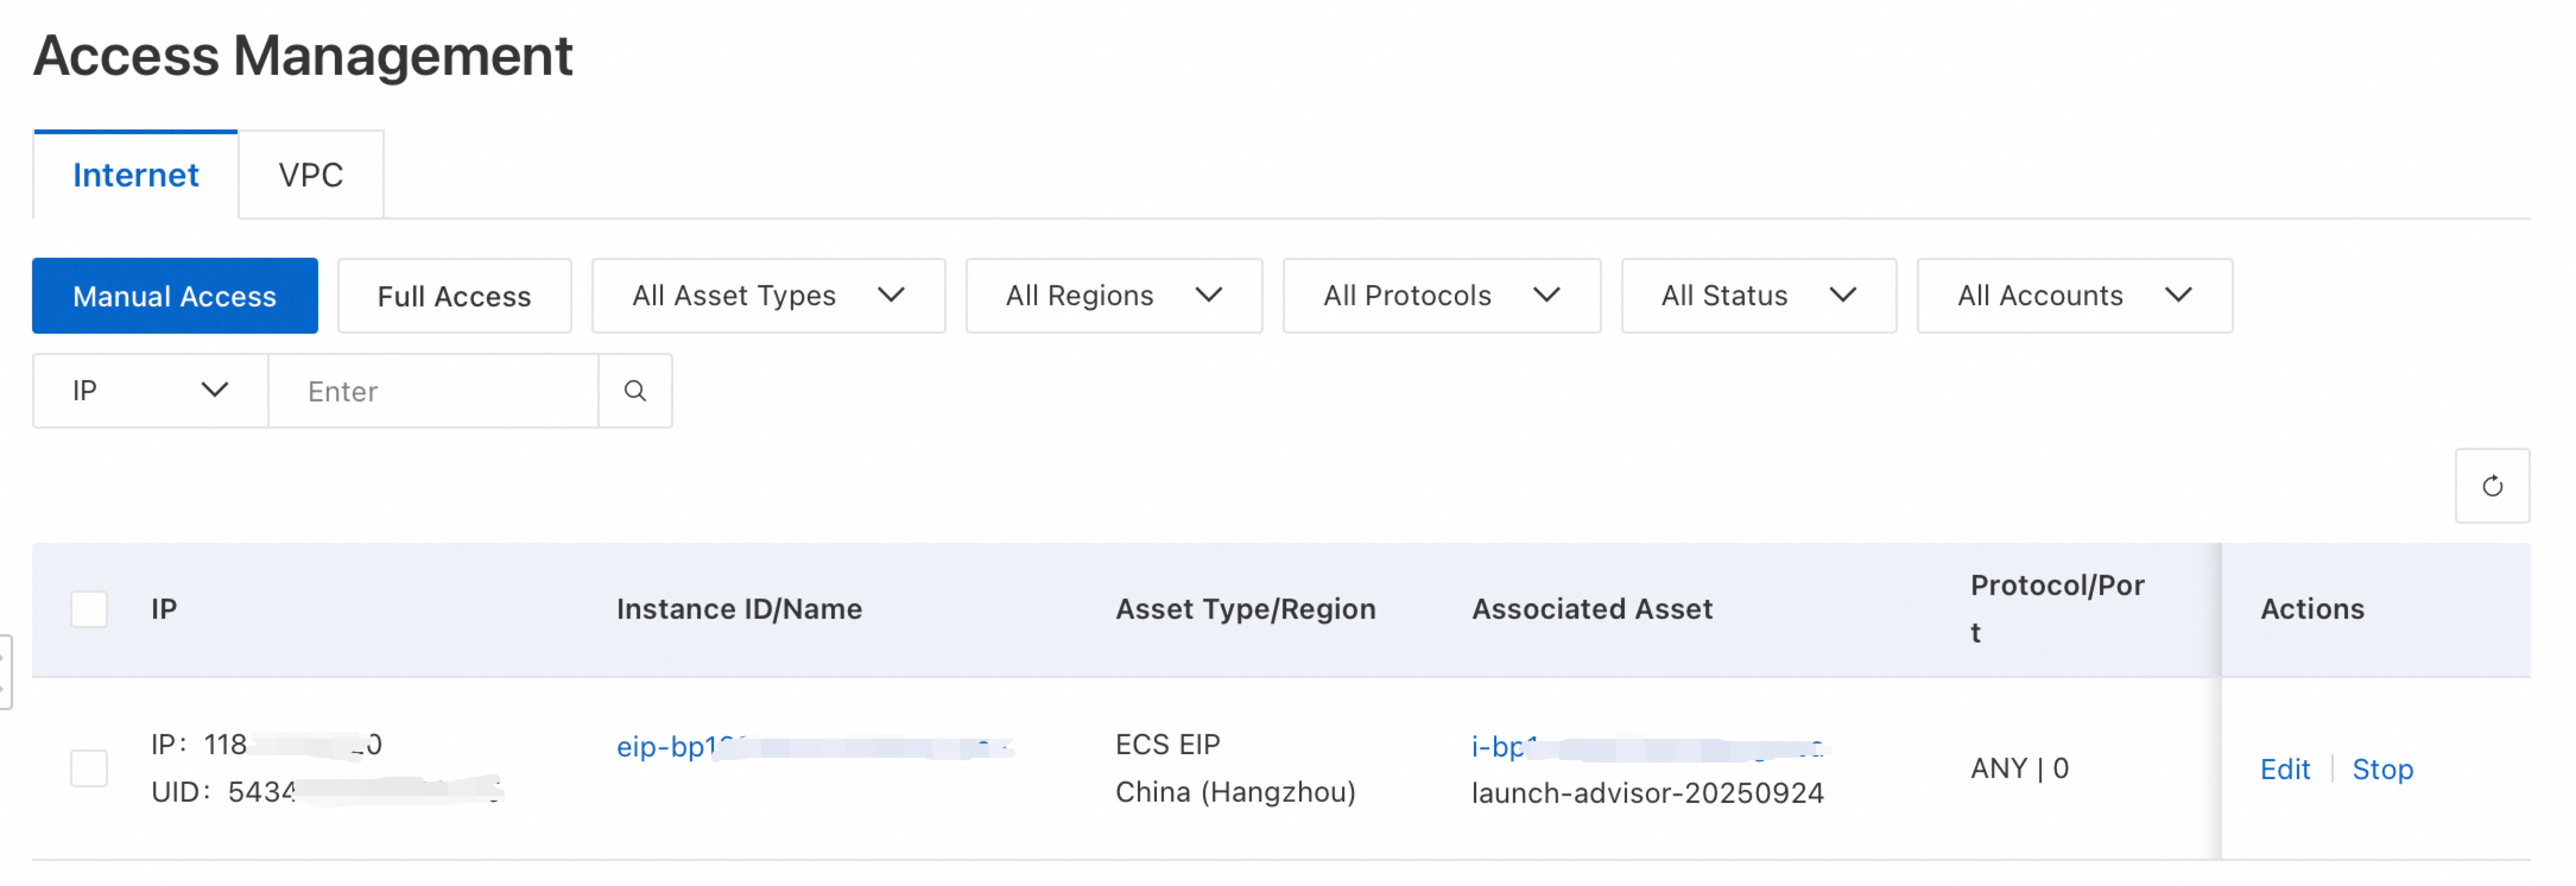
From the list, you can:
Filter: Search by protocol, Alibaba Cloud service, collection status, asset ID, IP address, or asset name.
Edit: In the Actions column, click Edit to modify the port, protocol type, traffic threshold, or collection time.
Stop: In the Actions column, click Stop to disable traffic collection for an asset.
Provision VPC private network traffic
NDR provisions private network traffic through VPC traffic mirroring. The configuration wizard automatically creates the required infrastructure.
Prerequisites
Before you begin, ensure that:
Your VPC has enough available IP address space. NDR creates vSwitches in two availability zones for high availability. Each vSwitch CIDR block must be a subset of the VPC CIDR block, with a mask length between /24 and /27.
You plan subnets in advance. A /27 subnet is recommended — it provides approximately 60 Gbps of provisioning capacity while conserving VPC IP resources.
You have access to the NDR console.
Provision a VPC
Log in to the NDR console.
In the left navigation pane, click Access Management.
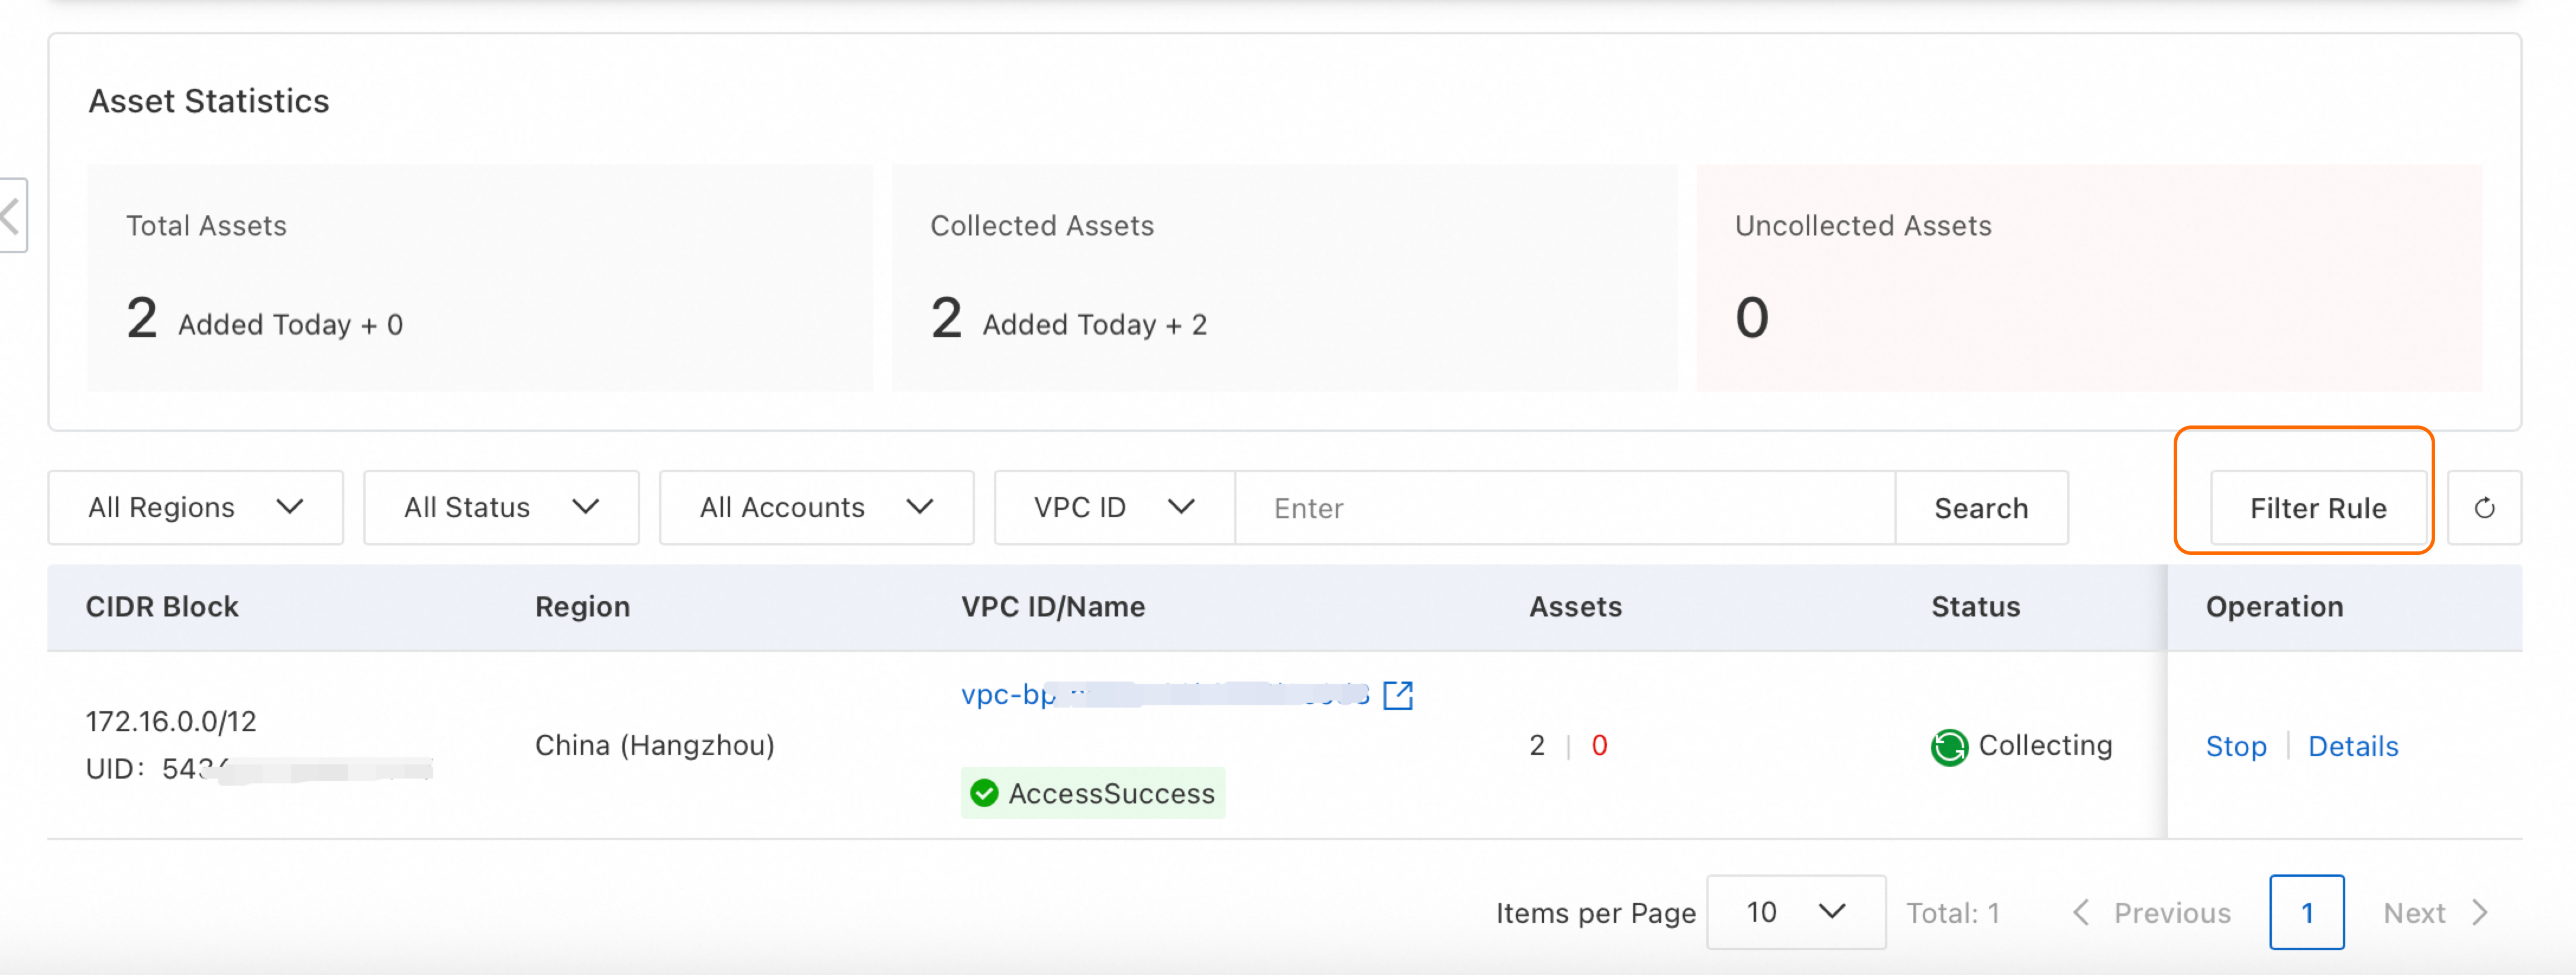
Click the VPC tab. The page shows Total Assets, Collected Assets, Uncollected Assets, and a list of VPCs.
Find the VPC to provision, then click Access in the Operation column.
In the Access panel, complete the configuration wizard:
Step 1: Define mirroring parameters
| Parameter | Description | Notes |
|---|---|---|
| Network configuration | NDR creates vSwitches in two zones for high availability. | NDR auto-calculates the smallest compliant subnets based on your VPC CIDR block and existing vSwitches. For example, if your VPC CIDR block is 192.168.0.0/16, you can select a subnet between 192.168.0.0/24 and 192.168.0.0/27. If the VPC lacks sufficient subnet space, the following error appears: "The CIDR block overlaps with the CIDR blocks of other vSwitches in the current VPC." Release unused vSwitch subnets to continue. Click View vSwitches in this VPC to inspect current allocations. |
| Mirror traffic threshold | Maximum mirrored bandwidth. | Select from the drop-down list. |
| Traffic threshold | Stop provisioning when this threshold is exceeded. | Set a specific value, or select Unlimited to collect without a cap. |
| Period type | When to collect traffic. | Unlimited: Collect continuously. If a traffic threshold is set, collection stops when the threshold is reached. Single time range: Collect during a one-time window. Recurring cycle: Collect on a repeating schedule. |
Step 2: Configure traffic mirroring
Select the assets whose traffic you want to mirror.
Click Confirm.
In the Billing Note dialog box, click OK.
Creating a traffic mirror incurs fees charged by VPC. For pricing details, see Traffic Mirroring.
Click Close.
During provisioning, click Accessing in the VPC ID/Name column to check the provisioning status. After provisioning completes, NDR automatically applies a default traffic filter rule. Customize filter rules as needed — see Customize traffic filter rules.
View provisioned assets
In the Actions column, click Details.
In the Details panel, review the tabs described below.
Mirroring Parameters tab:
View NDR collection vSwitches. Click a vSwitch name to open its details in the VPC console.
Click Edit to change the mirrored bandwidth threshold.
In Advanced Settings, click Edit Information to update the traffic threshold or period type.
Mirrored Traffic Assets tab:
For uncollected assets, click Steer Traffic in the Actions column.
For collected assets, click the pencil icon in the Filter Rule column to modify the filter rule, or click New Rule to add one.
Customize traffic filter rules
Traffic filter rules control which private network traffic NDR collects. Define conditions based on direction, IP address, port, and protocol to allow or deny specific traffic.
Rules are evaluated from highest to lowest priority (smallest number first). The first matching rule determines whether the traffic is collected.
Example: To collect inbound HTTPS traffic while excluding a specific source range:
| Priority | Direction | Protocol | Source CIDR block | Destination port | Collect or not |
|---|---|---|---|---|---|
| 10 | Inbound | TCP | 203.0.113.0/24 | 443/443 | No |
| 20 | Inbound | TCP | 0.0.0.0/0 | 443/443 | Yes |
Rule 10 excludes HTTPS traffic from 203.0.113.0/24. Rule 20 collects all other inbound HTTPS traffic. Because rule 10 has a lower number, it takes precedence.
Create a filter rule
In the upper-right corner of the asset list, click Filter Rule.
In the Filter Rule panel, click Create Rule.
Enter a Rule Name, then click Add Rule Condition.
Configure the rule conditions:
| Parameter | Description |
|---|---|
| Direction | Traffic direction: Inbound or Outbound. |
| Protocol type | Protocol to match: ALL, ICMP, TCP, UDP, and more. |
| Source CIDR block | Source IP range. |
| Source port | Source port range (1–65535). Separate start and end ports with a forward slash, for example, 1/200 or 80/80. |
| Destination CIDR block | Destination IP range. |
| Destination port | Destination port range (1–65535). Use the same format as source port. |
| Collect or not | Yes: Collect only traffic matching this rule. No: Exclude traffic matching this rule; collect everything else. |
| Priority | Rule evaluation order. Lower values take precedence. |
Edit or delete a rule
Edit: In the Operation column, click Details to view or modify the rule's conditions, or add new ones.
Delete: In the Operation column, click Delete to remove a custom filter rule. Only unreferenced rules can be deleted.