Dynamic node scaling in ACK clusters leads to frequent IP address changes. Use an ACK cluster synchronization node to automatically sync these IP addresses to a Cloud Firewall address book, reducing the need for manual updates and improving security.
Usage notes
Only ACK clusters that use the Terway network plugin are supported. To check the network plugin type, see Container Network FAQ.
Creating a synchronization node requires granting the Cloud Firewall service-linked role RBAC permissions to the cluster. This allows the node to access information about Pods within the cluster.
Supported regions and zones
Supported regions and zones in the public cloud
Region | Region ID | Zone |
China (Chengdu) | cn-chengdu | Zone A, Zone B |
China (Guangzhou) | cn-guangzhou | Zone A, Zone B |
China (Shenzhen) | cn-shenzhen | Zone D, Zone E, Zone F |
China (Beijing) | cn-beijing | Zone F, Zone G, Zone H, Zone I, Zone L |
China (Shanghai) | cn-shanghai | Zone B, Zone G, Zone M, Zone N |
China (Hangzhou) | cn-hangzhou | Zone H, Zone I, Zone J, Zone K |
China (Hong Kong) | cn-hongkong | Zone B, Zone C |
Singapore | ap-southeast-1 | Zone A, Zone B, Zone C |
Procedure
Log on to the Cloud Firewall console. In the left-side navigation pane, choose . On the page that appears, click the ACK cluster tab, and then click Create Sync Node to open the Create Sync Node panel.

Follow the on-screen instructions to grant permissions to the Cloud Firewall service-linked role (AliyunServiceRoleForCloudFW). You can click the link or button to go to the authorization page.
 Important
When you create a synchronization node for a cluster for the first time, you must grant the Cloud Firewall service-linked role at least the Restricted User or higher RBAC permissions for the cluster.
You can grant permissions for specific namespaces that require access control or for all namespaces, based on your requirements.
Incorrectly configuring permissions in this step will cause the final health check and node creation to fail.
For more information about authorization, see Use RBAC to authorize operations on cluster resources.
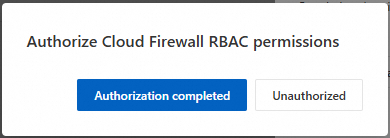
After successful authorization, return to the node creation page and click Authorization completed to proceed to the next step.
If an issue occurs during authorization, you can click Unauthorized to remain on the current page.

Enter the synchronization node information to complete the creation.
After you finish entering the synchronization node information, click OK to start the automatic detection and creation of the synchronization node.
ImportantIf the Authorize Cloud Firewall RBAC permissions requirement is not met, this step will fail.
Other operations
After the synchronization node is created, it is displayed in the list.

Actions
Details: View the configuration details of the synchronization node.
Modify: Modify the information of the synchronization node.
NoteCurrently, you can only modify the Synchronization Node Name and Synchronization Cycle. To change other settings, you must delete and recreate the node.
Delete: Delete the current synchronization node.
NoteTo delete a synchronization node that is referenced by an address book, you must first delete the address book.
Status
Status: Indicates the running status of the synchronization node instance.
Health Status: Indicates the operational state of the synchronization node. If the status is unhealthy, hover over the icon to view the cause. For example:

Usage
After the synchronization node is created, you can reference it in an ACK address book. For more information, see Create a custom address book.

