This topic describes how to switch a virtual private cloud (VPC) firewall from the default active-active architecture to the active-standby architecture by specifying a primary zone and a secondary zone. The switchover helps reduce latency caused by traffic flows across zones.
Sample scenario
An enterprise created a VPC firewall in the Singapore region, and the Default (Auto-assigned) option was selected for the primary and secondary zones.

By default, the VPC firewall uses the active-active architecture for disaster recovery. In the active-active architecture, the Cloud Firewall cluster does not forward traffic to the nearest zone. Instead, the cluster randomly forwards traffic to the primary and secondary zones. This may cause traffic flows across zones.
To resolve this issue, Cloud Firewall provides the active-standby architecture for VPC firewalls to implement disaster recovery. A VPC firewall can first process traffic in the primary zone, and then switch to the secondary zone to forward traffic in disaster recovery scenarios.
If your VPC firewall uses the active-active architecture, you can switch it to the active-standby architecture.
Before | After |
 |  |
Usage notes
Before the switchover, you must disable and delete all VPC firewalls in the corresponding region. Then, recreate them. The access control policies created for the original VPC firewalls are retained.
When you enable or disable a VPC firewall for a Basic Edition transit router, a transient connection that lasts for several seconds occurs.
When you enable or disable a VPC firewall for an Enterprise Edition transit router, no transient connection occurs.
To prevent unidirectional traffic on a VPC firewall from being blocked, we recommend that you configure an Allow policy with a high priority on ANY traffic during the switchover. For more information, see Create an access control policy for a VPC firewall.
You can record the VPC and vSwitch CIDR blocks of an original VPC firewall in advance for reuse during the recreation process.
In the active-standby architecture, dependencies exist between the primary and secondary zones. The actual available zones prevail.
Switchover for a VPC firewall created for a Basic Edition transit router
Before you can switch a VPC firewall created for a Basic Edition transit router of a Cloud Enterprise Network (CEN) instance from the active-active to active-standby architecture, you must select the CEN instance and the region in which the VPC firewall resides to disable and delete all VPC firewalls in the region. Then, recreate them.
Step 1: Disable and delete VPC firewalls
Log on to the Cloud Firewall console. In the left-side navigation pane, click Firewall Settings.
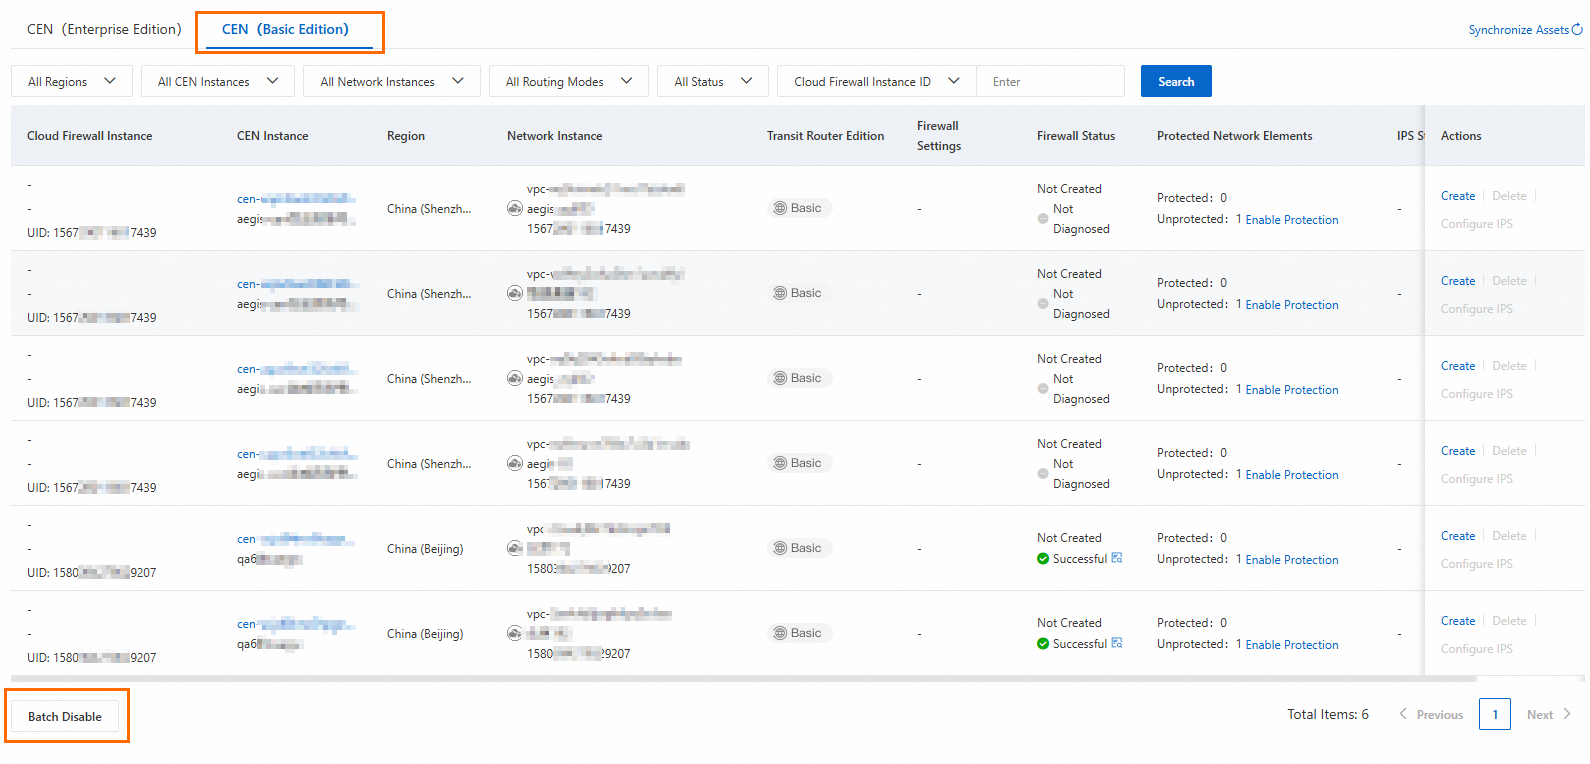
On the tab, click Batch Disable.

In the Batch Disable dialog box, configure the CEN Instance and Region parameters, and click OK.
After the VPC firewalls are disabled, find the firewalls in the specified region and click Delete in the Actions column. This deletes all VPC firewalls in the region.
Step 2: Create VPC firewalls
Find your CEN instance in the specified region and click Create in the Actions column.
In the Create Firewall panel, click Quick Diagnosis.
If you want to create a VPC firewall for a Basic Edition transit router, you can click Quick Diagnosis to check whether the required conditions are met. After the check is complete, you can view the diagnostic results in the Enable Diagnosis step in the panel. If you understand the rules for creating a VPC firewall, you can skip quick diagnostics and directly create a VPC firewall. For more information about how to handle diagnostic failures, see Causes and solutions of firewall enabling failures.
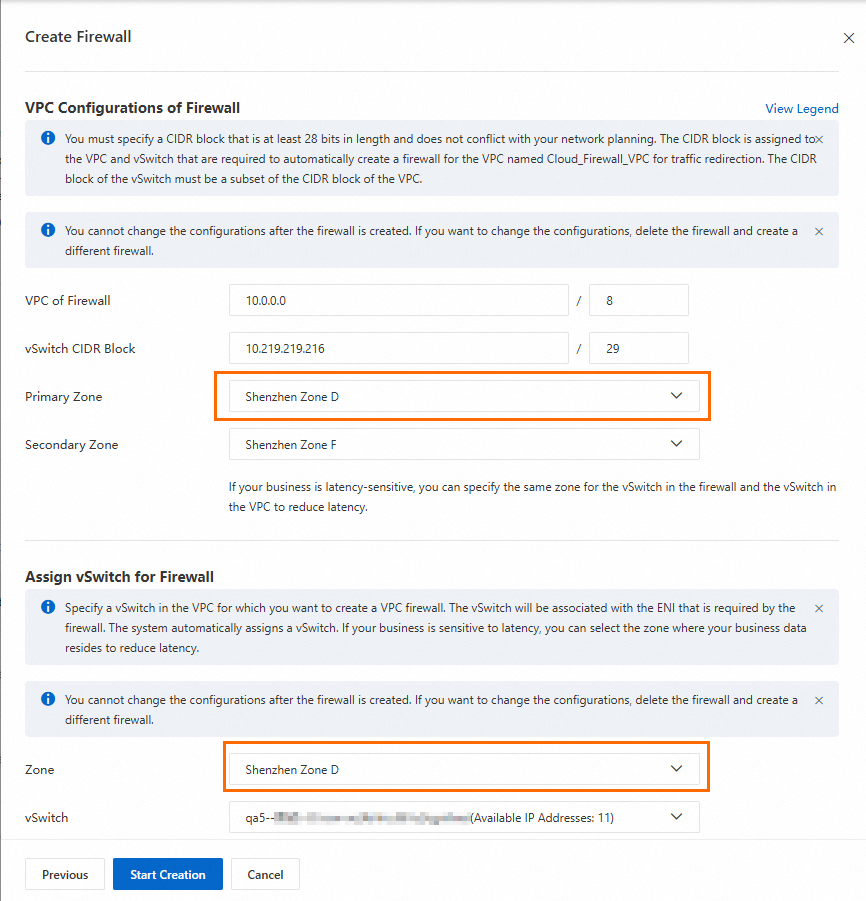
Configure other settings, including the CIDR block of the firewall VPC, primary zone, secondary zone, vSwitch of the business VPC, zone of the vSwitch, and intrusion prevention settings.
ImportantIf you set Primary Zone and Secondary Zone in the VPC Configurations of Firewall section to zones in which your business traffic is generated, the VPC firewall switches to the active-standby architecture. If you set Zone in the Assign vSwitch for Firewall section to a different zone from the zone specified for Primary Zone, traffic latency exists.
If your business is latency-sensitive, set Primary Zone in the VPC Configurations of Firewall section and Zone in the Assign vSwitch for Firewall section to the same zone in which your business traffic is generated to further reduce latency.
The intrusion prevention settings apply to all network instances that are attached to the same CEN instance.

Click Start Creation to create a VPC firewall.
After the VPC firewall is created, repeat the preceding operations to configure vSwitches for traffic redirection and protection for other VPCs in the CEN instance. We recommend that you specify the same zone for the vSwitch and the primary zone for the firewall VPC in a VPC firewall.
After the configuration is complete for all VPCs in the region, turn on the switch in the Firewall Settings column for the VPCs.

Switchover for a VPC firewall created for an Enterprise Edition transit router
Before you switch a VPC firewall created for an Enterprise Edition transit router of a CEN instance from the active-active architecture to the active-standby architecture, you must disable and delete all traffic redirection scenarios in the region to which the CEN instance belongs. Then, you must delete and recreate the VPC firewall, and restore the original traffic redirection scenarios.
Step 1: Disable and delete traffic redirection scenarios
Log on to the Cloud Firewall console. In the left-side navigation pane, click Firewall Settings.
On the , find the VPC firewall that you want to manage and click Details in the Actions column.

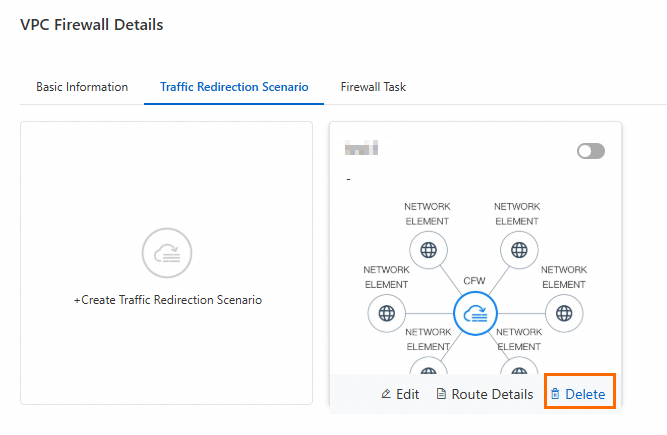
On the tab, turn off the switch.
In the Disable Traffic Redirection Scenario dialog box, select Roll Back Route and click OK.
You can view the disabling progress on the Firewall Task tab.
After the traffic redirection scenario is disabled, click Delete to delete the traffic redirection scenario. Then, close the VPC Firewall Details panel.

Step 2: Delete a VPC firewall
Find the required CEN instance and click Delete in the Actions column.
In the Delete dialog box, click OK.

Step 3: Recreate a VPC firewall and reconfigure the traffic redirection scenario
Find the required CEN instance and click Create in the Actions column.

In the Create Firewall panel, select Automatic for Traffic Redirection Mode and click Check Now.
If you want to create a VPC firewall for an Enterprise Edition transit router, you can click Check Now to check whether the required conditions are met. After the check is complete, you can view the check results in the Precheck step. If you understand the rules for creating a VPC firewall, you can click Skip and start creation now. For more information about firewall enabling failures, see Causes and solutions of firewall enabling failures.
Configure other settings, including the CIDR block of the firewall VPC, primary and secondary zones, and intrusion prevention settings.
ImportantIf your business is latency-sensitive, we recommend that you select the zones of your actual business as the primary zone and secondary zone to reduce latency.
The intrusion prevention settings apply to all network instances that are attached to the same CEN instance.

After the VPC firewall is created, click Next to reconfigure traffic redirection scenario.
Click Next. The VPC firewall is created and automatically enabled.