Service Mesh (ASM) provides an intuitive graphical user interface (GUI) for gateways. You can create DestinationRules and VirtualServices directly in the console without writing YAML, which simplifies traffic management. This topic shows you how to use the GUI to create traffic policies and routing rules.
Prerequisites
-
You have enabled automatic sidecar injection for the namespace. For more information, see Enable automatic injection.
An ingress gateway is deployed. For more information, see Create an ingress gateway.
An application is deployed in the cluster that is added to the ASM instance. For more information, see Deploy an application to an ASM-associated cluster.
-
You have obtained the IP address of the ASM Gateway. For more information, see Obtain the ingress gateway address.
Example
This topic uses the Reviews service as an example to describe how to graphically configure traffic policies, such as load balancing and connection pools. After a traffic policy is created, a YAML file for the corresponding DestinationRule is automatically generated. For example, you can graphically create routing rules for the Bookinfo service, such as /productpage and /login. This allows you to access the Bookinfo service by using paths such as /productpage.
Create a domain
-
Log on to the ASM console. In the left-side navigation pane, choose .
-
On the Mesh Management page, click the name of the ASM instance. In the left-side navigation pane, choose .
-
On the Ingress Gateway page, click the name of the target gateway. In the left-side navigation pane of the gateway details page, click Domain/Certificate.
-
On the Add domain page, configure the following parameters and click Create.
Parameter
Example
Domain
*
Protocol
HTTP
Namespaces
default
Port Name
http
Port
80

Import upstream services
Import services into the ASM Gateway to associate them with the gateway.
-
On the Ingress Gateway page, click the name of the target gateway. In the left-side navigation pane of the gateway details page, click Upstream Service.
-
On the Upstream Service page, click Import service. On the Import service page, select a Namespaces, select the reviews and productpage services, click the
 icon to add them to the list of selected services, and then click Confirm.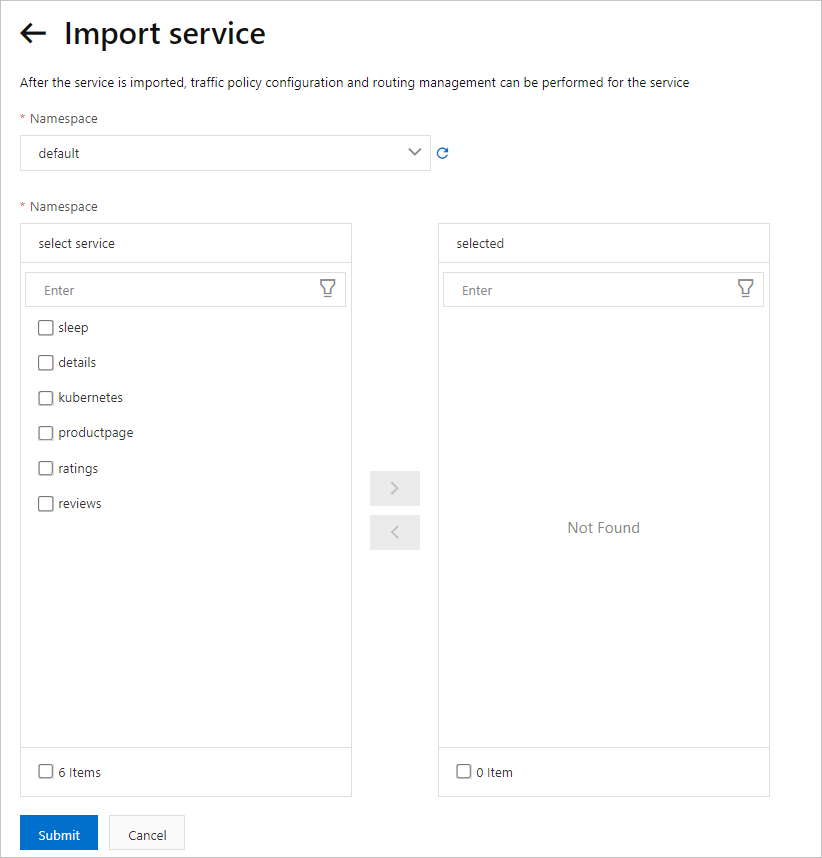
Create a traffic policy
-
Define service versions.
This step divides the
reviewsservice into three versions (subsets): v1, v2, and v3.-
On the Upstream Service page, find the reviews service and click versions in the Operator column.
-
On the versions page, click Add Service Version (Subset), set Name to v1, click Add Label, set the Key to version, and set the Value to v1.
-
Click Add Service Version (Subset). Set Name to v2, click Add Label, set the Key to version, and set the Value to v2.
-
Click Add Service Version (Subset). Set Name to v3, click Add Label, set the Key to version, set the Value to v3, and then click Create.
-
-
Create the traffic policy.
-
On the Upstream Service page, find the reviews service and click traffic policy in the Operator column.
-
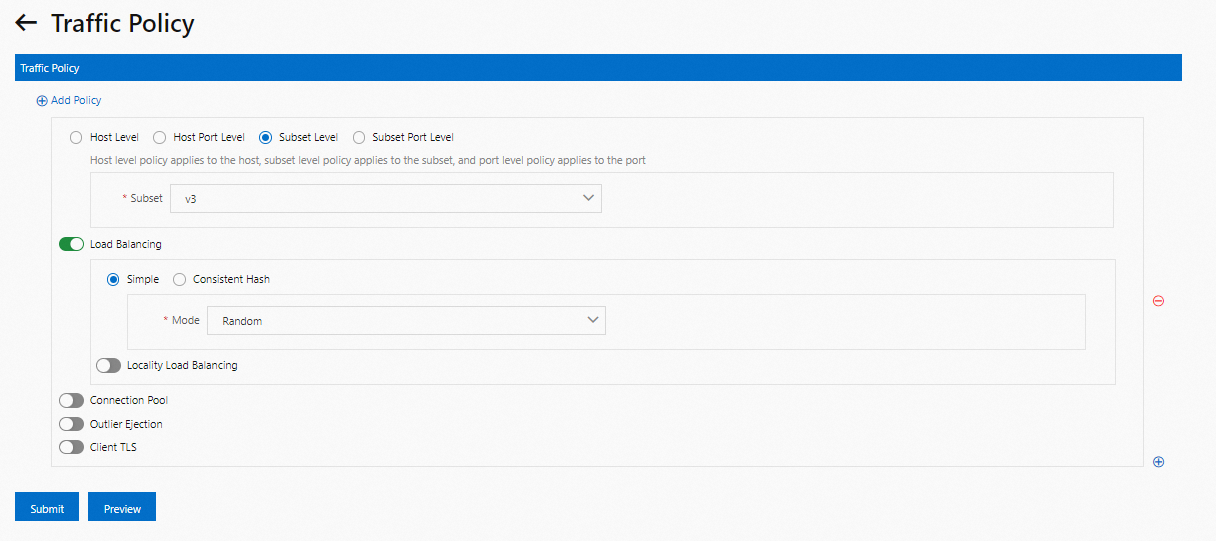
On the traffic policy page, click Add Policy, select Subset Level, and choose the v3 version. Enable Load Balancing, select Simple mode, set Mode to Random, and then click Submit.
-
-
(Optional) View the DestinationRule YAML file generated after you create the traffic policy.
On the Upstream Service page, find the reviews service and click View YAML in the Operator column. In the Preview dialog box, review the YAML file and click Confirm.
NoteAlternatively, on the mesh details page, choose in the left-side navigation pane. On the DestinationRule page, find the target rule and click View YAML in the Operator column. In the Edit dialog box, you can view the YAML file of the generated DestinationRule.
Create routing rules
-
Create the routing rules for the Bookinfo application.
-
Create the
/productpageroute.-
In the left-side navigation pane of the gateway details page, click Route management, and then click Create.
-
In the set route detail wizard, configure the following parameters and click Next.
Parameter
Example
route type
Set to http.
Namespaces
Set to default.
route name
Set to
productpage-route.description
Set to
productpage route.priority
Set to
3.NoteRouting rules are prioritized. A smaller number indicates a higher priority. If a request URI matches multiple routing rules, the rule with the highest priority is applied.
Matching rules
Specifies the URL matching criteria. Only requests with matching URLs are routed to the destination service.
Enable Matching request URI. Set Method to Exact and Content to
/productpage.NoteYou can also click Add Header Matching Rule to set header-based matching.
-
In the set route destination wizard, configure the following parameters and click Next.
Parameter
Example
select upstream service
The destination service for this route. Select productpage.
Port
Optional. The port exposed by the upstream service. If the service exposes multiple ports, you must specify one. Leave this blank.
Subset
The destination service version (subset) for this route. Leave this blank.
Weight
The traffic weight for the destination service. Leave this blank.
-
In the advanced config wizard, enable Fault Injection. Then, enable Request Latency, set Latency to 4s, and set Injection Percentage to 100. Click Create.
-
-
Create the
/staticroute.-
On the Route management page, click Create.
-
In the set route detail wizard, configure the following parameters and click Next.
Parameter
Example
route type
Set to http.
Namespaces
Set to default.
route name
Set to
static.description
Set to
static resource.priority
Set to
0.Matching rules
Specifies the URL matching criteria. Only requests with matching URLs are routed to the destination service.
Enable Matching request URI. Set Method to Prefix and Content to
/static. -
The subsequent steps for creating the
/staticroute are the same as those for creating the/productpageroute. For more information, see Create the /productpage route.
-
-
Create the
/loginroute.-
On the Route management page, click Create.
-
In the set route detail wizard, configure the following parameters and click Next.
Parameter
Example
route type
Set to http
Namespaces
Set to default.
route name
Set to
login.description
Set to
login request route.priority
Set to
0.Matching rules
Specifies the URL matching criteria. Only requests with matching URLs are routed to the destination service.
Enable Matching request URI. Set Method to Prefix and Content to
/login. -
The subsequent steps for creating the
/loginroute are the same as those for creating the/productpageroute. For more information, see Create the /productpage route.
-
-
Create the
/logoutroute.-
On the Route management page, click Create.
-
In the set route detail wizard, configure the following parameters and click Next.
Parameter
Example
route type
Set to http.
Namespaces
Set to default.
route name
Set to
logout.description
Set to
logout route.priority
Set to
0.Matching rules
Specifies the URL matching criteria. Only requests with matching URLs are routed to the destination service.
Enable Matching request URI. Set Method to Prefix and Content to /logout.
-
The subsequent steps for creating the /logout route are the same as those for creating the /productpage route. For more information, see Create the /productpage route.
-
-
Create the
/api/v1/productsroute.-
On the Route management page, click Create.
-
In the set route detail wizard, configure the following parameters and click Next.
Parameter
Description
route type
Set to http.
Namespaces
Set to default.
route name
Set to
products-route.description
Set to
product information.priority
Set to
0.Matching rules
Specifies the URL matching criteria. Only requests with matching URLs are routed to the destination service.
Enable Matching request URI. Set Method to Prefix and Content to
/api/v1/products. -
The subsequent steps for creating the
/api/v1/productsroute are the same as those for creating the/productpageroute. For more information, see Create the /productpage route.
-
-
-
Verify that the routing rules are effective.
-
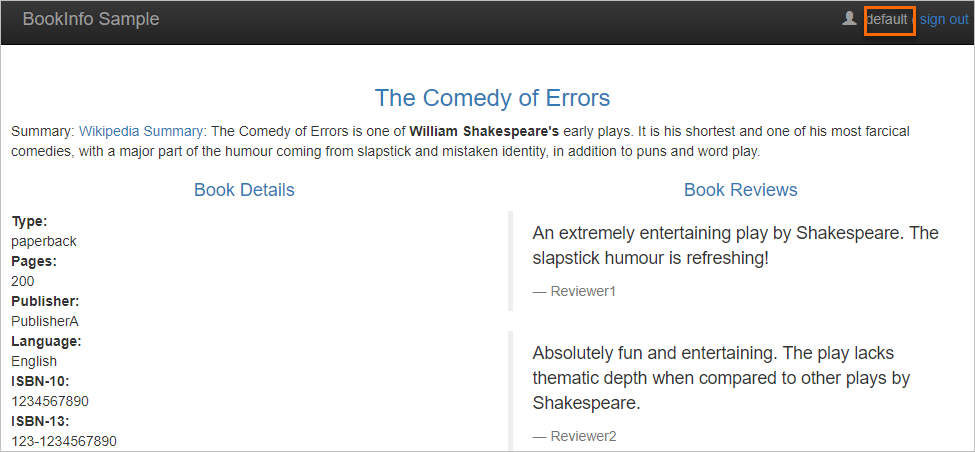
In the address bar of your browser, enter
http://{IP_address_of_ingress_gateway}/productpage.The following page appears.
-
In the upper-right corner of the Bookinfo page, click Sign in.
-
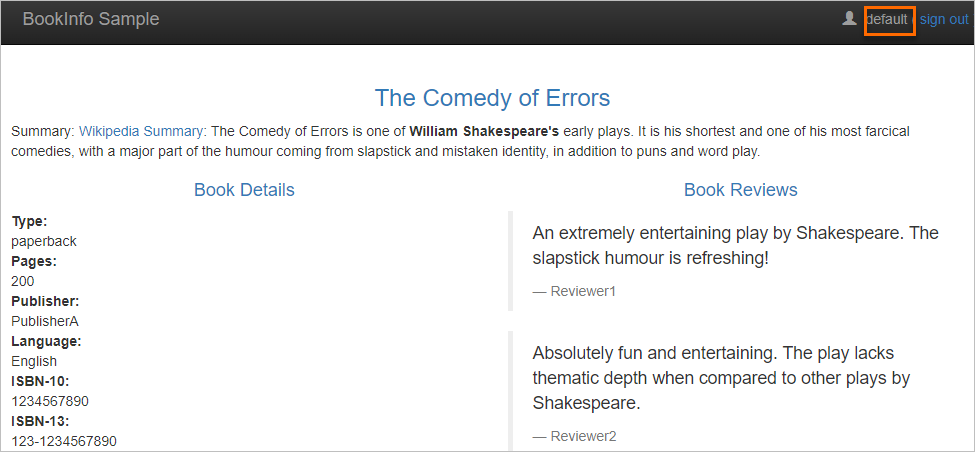
On the Please sign in page, enter any username and password, and click Sign in.
You are logged in to the Bookinfo application.
You can also access the Bookinfo service by using the /logout, /static, and /api/v1/products paths to verify the routing rules.
-
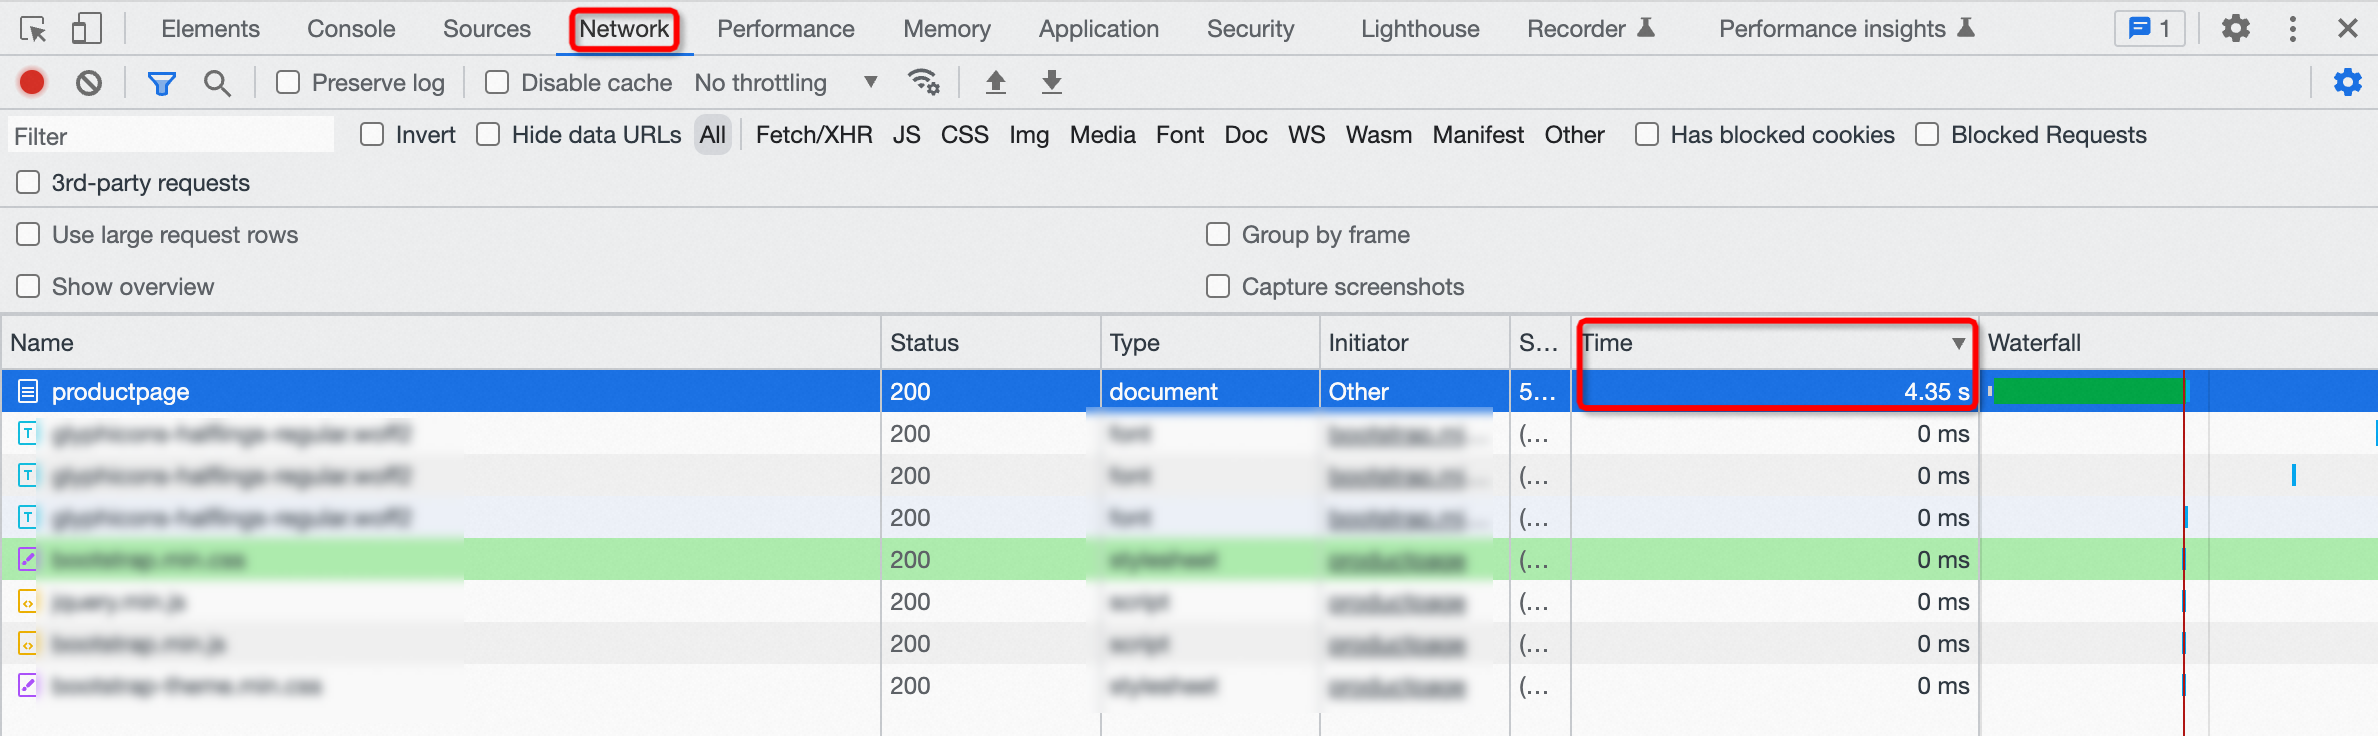
Open the developer tools of your browser and switch to the Network tab.
-
Refresh the page.
A delay of approximately 4 seconds is displayed, which indicates that the fault injection rule is in effect.
-
-
(Optional) View the YAML file of the VirtualService that is generated after the routing rules are created.
-
On the details page of the ASM instance, choose in the left-side navigation pane.
-
On the Virtual Service page, find the target VirtualService and click View YAML in the Operator column.
-
In the Edit dialog box, view the YAML file of the generated VirtualService. After you confirm that the file is correct, click OK.
-
Related operations
View service details
View details about an imported service, such as whether a sidecar is injected and the region where the service is deployed.
-
On the Ingress Gateway page, click the name of the target gateway. In the left-side navigation pane of the gateway details page, click Upstream Service.
-
On the Upstream Service page, find the target service and click service details in the Operator column. On the service details page, you can view information such as whether a sidecar is injected and the region of the service.
Take a routing rule offline
Take a routing rule offline to make it inactive.
-
On the Ingress Gateway page, click the name of the target gateway.
-
In the left-side navigation pane of the gateway details page, click Route management.
-
On the Route management page, find the target routing rule and click offline in the Operator column.
-
In the Confirm dialog box, click OK.
-
Verify that the routing rule is offline.
-
In the address bar of your browser, enter
http://{IP_address_of_ingress_gateway}/productpage. -
In the upper-right corner of the Bookinfo page, click Sign in.
-
On the Please sign in page, enter any username and password, and click Sign in.
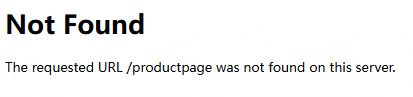
A "page not found" error appears, which confirms that the routing rule is inactive.
NoteTo reactivate a routing rule, bring it online:
On the Route management page, find the target routing rule and click online in the Operator column. In the Confirm dialog box, click OK.
-