When you run Python applications in Container Service for Kubernetes (ACK) or Container Compute Service (ACS) clusters, Application Real-Time Monitoring Service (ARMS) provides distributed tracing, application topology maps, and API call analysis. To collect this data, install the ARMS Python agent using the ack-onepilot component.
Two installation methods are available:
| Method | ack-onepilot version | Dockerfile changes |
|---|---|---|
| Auto-injection (recommended) | Later than 5.0.0 | Not required |
| Manual installation | 3.2.4 or later | Required |
For questions about the Python agent, see FAQ about the Python agent. You can also contact us through DingTalk group (ID: 159215000379).
Prerequisites
An ACK or ACS cluster is created
A namespace is created. See Manage namespaces and quotas. The examples in this guide use
arms-demoYour Python version and frameworks are supported. See Python libraries supported by Application Monitoring
Python framework compatibility
Review these framework-specific requirements before you proceed.
uvicorn
If your application starts with uvicorn, choose one of the following approaches:
Approach A: Import the agent in code. Add this import statement to the first line of your uvicorn entry file:
from aliyun.opentelemetry.instrumentation.auto_instrumentation import sitecustomizeApproach B: Switch to gunicorn with the aliyun-instrument prefix. Replace your uvicorn command:
# Before
uvicorn app:app --workers 4 --port=9090 --host 0.0.0.0

# After
aliyun-instrument gunicorn -w 4 -k uvicorn.workers.UvicornWorker -b 0.0.0.0:8000 app:appThe aliyun-instrument prefix handles initialization and non-intrusive instrumentation of the ARMS Python agent.
uWSGI
If your application starts with uWSGI, see Install the Python agent for a Django or Flask project that starts with uWSGI.
gevent
If you use gevent coroutines, set the GEVENT_ENABLE environment variable to true.
For example, if your code contains:
from gevent import monkey
monkey.patch_all()
Set the following environment variable in your deployment:
GEVENT_ENABLE=trueStep 1: Install ack-onepilot
ack-onepilot is the cluster-side component that manages ARMS agent installation.
Log on to the ACK console. On the Clusters page, click the name of your cluster.
In the left-side navigation pane, click Add-ons. Search for ack-onepilot in the upper-right corner.
ImportantMake sure that the ack-onepilot version is 3.2.4 or later.
Click Install on the ack-onepilot card.
NoteBy default, ack-onepilot supports 1,000 pods. For every additional 1,000 pods, add 0.5 CPU cores and 512 MB of memory to the component.
In the dialog box, configure the parameters and click OK. Default values are recommended.
NoteAfter installation, you can upgrade, configure, or uninstall ack-onepilot from the Add-ons page.
Choose your next step based on the ack-onepilot version:
Version later than 5.0.0: Go to Step 3: Grant permissions. No Dockerfile changes are needed. This provides a fully non-intrusive installation experience for Python applications.
Other versions (3.2.4 or later): Continue to Step 2: Modify the Dockerfile.
Step 2: Modify the Dockerfile (ack-onepilot 5.0.0 or earlier)
Skip this step if your ack-onepilot version is later than 5.0.0.
Add the ARMS Python agent to your Dockerfile and update the startup command.
Install the agent installer from PyPI:
RUN pip3 install aliyun-bootstrapInstall the agent. Replace
<region-id>with your Alibaba Cloud region ID (for example,cn-hangzhou):NoteTo install a specific agent version, run:
aliyun-bootstrap -a install -v <version>For all released versions, see Python agent release notes.RUN ARMS_REGION_ID=<region-id> aliyun-bootstrap -a installUpdate the startup command to use the
aliyun-instrumentprefix:CMD ["aliyun-instrument", "python", "app.py"]Build the image.
Complete Dockerfile example
Replace <region-id> with your Alibaba Cloud region ID, such as cn-hangzhou.
Step 3: Grant permissions
Permission configuration varies by cluster type.
ACK managed clusters
ACK managed clusters with an ARMS Addon Token require no additional permission configuration.
ACK dedicated clusters and registered clusters
Make sure that the AliyunARMSFullAccess and AliyunSTSAssumeRoleAccess permissions are granted to your Resource Access Management (RAM) user.
After ack-onepilot is installed, configure your AccessKey ID and AccessKey Secret using one of these methods.
Method 1: Update the Helm configuration
Log on to the ACK console. In the left-side navigation pane, click Clusters.
Click the name of your cluster. In the left-side navigation pane, choose Applications > Helm. Click Update next to ack-onepilot.
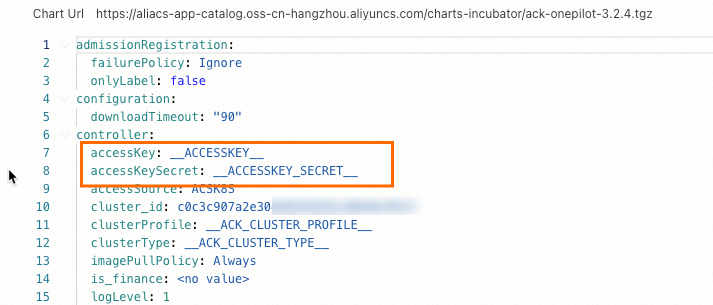
Replace the
accessKeyandaccessKeySecretvalues with your AccessKey ID and AccessKey Secret, then click OK.NoteThe AccessKey Secret is only visible when you first create the AccessKey pair. Store it securely -- it cannot be retrieved later.
Restart the Deployment.
Method 2: Use Kubernetes Secrets
Log on to the ACK console. In the left-side navigation pane, click Clusters.
Click the name of your cluster. In the left-side navigation pane, choose Configurations > Secrets.
Click Create. In the panel, click Add and enter your AccessKey ID and AccessKey Secret.
NoteThe AccessKey Secret is only visible when you first create the AccessKey pair. Store it securely -- it cannot be retrieved later.

In the left-side navigation pane, choose Workloads > Deployments. Click the ack-onepilot component (typically named
ack-onepilot-ack-onepilotin theack-onepilotnamespace).In the upper-right corner, click Edit.
Scroll to the Environments section. Click Add, then add the following environment variables that reference the Secrets you created: Click OK.
ONE_PILOT_ACCESSKEYONE_PILOT_ACCESSKEY_SECRET

ACK Serverless (ASK) and Elastic Container Instance (ECI) clusters
Authorize the cluster to access ARMS on the Cloud Resource Access Authorization page.
Restart all pods on which ack-onepilot is deployed.
Step 4: Enable ARMS monitoring
Add ARMS labels to your Kubernetes deployment to activate monitoring.
With ack-onepilot later than 5.0.0, the component automatically downloads and injects the Python agent package during this step -- no Dockerfile changes are needed. An init container handles agent injection with these defaults:
Resources: 0.5 CPU cores, 250 MB memory (released after initialization)
Execution time: approximately 10 seconds To adjust init container resources, set these environment variables: | Environment variable | Description | Example | |---|---|---| |
PYTHON_INIT_RESOURCE_REQUESTS_CPU| CPU request |500m| |PYTHON_INIT_RESOURCE_REQUESTS_MEM| Memory request |250Mi| |PYTHON_INIT_RESOURCE_LIMIT_CPU| CPU limit |1000m| |PYTHON_INIT_RESOURCE_LIMIT_MEM| Memory limit |500Mi| This auto-injection feature is in beta. Contact us through DingTalk group (ID: 159215000379) if you have questions.
Add labels to your deployment
Log on to the ACK console. In the left-side navigation pane, click Clusters.
Click the name of your cluster. In the left-side navigation pane, choose Workloads > Deployments.
Find your application, then choose
 > Edit YAML from the Actions column. Alternatively, click Create From YAML to create a new application.
Add the following labels under
spec.template.metadata: Replace<app-name>with a descriptive name for your application, such asmy-python-service.ImportantIf you use ack-onepilot later than 5.0.0 but have already installed the agent manually in your Dockerfile, disable auto-injection by adding this label: ``
yaml armsAutoInstrumentationEnable: "off"``labels: aliyun.com/app-language: python # Required. Identifies this as a Python application. armsPilotAutoEnable: 'on' # Enables ARMS monitoring. armsPilotCreateAppName: "<app-name>" # Display name in the ARMS console.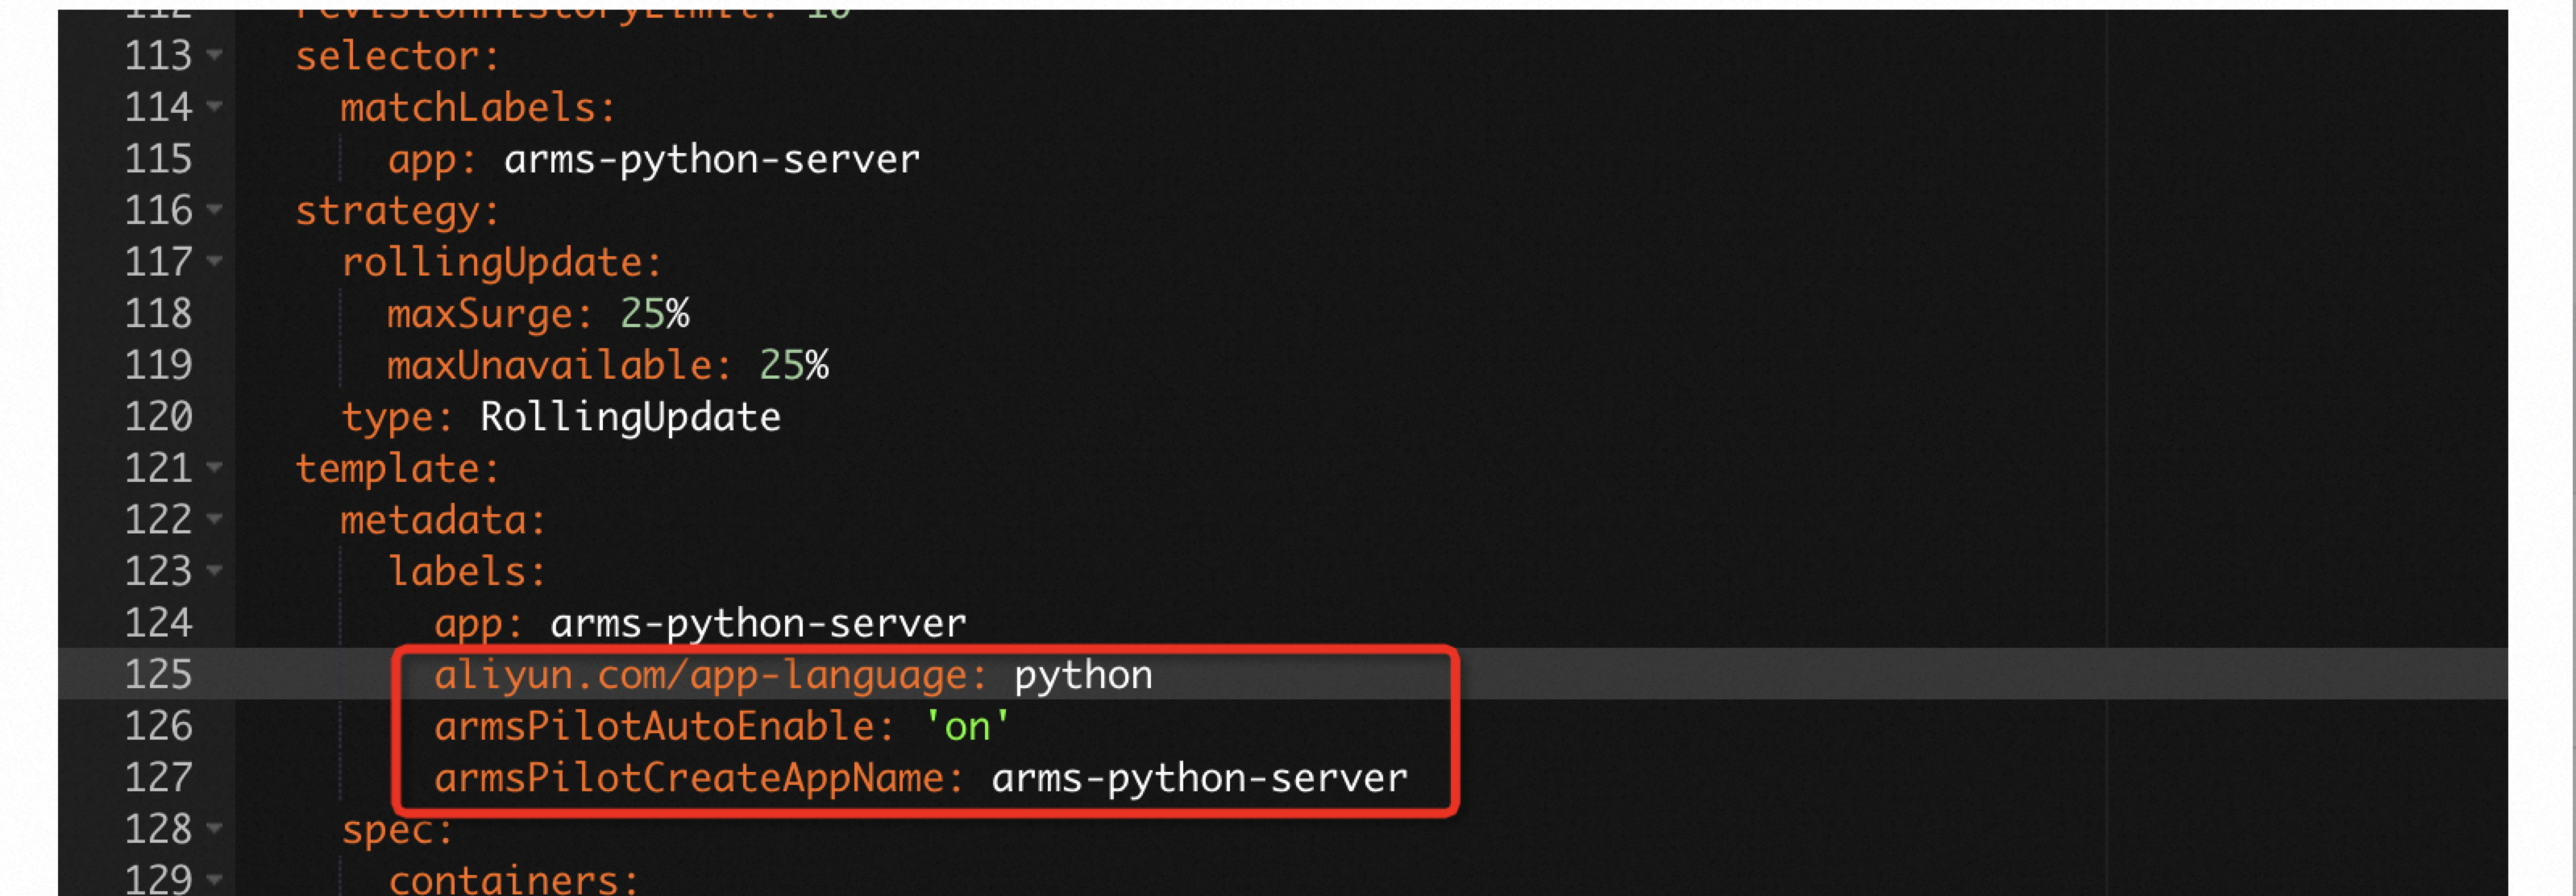
Click Update.
Complete YAML example
The following YAML deploys two sample Python applications with ARMS monitoring:
Verify the installation
Confirm that the agent is reporting data.
Open the ARMS console.
In the left-side navigation pane, choose Application Monitoring > Applications.
Confirm that your Python application appears in the list and is reporting data. This typically takes about one minute.

Troubleshoot common issues
If your application does not appear in the ARMS console after a few minutes:
Verify the labels are applied to the pod (not the deployment): Confirm that
aliyun.com/app-language,armsPilotAutoEnable, andarmsPilotCreateAppNameare present.kubectl get pod <pod-name> -n <namespace> -o jsonpath='{.metadata.labels}'Check the init container status (ack-onepilot later than 5.0.0): Look for the init container in the output. Verify that it completed successfully.
kubectl describe pod <pod-name> -n <namespace>Verify ack-onepilot is running: All ack-onepilot pods should be in
Runningstatus.kubectl get pods -n ack-onepilotCheck permissions: Make sure that the required RAM policies are attached. See Step 3: Grant permissions.
Version notes
By default, the latest Python agent version is installed each time you use aliyun-bootstrap or the auto-injection method. To pin a specific version, see the How do I install an agent for a specific region and version? section in FAQ about the Python agent.