Set up the ApsaraMQ for RocketMQ TCP client SDK for .NET to send and receive messages from a Windows application.
SDK architecture
The ApsaraMQ for RocketMQ SDK for .NET is a managed wrapper around the C++ SDK. It uses C++ multi-thread concurrent processing for high efficiency and stability while remaining independent of the public library of the Windows SDK for .NET.
When Visual Studio compiles a .NET project, the default target platform is AnyCPU, which auto-selects x86 or x64 based on the CPU type. At runtime, the Just-in-Time (JIT) compiler in the .NET Common Language Runtime (CLR) converts Intermediate Language (IL) code into x86 or x64 machine code. The underlying C or C++ DLL is compiled as x64 machine code. Therefore, the SDK ships a 64-bit DLL in release mode, built with Visual Studio 2015 and .NET Framework 4.5.2. This 64-bit DLL is compatible with other Visual Studio versions.
The SDK supports only the Windows 64-bit operating system.
The C++ DLL requires the Visual C++ 2015 runtime. If the runtime is not installed, run the
vc_redist.x64.exeinstaller included in the SDK package.
Prerequisites
Before you begin, make sure that you have:
An Alibaba Cloud Elastic Compute Service (ECS) instance to deploy your application
A Windows 64-bit operating system
Visual Studio 2015 (the 64-bit DLL is also compatible with other Visual Studio versions)
.NET Framework 4.5.2
The Visual C++ 2015 runtime (install
vc_redist.x64.exefrom the SDK package if not already present)Topics and group IDs created in the ApsaraMQ for RocketMQ console (message tags can be specified in your application code)
Download the SDK
We recommend that both new users and existing users who are not concerned with upgrade costs download the latest version of the SDK for .NET from the release notes page.
After you extract the package, the directory structure is as follows:
Directory or file | Description |
| Underlying C++ DLL files and the Visual C++ 2015 runtime installer |
| C++ static library |
| C++ dynamic library |
| Debug symbols |
| Visual C++ 2015 runtime installer |
| Sample code for sending normal, one-way, and ordered messages, and for consuming normal and ordered messages |
| PInvoke wrapper code (must be included in your project) |
| SDK environment setup guide and FAQ |
| Bug fixes and new features per release |
File names in the lib/ directory may vary depending on the SDK version.Set up a .NET console project
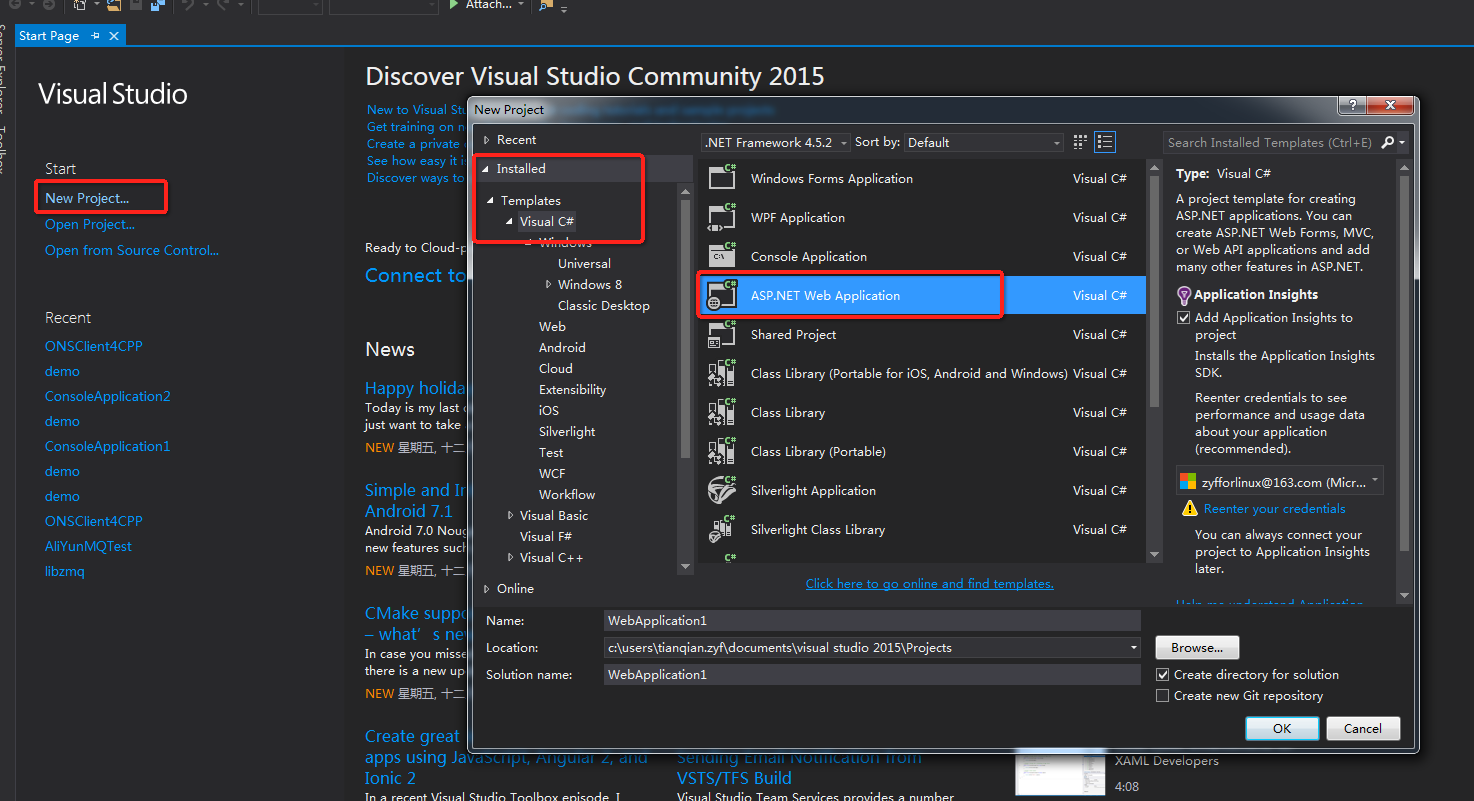
Create a project in Visual Studio.

Add the PInvoke wrapper files: right-click the project, choose Add > Add Existing Item, and select all files from the
interface/directory of the extracted SDK package.
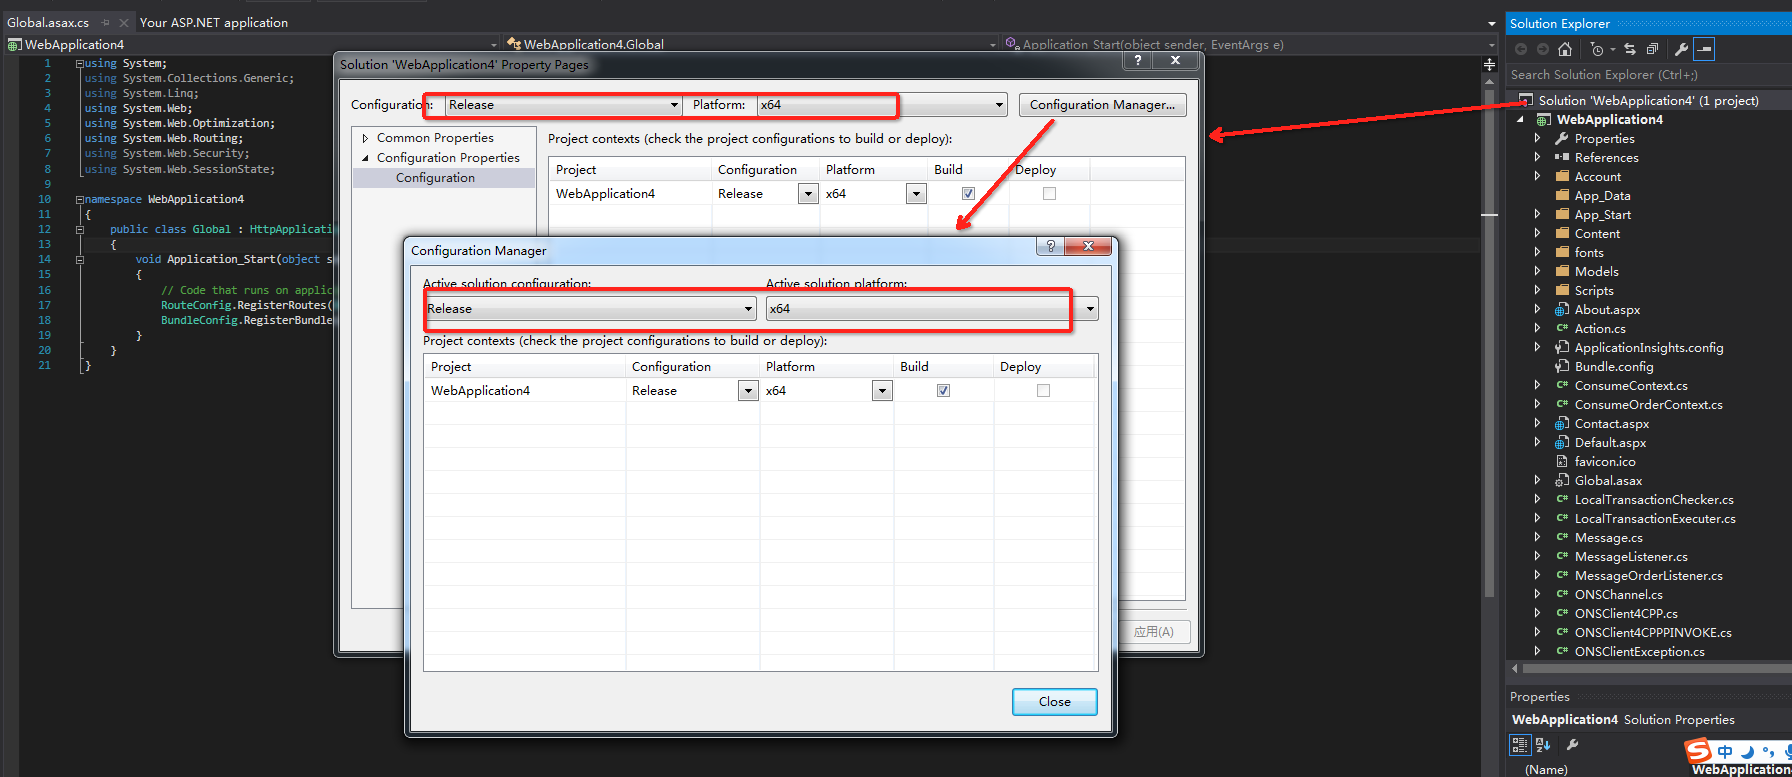
Set the build configuration: right-click the project, choose Properties > Configuration Manager, then set Active solution configuration to Release and Active solution platform to x64.
Write and compile your application, then copy the SDK DLL files to the output directory of the executable (or to a system directory) and run the program.

The SDK includes a preconfigured demo project that you can open and compile directly. Before running it, copy the required DLL files to the directory of the executable.

Set up an ASP.NET Web Forms project
Create a Web Forms project for ASP.NET in Visual Studio.
Set the build configuration: right-click the project, choose Properties > Configuration Manager, then set Active solution configuration to Release and Active solution platform to x64.
Add the PInvoke wrapper files: right-click the project, choose Add > Add Existing Item, and select all files from the
interface/directory of the extracted SDK package. For details, see Step 2 in Set up a .NET console project.Add SDK startup and shutdown code to the
Global.asax.csfile. The following example starts the producer when the application starts and shuts it down when the application ends:using System; using System.Collections.Generic; using System.Linq; using System.Web; using System.Web.Optimization; using System.Web.Routing; using System.Web.Security; using System.Web.SessionState; using ons; // SDK namespace using test; // Wrapper classes namespace namespace WebApplication4 { public class Global : HttpApplication { void Application_Start(object sender, EventArgs e) { // Standard ASP.NET startup RouteConfig.RegisterRoutes(RouteTable.Routes); BundleConfig.RegisterBundles(BundleTable.Bundles); try { // Initialize and start the producer OnscSharp.CreateProducer(); OnscSharp.StartProducer(); } catch (Exception ex) { // Handle initialization errors } } protected void Application_End(object sender, EventArgs e) { try { // Shut down the producer gracefully OnscSharp.ShutdownProducer(); } catch (Exception ex) { // Handle shutdown errors } } } }Write and compile the application.
Copy the SDK DLL files to the output directory of the executable (or to a system directory) and run the program.

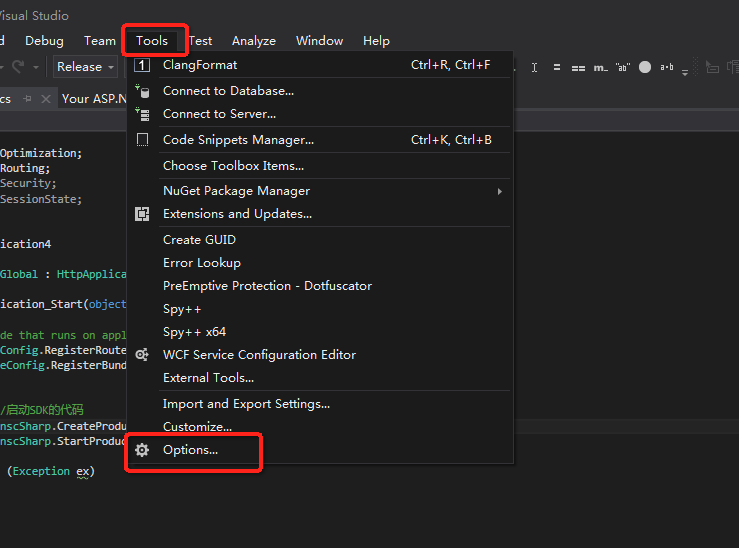
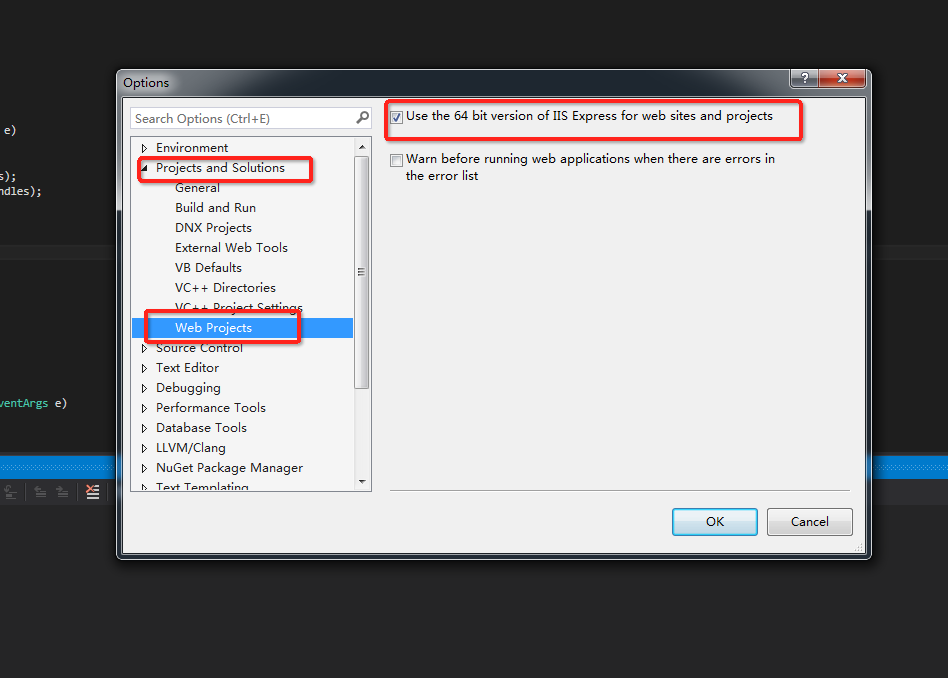
Enable 64-bit IIS Express: choose Tools > Options > Projects and Solutions > Web Projects, then select the Use the 64 bit version of IIS Express check box.
What's next
After you set up the environment, use the sample code in the demo/ directory to send and receive messages. For more information about how to create topics, group IDs, and message tags, see Create resources.