ApsaraMQ for Kafka can be used as an input for Logstash. This topic describes how to use Logstash to consume messages from ApsaraMQ for Kafka in a VPC environment.
Prerequisites
Before you begin, complete the following prerequisites:
-
Purchase and deploy an ApsaraMQ for Kafka instance. For more information, see Connect to an ApsaraMQ for Kafka instance from an ECS instance in a VPC.
-
Download and install Logstash. For more information, see Download Logstash.
-
Download and install Java Development Kit (JDK) 8. For more information, see Download JDK 8.
Step 1: Get the endpoint
Logstash uses an endpoint to connect to ApsaraMQ for Kafka.
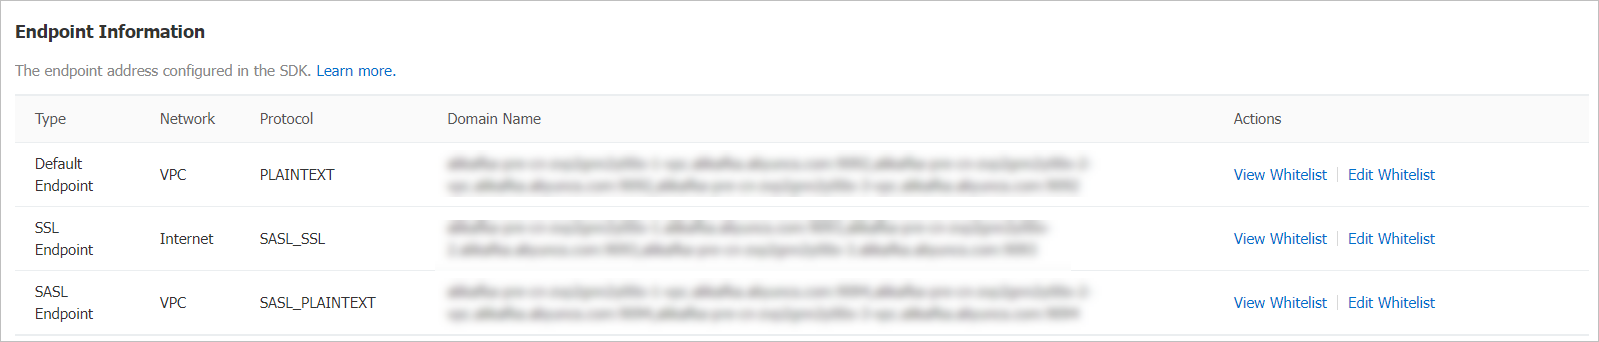
ApsaraMQ for Kafka supports the following endpoints in a VPC environment:
-
Default endpoint: Port 9092.
-
SASL endpoint: Port 9094. To use the SASL endpoint, you must enable ACL. For more information, see Enable ACL.
Log on to the ApsaraMQ for Kafka console.
In the Resource Distribution section of the Overview page, select the region where the ApsaraMQ for Kafka instance that you want to manage resides.
-
On the Instances page, click the name of the target instance.
In the Endpoint Information section of the Instance Details page, view the endpoints of the instance. In the Configuration Information section, obtain the values of the Username and Password parameters.
 Note
NoteFor information about the differences among different types of endpoints, see Endpoints and protocols.
Step 2: Create a topic
Create a topic to store messages.
Log on to the ApsaraMQ for Kafka console.
In the Resource Distribution section of the Overview page, select the region where the ApsaraMQ for Kafka instance that you want to manage resides.
ImportantYou must create topics in the region where your Elastic Compute Service (ECS) instance is deployed. A topic cannot be used across regions. For example, if the producers and consumers of messages run on an ECS instance that is deployed in the China (Beijing) region, the topic must also be created in the China (Beijing) region.
On the Instances page, click the name of the instance that you want to manage.
In the left-side navigation pane, click Topics.
On the Topics page, click Create Topic.
In the Create Topic panel, specify the properties of the topic and click OK.
Parameter
Description
Example
Name
The topic name.
demo
Description
The topic description.
demo test
Partitions
The number of partitions in the topic.
12
Storage Engine
NoteYou can specify the storage engine type only if you use a non-serverless Professional Edition instance. For other types of instances, Cloud Storage is selected by default.
The type of the storage engine that is used to store messages in the topic.
ApsaraMQ for Kafka supports the following types of storage engines:
Cloud Storage: If you select this value, the system uses Alibaba Cloud disks for the topic and stores data in three replicas in distributed mode. This storage engine features low latency, high performance, long durability, and high reliability. If you set the Instance Edition parameter to Standard (High Write) when you created the instance, you can set this parameter only to Cloud Storage.
Local Storage: If you select this value, the system uses the in-sync replicas (ISR) algorithm of open source Apache Kafka and stores data in three replicas in distributed mode.
Cloud Storage
Message Type
The message type of the topic. Valid values:
Normal Message: By default, messages that have the same key are stored in the same partition in the order in which the messages are sent. If a broker in the cluster fails, the order of messages that are stored in the partitions may not be preserved. If you set the Storage Engine parameter to Cloud Storage, this parameter is automatically set to Normal Message.
Partitionally Ordered Message: By default, messages that have the same key are stored in the same partition in the order in which the messages are sent. If a broker in the cluster fails, messages are still stored in the partitions in the order in which the messages are sent. Messages in some partitions cannot be sent until the partitions are restored. If you set the Storage Engine parameter to Local Storage, this parameter is automatically set to Partitionally Ordered Message.
Normal Message
Log Cleanup Policy
The log cleanup policy that is used by the topic.
If you set the Storage Engine parameter to Local Storage, you must configure the Log Cleanup Policy parameter. You can set the Storage Engine parameter to Local Storage only if you use an ApsaraMQ for Kafka Professional Edition instance.
ApsaraMQ for Kafka provides the following log cleanup policies:
Delete: the default log cleanup policy. If sufficient storage space is available in the system, messages are retained based on the maximum retention period. After the storage usage exceeds 85%, the system deletes the earliest stored messages to ensure service availability.
Compact: the log compaction policy that is used in Apache Kafka. Log compaction ensures that the latest values are retained for messages that have the same key. This policy is suitable for scenarios such as restoring a failed system or reloading the cache after a system restarts. For example, when you use Kafka Connect or Confluent Schema Registry, you must store the information about the system status and configurations in a log-compacted topic.
ImportantYou can use log-compacted topics only in specific cloud-native components, such as Kafka Connect and Confluent Schema Registry. For more information, see aliware-kafka-demos.
Compact
Tag
The tags that you want to attach to the topic.
demo
After a topic is created, you can view the topic on the Topics page.
Step 3: Send messages
Send messages to the topic that you created.
-
Log on to the ApsaraMQ for Kafka console.
In the Resource Distribution section of the Overview page, select the region where the ApsaraMQ for Kafka instance that you want to manage resides.
On the Instances page, click the name of the instance that you want to manage.
In the left-side navigation pane, click Topics.
On the Topics page, click the name of the topic that you want to manage. In the upper-right corner of the Topic Details page, click Send Message.Name
In the Start to Send and Consume Message panel, configure the parameters to send a message for testing.
If you set the Sending Method parameter to Console, perform the following steps:
In the Message Key field, enter the message key. Example: demo.
In the Message Content field, enter the message content. Example: {"key": "test"}.
Configure the Send to Specified Partition parameter to specify whether to send the test message to a specific partition.
If you want to send the test message to a specific partition, click Yes and enter the partition ID in the Partition ID field. Example: 0. For information about how to query partition IDs, see View partition status.
If you do not want to send the test message to a specific partition, click No.
Use ApsaraMQ for Kafka SDKs or run the Docker commands that are displayed in the Start to Send and Consume Message panel to subscribe to the test message.
If you set the Sending Method parameter to Docker, perform the following steps to run a Docker container:
Run the Docker commands that are displayed in the Run the Docker container to produce a sample message section to send the test message.
Run the Docker commands that are displayed in the How do I consume a message after the message is sent? section to subscribe to the test message.
If you set the Sending Method parameter to SDK, select an SDK for the required programming language or framework and an access method to send and subscribe to the test message.
Step 4: Create a consumer group
Create a consumer group for Logstash.
Log on to the ApsaraMQ for Kafka console.
In the Resource Distribution section of the Overview page, select the region where the ApsaraMQ for Kafka instance that you want to manage resides.
On the Instances page, click the name of the instance that you want to manage.
In the left-side navigation pane, click Groups.
On the Groups page, click Create Group.
In the Create Group panel, enter a group name in the Group ID field and a group description in the Description field, attach tags to the group, and then click OK.
After you create a consumer group, you can view the consumer group on the Groups page.
Step 5: Use Logstash to consume messages
On the host machine where Logstash is installed, start Logstash to consume messages from the topic.
-
Run the cd command to switch to the bin directory of your Logstash installation.
-
Create a configuration file named input.conf.
-
Run
vim input.confto create an empty configuration file. Press the i key to enter the insert mode.
-
Enter the following content:
input {
 kafka {
     bootstrap_servers => "alikafka-pre-cn-zv**********-1-vpc.alikafka.aliyuncs.com:9092,alikafka-pre-cn-zv**********-2-vpc.alikafka.aliyuncs.com:9092,alikafka-pre-cn-zv**********-3-vpc.alikafka.aliyuncs.com:9092"
     group_id => "logstash_group"
     topics => ["logstash_test"]
     consumer_threads => 12
     auto_offset_reset => "earliest"
 }
}
output {
 stdout{codec=>rubydebug}
}
Parameter
Description
Example value
bootstrap_servers
ApsaraMQ for Kafka provides the following VPC endpoints:
-
Default endpoint
-
SASL endpoint
alikafka-pre-cn-zv**********-1-vpc.alikafka.aliyuncs.com:9092,alikafka-pre-cn-zv**********-2-vpc.alikafka.aliyuncs.com:9092,alikafka-pre-cn-zv**********-3-vpc.alikafka.aliyuncs.com:9092
group_id
The name of the consumer group.
logstash_group
topics
The name of the topic.
logstash_test
consumer_threads
The number of consumer threads. Set this value to the number of partitions in the topic.
12
auto_offset_reset
Specifies how to reset the offset. Valid values:
-
earliest: Read messages from the earliest offset.
-
latest: Read messages from the latest offset.
earliest
-
Press the Esc key to return to the CLI mode.
Press the : key to enter the bottom line mode. Enter wq and press the Enter key to save the file and exit.
-
-
Run the following command to consume messages:
./logstash -f input.confThe following output is returned:
{
    "@timestamp" => 2020-05-14T11:56:04.316Z,
      "@version" => "1",
       "message" => "{\"@timestamp\":\"2020-05-14T11:53:15.449Z\",\"@metadata\":{\"beat\":\"filebeat\",\"type\":\"_doc\",\"version\":\"7.7.0\"},\"log\":{\"offset\":0,\"file\":{\"path\":\"\"}},\"message\":\"test22222222\",\"input\":{\"type\":\"stdin\"},\"agent\":{\"hostname\":\"kafka-connector\",\"id\":\"90036192-fa99-xxx\",\"version\":\"7.7.0\",\"type\":\"filebeat\",\"ephemeral_id\":\"2520xxx\"},\"ecs\":{\"version\":\"1.5.0\"},\"host\":{\"name\":\"kafka-connector\"}}"
}
More information
For more information about parameter settings, see Kafka input plugin.