You can create an ApsaraDB RDS for MariaDB instance in the ApsaraDB RDS console or by calling an operation. This topic describes how to create an RDS instance in the ApsaraDB RDS console.
Prerequisites
If you use a RAM user to create an RDS instance, the AliyunRDSFullAccess and AliyunBSSOrderAccess policies must be attached to the RAM user. For more information, see Use RAM for resource authorization.
Procedure
On the ApsaraDB RDS buy page, click New Version or Back to Old Version to go to the new version or old version of the ApsaraDB RDS buy page.
Configure the Billing Method parameter.
Billing method
Description
Benefit
Subscription
A subscription RDS instance is an instance for which you pay an upfront fee. If you want to use an RDS instance for a long period of time, we recommend that you select the Subscription billing method. If you select the subscription billing method, you must configure the Subscription Duration parameter.
In most cases, the subscription billing method is more cost-effective than the pay-as-you-go billing method for long-term usage. Alibaba Cloud provides lower prices for longer subscription durations.
Pay-as-you-go
You are charged on an hourly basis for a pay-as-you-go RDS instance based on your actual resource usage. If you want to use an RDS instance for a short period of time, we recommend that you select the pay-as-you-go billing method.
You can create a pay-as-you-go RDS instance. After you confirm that the created RDS instance meets your business requirements, you can change the billing method of the RDS instance to subscription.
You can release a pay-as-you-go RDS instance based on your business requirements. The billing cycle of a pay-as-you-go RDS instance immediately stops after you release the instance.
NoteYou can view the price in the lower-right corner of the page. The price is displayed only after you configure all required parameters.
Configure the Region parameter.
We recommend that you create the RDS instance in the same region as the Elastic Compute Service (ECS) instance to deliver optimal performance.
NoteAfter an RDS instance is created, you cannot change the region of the RDS instance. Make sure that the RDS instance and the ECS instance reside in the same region to enable connections over internal networks.
If your application is deployed on an device rather than the ECS instance, we recommend that you select a region that is in close proximity to the device. This way, you can connect to the RDS instance from your application by using the public endpoint of the instance.
Configure the Database Engine and Storage Type parameters.
NoteYou can set the Edition parameter only to High-availability Edition. In RDS High-availability Edition, your database system consists of a primary RDS instance and a secondary RDS instance. These instances work in a high availability architecture. RDS High-availability Edition is suitable for production environments.
You can set the Product Type parameter only to Standard.
Configure the Database Engine parameter.
Select MariaDB.
Configure the Storage Type parameter. For more information, see Storage types.
Item
ESSD
Scalability
Up to 32 TB of data is supported.
No transient connections occur during storage capacity expansion.
You can upgrade, downgrade, create, or release an RDS instance within minutes.
Automatic storage expansion is supported.
Performance
PL1<PL2<PL3
A performance level 2 (PL2) Enterprise SSD (ESSD) delivers twice the IOPS and throughput of a PL1 ESSD.
A PL3 ESSD delivers IOPS that is up to 20 times the IOPS delivered by a PL1 ESSD. A PL3 ESSD also delivers throughput that is up to 11 times the throughput delivered by a PL1 ESSD.
Backup
A backup can be completed within minutes or seconds.
The highest backup frequency is once every 15 minutes.
NoteYou can select Cloud Disk Encryption to ensure data security. For more information, see Configure the cloud disk encryption feature.
Configure the Network Type parameter. The Network Type parameter is fixed as VPC.
Configure the VPC parameter. We recommend that you select the same VPC as the ECS instance. Different VPCs cannot communicate with each other over an internal network.
Configure the Add to Whitelist parameter to specify whether to add the CIDR block of the selected VPC to a whitelist of the RDS instance. If you set this parameter to Yes, the ECS instances that reside in the selected VPC can access the RDS instance.
NoteIf you set this parameter to No, you can configure a whitelist after the RDS instance is created. For more information, see Configure an IP address whitelist.
Select a zone, vSwitch, and network for the RDS instance and configure the Deployment Method parameter.
Zone
All zones in a region provide the same services.
If the RDS instance resides in the same zone as the ECS instance that you want to connect, these instances can deliver optimal performance. If the RDS instance and the ECS instance reside in different zones in the same region, the performance of these instances slightly decreases.
vSwitch
Select an existing vSwitch or click Create vSwitch. For more information, see Create and manage a vSwitch.
Deployment method
Multi-zone Deployment: The primary RDS instance and the secondary RDS instance reside in different zones of a region to provide cross-zone disaster recovery. We recommend that you use this deployment method.
If you set the Deployment Method parameter to Multi-zone Deployment, you must configure the Zone and Network of Primary Node and Zone and Network of Secondary Node parameters.
Single-zone Deployment: The RDS instance and the secondary RDS instance reside in the same zone.
Configure the Instance Type parameter.
Configure the Category parameter. You can select General-purpose Instance Types or Dedicated Instance Types.
Instance type
Description
Benefit
General-purpose instance type
The memory and I/O resources are shared.
The CPU and storage resources are exclusively occupied.
RDS instances of the general-purpose instance type are cost-effective.
Dedicated instance type
The CPU, memory, storage, and I/O resources are exclusively occupied.
NoteThe dedicated host instance family is the highest configuration of the dedicated instance family. A dedicated host RDS instance exclusively occupies all the CPU, memory, storage, and I/O resources of the host on which the RDS instance is deployed.
A dedicated RDS instance delivers higher performance and higher stability.
NoteAn RDS instance that runs RDS Basic Edition does not support the dedicated instance type.
Configure detailed specifications, including CPU cores and memory capacity. For more information about instance types, see Instance types.
Configure the Storage Capacity parameter.
The valid values of the Storage Capacity parameter vary based on the instance type and storage type that you select.
You can adjust the storage capacity at a step size of 5 GB.
(Optional) If you select the Subscription Billing Method, you must also set the Subscription Duration.
Different discounts are provided based on the specified subscription duration. You can move the pointer over View Details on the right side of the page to view the estimated total fee and fee details.
Configure other custom parameters. If you do not have special business requirements, you can retain the default values of these parameters.
Parameter
Description
Port
Valid values: 1000 to 5999. Port initialization is supported.
Release Protection
Specifies whether to enable the release protection feature for a pay-as-you-go RDS instance. The feature helps prevent a pay-as-you-go RDS instance from being released due to unintended operations. For more information, see Enable or disable the release protection feature.
Resource Group
You can use the default resource group or select a custom resource group based on your business requirements. This facilitates instance management.
Instance Description
The description of the RDS instance.
Tags
You can use tags to classify and manage RDS instances. For more information, see Use tags to filter instances.
Privileged Account
You can create a privileged account when you create the RDS instance. Each RDS instance supports only one privileged account. The privileged account cannot be deleted.
In the upper-right corner of the page, configure the Quantity parameter.
The default value is 1. You can purchase up to 20 instances at a time. Specify the number of instances based on your business requirements.
Confirm the order information, quantity, and subscription duration of the RDS instance (subscription instance only), click Pay Now, and then complete the payment. You must configure the Subscription Duration parameter only when you select the subscription billing method for the RDS instance. The Congratulations or The service is activated message is displayed in the ApsaraDB RDS console.
NoteIf you select the subscription billing method for the RDS instance, we recommend that you select Enable Auto-renewal. This prevents interruptions on your workloads even if you forget to renew the RDS instance.
The auto-renewal cycle is one month for monthly subscription and one year for yearly subscription. The actual auto-renewal cycle in the order prevails. You can disable auto-renewal at any time. For more information, see Renewal management/Resource renewal usage guide and Use the auto-renewal feature.
View the RDS instance.
Go to the Instances page. In the top navigation bar, select the region in which your RDS instance resides. Then, find the RDS instance based on the Creation Time parameter.
NoteIt requires 1 to 5 minutes to create an RDS instance. You can refresh the page to check whether the RDS instance is created.
What to do next
FAQ
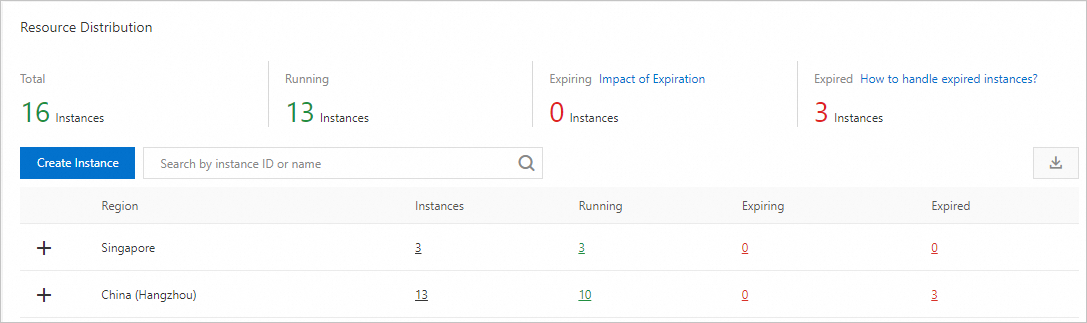
Log on to the ApsaraDB RDS overview page to view the total number of ApsaraDB RDS instances that use all database engines under your Alibaba Cloud account. On this page, you can also view the regions where the instances are located and the number of running instances in each region.
References
For more information about how to create an RDS instance by calling an API operation, see Create an RDS instance.
For more information about how to create an RDS instance that runs a different database engine, see the following topics: