If you want to access a microservices application in a Microservices Engine (MSE) Nacos instance from an external system or client, you can use an HTTP API and a route in the Cloud-native API Gateway console for the access. This improves service accessibility and system integration. This topic describes how to use an HTTP API to access a service in an MSE Nacos instance.
Prerequisites
An MSE Nacos instance is created. For more information, see Create a Nacos engine.
A microservices demo is registered in the MSE Nacos instance. For more information, see Register Spring Cloud applications with MSE Nacos registries.
ImportantYou cannot associate Cloud-native API Gateway instances with on-premises services that are registered with MSE Nacos or ZooKeeper registries.
A Cloud-native API Gateway instance is created. For more information, see Create a gateway instance.
Process
Create an HTTP API: In this step, you configure the basic information of the API.
Configure routing rules: In this sub-step, you configure how the API maps with the MSE Nacos service. This ensures that requests can be accurately routed to the destination service.
Instance: Select the corresponding Cloud-native API Gateway instance to ensure that the routing configuration can be correctly applied during actual deployment.
Associate the service: In this sub-step, you associate service instances with the routing rules to implement dynamic service discovery and scheduling. System flexibility and scalability improve on this basis.
Debug the route: In this step, you verify whether Cloud-native API Gateway is integrated as expected with the MSE Nacos service by simulating requests and analyzing responses. This ensures the efficiency and stability of service invocation.
Step 1: Create an HTTP API
Log on to the Cloud-native API Gateway console.
In the left-side navigation pane, click API. In the top navigation bar, select a region.
On the API page, click Create API.
In the Create API dialog box, click Create in the HTTP API section. In the Create HTTP API panel, configure the API Name and Description parameters as prompted.
Step 2: Create a route
Click the name of the API that you want to manage. On the API details page, click Create Route. In the Create Route panel, configure the parameters.
1. Configure basic route information
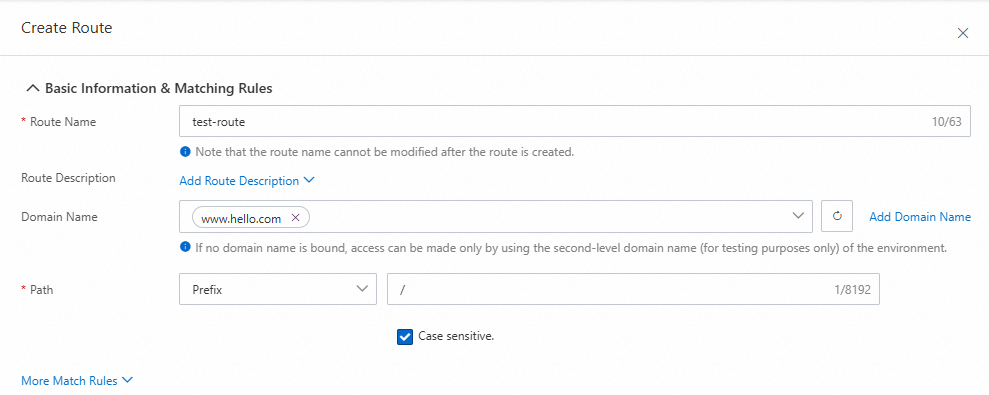
Domain Name: You can click Add Domain Name on the right to create a domain name in the Add Domain Name panel.
Path: Select Prefix from the drop-down list and enter a forward slash (/) in the field to match HTTP requests that start with a
/.
2. Select an instance and configure the backend service
Select the created Cloud-native API Gateway instance from the Instance drop-down list.
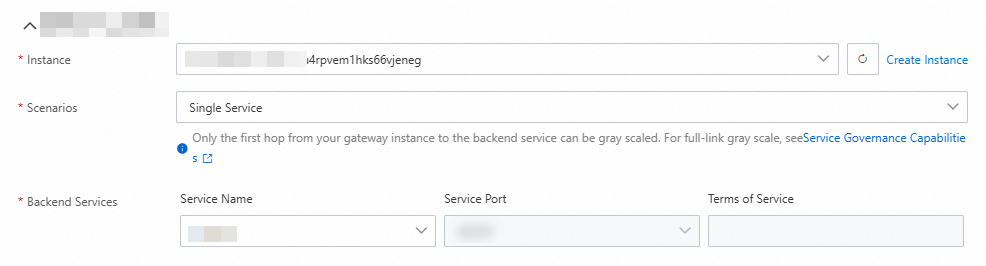
Scenarios: Select Single Service from the drop-down list.
3. Associate the MSE Nacos service
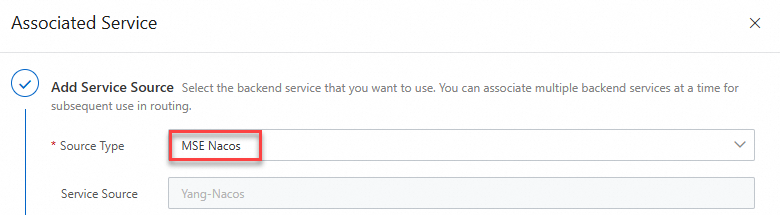
In the Backend Services parameter, click the drop-down list below Service Name and click Create Service.

Add a service source.
Select MSE Nacos for the Source Type parameter.
Click Add Source, select the Nacos cluster where the service is deployed, and then click OK.
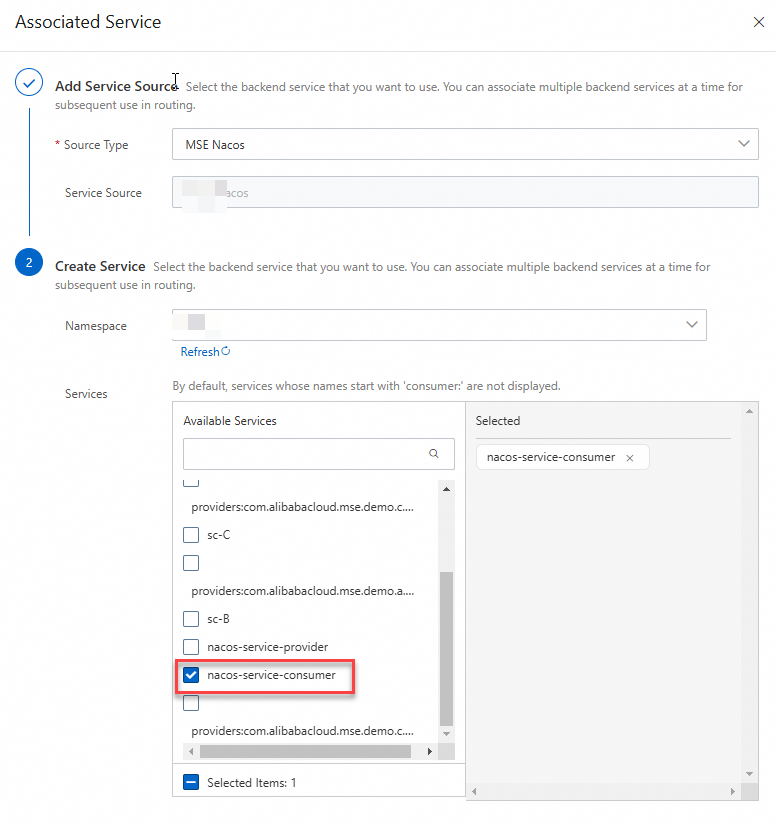
Create a service:
Namespace: Select the namespace to which the demo project belongs.
Services: Select a service consumer in your microservices project from the list.
4. Click Save and publish.
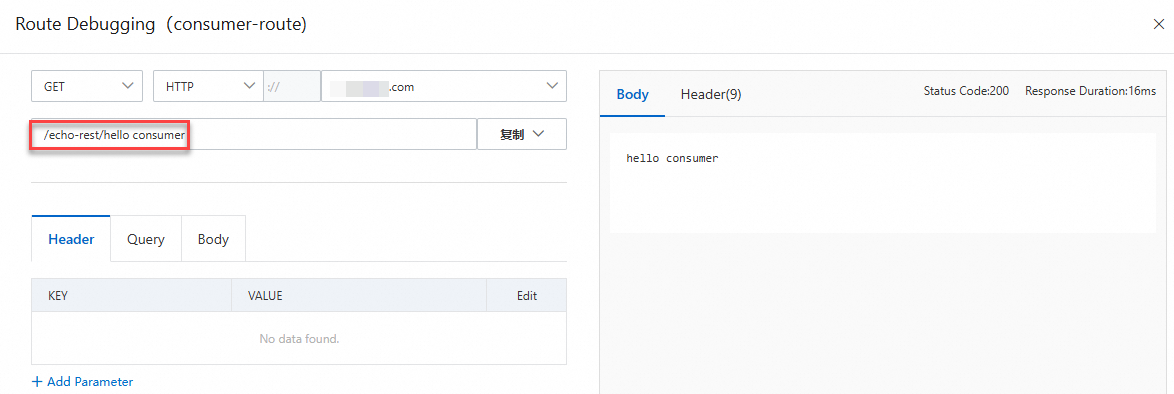
Step 3: Debug the route
After the route is published, find the route in the route list and click Debug in the Actions column.
In the debugging panel, configure the input parameter and click Send. The response of the API is displayed on the right.
References
For information about how to open your application in a container service for public access, see Access applications in ACK by using an HTTP API.
For more information about the frequently asked questions (FAQ) about using Cloud-native API Gateway. see FAQ.