This topic describes how to use DMS-hosted Airflow to schedule Spark jobs in a Notebook.
Solution architecture
DMS Notebook is a container for running Spark jobs and provides unified management of PySpark, SparkSQL, and Python jobs.
DMS Airflow is a scheduler that treats the .ipynb file in the Notebook as an Operator node in a Directed Acyclic Graph (DAG) definition.
AnalyticDB for MySQL is the data lakehouse. It provides Spark compute resources and manages data lake tables, such as Delta Lake tables, stored in Object Storage Service (OSS).

Preparations
AnalyticDB for MySQL
An AnalyticDB for MySQL Enterprise Edition, Basic Edition, or Data Lakehouse Edition cluster is created.
If you do not have a cluster that meets these requirements, you can log on to the AnalyticDB for MySQL console to create an Enterprise Edition or Basic Edition cluster.
A database account is created for the AnalyticDB for MySQL cluster.
If you use an Alibaba Cloud account, you need to only create a privileged account.
If you use a Resource Access Management (RAM) user, you must create a privileged account and a standard account and associate the standard account with the RAM user.
You have created a job-type resource group.
OSS
Create a bucket. The bucket must be in the same region as the AnalyticDB for MySQL cluster.
Notebook workspace
Log on to the AnalyticDB for MySQL console. In the upper-left corner, select the region where your cluster resides. In the navigation pane on the left, click Clusters, and then click the ID of the target cluster.
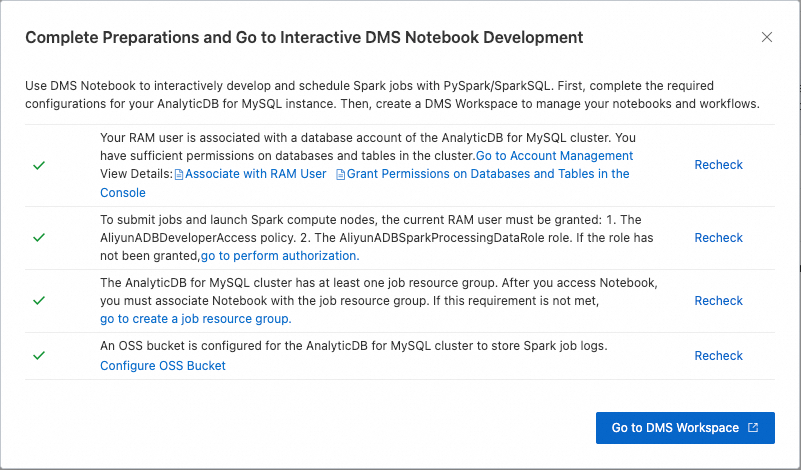
Click . After you complete the required preparations, click Go To DMS Workspace.
Create a Spark cluster.
Click the
 icon to go to the Resource Management page, and then click Compute Cluster.
Click the Spark cluster tab, click Create Cluster, and then configure the parameters as follows:
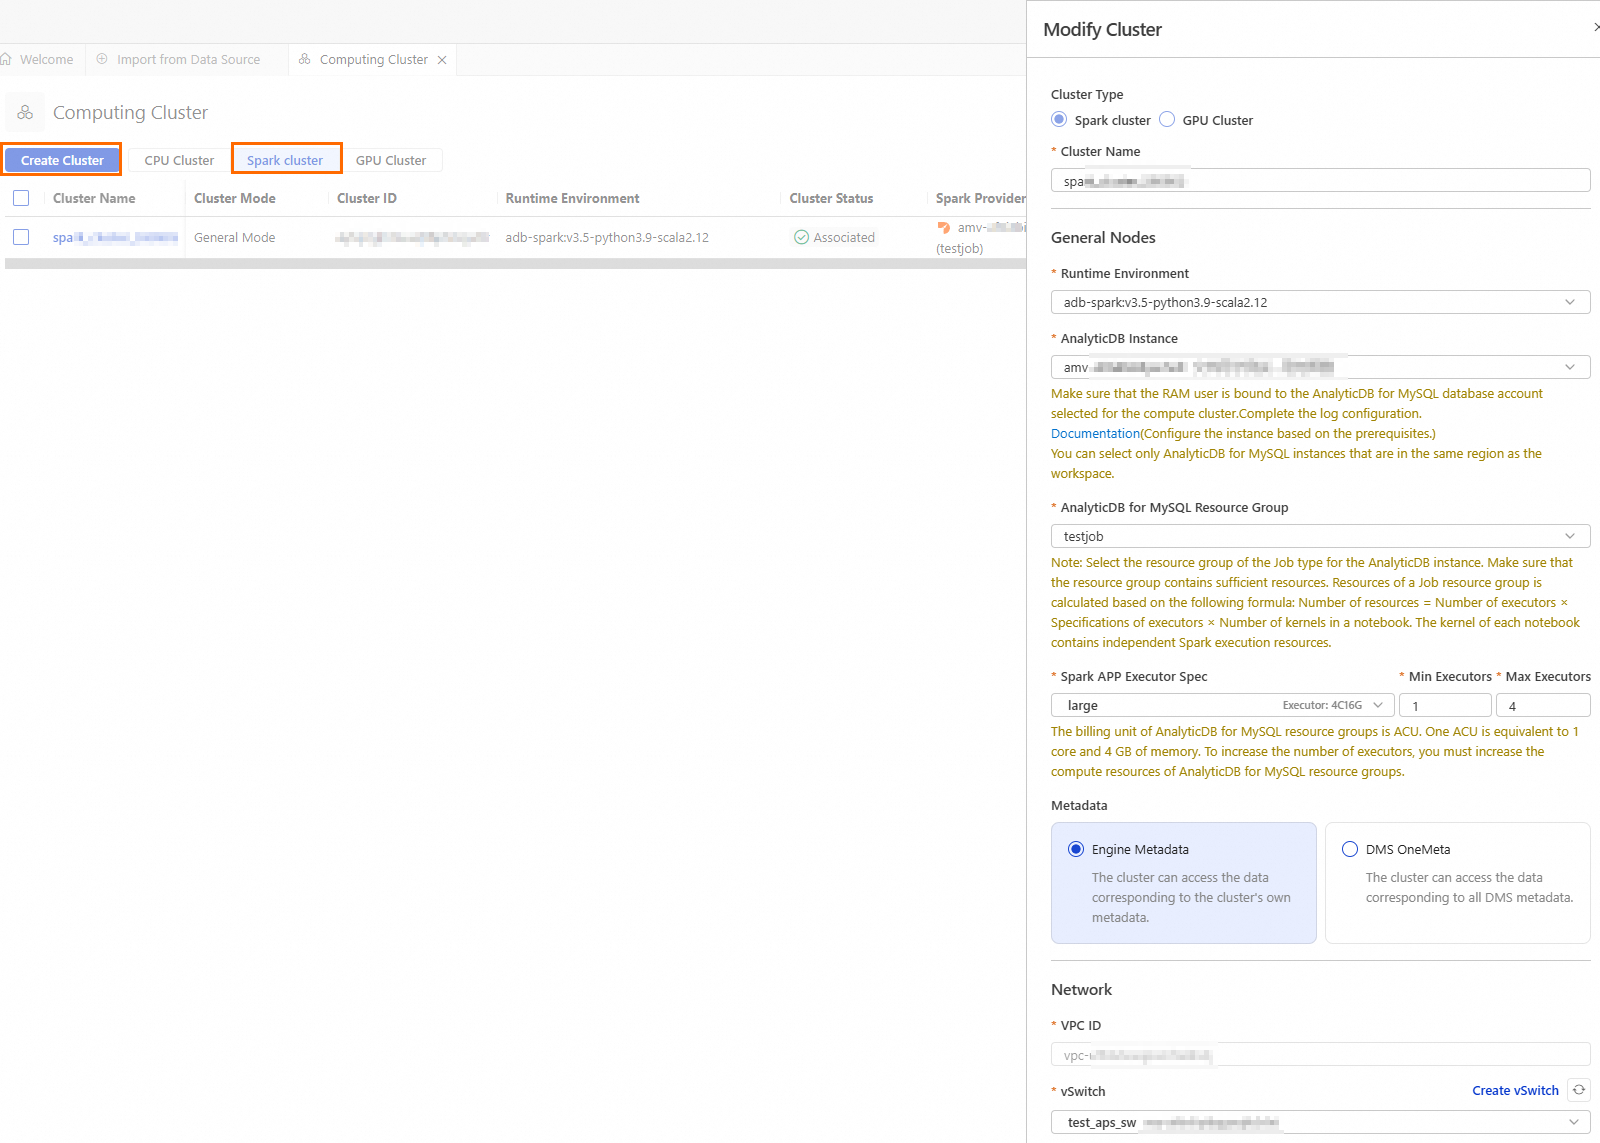
Parameter
Description
Example
Cluster Name
Enter a name for the cluster that helps you identify its purpose.
spark_test
Runtime Environment
The following images are supported:
adb-spark:v3.3-python3.9-scala2.12
adb-spark:v3.5-python3.9-scala2.12
adb-spark:v3.5-python3.9-scala2.12
AnalyticDB Instance
Select an AnalyticDB for MySQL cluster from the drop-down list.
amv-uf6i4bi88****
AnalyticDB for MySQL Resource Group
Select a job-based resource group from the drop-down list.
testjob
Spark APP Executor Spec
Select the resource specifications for the Spark executor.
Different models correspond to different specifications. For more information, see the Model column in Spark application configuration parameters.
large
vSwitch
Select a vSwitch in the current VPC.
vsw-uf6n9ipl6qgo****
When you create and start a Notebook session, the initial startup may take approximately 5 minutes.
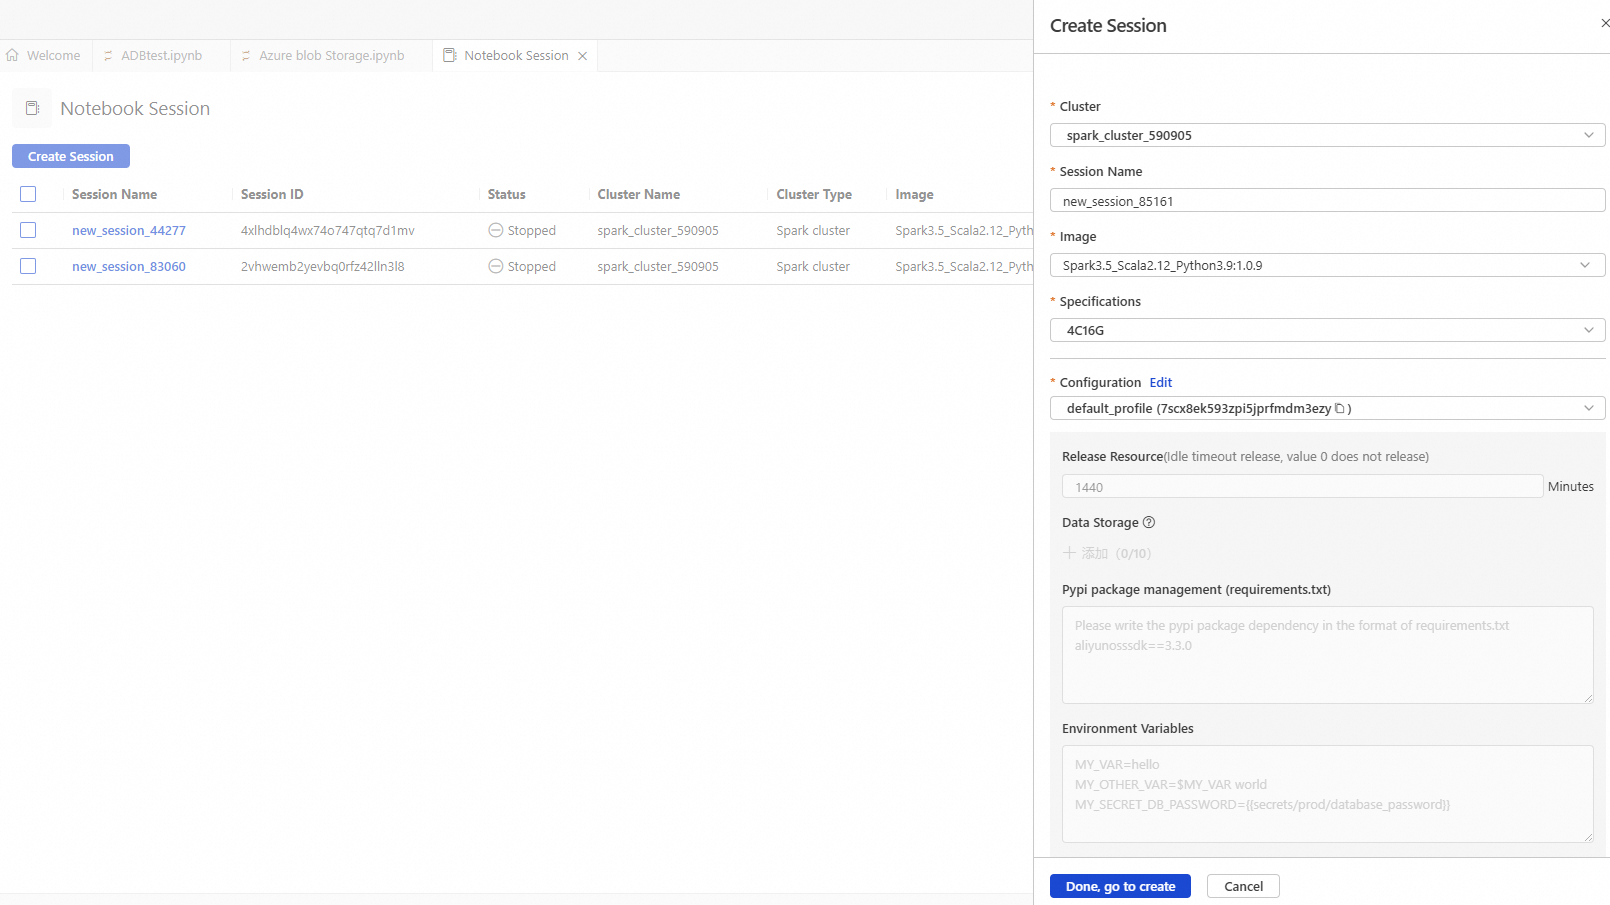
Parameter
Description
Example value
Cluster
Select the Spark cluster created in step b.
spark_test
Session Name
You can customize the session name.
new_session
Image
Select an image specification.
Spark3.5_Scala2.12_Python3.9:1.0.9
Spark3.3_Scala2.12_Python3.9:1.0.9
Spark3.5_Scala2.12_Python3.9:1.0.9
Specifications
The resource specification for the kernel.
1 core 4 GB
2 cores 8 GB
4 cores 16 GB
8 cores 32 GB
16 cores 64 GB
4C16G
Configuration
The profile resource.
You can edit the profile name, resource release duration, data storage location, PyPI package management, and environment variables.
ImportantResource release duration: Resources are automatically released when they are idle for longer than the specified duration. If you set the duration to 0, resources are never automatically released.
deault_profile
Step 1: Create an Airflow instance
Go to DMS Workspace. In the navigation pane on the left, click the
 icon to go to the Resource Management page.
Click Airflow Instance, and then click Create Instance in the upper-left corner.
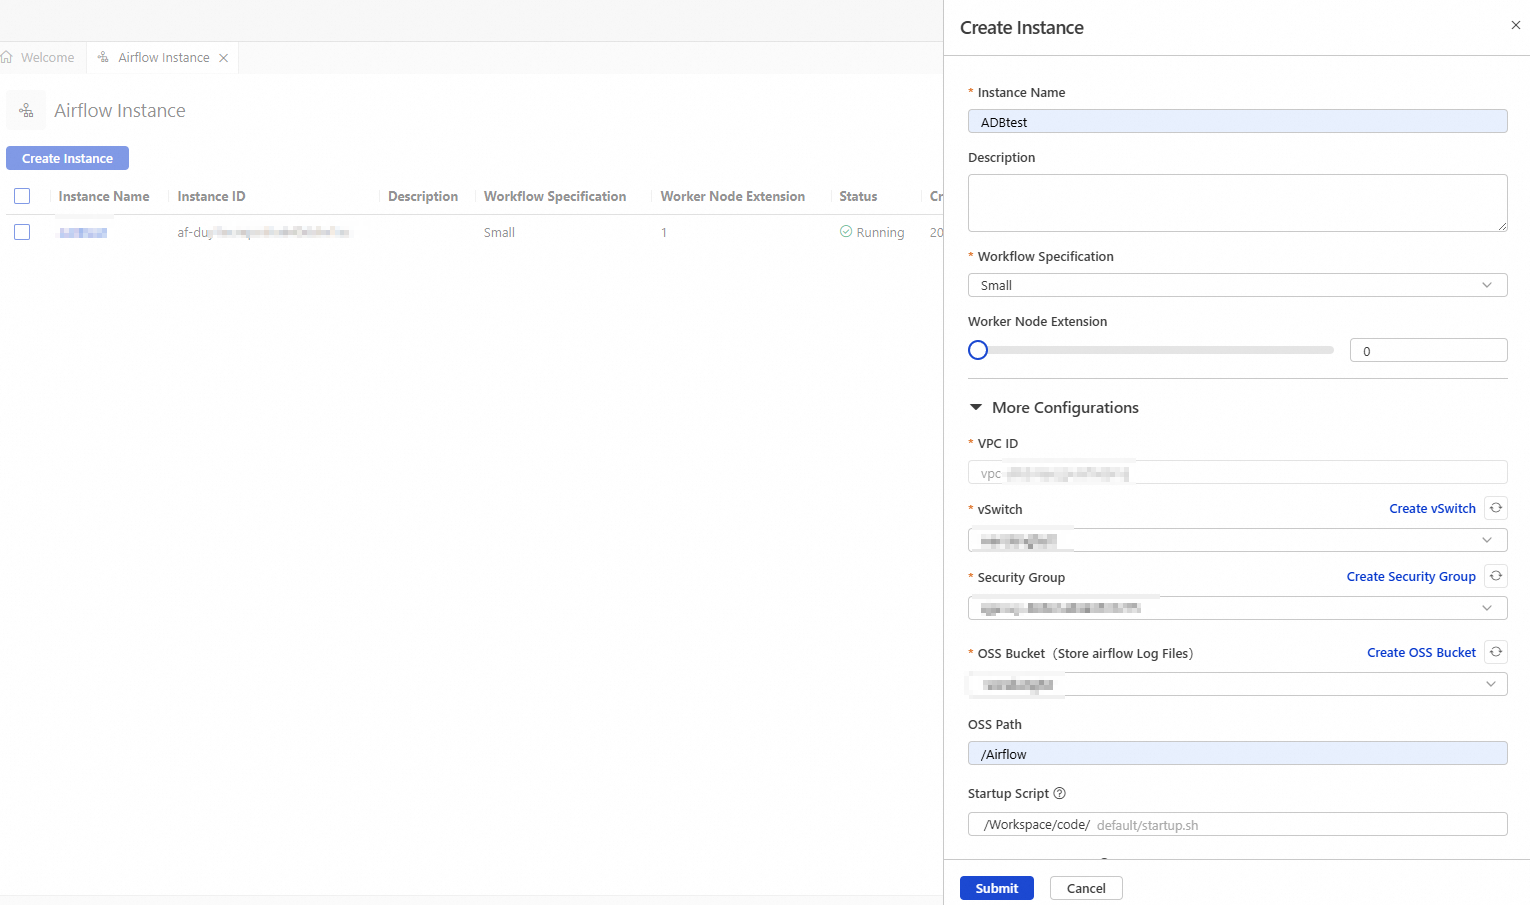
In the Create Instance panel, configure the instance information.
Parameter
Description
Example
Instance Name
Enter a name for the instance that helps you identify its purpose.
Airflow_test
Workflow Specification
Select specifications based on the scale and complexity of your workflow. The following specifications are supported:
Small (scheduler: 1, webserver: 1, worker: 1)
Medium (scheduler: 2, webserver: 1, worker: 3)
Large (scheduler: 2, webserver: 2, worker: 6)
Small
Worker Node Extension
Airflow automatically adjusts the number of nodes based on the task payload. The minimum number of worker nodes is 1, and the maximum is 10.
1
VPC ID
No adjustment is needed. The VPC is the same as the workspace's VPC by default.
vpc-uf63vtexqpvl****
vSwitch
Select the target vSwitch.
vsw-uf6n9ipl6qgo****
Security Group
Select a security group to control the workflow.
sg-bp19mr685pmg4ihc****
OSS Bucket
Select an OSS bucket that is in the same region as the workspace.
testBucketName
OSS Path
The storage path for log data during Airflow runtime.
Airflow
Click Submit.
The instance creation takes about 20 minutes. When the instance status changes to Running, the resources are deployed.

Step 2: Build an ETL pipeline for order data aggregation and analysis
Workflow
This step simulates the following business scenario:

Raw layer: Build a hierarchical data lakehouse based on order data. First, generate dynamic raw order data in the raw layer and write it to a Delta Lake table named
orders_raw.Bronze layer: Cleanse the raw data from the
orders_rawtable. This includes filtering invalid data, identifying valid orders, and standardizing date formats. Then, write the cleansed data to a Delta Lake table namedorders_bronze.Silver layer: Aggregate and process the data from the bronze layer to compare the sales performance of different product categories. This helps identify peak sales periods for each category and optimize the allocation of marketing resources.
Procedure
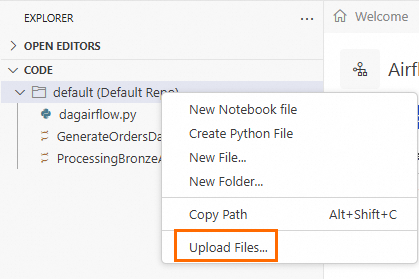
This tutorial provides complete code samples. You can download the sample files, upload them to your workspace, and run them sequentially.
Download the sample files GenerateOrdersDataInRawLayer.ipynb and ProcessingBronzeAndSilverLayer.ipynb.
GenerateOrdersDataInRawLayer.ipynb: Dynamically generates sample order detail data and writes it to theorders_rawtable. Thebatch_start_datetimeparameter defines the time when order data is synchronized to the data lake. When this Notebook is scheduled by Airflow, the value of thebatch_start_datetimeparameter is dynamically passed from Airflow and overwrites the existing value.ProcessingBronzeAndSilverLayer.ipynb: Creates the bronze and silver layer tables. It then imports data from the raw layer and performs extract, transform, and load (ETL) operations to complete the hierarchical data transformation.
Upload the
GenerateOrdersDataInRawLayer.ipynbandProcessingBronzeAndSilverLayer.ipynbfiles to the Default folder.Go to DMS Workspace. In the navigation pane on the left, click the
 icon to go to the EXPLORER page.
Hover over Default, right-click, and then click Upload Files. Select the sample files that you downloaded in step 1.
Run the
GenerateOrdersDataInRawLayer.ipynbandProcessingBronzeAndSilverLayer.ipynbfiles to verify that the data transformation job runs as expected.Open the
GenerateOrdersDataInRawLayer.ipynbfile. In the second cell, replace the Location parameter with the actual OSS path where your data is stored. Then, click Run All to run the cells in the file sequentially.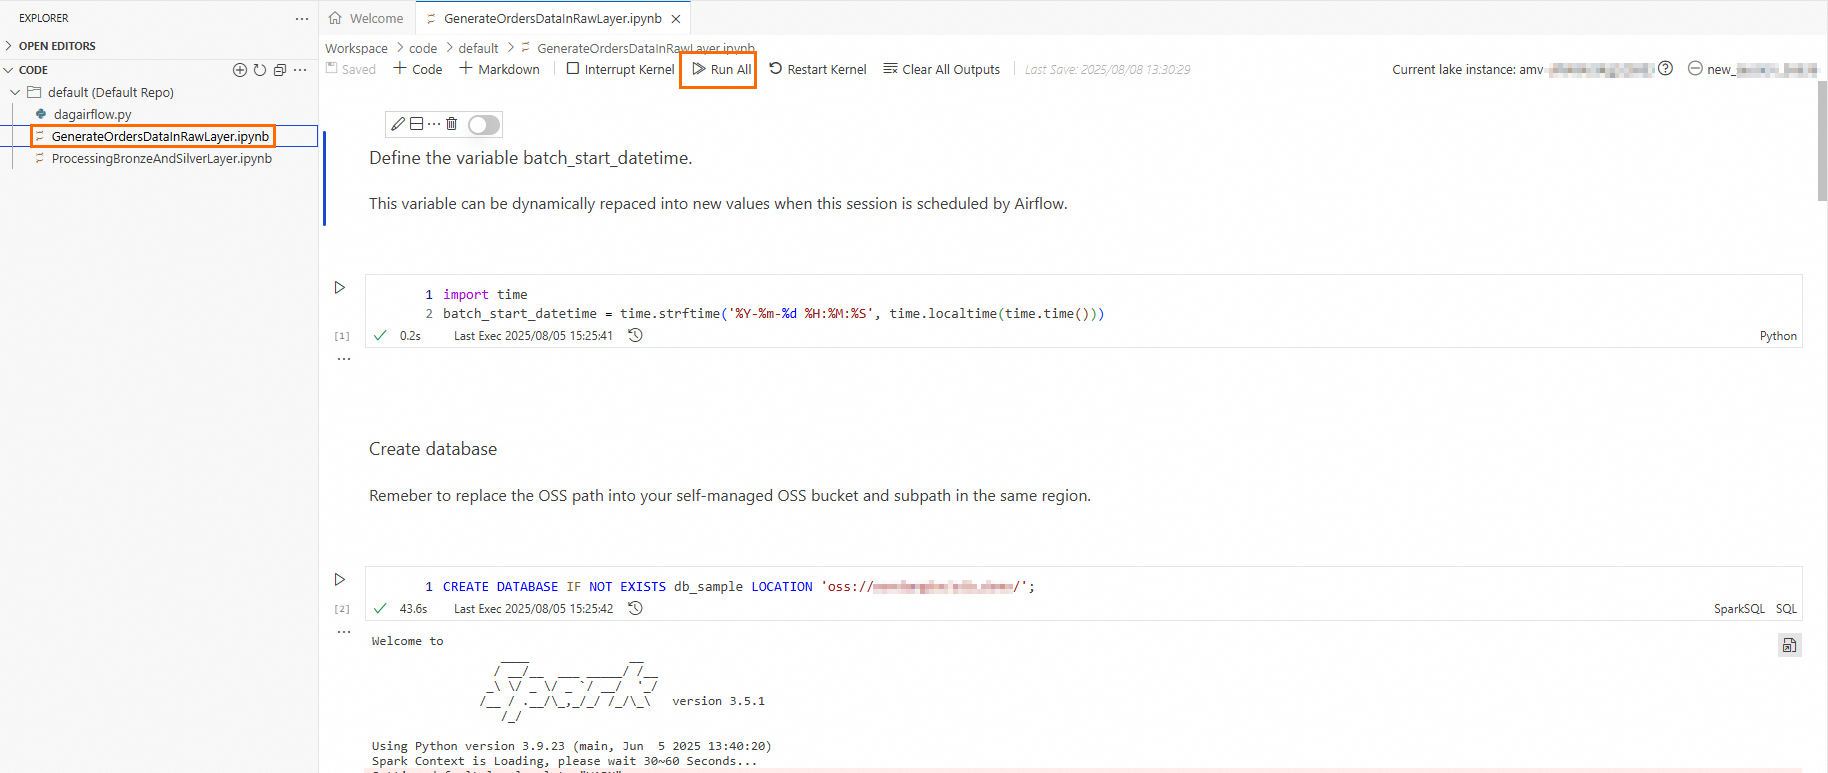
Open the
ProcessingBronzeAndSilverLayer.ipynbfile. Click Run All to run the cells in the file sequentially.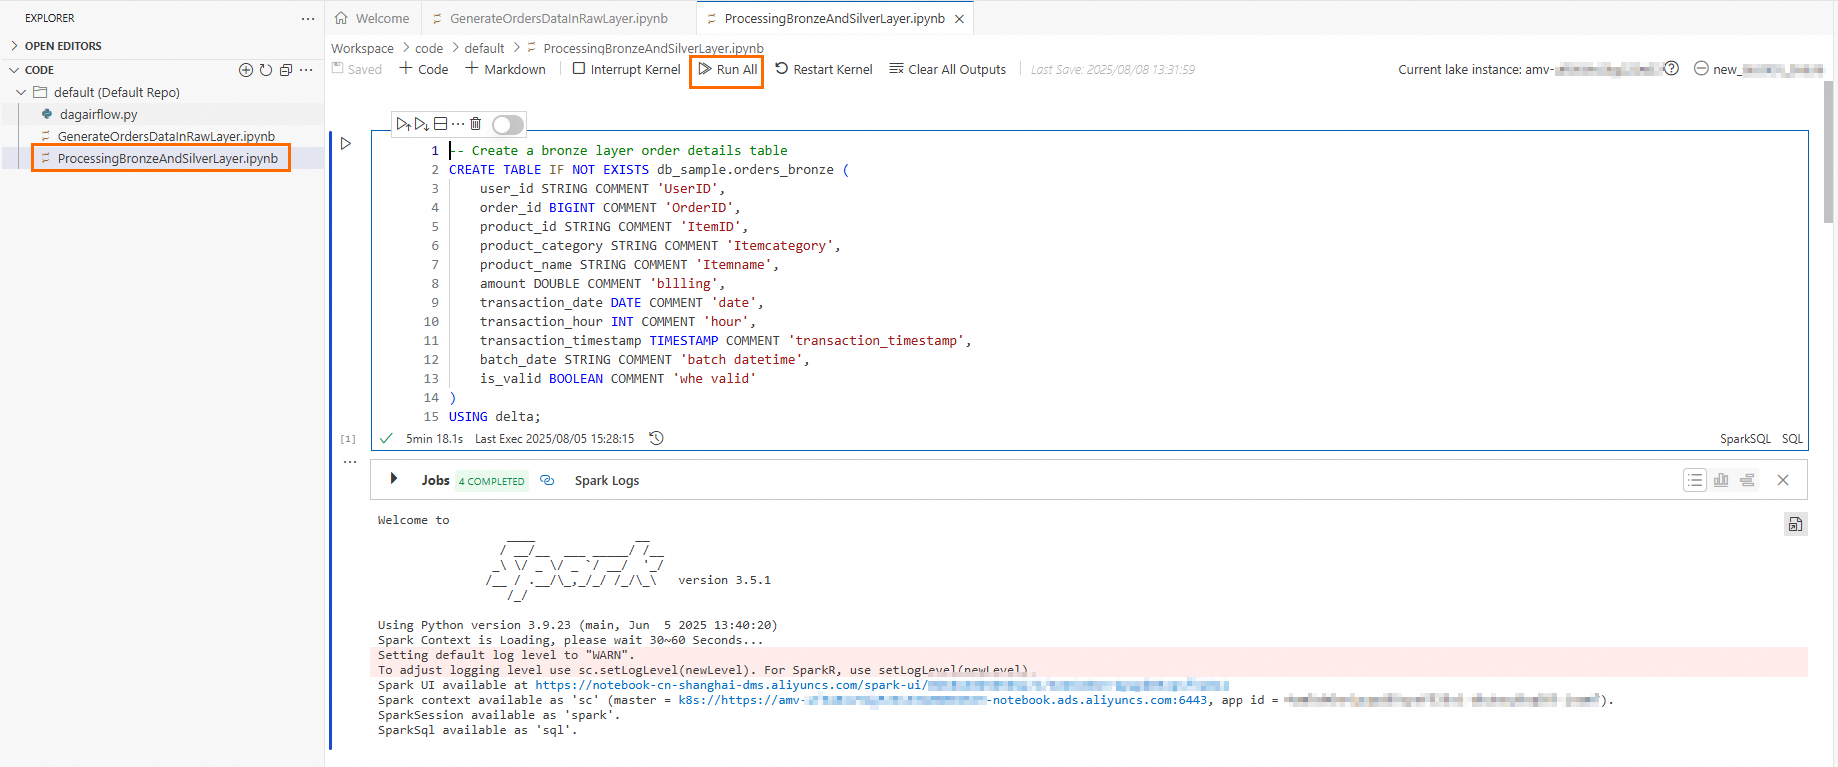
Step 3: Define the workflow DAG and publish it to Airflow
On the EXPLORER page, click the
 icon, and then click Create Python File.
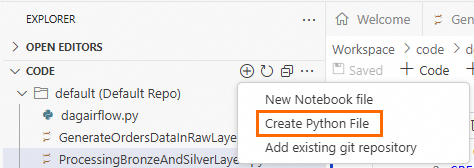
Enter the following code and replace the configuration parameters as needed.
from doctest import debug from airflow import DAG from airflow.decorators import task from airflow.models.param import Param from airflow.operators.bash import BashOperator from airflow.operators.empty import EmptyOperator from datetime import datetime, timedelta from airflow.providers.alibaba_dms.cloud.operators.dms_notebook import DMSNotebookOperator import time # Define DAG parameters default_args = { # Task owner 'owner': 'user', # Number of retries after a task fails 'retries': 1, # Wait time before a retry 'retry_delay': timedelta(minutes=5) } # Define DAG parameters with DAG( # Define the DAG ID, which must be globally unique dag_id="RefreshTheRawBronze****", default_args=default_args, # Define the DAG description description="Trigger this DAG every three hours and dynamically refresh the raw/bronze/silver layers", # Define the DAG scheduling frequency. The DAG is scheduled every 3 hours. schedule_interval='0 0/3 * * *', # refresh every three hours # Define the time for the first DAG run start_date=datetime(2025, 7, 28), # Specifies whether to run missed tasks when the DAG starts catchup=False ) as dag: notebook_node_raw_layer = DMSNotebookOperator( # Define the Task ID, which must be globally unique task_id = 'GenerateOrdersData****', # The Notebook session name. Enter the name of the session that you created in the Preparations section. session_name='Spark****', # The path of the GenerateOrdersDataInRawLayer.ipynb file. Default path: /Workspace/code/default/<file_name> file_path='/Workspace/code/default/GenerateOrdersDataInRawLayer.ipynb', run_params={'batch_start_datetime': time.strftime('%Y-%m-%d %H:%M:%S', time.localtime(time.time())) }, debug=True, dag=dag ) notebook_node_bronze_silver_layer = DMSNotebookOperator( # Define the Task ID, which must be globally unique task_id = 'ProcessingBronzeAnd****', # The Notebook session name. Enter the name of the session that you created in the Preparations section. session_name='Spark****', # The path of the ProcessingBronzeAndSilverLayer.ipynb file. Default path: /Workspace/code/default/<file_name> file_path='/Workspace/code/default/ProcessingBronzeAndSilverLayer.ipynb', run_params={}, debug=True, dag=dag ) # Define the execution order of the DAG notebook_node_raw_layer >> notebook_node_bronze_silver_layer if __name__ == "__main__": dag.test( run_conf={} )NoteFor more information about custom parameters for DAGs and the DMS Notebook Operator, see DAG, Best Practices, and Parameter description.
Publish the workflow DAG to Airflow.
In the navigation pane on the left, click the
 icon to go to the Airflow page.
Click the Airflow instance that you created in Step 1. In the top navigation bar, click Dags to check whether the workflow DAG exists.
Click the DAG name, and then click the
 icon to refresh the workflow.
Click the Code tab. Check that the DAG content is consistent with the DAG defined in step 2 and that the task list on the left is consistent with the Operator nodes defined in step 2.
If they are consistent, the DAG is published. If not, you can modify the parameters in step 2, and then click the
 icon to refresh the workflow.
Step 4: Run the DAG and enable automatic scheduling
After you confirm that the DAG content is correct, you can click the
 icon to manually run the DAG.
Click the
 icon to the right of the task list to view the DAG execution details.
Click Details to view information such as the task ID, execution status, start time, and end time.
Click the Logs tab to view the execution progress of the cells. Click the url to view the output of the corresponding cell. This helps you verify that the final result of the DAG schedule meets your expectations.
In the top navigation bar, click DAGs. You can view the number of successful and failed DAG runs in the Runs column, and the number of tasks that are successful, failed, or queued in the Recent Tasks column.
Enable automatic scheduling.
After the run is complete, click Dags in the top navigation bar to check whether the scheduling button for the DAG is enabled. If the button is grayed out, you must enable it manually. If it is enabled, the DAG runs at the scheduled frequency.