Forward incoming emails to another mailbox automatically.
Method One
Use the Automatic Forwarding module
1. Go to Settings > Mailbox Settings > Automatic Forwarding > Add Forwarding Email Address.
a. If a secure phone is linked, complete identity verification first. Click Get Dynamic Password, enter the password, and click Next.
b. Add the forwarding email address.
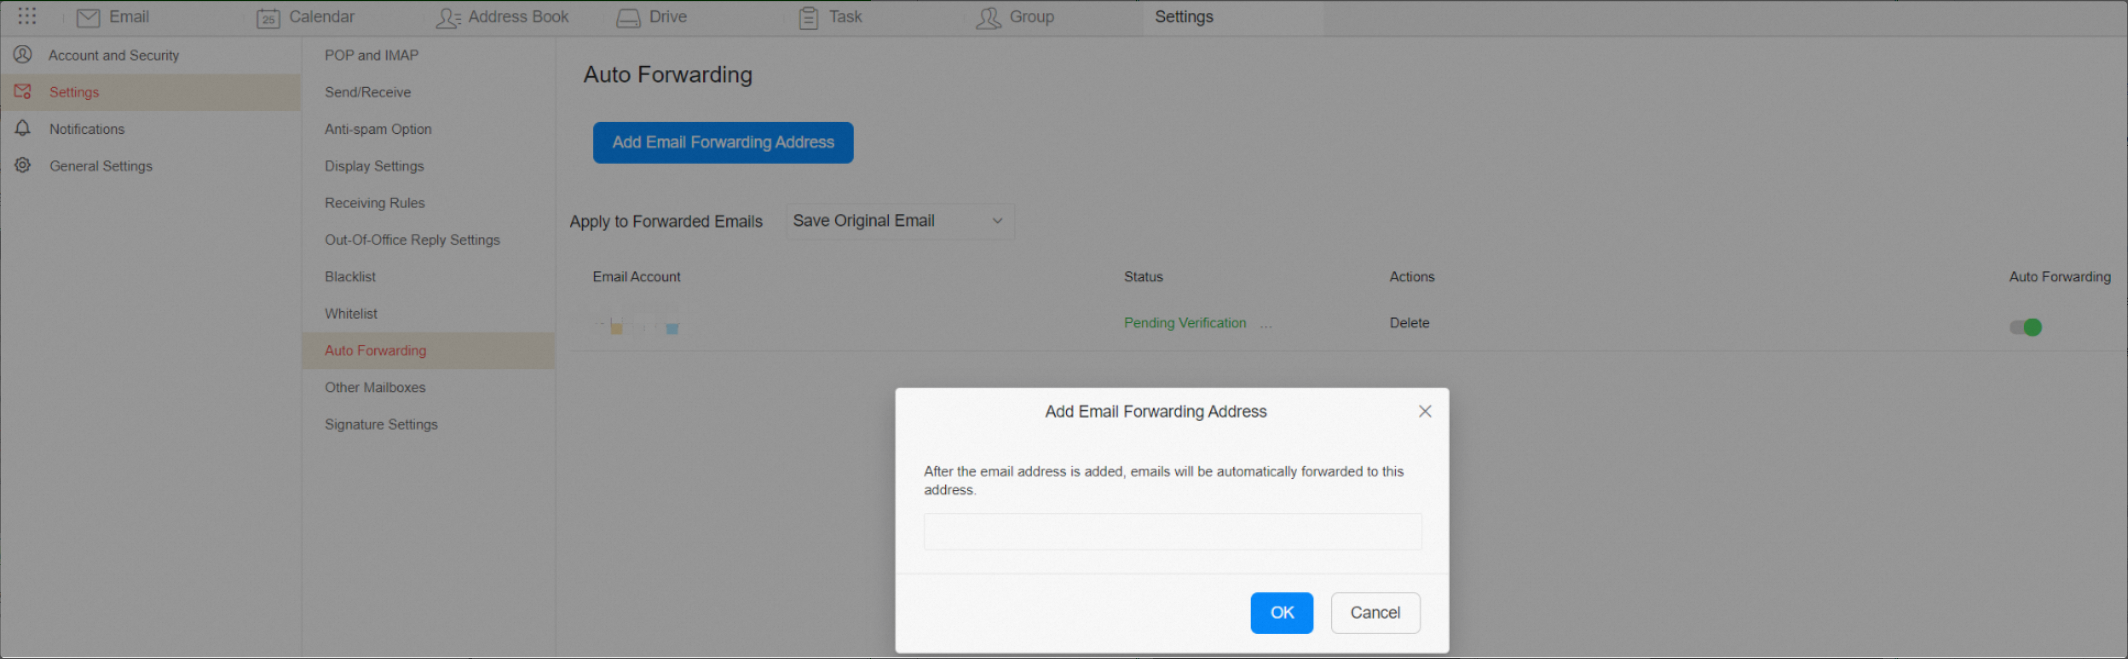
c. Select an action for forwarded emails to complete the setup.
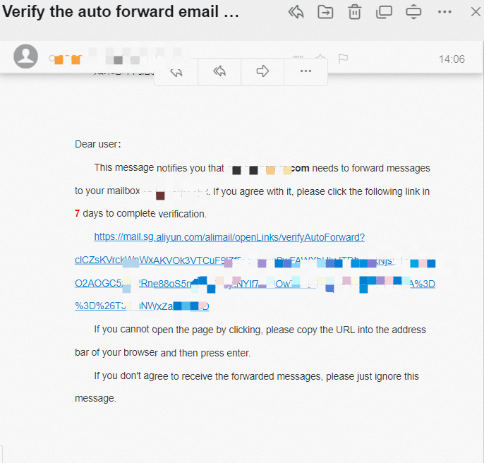
2. Log in to the forwarding mailbox and click the validation link to verify your identity.
3. After verification, refresh the Automatic Forwarding page. The status changes to Validation Successful and the automatic forwarding button is enabled.

Method Two
Use an incoming mail rule
1. Go to Settings > Mailbox Settings > Incoming Mail Rules > New Incoming Mail Rule.
Set conditions such as sender, recipient, subject, email size, or whether the email has an attachment. Select the Forward to checkbox, enter the recipient's email address, and click OK. The recipient must complete a validation step. This rule keeps a copy of the original email.
Note: If no conditions are set, all incoming emails are forwarded.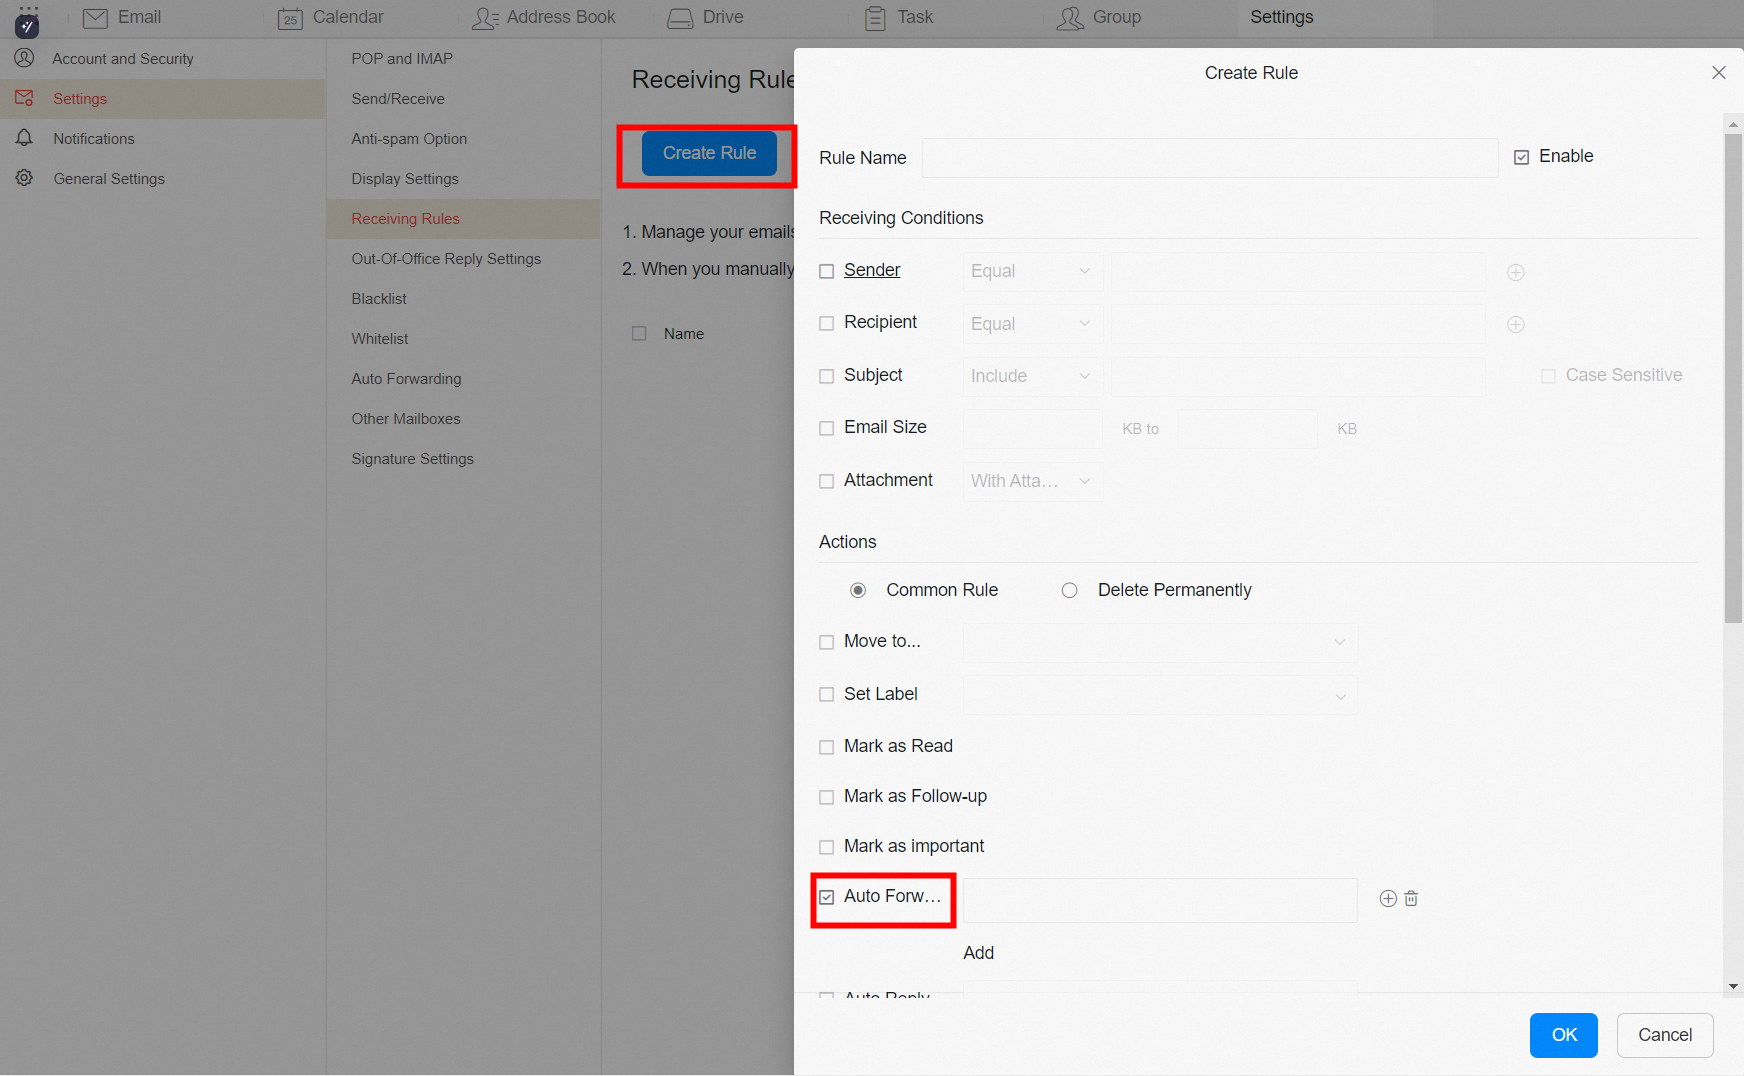
Troubleshooting
The following message is displayed: "Automatic forwarding has been disabled. Please contact your administrator to enable it."
The administrator logs in to the mail management platform, navigates to employee account management, and edits the account permissions.
-
Forwarding includes deduplication. If User A forwards to User B, emails from User B to User A are not forwarded back to avoid duplicates.
-
Emails marked as spam are not forwarded. This protects the outbound IP address from being blacklisted.