ACK clusters do not support changing the network plug-in or virtual private cloud (VPC) after creation. To move workloads to a different VPC in the same region, create a new ACK cluster in the target VPC and migrate your applications using the backup center feature. The new cluster can reuse the existing Server Load Balancer (SLB) instances, disks, File Storage NAS (NAS) file systems, and Object Storage Service (OSS) buckets from the original cluster — no data duplication required.
This topic uses an NGINX application that mounts NAS, OSS, and disk volumes and exposes a LoadBalancer Service as an example.
Before you begin
Review these constraints before starting. Each one may affect whether your migration path is viable.
-
Region: Both clusters must be in the same region. Cross-region migration is not supported.
-
Kubernetes version: Migrate to the same or a newer Kubernetes version. Restoring to an older version is not supported.
-
To use Velero resource modifiers, the restore cluster must run Kubernetes 1.20 or later.
-
After migrating to Kubernetes 1.28, Ingress and CronJob resources must be restored manually. For details, see Release notes for Kubernetes versions supported by ACK and Deprecated API Migration Guide.
-
-
Disk detachment: Reusing a disk across VPCs detaches it from the backup cluster and attaches it to the restore cluster. If you need to maintain service availability or data consistency during migration, do not forcefully detach disks. Instead, back up disk volumes and create new disks in the restore cluster.
-
NAS and OSS: Both clusters can read from and write to the same NAS file systems and OSS buckets simultaneously — no detachment needed.
Prerequisites
Before you begin, make sure that:
-
The backup cluster runs Kubernetes 1.16 or later
-
Both clusters have Container Storage Interface (CSI) 1.1.0 or later installed
-
Both clusters have migrate-controller 1.8.1 or later installed. To use resource modifiers, the restore cluster must have migrate-controller 1.8.2 or later
-
The ECS snapshot service is enabled
-
The following system components are installed and configured in the restore cluster:
-
Container Registry password-free image pulling component: grant permissions and configure
acr-configuration -
ALB Ingress component: configure an
AlbConfig
-
-
The reclaim policies for all NAS, OSS, and disk volumes are set to
Retain. This prevents volumes from being deleted if the backup cluster's PVCs are removed during migration
Related operations:
Usage notes
Backup notes
-
The backup center does not back up resources that are being deleted.
-
After migration, pods in the restore cluster cannot communicate with pods and Elastic Compute Service (ECS) instances in the backup cluster's VPC. For more information, see Network planning of an ACK managed cluster.
Restore notes
-
The backup center restores resources to the API version recommended for the restore cluster's Kubernetes version. If no compatible API version exists between the old and new Kubernetes versions, manually deploy the resource. Examples:
-
Deployments in Kubernetes 1.16 support
extensions/v1beta1,apps/v1beta1,apps/v1beta2, andapps/v1. When restoring to Kubernetes 1.28, these are restored asapps/v1. -
Ingresses in Kubernetes 1.16 support
extensions/v1beta1andnetworking.k8s.io/v1beta1. These cannot be automatically restored in Kubernetes 1.22 or later.
-
-
Enterprise SSDs (ESSDs) support the instant access feature by default, which protects data during backup and accelerates migration.
Billing
The backup center feature is free of charge. You may be charged for the following related services:
-
OSS: Stores backup files such as YAML files. For billing details, see Billing overview.
-
Disk snapshots: Used to back up disk volumes. For billing details, see Snapshot billing.
Starting 11:00 (UTC+8) on October 12, 2023, instant access storage for snapshots is free. The instant access feature is enabled by default for snapshots created for ESSDs and ESSD AutoPL disks at all performance levels (PL0, PL1, PL2, and PL3).
Example application setup

The example application is an NGINX Deployment that mounts three volume types and exposes a LoadBalancer Service named nginx-svc. The cloud controller manager (CCM) creates the corresponding SLB instance. For details about SLB instance creation, see Considerations for configuring a LoadBalancer Service.
When you create the application, make sure the RAM user has permissions to operate the OSS bucket, and replace the url value with the actual bucket endpoint. For more information, see Grant permissions and mount OSS static volumes.
Show the YAML file content
# The configurations of a dynamically provisioned disk volume.
apiVersion: v1
kind: PersistentVolumeClaim
metadata:
  name: pvc-disk
spec:
  accessModes:
  - ReadWriteOnce
  volumeMode: Filesystem
  resources:
    requests:
      storage: 20Gi
  storageClassName: alicloud-disk-topology-alltype
---
# The configurations of a statically provisioned OSS volume.
apiVersion: v1
kind: Secret
metadata:
  name: oss-secret
  namespace: default
stringData:
  akSecret: <yourAccessKey Secret>
  akId: <yourAccessKey ID>
---
apiVersion: v1
kind: PersistentVolume
metadata:
  name: pv-oss
spec:
  capacity:
    storage: 5Gi
  accessModes:
    - ReadWriteMany
  persistentVolumeReclaimPolicy: Retain
  csi:
    driver: ossplugin.csi.alibabacloud.com
    volumeHandle: pv-oss
    nodePublishSecretRef:
      name: oss-secret
      namespace: default
    volumeAttributes:
      bucket: "a-new-bucket"
      url: "http://oss-cn-beijing.aliyuncs.com"
      otherOpts: "-o allow_other -oumask=000"
---
apiVersion: v1
kind: PersistentVolumeClaim
metadata:
  name: pvc-oss
spec:
  accessModes:
  - ReadWriteMany
  resources:
    requests:
      storage: 5Gi
  volumeName: pv-oss
---
# The configurations of a dynamically provisioned NAS volume.
apiVersion: v1
kind: PersistentVolumeClaim
metadata:
  name: pvc-nas
spec:
  accessModes:
  - ReadWriteMany
  volumeMode: Filesystem
  resources:
    requests:
      storage: 20Gi
  storageClassName: alibabacloud-cnfs-nas
---
apiVersion: apps/v1
kind: Deployment
metadata:
  name: nginx
  labels:
    app: nginx
spec:
  replicas: 1
  selector:
    matchLabels:
      app: nginx
  template:
    metadata:
      labels:
        app: nginx
    spec:
      containers:
      - name: nginx
        image: anolis-registry.cn-zhangjiakou.cr.aliyuncs.com/openanolis/nginx:1.14.1-8.6
        ports:
        - containerPort: 80
        volumeMounts:
          - name: nas
            mountPath: /nas-data
          - name: oss
            mountPath: /oss-data
          - name: disk
            mountPath: /disk-data
      volumes:
        - name: nas
          persistentVolumeClaim:
            claimName: pvc-nas
        - name: disk
          persistentVolumeClaim:
            claimName: pvc-disk
        - name: oss
          persistentVolumeClaim:
            claimName: pvc-oss
---
apiVersion: v1
kind: Service
metadata:
  annotations:
    service.beta.kubernetes.io/alibaba-cloud-loadbalancer-spec: slb.s1.small
  name: nginx-svc
  namespace: default
spec:
  externalTrafficPolicy: Local
  internalTrafficPolicy: Cluster
  ipFamilies:
    - IPv4
  ports:
    - name: nginx
      nodePort: 31463
      port: 8080
      protocol: TCP
      targetPort: 80
  selector:
    app: nginx
  type: LoadBalancer
Migration procedure

The migration follows this sequence:
-
Create new NAS mount targets in the restore cluster's VPC — so the restore cluster can reach the existing NAS file systems.
-
Migrate NAS and OSS volumes — back up only the PVC and PV YAML files (not the data), then restore and patch mount target references using resource modifiers.
-
Migrate disk volumes — use snapshot-based backup, then restore to new disks in the restore cluster.
-
Configure annotation overwrite policies for Services and Ingresses — so the restore cluster reuses the existing SLB instance.
-
Migrate applications (excluding volumes) — back up and restore the remaining workload resources.
Step 1: Create new NAS mount targets in the new VPC
Create new mount targets for the NAS volumes used by the backup cluster. The procedure differs based on how the NAS volumes are provisioned.
-
If a NAS volume is managed using Container Network File System (CNFS), obtain the NAS file system ID from CNFS, then create a new mount target, CNFS object, and StorageClass in the restore cluster.
-
If a NAS volume is statically or dynamically provisioned using a custom StorageClass, create a new mount target in the new VPC, then create a new StorageClass or PersistentVolume (PV) in the restore cluster.
When you create the restore cluster and want it to reuse NAS volumes from the backup cluster, clear Dynamically Provision Volumes by Using Default NAS File Systems and CNFS, Enable NAS Recycle Bin, and Support Fast Data Restore in the Volume Plug-in section on the Component Configurations wizard page. If this option is selected, delete thealibabacloud-cnfs-nasStorageClass and create a new one namedalibabacloud-cnfs-nas.
NAS volumes managed using CNFS
-
In the backup cluster, run the following command to list CNFS objects and their associated NAS file system IDs:
kubectl get cnfs -o=custom-columns=name:.metadata.name,filesystemId:.status.fsAttributes.filesystemIdExpected output:
name                                         filesystemId
cnfs-nas-c529e33c3f8704e27a8e2abff********   1caa64****
If multiple CNFS objects appear, multiple NAS file systems are in use. Create a new mount target for each file system.
-
Log on to the NAS console and create a mount target for each file system. Select the VPC and a vSwitch used by the restore cluster. For more information, see Create a mount target.
ECS instances using different vSwitches in the same VPC can all access the NAS file system through one mount target. A general-purpose file system or Extreme NAS file system supports up to two mount targets. Reclaim mount targets that are no longer in use.
-
On the File System List page, find the target file system and click Manage. On the File System Details page, click Mount Targets. In the Mount Target column, hover over the
 icon to view and record the mount target domain name.
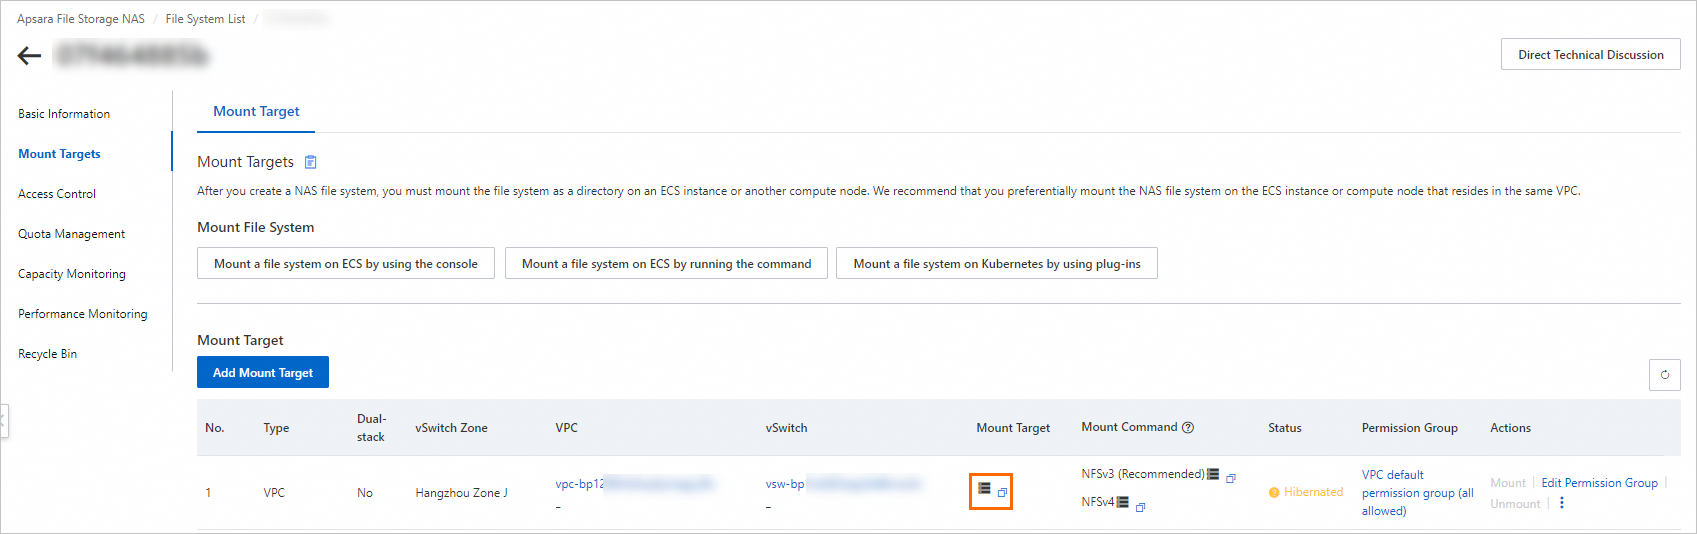
-
In the restore cluster, create a CNFS object using the following YAML. Replace the
servervalue with the mount target domain name you recorded in step 3. For more information, see Use CNFS to manage NAS file systems (recommended).apiVersion: storage.alibabacloud.com/v1beta1 kind: ContainerNetworkFileSystem metadata: name: cnfs-nas-restore-from-c529e33c3f8704e27a8e2abff******** spec: description: cnfs-nas parameters: server: 1caa64****-h****.cn-beijing.nas.aliyuncs.com # The domain name of the mount target. storageType: Capacity # A Capacity NAS file system. reclaimPolicy: Retain type: nas -
(Optional) Delete the
alibabacloud-cnfs-nasStorageClass created during cluster creation.This step is required only if you selected Dynamically Provision Volumes By Using Default NAS File Systems And CNFS, Enable NAS Recycle Bin, And Support Fast Data Restore when creating the restore cluster.
kubectl delete sc alibabacloud-cnfs-nas -
In the restore cluster, recreate the
alibabacloud-cnfs-nasStorageClass. SetcontainerNetworkFileSystemto the name of the CNFS object you created in step 4.allowVolumeExpansion: true apiVersion: storage.k8s.io/v1 kind: StorageClass metadata: name: alibabacloud-cnfs-nas mountOptions: - nolock,tcp,noresvport - vers=3 parameters: archiveOnDelete: "false" # The name of the CNFS object you created. containerNetworkFileSystem: cnfs-nas-restore-from-c529e33c3f8704e27a8e2abff******** path: / volumeAs: subpath provisioner: nasplugin.csi.alibabacloud.com reclaimPolicy: Delete volumeBindingMode: Immediate
NAS volumes statically or dynamically provisioned using custom StorageClasses
-
Log on to the NAS console and create a mount target for each file system. Select the VPC and a vSwitch used by the restore cluster. For more information, see Create a mount target.
ECS instances using different vSwitches in the same VPC can all access the NAS file system through one mount target. A general-purpose file system or Extreme NAS file system supports up to two mount targets. Reclaim mount targets that are no longer in use.
-
In the restore cluster, create the PVC, PV, or StorageClass based on how the original NAS volume was provisioned:
-
Static provisioning: Create a PersistentVolumeClaim (PVC) and PV in the restore cluster. In the PV configuration, replace the
servervalue with the domain name of the new mount target. The PVC configuration can be reused without modification.apiVersion: v1 kind: PersistentVolume metadata: name: pv-nas labels: alicloud-pvname: pv-nas spec: capacity: storage: 5Gi accessModes: - ReadWriteMany csi: driver: nasplugin.csi.alibabacloud.com volumeHandle: pv-nas # Specify the name of the PV. volumeAttributes: server: "2564f4****-ysu87.cn-shenzhen.nas.aliyuncs.com" path: "/csi" mountOptions: - nolock,tcp,noresvport - vers=3 -
Dynamic provisioning: Create a StorageClass in the restore cluster. Replace the
servervalue with the domain name of the new mount target. The PVC configuration can be reused without modification.allowVolumeExpansion: true apiVersion: storage.k8s.io/v1 kind: StorageClass metadata: name: alicloud-nas-subpath mountOptions: - nolock,tcp,noresvport - vers=3 parameters: volumeAs: subpath server: "0cd8b4a576-g****.cn-hangzhou.nas.aliyuncs.com:/k8s/" provisioner: nasplugin.csi.alibabacloud.com reclaimPolicy: Retain
-
Step 2: Migrate NAS and OSS volumes
This step backs up only the PVC and PV YAML files — not the volume data itself. After restore, the volumes access the original NAS file systems and OSS buckets through the new mount targets. No data copying is needed.
-
In the backup cluster, add labels to the NAS and OSS PVCs and their bound PVs. Labels let you select resources in batches during backup.
kubectl label pvc pvc-nas pvc-oss backup="true" kubectl label pv `kubectl get pvc -l backup="true" | grep Bound | awk '{print $3}'| xargs` backup="true" -
Add a separate label to NAS PVCs and PVs. This label is used later by the resource modifier to patch mount target references in batches.
kubectl label pvc pvc-nas nas-volume="true" kubectl label pv `kubectl get pvc -l nas-volume="true" | grep Bound | awk '{print $3}'| xargs` nas-volume="true" -
Create a backup task for the NAS and OSS volumes. For more information, see the "Back up instantly" section in Create a backup plan or back up instantly. On the Application Backup page, click the Backup Records tab. When the Status column shows Completed, the backup is ready. Click the backup record name to verify that all NAS and OSS volumes are included:
ImportantSet Label to
backup=true, Specify Resources topvc,pv, and Volume Backup to Disabled. Disabling volume backup saves only the YAML definitions — the restore cluster accesses the original data directly through the new mount targets, so no data copies are created.{ "v1/PersistentVolume": [ "nas-916c0c04-e91e-4fc3-9115-d8a9********", # The PV is dynamically provisioned. "pv-oss" ], "v1/PersistentVolumeClaim": [ "default/pvc-nas", "default/pvc-oss" ] } -
In the restore cluster, create a ConfigMap that uses Velero resource modifiers to update the NAS mount target references during restore. > Tip: Before encoding patches in the ConfigMap, validate each patch path using
kubectl patchon a test resource. The patch syntax is identical, so this helps catch path errors before restore.Resource modifiers require migrate-controller 1.8.2 or later and role-based access control (RBAC) administrator permissions on the cluster. For upgrade instructions, see Manage components. For permission setup, see Grant RBAC permissions to RAM users or RAM roles. The following example applies to NAS volumes using the default
alibabacloud-cnfs-nasStorageClass. If your NAS volumes use static or dynamic provisioning with a custom StorageClass, adjust the patch paths to match your PVC and PV fields.apiVersion: v1 data: modifier: | version: v1 resourceModifierRules: - conditions: groupResource: pvcs labelSelector: matchLabels: nas-volume: "true" patches: - operation: replace path: "/spec/storageClassName" value: "alibabacloud-cnfs-nas" - conditions: groupResource: pods labelSelector: matchLabels: nas-volume: "true" patches: - operation: replace path: "/spec/csi/volumeAttributes/containerNetworkFileSystem" value: "cnfs-nas-restore-from-c529e33c3f8704e27a8e2abff********" - operation: replace path: "/spec/storageClassName" value: "alibabacloud-cnfs-nas" - operation: remove path: "/spec/csi/volumeAttributes/storage.kubernetes.io/csiProvisionerIdentity" kind: ConfigMap metadata: name: <Backup task name>-resource-modifier namespace: csdr -
(Optional) Initialize the backup vault in the restore cluster. If the vault is already initialized, skip this step. Create a file named
backuplocation.yamlwith the following content:apiVersion: csdr.alibabacloud.com/v1beta1 kind: BackupLocation metadata: name: <Backup vault name> namespace: csdr spec: backupSyncPeriod: 0s # Specify the configurations of the original backup vault. # You can also initialize the backup vault in the ACK console. config: network: internal region: <Region of the OSS bucket associated with the backup vault> objectStorage: bucket: <OSS bucket associated with the backup vault> prefix: <OSS subdirectory associated with the backup vault> provider: alibabacloud -
In the restore cluster, verify that the backup has been synchronized:
kubectl get -ncsdr applicationbackup <Backup name>If the output is not empty, the backup is available in the restore cluster.
-
In the restore cluster, create a file named
applicationrestore.yamland apply it to start the restore task.Resource modifier operations require using the CLI.
apiVersion: csdr.alibabacloud.com/v1beta1
kind: ApplicationRestore
metadata:
  name: nas-oss-restore
  namespace: csdr
spec:
  backupName: <Backup task name>
  resourceModifier:
    kind: ConfigMap
    name: <Backup task name>-resource-modifier
kubectl apply -f applicationrestore.yaml -
Verify the restore task is in the Completed state. Check that the PVCs and PVs are in the
Boundstate and that the NAS mount target references in the PV configurations reflect the new VPC.
Step 3: Migrate disk volumes
Disk migration uses snapshot-based backup. Unlike NAS and OSS, disks cannot be shared between clusters — the disk is detached from the backup cluster and attached to the restore cluster as a new volume.
-
In the backup cluster, create a file named
applicationbackup.yamlto back up the disk volumes:apiVersion: csdr.alibabacloud.com/v1beta1 kind: ApplicationBackup metadata: annotations: # If the backup vault is already used by the backup cluster, remove this annotation. # csdr.alibabacloud.com/backuplocations: >- # {"name":"<Backup vault name>","region":"<Region>","bucket":"<Bucket>","prefix":"<Prefix>","provider":"alibabacloud"} name: backup-disk namespace: csdr spec: # includedNamespaces: # Namespaces containing volumes to back up. # - default backupType: PvBackup pvBackup: defaultPvBackup: true pvcList: # PVCs to back up. - name: pvc-disk namespace: default storageLocation: <Backup vault name> ttl: 720h0m0s -
In the backup cluster, apply the backup object:
kubectl apply -f applicationbackup.yaml -
In the backup cluster, check the backup task status:
kubectl describe applicationbackup <yourApplicationBackupName> -n csdrThe task is complete when the output shows:
... Status: Completion Timestamp: 2022-12-05T15:02:35Z Expiration: 2023-01-04T15:02:25Z Message: success Phase: Completed -
In the restore cluster, verify that the backup has been synchronized:
kubectl get -ncsdr applicationbackup <Backup name>If the output is not empty, the backup is available in the restore cluster.
-
In the restore cluster, create a file named
applicationrestore.yamland apply it:apiVersion: csdr.alibabacloud.com/v1beta1 kind: ApplicationRestore metadata: name: disk-restore namespace: csdr spec: backupName: <Backup task name>kubectl apply -f applicationrestore.yaml -
Verify the restore task is in the Completed state. Check that the PVCs and PVs are in the
Boundstate and that the disk ID in the PV configuration has been updated to the new disk.
Step 4: Configure annotation overwrite policies for Services and Ingresses
The nginx-svc Service in the backup cluster has the following annotation and label, created by the CCM:
Annotation:
service.beta.kubernetes.io/alibaba-cloud-loadbalancer-spec: slb.s1.smallLabel:
service.k8s.alibaba/loadbalancer-id: lb-2ze2hxgbuw145******To reuse the existing SLB instance (lb-2ze2hxgbuw145******) in the restore cluster, create an annotation overwrite ConfigMap. This replaces the loadbalancer-spec annotation with the loadbalancer-id annotation, directing the CCM to attach to the existing instance rather than create a new one.
apiVersion: v1
data:
  # use-nlb: "true" takes effect only when new SLB instances are created.
  default.nginx-svc: |
    {"service.beta.kubernetes.io/alibaba-cloud-loadbalancer-id":"lb-2ze2hxgbuw145******","xxx":"yyy"}
  # <ns>.<svc>
  # {"xxx": "yyy", ...}
kind: ConfigMap
metadata:
  name: service-annotation-overwrite
  namespace: csdr
Additional notes on the overwrite policy:
-
For Service annotation references, see Use annotations to configure CLB instances and Use annotations to configure NLB instances.
-
An annotation overwrite policy replaces all annotations in the ConfigMap. Use it to create a new SLB instance when needed.
-
By default, the listeners of a reused SLB instance are not overwritten (
service.beta.kubernetes.io/alibaba-cloud-loadbalancer-force-override-listenersdefaults tofalse). Switch traffic to the restore cluster only after confirming that applications are fully started.
To overwrite Ingress annotations, create a ConfigMap named ingress-annotation-overwrite.
Step 5: Migrate applications (excluding volumes)
To modify resource configurations during restoration, see Modify resource configurations during application restoration.
-
In the backup cluster, create a backup of the applications. When configuring the backup task, do not select Back Up Volume Data. For more information, see the "Back up instantly" section in Create a backup plan or back up instantly.
-
On the Application Backup page, click the Backup Records tab. Confirm the backup record shows Completed.
-
Wait for the backup to synchronize to the restore cluster, then restore the applications. For more information, see Restore applications.
-
On the Application Backup page, click View Restoration Records. Confirm the restoration task shows Completed.
-
Verify the restore cluster:
-
On the Deployments page, confirm the NGINX application is running and the same volumes are mounted.
-
On the Services page, find
nginx-svc, click Details, and confirm the same SLB instance is in use.
-