OSS persistent volumes (PVs) support multiple clients, but full write support degrades read performance. Read/write splitting addresses this by routing reads and writes through separate mount paths — a read-optimized path for data loading and a write path for checkpoints or outputs. This significantly improves throughput in read-intensive workloads such as model training, inference, and data analytics.
This topic explains how to implement read/write splitting for OSS PVs using ossfs clients or the OSS SDK, with a worked example based on a MNIST handwriting recognition training job.
Prerequisites
Before you begin, ensure that you have:
-
A cluster with the Container Storage Interface (CSI) component installed. Different clients require different CSI versions — upgrade to the latest version. For more information, see Manage csi-plugin and csi-provisioner components.
-
An OSS bucket in the same Alibaba Cloud account as the cluster.
Keep the OSS bucket in the same account as the cluster. Cross-account OSS access is not recommended.
Choose a client
OSS PVs support three clients: ossfs 1.0, ossfs 2.0, and strmvol. All three support read-only access. Their write support differs:
| Client | Read-only | Read/write | Best for |
|---|---|---|---|
| ossfs 1.0 | Yes | Full write | General read/write workloads; direct read mode available (v1.91+) |
| ossfs 2.0 | Yes | Sequential append writes only | Read-heavy workloads; requires CSI >= 1.33.1 |
| strmvol | Yes | — | Many small files (datasets, time-series logs, quantitative backtesting) |
For detailed guidance on choosing a client, see Client selection reference.
Use cases
Read-only access
Set the PV access mode to ReadOnlyMany to prevent accidental data modification. This is appropriate for inference, data analytics, and log queries in big data services.
-
For read-heavy workloads, use ossfs 2.0 (requires CSI >= 1.33.1). See Use ossfs 2.0 PVs.
-
For workloads that read many small files, use strmvol. See Use strmvol PVs.
To tune ossfs 1.0 for read-only scenarios, configure these parameters in otherOpts. Most workloads do not need to change these defaults — adjust them only when you have a specific performance requirement.
| Parameter | Default | Description |
|---|---|---|
kernel_cache |
Disabled | Enables the kernel buffer cache. Use when real-time access to the latest content is not required. Cache hits are served from memory not used by other processes. |
parallel_count |
20 | Number of concurrent shards for uploading or downloading large files. |
max_multireq |
20 | Maximum concurrent requests for object metadata listing. Must be >= parallel_count. |
max_stat_cache_size |
1000 | Number of cached metadata entries. Set to 0 to disable. Increase this value to speed up ls in directories with many files — 10,000 entries consume about 40 MB of memory. |
direct_read |
Disabled | Direct read mode for read-only scenarios (ossfs 1.91 and later). See Features and performance testing of the new ossfs 1.0 version and Performance optimization for read-only scenarios. |
Read/write access
Set the PV access mode to ReadWriteMany for workloads that write data.
ossfs does not guarantee consistency for concurrent write operations. If multiple writers modify the same objects simultaneously, data corruption can occur. For sequential checkpoint writes during model training, use a single writer per path.
Deleting or modifying files in the mounted path also deletes or modifies the corresponding objects in the OSS bucket. To protect against accidental data loss, enable versioning for the bucket.
For read-intensive workloads where reads and writes go to different paths (such as model training), implement read/write splitting: mount the read path as ReadOnlyMany with cache parameters enabled, and handle writes separately using a ReadWriteMany PV or the OSS SDK.
How read/write splitting works
Read/write splitting routes reads and writes through separate mount points, each pointing to a different subpath of the same OSS bucket. Mounting different subpaths is the core design decision — it isolates read I/O and write I/O so they never share the same mount point or interfere with each other.
-
Read path — Mount a subpath (for example,
/tf-train/train/data) asReadOnlyManywith cache settings enabled. The kernel cache and metadata cache mean repeated reads are served from memory rather than from OSS. -
Write path — Mount a different subpath (for example,
/tf-train/training_logs) asReadWriteMany, or write directly to OSS using the SDK. This isolates write traffic from the read path.
Example: MNIST handwriting recognition training
This example uses a handwriting image recognition and training job to demonstrate read/write splitting. The job:
-
Reads the training dataset from
/tf-train/train/datain the OSS bucket using a read-only PV. -
Writes training checkpoints to
/tf-train/training_logsusing either a read/write PV or the OSS SDK.
Before you start, download the MNIST dataset and upload it to the /tf-train/train/data directory in your OSS bucket:
The following screenshot shows how the files are organized in the OSS bucket:

Implement read/write operations using ossfs
Because checkpoint writing is a sequential append operation, ossfs 1.0 or ossfs 2.0 both work for the write path.
-
Deploy the training application. The application mounts the
/tf-trainsubpath of the OSS bucket to the/mntdirectory of the pod. For more information on configuring an OSS PV, see Use ossfs 1.0 statically provisioned volumes or Use ossfs 2.0 PVs.-
Create an ossfs 1.0 PV:
cat << EOF | kubectl apply -f - apiVersion: v1 kind: Secret metadata: name: oss-secret namespace: default stringData: akId: "<your-accesskey-id>" akSecret: "<your-accesskey-secret>" --- apiVersion: v1 kind: PersistentVolume metadata: name: tf-train-pv labels: alicloud-pvname: tf-train-pv spec: capacity: storage: 10Gi accessModes: - ReadWriteMany persistentVolumeReclaimPolicy: Retain csi: driver: ossplugin.csi.alibabacloud.com volumeHandle: tf-train-pv nodePublishSecretRef: name: oss-secret namespace: default volumeAttributes: bucket: "<your-bucket-name>" url: "oss-<region>.aliyuncs.com" otherOpts: "-o max_stat_cache_size=0 -o allow_other" path: "/tf-train" --- apiVersion: v1 kind: PersistentVolumeClaim metadata: name: tf-train-pvc spec: accessModes: - ReadWriteMany resources: requests: storage: 10Gi selector: matchLabels: alicloud-pvname: tf-train-pv EOF -
Create the training pod:
During training, intermediate files are written to
/mnt/training_logsin the pod and uploaded by ossfs to/tf-train/training_logsin the OSS bucket.cat << EOF | kubectl apply -f - apiVersion: v1 kind: Pod metadata: labels: app: tfjob name: tf-mnist namespace: default spec: containers: - command: - sh - -c - python /app/main.py env: - name: NVIDIA_VISIBLE_DEVICES value: void - name: gpus value: "0" - name: workers value: "1" - name: TEST_TMPDIR value: "/mnt" image: registry.cn-beijing.aliyuncs.com/tool-sys/tf-train-demo:rw imagePullPolicy: Always name: tensorflow ports: - containerPort: 20000 name: tfjob-port protocol: TCP volumeMounts: - name: train mountPath: "/mnt" workingDir: /root priority: 0 restartPolicy: Never securityContext: {} terminationGracePeriodSeconds: 30 volumes: - name: train persistentVolumeClaim: claimName: tf-train-pvc EOF
-
-
Verify that data is read and written correctly.
-
Check the pod status:
kubectl get pod tf-mnistWait a few minutes for the pod status to change from
RunningtoCompleted:NAME READY STATUS RESTARTS AGE tf-mnist 0/1 Completed 0 2m12s -
Check the data load time in the pod logs:
kubectl logs tf-mnist | grep dataloadExpected output (actual time varies by instance performance and network):
dataload cost time: 1.54191803932 -
Log in to the OSS Management Console and verify that files have been generated under
/tf-train/training_logsin the bucket. Files present in that directory confirm that read and write operations are working.
-
Optimize read performance using read/write splitting
Split the single read/write PV into two separate PVs: a read-only PV with cache tuning for the dataset, and a write PV for checkpoints. The training service code does not need to change — only the mount configuration differs.
Two write options are available:
-
Option 1: Use a separate read/write ossfs PV for checkpoint writes.
-
Option 2: Use the OSS SDK to write checkpoints directly, bypassing ossfs entirely.
Option 1: Write using a read/write ossfs PV
-
Create a read-only ossfs 1.0 PV for the dataset. The key configuration changes:
-
Set
accessModestoReadOnlyManyon both the PV and PersistentVolumeClaim (PVC). Mount only the dataset subpath/tf-train/train/data. -
In
otherOpts, add-o kernel_cache -o max_stat_cache_size=10000 -o umask=022:-
kernel_cacheenables in-memory read caching. -
max_stat_cache_size=10000caches 10,000 metadata entries (approximately 40 MB). Adjust based on your instance type and dataset size. -
umask=022grants read access to container processes running as non-root users.
-
cat << EOF | kubectl apply -f - apiVersion: v1 kind: Secret metadata: name: oss-secret namespace: default stringData: akId: "<your-accesskey-id>" akSecret: "<your-accesskey-secret>" --- apiVersion: v1 kind: PersistentVolume metadata: name: tf-train-pv labels: alicloud-pvname: tf-train-pv spec: capacity: storage: 10Gi accessModes: - ReadOnlyMany persistentVolumeReclaimPolicy: Retain csi: driver: ossplugin.csi.alibabacloud.com volumeHandle: tf-train-pv nodePublishSecretRef: name: oss-secret namespace: default volumeAttributes: bucket: "<your-bucket-name>" url: "oss-<region>.aliyuncs.com" otherOpts: "-o kernel_cache -o max_stat_cache_size=10000 -o umask=022 -o allow_other" path: "/tf-train/train/data" --- apiVersion: v1 kind: PersistentVolumeClaim metadata: name: tf-train-pvc spec: accessModes: - ReadOnlyMany resources: requests: storage: 10Gi selector: matchLabels: alicloud-pvname: tf-train-pv EOF -
-
Create a read/write ossfs 1.0 PV for checkpoints. This PV mounts only the checkpoint subpath
/tf-train/training_logs. Metadata caching is disabled (max_stat_cache_size=0) because checkpoint writes are sequential and do not benefit from caching.cat << EOF | kubectl apply -f - apiVersion: v1 kind: PersistentVolume metadata: name: tf-logging-pv labels: alicloud-pvname: tf-logging-pv spec: capacity: storage: 10Gi accessModes: - ReadWriteMany persistentVolumeReclaimPolicy: Retain csi: driver: ossplugin.csi.alibabacloud.com volumeHandle: tf-logging-pv nodePublishSecretRef: name: oss-secret namespace: default volumeAttributes: bucket: "<your-bucket-name>" url: "oss-<region>.aliyuncs.com" otherOpts: "-o max_stat_cache_size=0 -o allow_other" path: "/tf-train/training_logs" --- apiVersion: v1 kind: PersistentVolumeClaim metadata: name: tf-logging-pvc spec: accessModes: - ReadWriteMany resources: requests: storage: 10Gi selector: matchLabels: alicloud-pvname: tf-logging-pv EOF -
Deploy the training pod with both PVs mounted.
The training service code does not need modification. Mount both PVs in the pod spec — the read-only PV at
/mnt/train/dataand the read/write PV at/mnt/training_logs.cat << EOF | kubectl apply -f - apiVersion: v1 kind: Pod metadata: labels: app: tfjob name: tf-mnist namespace: default spec: containers: - command: - sh - -c - python /app/main.py env: - name: NVIDIA_VISIBLE_DEVICES value: void - name: gpus value: "0" - name: workers value: "1" - name: TEST_TMPDIR value: "/mnt" image: registry.cn-beijing.aliyuncs.com/tool-sys/tf-train-demo:rw imagePullPolicy: Always name: tensorflow ports: - containerPort: 20000 name: tfjob-port protocol: TCP volumeMounts: - name: train mountPath: "/mnt/train/data" - name: logging mountPath: "/mnt/training_logs" workingDir: /root priority: 0 restartPolicy: Never securityContext: {} terminationGracePeriodSeconds: 30 volumes: - name: train persistentVolumeClaim: claimName: tf-train-pvc - name: logging persistentVolumeClaim: claimName: tf-logging-pvc EOF
Option 2: Write using the OSS SDK
Use the OSS SDK to write checkpoints directly to OSS without a read/write PV. The training pod uses a read-only PV for the dataset and calls the SDK for checkpoint uploads.
-
Add the OSS Python SDK to the container image:
RUN pip install oss2For installation options, see Installation.
-
Modify the training code to upload checkpoints using the SDK. The original code saves checkpoints to
log_direvery 100 iterations usingtf.train.Saverwithmax_to_keep=0(retaining all checkpoints). After 1,000 iterations, this produces 10 sets of checkpoint files in OSS.-
Set
max_to_keep=1to retain only the latest checkpoint, reducing memory usage. -
Upload each checkpoint file to OSS using
put_object_from_fileafter saving.
In workloads with separated read and write paths, use asynchronous I/O with the SDK to further improve training throughput.
def train():
    ...
saver = tf.train.Saver(max_to_keep=0)

    for i in range(FLAGS.max_steps):
        if i % 10 == 0:  # Record summaries and test-set accuracy
            summary, acc = sess.run([merged, accuracy], feed_dict=feed_dict(False))
            print('Accuracy at step %s: %s' % (i, acc))
            if i % 100 == 0:
                print('Save checkpoint at step %s: %s' % (i, acc))
                saver.save(sess, FLAGS.log_dir + '/model.ckpt', global_step=i)
Replace it with SDK-based uploads. Two changes reduce memory usage and eliminate the read/write PV: Read the AccessKey and bucket settings from environment variables. For credential configuration, see Configure access credentials.
import oss2
from oss2.credentials import EnvironmentVariableCredentialsProvider

auth = oss2.ProviderAuth(EnvironmentVariableCredentialsProvider())
url = os.getenv('URL','<default-url>')
bucketname = os.getenv('BUCKET','<default-bucket-name>')
bucket = oss2.Bucket(auth, url, bucketname)

...
def train():
  ...
  saver = tf.train.Saver(max_to_keep=1)

 for i in range(FLAGS.max_steps):
    if i % 10 == 0:  # Record summaries and test-set accuracy
      summary, acc = sess.run([merged, accuracy], feed_dict=feed_dict(False))
      print('Accuracy at step %s: %s' % (i, acc))
      if i % 100 == 0:
        print('Save checkpoint at step %s: %s' % (i, acc))
        saver.save(sess, FLAGS.log_dir + '/model.ckpt', global_step=i)
        # FLAGS.log_dir = os.path.join(os.getenv('TEST_TMPDIR', '/mnt'),'training_logs')
        for path,_,file_list in os.walk(FLAGS.log_dir) :
          for file_name in file_list:
            bucket.put_object_from_file(os.path.join('tf-train/training_logs', file_name), os.path.join(path, file_name))
The modified container image is
registry.cn-beijing.aliyuncs.com/tool-sys/tf-train-demo:ro. -
-
Deploy the pod with the read-only PV and SDK credentials. The pod configuration sets
accessModestoReadOnlyManyand addsOSS_ACCESS_KEY_IDandOSS_ACCESS_KEY_SECRETenvironment variables so the SDK can authenticate using the same credentials as the PV. <details> <summary>Click to view the full YAML</summary>cat << EOF | kubectl apply -f - apiVersion: v1 kind: Secret metadata: name: oss-secret namespace: default stringData: akId: "<your-accesskey-id>" akSecret: "<your-accesskey-secret>" --- apiVersion: v1 kind: PersistentVolume metadata: name: tf-train-pv labels: alicloud-pvname: tf-train-pv spec: capacity: storage: 10Gi accessModes: - ReadOnlyMany persistentVolumeReclaimPolicy: Retain csi: driver: ossplugin.csi.alibabacloud.com volumeHandle: tf-train-pv nodePublishSecretRef: name: oss-secret namespace: default volumeAttributes: bucket: "<your-bucket-name>" url: "oss-<region>.aliyuncs.com" otherOpts: "-o kernel_cache -o max_stat_cache_size=10000 -o umask=022 -o allow_other" path: "/tf-train/train/data" --- apiVersion: v1 kind: PersistentVolumeClaim metadata: name: tf-train-pvc spec: accessModes: - ReadOnlyMany resources: requests: storage: 10Gi selector: matchLabels: alicloud-pvname: tf-train-pv --- apiVersion: v1 kind: Pod metadata: labels: app: tfjob name: tf-mnist namespace: default spec: containers: - command: - sh - -c - python /app/main.py env: - name: NVIDIA_VISIBLE_DEVICES value: void - name: gpus value: "0" - name: workers value: "1" - name: TEST_TMPDIR value: "/mnt" - name: OSS_ACCESS_KEY_ID #The source of the AccessKey is the same as that of the PV. valueFrom: secretKeyRef: name: oss-secret key: akId - name: OSS_ACCESS_KEY_SECRET #The source of the AccessKey is the same as that of the PV. valueFrom: secretKeyRef: name: oss-secret key: akSecret - name: URL #You can ignore this if a default URL is configured. value: "https://oss-<region>.aliyuncs.com" - name: BUCKET #You can ignore this if a default BUCKET is configured. value: "<bucket-name>" image: registry.cn-beijing.aliyuncs.com/tool-sys/tf-train-demo:ro imagePullPolicy: Always name: tensorflow ports: - containerPort: 20000 name: tfjob-port protocol: TCP volumeMounts: - name: train mountPath: "/mnt/train/data" workingDir: /root priority: 0 restartPolicy: Never securityContext: {} terminationGracePeriodSeconds: 30 volumes: - name: train persistentVolumeClaim: claimName: tf-train-pvc EOF</details>
Verify read/write splitting
After deploying with either write option:
-
Check the pod status:
kubectl get pod tf-mnistWait until the status changes from
RunningtoCompleted:NAME READY STATUS RESTARTS AGE tf-mnist 0/1 Completed 0 2m25s -
Check the data load time:
kubectl logs tf-mnist | grep dataloadWith read/write splitting and kernel cache enabled, the data load time drops compared to the baseline without splitting:
dataload cost time: 0.843528985977The baseline time without splitting is approximately 1.54 seconds. The improvement is more significant for large-scale training jobs or workloads that load data repeatedly.
-
Log in to the OSS Management Console and verify that checkpoint files are present under
/tf-train/training_logsin the bucket.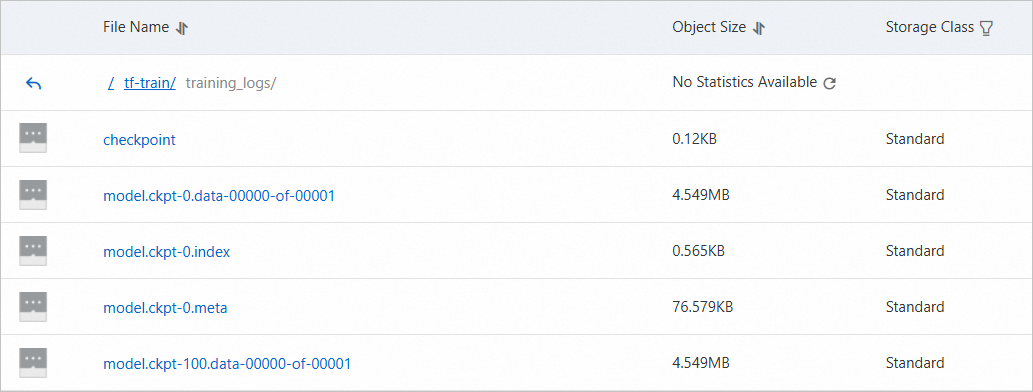
References
OSS SDK reference
All examples in this topic use the Python SDK. The following SDKs are also available:
For PHP, Node.js, Browser.js, .NET, Android, iOS, and Ruby, see SDK Reference.
Other write tools
These tools also support writing objects to OSS and can be used for the write path in read/write splitting scenarios:
| Tool | Reference |
|---|---|
| OSS Management Console | Quick start |
| OpenAPI | PutObject |
| ossutil command line interface | cp (upload files) |
| ossbrowser graphical management tool | Common operations |