If you want to use Microservices Engine (MSE) Ingresses to expose Services in your Container Service for Kubernetes (ACK) cluster, you must first authorize the MSE Ingress controller to access MSE. This topic describes how to authorize the MSE Ingress controller to access MSE.
Step 1: Install the MSE Ingress controller
Method 1: Install the MSE Ingress controller when you create a cluster
On the Component Configurations wizard page, select MSE Ingress in the Ingress section. For more information about cluster parameters, see Create an ACK managed cluster. 
Method 2: Install the MSE Ingress controller for an existing cluster on the Add-ons page
- Log on to the ACK console and click Clusters in the left-side navigation pane.
- On the Clusters page, click the name of a cluster and choose in the left-side navigation pane.
- On the Add-ons page, click the Networking tab. Find MSE Ingress Controller and click Install.
- In the Install MSE Ingress Controller dialog box, select or clear Cascade Delete SLB Instance and click OK.
Step 2: Authorize the MSE Ingress controller to access MSE
- Log on to the ACK console and click Clusters in the left-side navigation pane.
- On the Clusters page, click the name of a cluster and click Cluster Information in the left-side navigation pane.
- On the Cluster Information page, click the Cluster Resources tab, and then click the hyperlink next to Worker RAM Role.
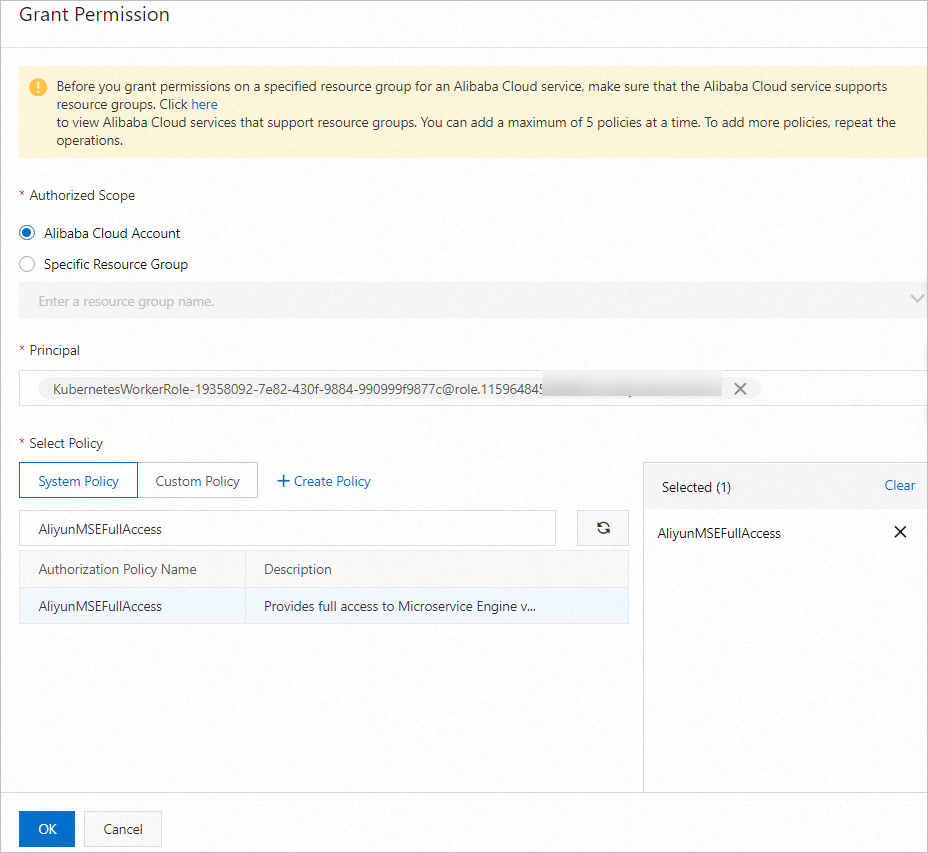
- On the Permissions tab of the role details page, click Grant Permission.
- In the Select Policy section of the Grant Permission panel, click the System Policy tab. Enter AliyunMSEFullAccess in the search box below. Click AliyunMSEFullAccess after it appears. Then, click OK.
Step 3 (optional): Authorize your cluster to access Log Service
If you want to enable Log Service for the MSE cloud-native gateway by using MseIngressConfig, you must grant the worker RAM role of your cluster the permissions to access Log Service.
- Create a RAM policy.
- Authorize your cluster to access Log Service
- Log on to the ACK console and click Clusters in the left-side navigation pane.
- On the Clusters page, click the name of a cluster and click Cluster Information in the left-side navigation pane.
- On the Cluster Information page, click the Cluster Resources tab, and then click the hyperlink next to Worker RAM Role.
- On the Permissions tab of the role details page, click Grant Permission.
- In the Select Policy section of the Grant Permission panel, click the Custom Policy tab. Enter the name of the custom policy that you created in Step 1. Click the policy after it appears. Then, click OK.