The IDaaS user portal lets you launch authorized applications using single sign-on (SSO), manage your profile, configure multi-factor authentication (MFA), and reset your password. This guide covers how to access the portal, launch and organize applications, and end your session.
Prerequisites
Before you begin, make sure you have:
An IDaaS account provisioned by your administrator
The IDaaS Sign-In URL (contact your administrator if you don't have it)
At least one application assigned to your account (contact your administrator to create an application and grant application authorization if your application list is empty)
Access the portal
Your administrator provides your organization's IDaaS Sign-In URL. Open the URL in your browser, then enter your username and password to log in.
If you need to find the Sign-In URL yourself, log in to the IDaaS console, go to IDaaS consoleEIAM, and select your IDaaS instance. Then use either of the following methods:
In the User Portal column of the instances list, click the portal link directly.
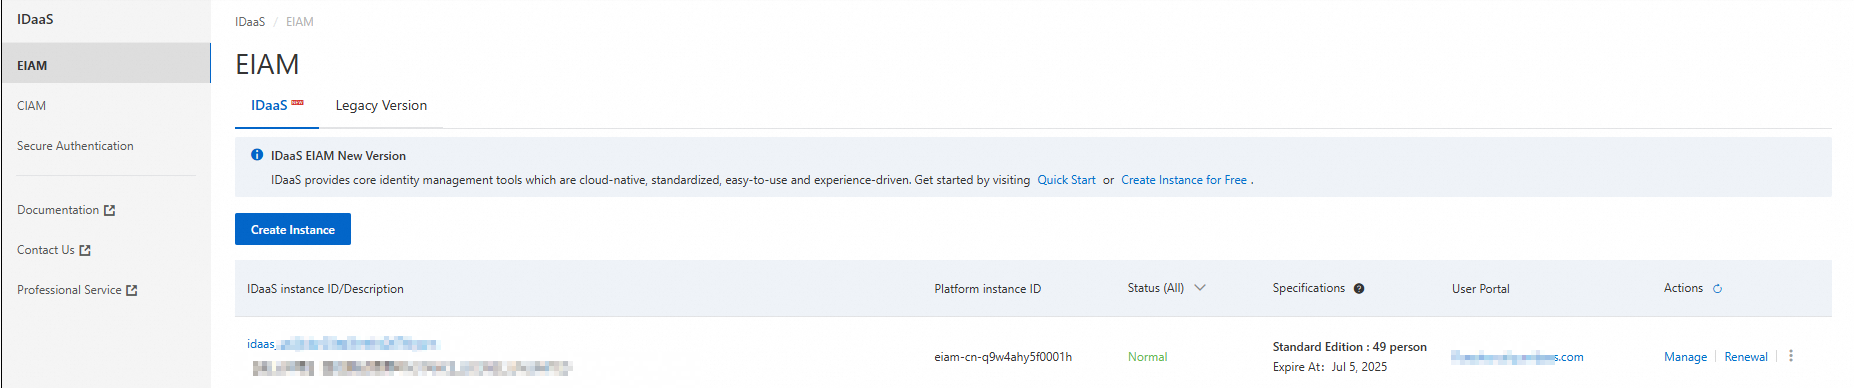
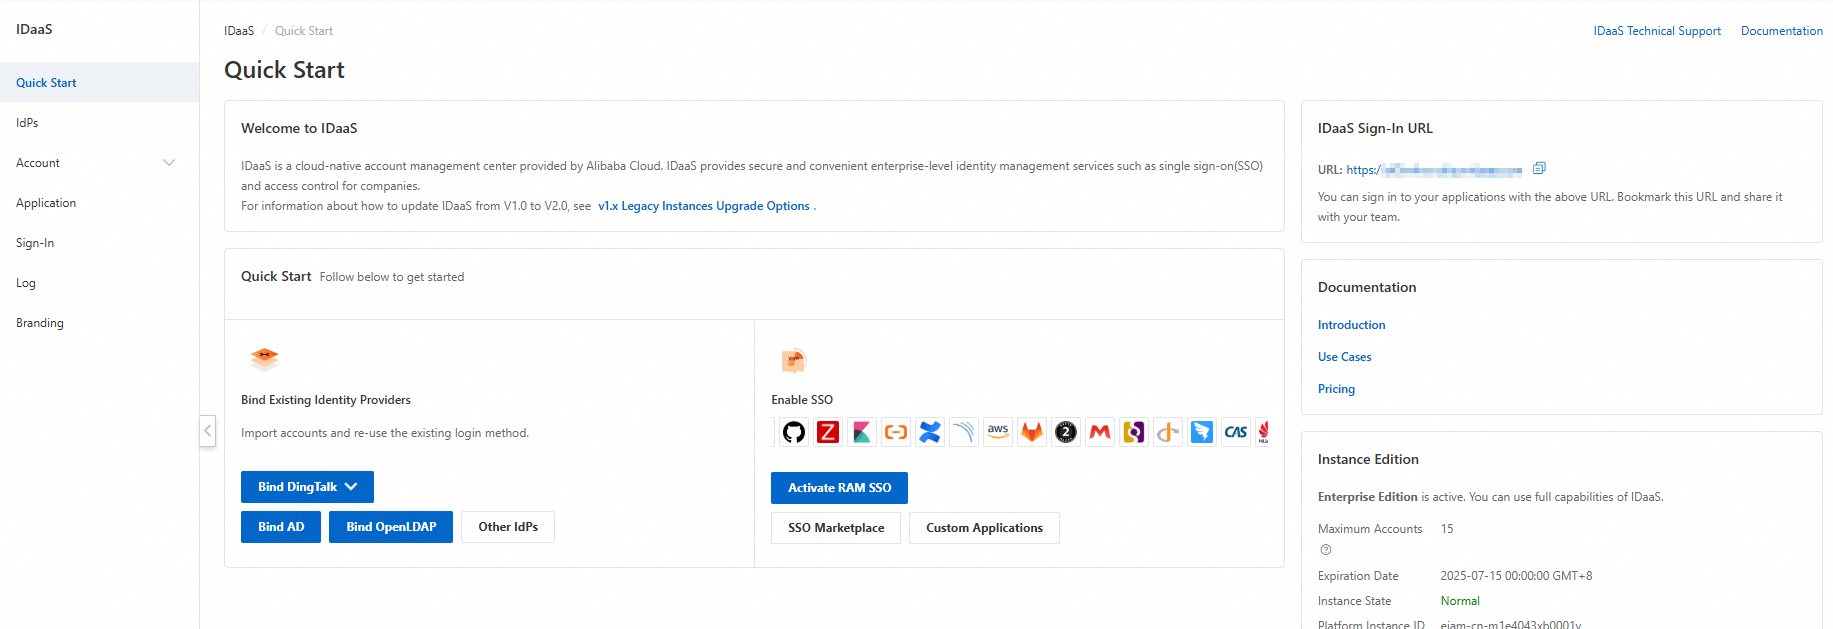
In the Actions column, click Manage. On the Quick Start page, copy the IDaaS Sign-In URL.
If an application initiates the SSO flow (Service Provider-initiated SSO), you are redirected back to that application after login—not to the user portal. You reach the user portal only when you log in directly from the portal's login page.
Launch an application
The Applications menu lists all applications you are authorized to access.
In the navigation pane on the left, click Applications.
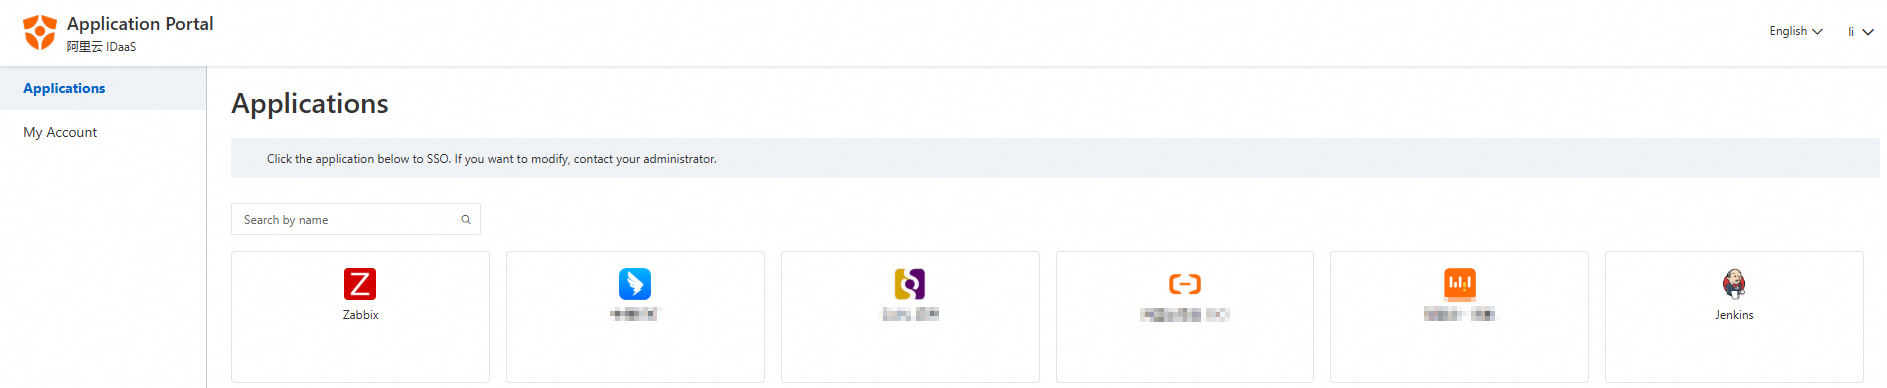
(Optional) Use the fuzzy search feature to quickly filter applications by name.
Click an application icon to launch it via SSO.
Depending on how many application accounts are linked to that application, one of the following happens:
| Scenario | What happens |
|---|---|
| One application account exists | SSO proceeds immediately—no extra steps. |
| No application accounts exist | The portal displays a message that SSO cannot proceed. Contact your administrator for assistance. You cannot request to add an application account. |
| Multiple application accounts exist | You are redirected to an account selection page (IdP-initiated SSO). Select the account to use, then access the application. |
Organize applications into groups
Create groups to keep your application list organized.
In the navigation pane on the left, click Applications.
To the right of Application Group, click the
 icon.
icon.
In the Group Name field, enter a name for the group (up to 32 characters).
In the application list, search or browse for applications to add:
Use the search box to filter by keyword.
Select the checkbox next to each application you want to add.
Click the
 icon to add them to the group.
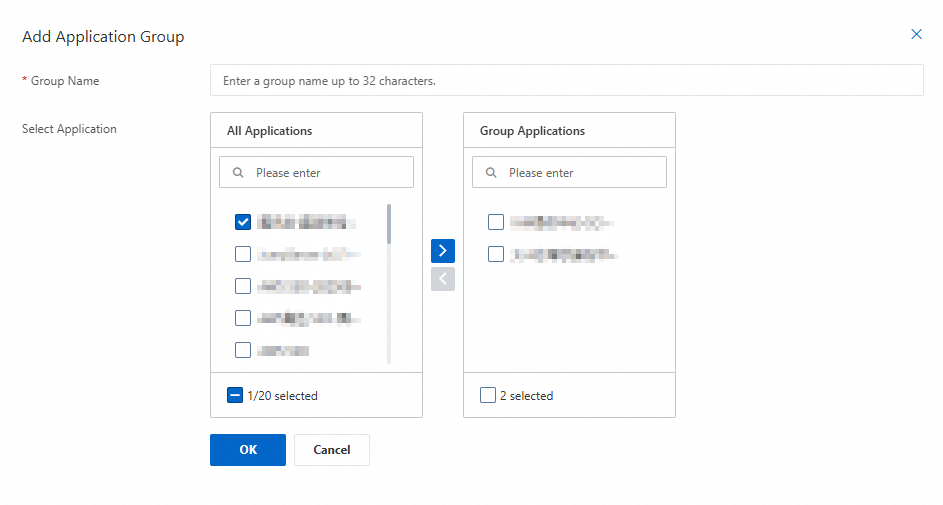
Review the applications in the group, then click OK to save. To cancel, click Cancel.
End your session
There are four ways your IDaaS login session can end:
| Method | Details |
|---|---|
| Login session expires | This is configurable—see Logon methods. |
| Inactivity timeout | The session ends after a period of no activity. This timeout is configurable—see Logon methods. |
| Manual logout | In the user portal, click Logout in the upper-right corner. |
| Close the browser | Closing all browser windows ends the session automatically. |
After logging out, log in again to access any application.