Authorization controls which accounts and organizations can access an application. Accounts without the required permissions are blocked from signing in.
After granting permissions to an organization, all accounts under the organization have permissions. IDaaS does not record the permissions of individual accounts under the organization.
To skip manual authorization entirely, set the Authorize parameter to All Users in the application's SSO configuration. When All Users is selected, you do not need to manage application permissions, and manual authorization is not applied. To restrict access to specific accounts or organizations, set Authorize to Manually.
Prerequisites
Before you begin, make sure you have:
Administrator access to the IDaaS console
Access the Authorize tab
All permission management for an application happens on the Authorize tab:
Go to the Application page and click the name of the application you want to manage.
Click Sign-In, then click the Authorize tab.
From this tab, you can view current permissions and grant or revoke permissions for accounts and organizations.
Granting permissions to an organization does not create individual permission records for the accounts under it. To check whether a specific account has access, go to Accounts > Accounts and Organizations, click the account, and open the Permissions tab.
Grant permissions
On the Authorize tab, click Authorize. The Authorize dialog box appears.
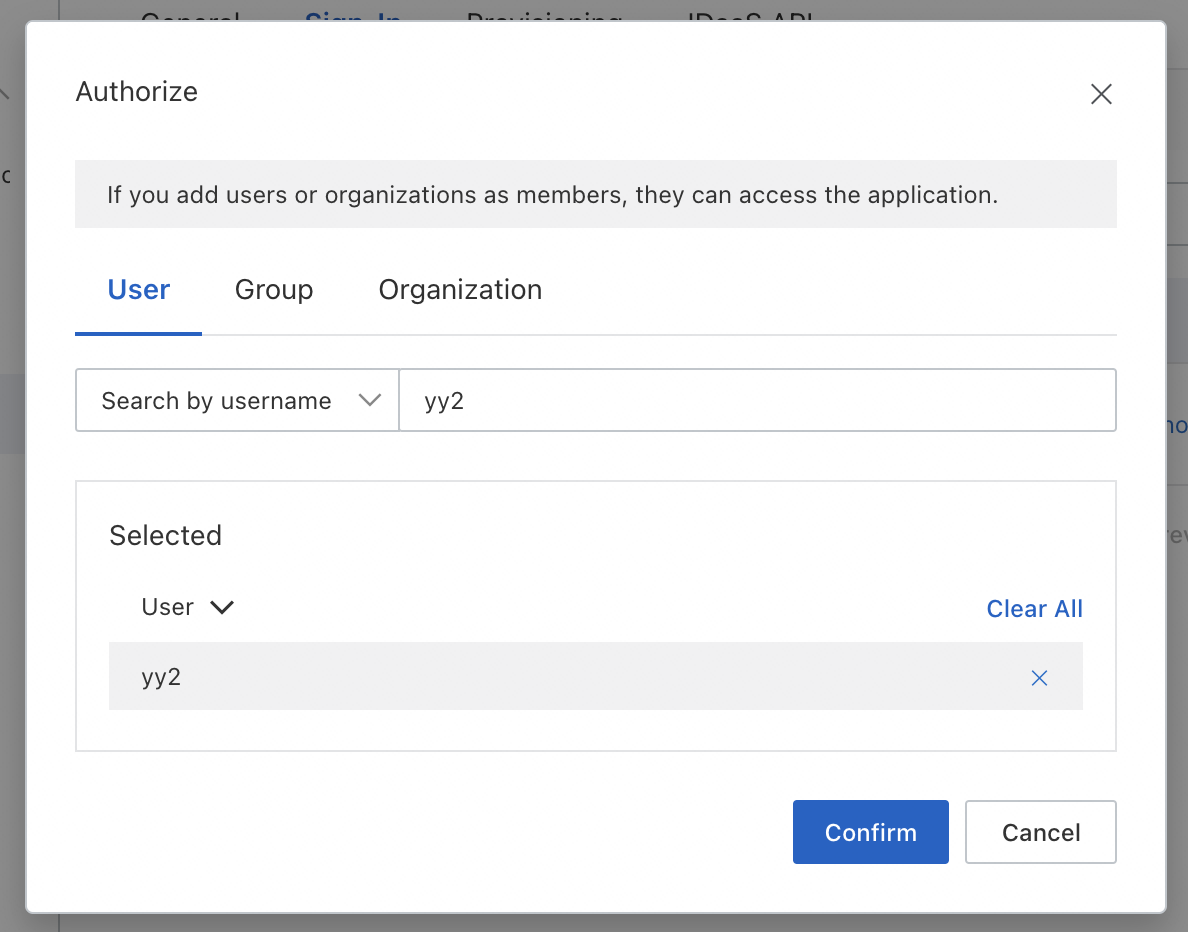
Search for the IDaaS organization or account you want to authorize.
Select the organization or account, then click Confirm.
The selected organization or account now has access to the application.
Revoke permissions
On the Authorize tab, locate the organization or account whose permissions you want to revoke, and revoke their permissions.
The organization or account no longer has access to the application.