This topic describes how to quickly build a ChatBI application using Dify and Hologres.
Background information
Dify is an open source large language model (LLM) application development platform. It combines the concepts of Backend as a Service and LLMOps, which allows developers to quickly build production-grade generative AI applications. Non-technical staff can also participate in defining AI applications and performing data operations.
Prerequisites
-
Dify 1.2.0 or later is deployed. For more information, see Dify.
-
The data for Hologres is prepared. The operation details are as follows:
-
Create a user and grant the user permissions to perform operations on the target database. For more information, see Create a custom user and Grant permissions to a user.
-
Prepare business data. This topic uses the TPC-H 10 GB public dataset of Hologres as an example. For more information about how to import a public dataset, see Import a public dataset with one click.
Precautions
Dify accesses the Hologres instance through the configured user. Note the following:
-
Resource isolation: Use Serverless Computing for resource isolation.
-
Permission isolation: Grant only query permissions to the user. For more information about access control for ChatBI, see the official Dify documentation.
Procedure
-
Install the hologres_text2data and model tools. In this example, the Qwen plug-in is used to provide the model service.
On the Dify platform, click Plugins, click Explore Marketplace, search for hologres_text2data and tongyi, and then click Install.
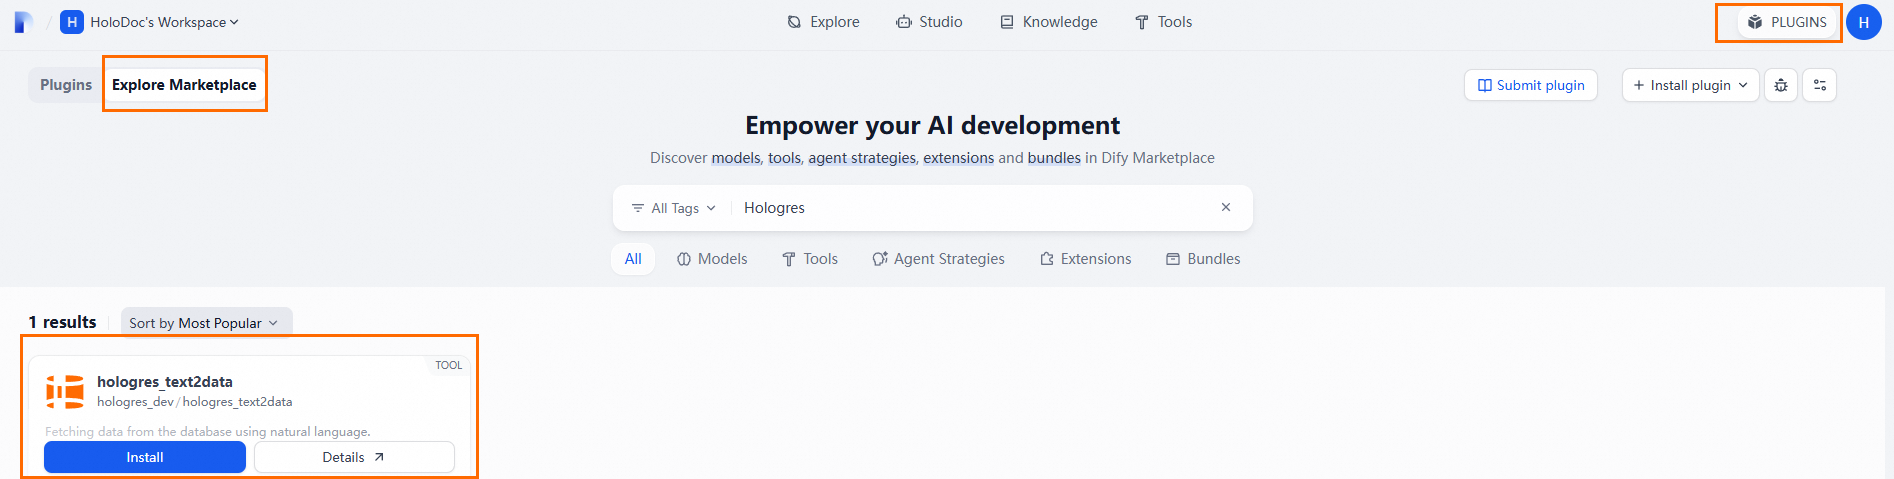 Note
NoteThe hologres_text2data plug-in is published to the official Dify marketplace and is open-sourced on GitHub.
-
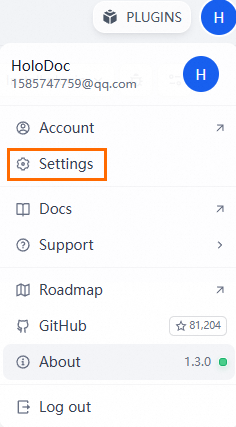
Configure the model provider.
-
Click your account icon, click Settings, and then go to the Account page.
-
In the navigation pane on the left, click Model Providers.
-
Click Settings next to Qwen, and in the Add Qwen dialog box, enter the API Key.
In the Add Qwen dialog box, you can click Get API Key From Alibaba Cloud Model Studio to obtain an API key. For more information, see Make your first call to the Qwen API.
-
Click Save to complete the configuration.
-
-
Import a DSL file to build a ChatFlow.
-
On the Dify platform, choose Studio from the menu bar, and then click Import DSL file.

-
In the dialog box that appears, upload the DSL file Hologres ChatBI with Holo Plugin-250422-v1.yml.
-
Click Create to complete the upload.
After the upload is complete, the system generates a default workflow. This workflow uses the Qwen-Max-Latest model from Model Studio. For more information about models, see Model list.

-
-
On the Orchestration page of the target ChatFlow, click the hologres_text2data and hologres_execute_sql nodes to configure the Hologres parameters.
Parameter Name
Description
Database IP/Domain Name
The endpoint of the Hologres instance. Example:
hgprecn-cn-xxxk3ovx003-cn-hangzhou.hologres.aliyuncs.com.Log on to the Hologres console. In the navigation pane on the left, choose Instances. Click the ID of the target instance. In the Network Information section of the Instance Details page, obtain the endpoint. For more information, see Endpoints.
Database Port
The port number. The default value is 80.
Database Name
The name of the created database.
Log on to the Hologres console. In the navigation pane on the left, choose Instances. Click the ID of the target instance to go to the Instance Details page. Click Database Management. On the Database Authorization page, obtain the database name.
Username
The name of the created user. The format is
BASIC$<name>.Log on to the Hologres console. In the navigation pane on the left, choose Instances. Click the ID of the target instance to go to the Instance Details page. Click Account Management. On the Users page, obtain the username. For more information, see User management.
Password
The password that corresponds to the user.
-
After the configuration is complete, click in the upper-right corner.
-
After the application is published, click in the upper-right corner to open the ChatBI application and start a chat.