By default, Managed Service for Grafana assigns each workspace a system-generated private domain name. To let users in your VPC access the workspace through a memorable, organization-specific URL, you can map the workspace to a custom private domain name using one of three methods.
Choose a method
Pick the method that matches your protocol and infrastructure requirements:
| Method | Protocol | Infrastructure | Best for |
|---|---|---|---|
| Private DNS (CNAME) | HTTP | Private DNS (PrivateZone) only | Quick setup when HTTPS is not required |
| NGINX reverse proxy | HTTPS | ECS + NGINX + Private DNS | Full control over TLS termination and proxy configuration |
| ALB | HTTPS | ALB + Private DNS | Managed load balancing with built-in certificate management |
Prerequisites
Before you begin, make sure that you have:
A Managed Service for Grafana workspace with the private domain name enabled (see Enable and retrieve the private domain name)
The private domain name of the workspace (see Enable and retrieve the private domain name)
Private DNS activated (required for all methods)
(Method 2) An ECS instance in the same VPC, with an SSL certificate for your custom domain
(Method 3) An ALB instance in the same VPC, with an SSL certificate
Enable and retrieve the private domain name
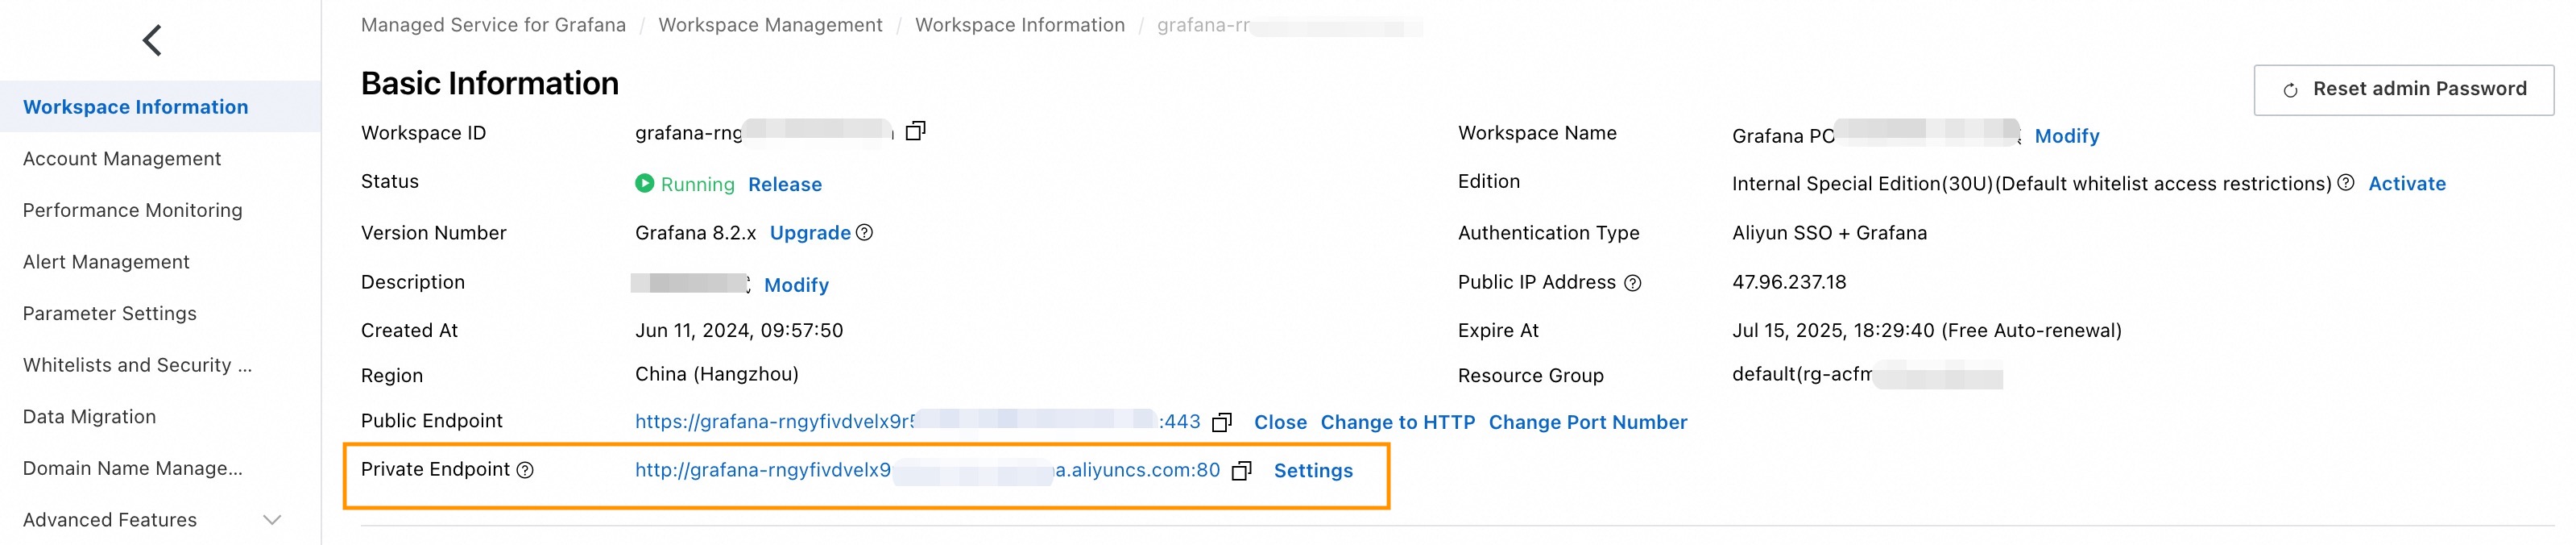
Log on to the Managed Service for Grafana console and go to the Workspace Information page.
In the Basic Information section, enable the private domain name.
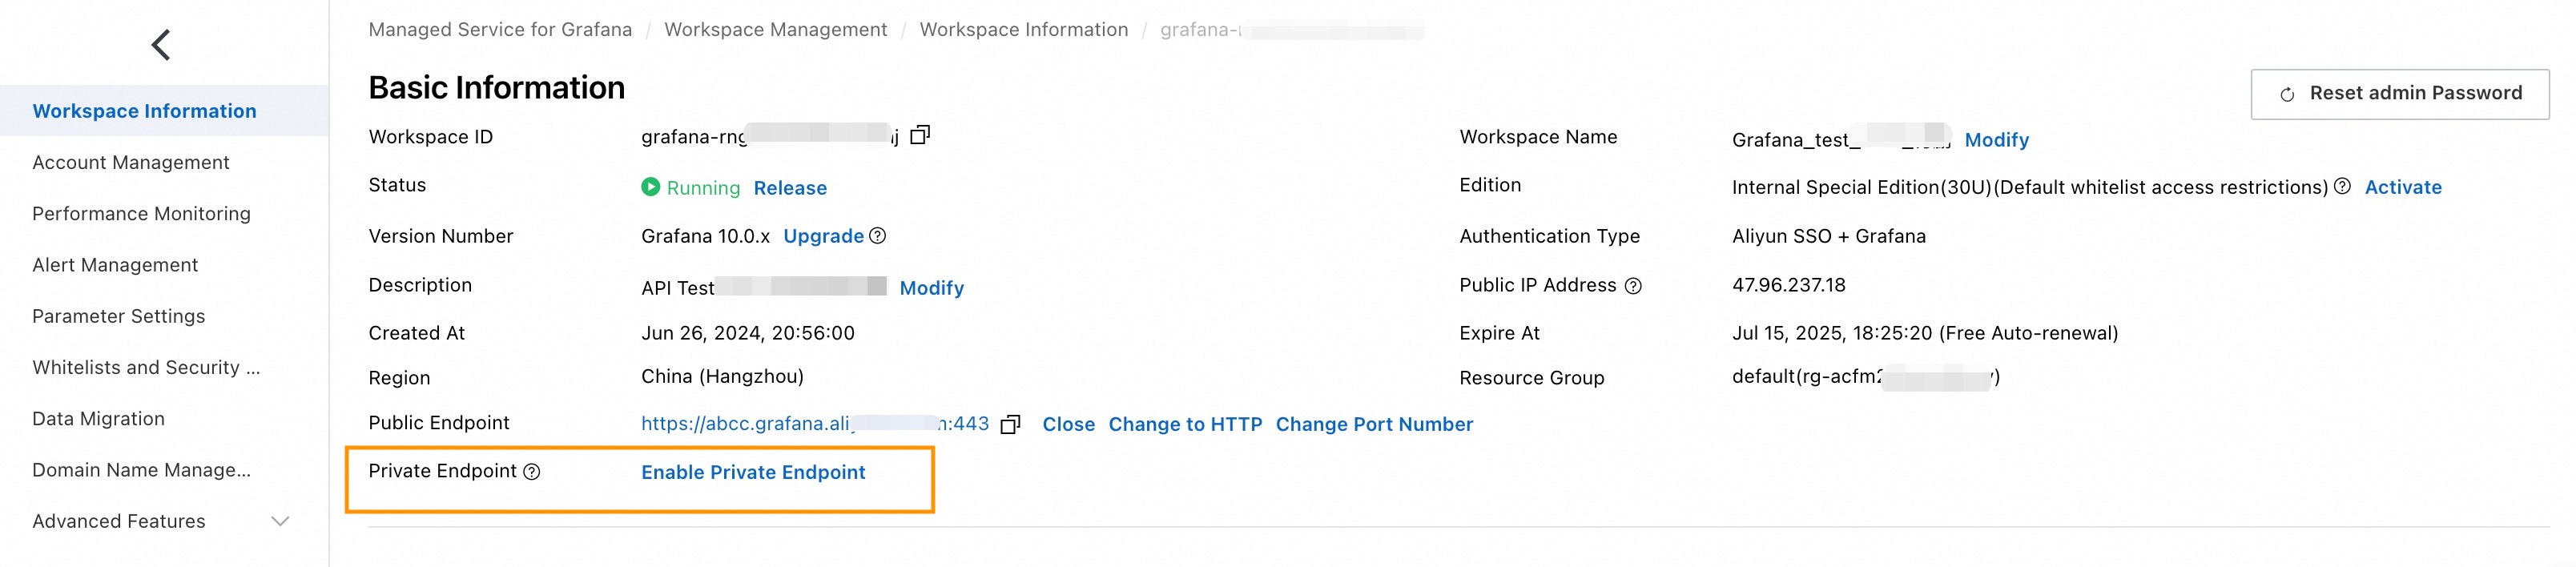
Copy the private domain name displayed on the page. This value is required in later steps.
Set up an HTTP private domain name
Use Private DNS (PrivateZone) to create a CNAME record that points your custom domain to the Grafana workspace's private domain name.
Create a Private DNS zone
Log on to the Alibaba Cloud DNS console.
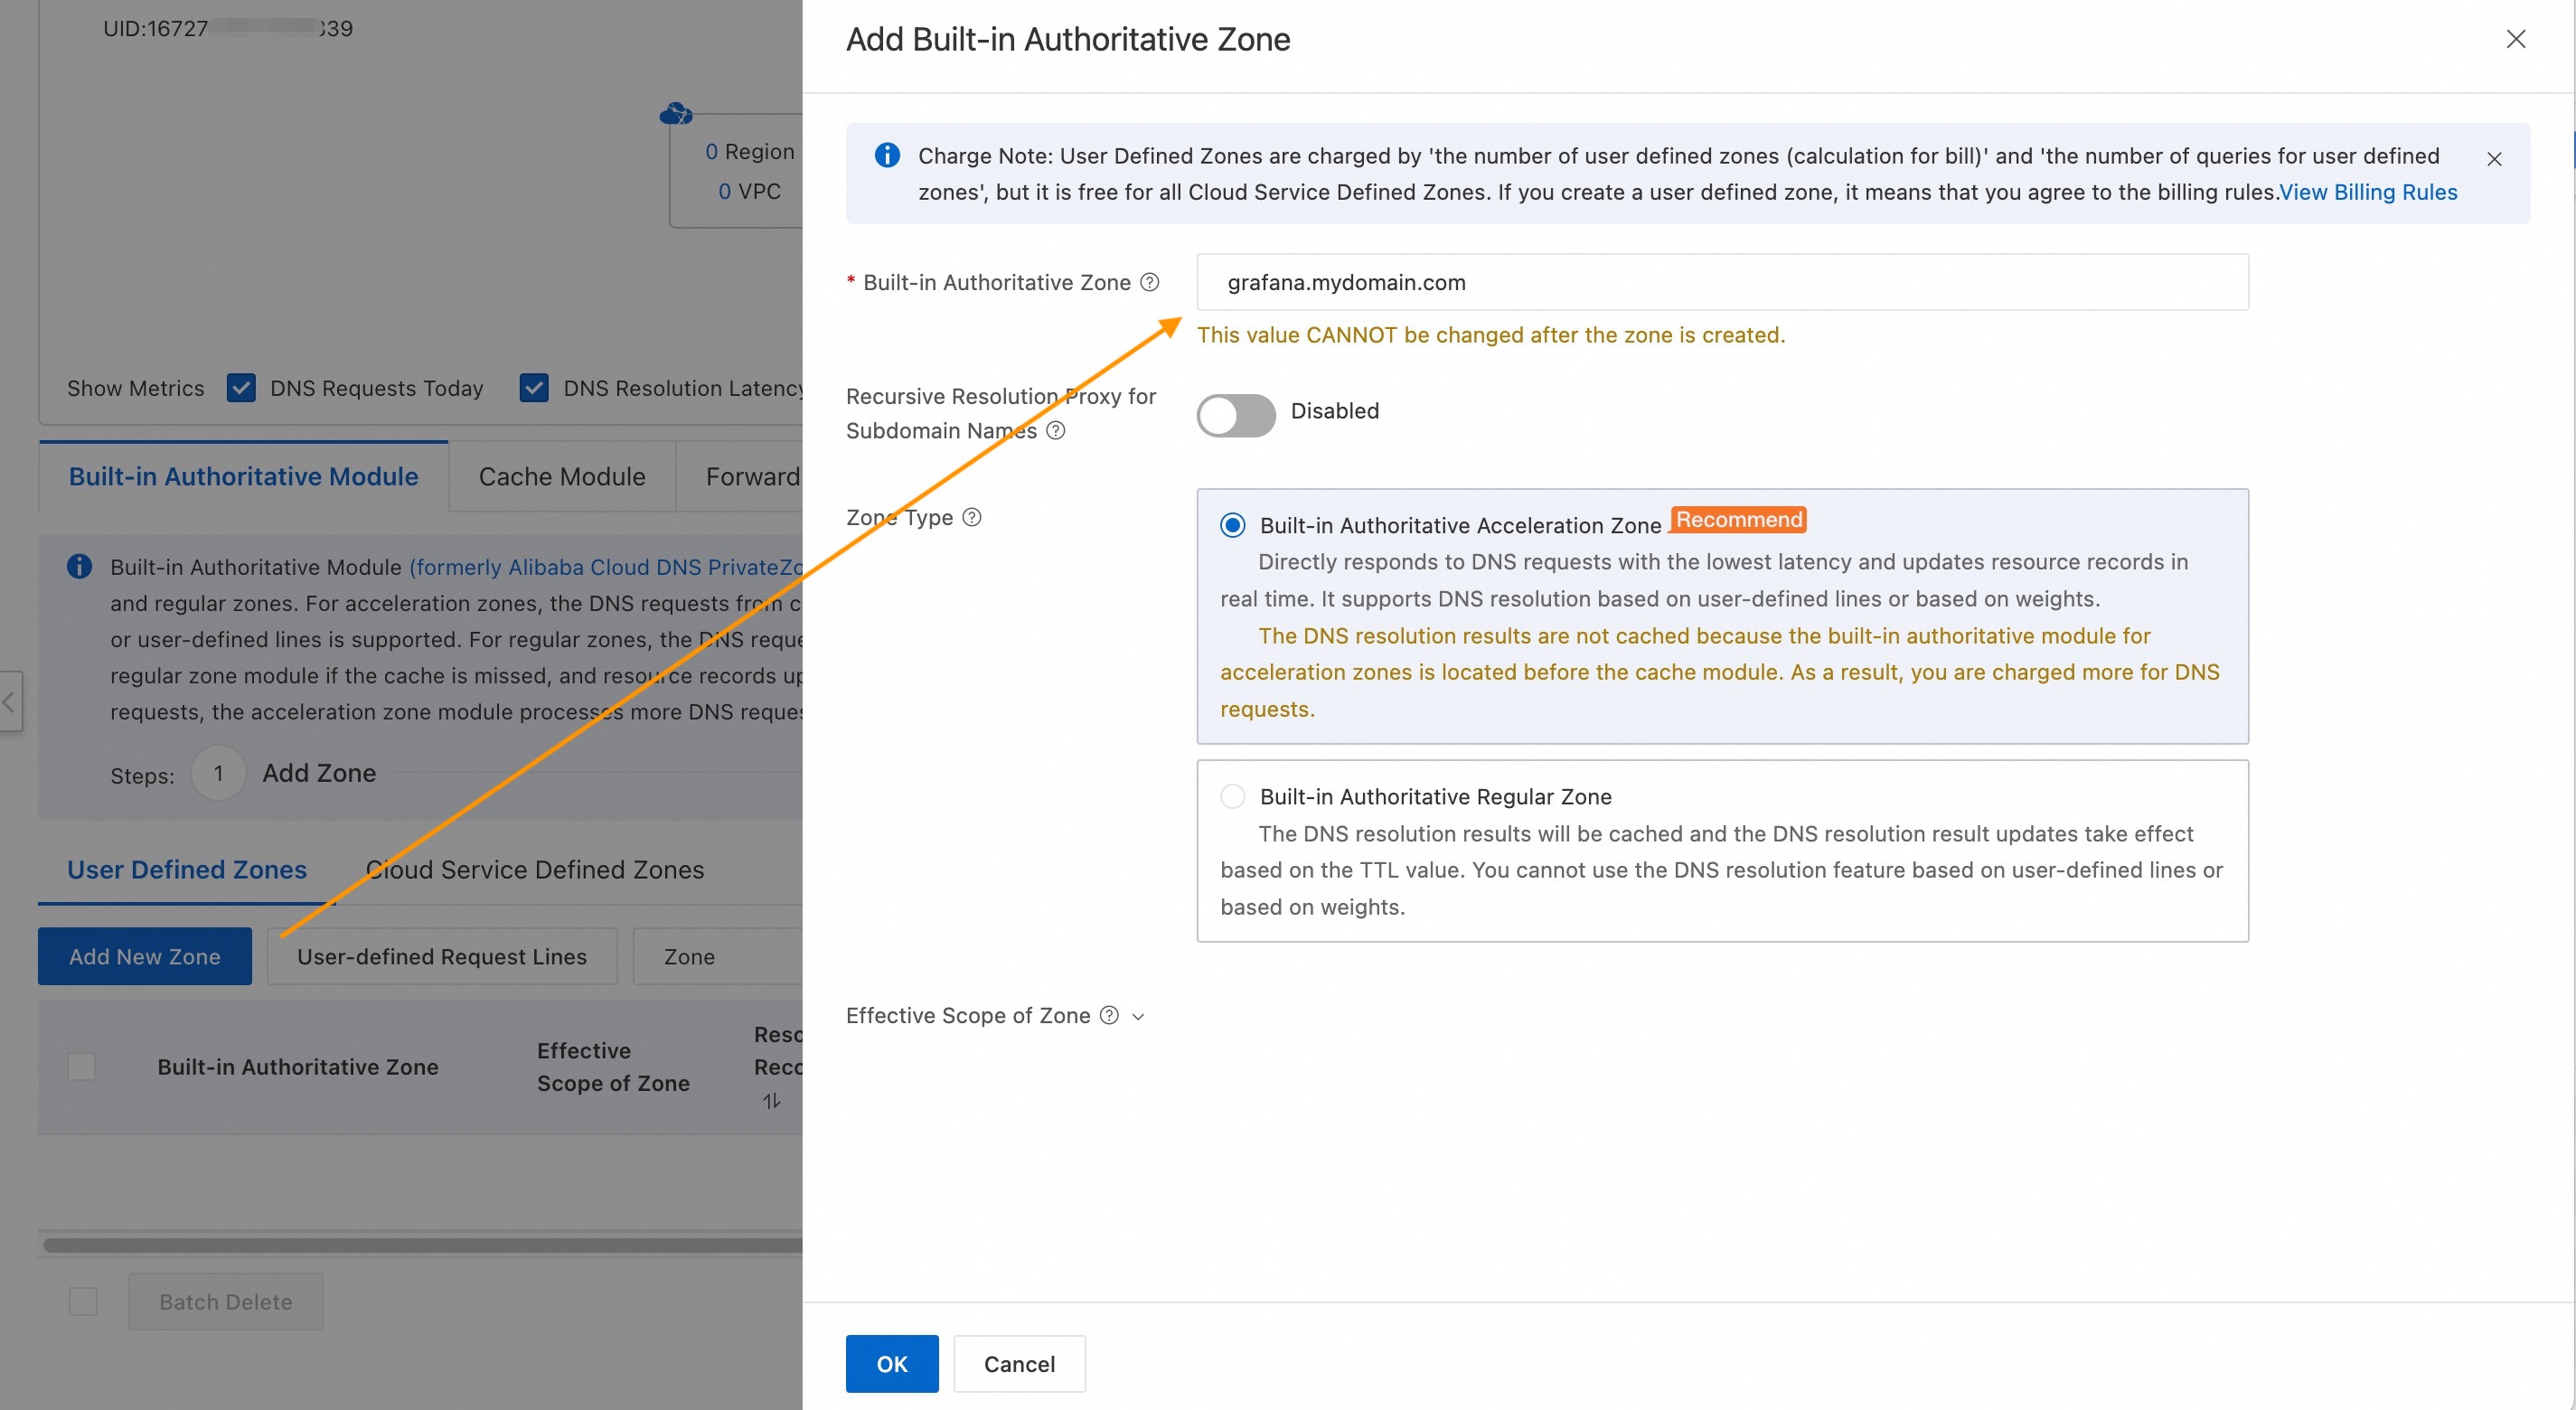
On the Private DNS (PrivateZone) page, click Add New Zone.
Set the zone type to Built-in Authoritative Zone and click OK.
Add a CNAME record
On the User Defined Zones tab, click the zone you created.
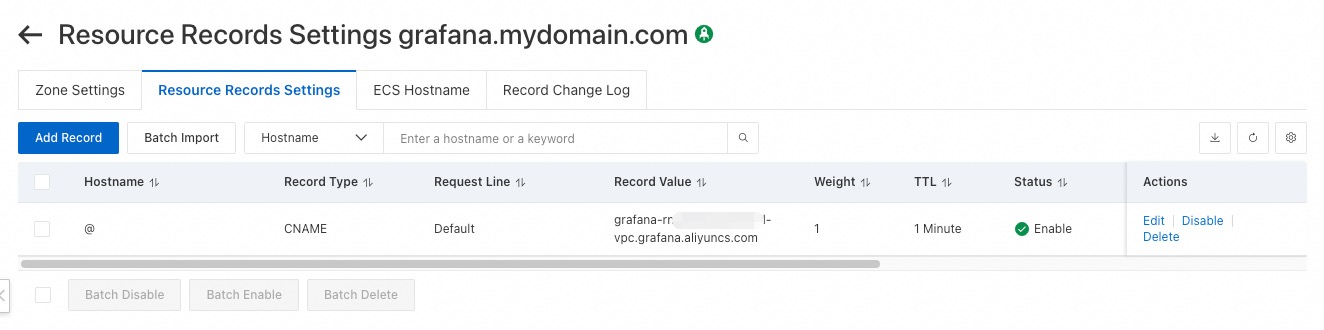
On the Resource Records Settings tab, click Add Record and configure the following parameters:
Parameter Description Example Record Type Select CNAME to point your domain to another domain name. CNAME Hostname Enter the domain name prefix. Use @for the root domain.@ Request Line Select Default. Default Record Value Enter the private domain name of the Grafana workspace. Set Weight to 1. grafana-cn-kjp**-vpc.grafana.aliyuncs.comTTL Select 1 Minute. 1 Minute 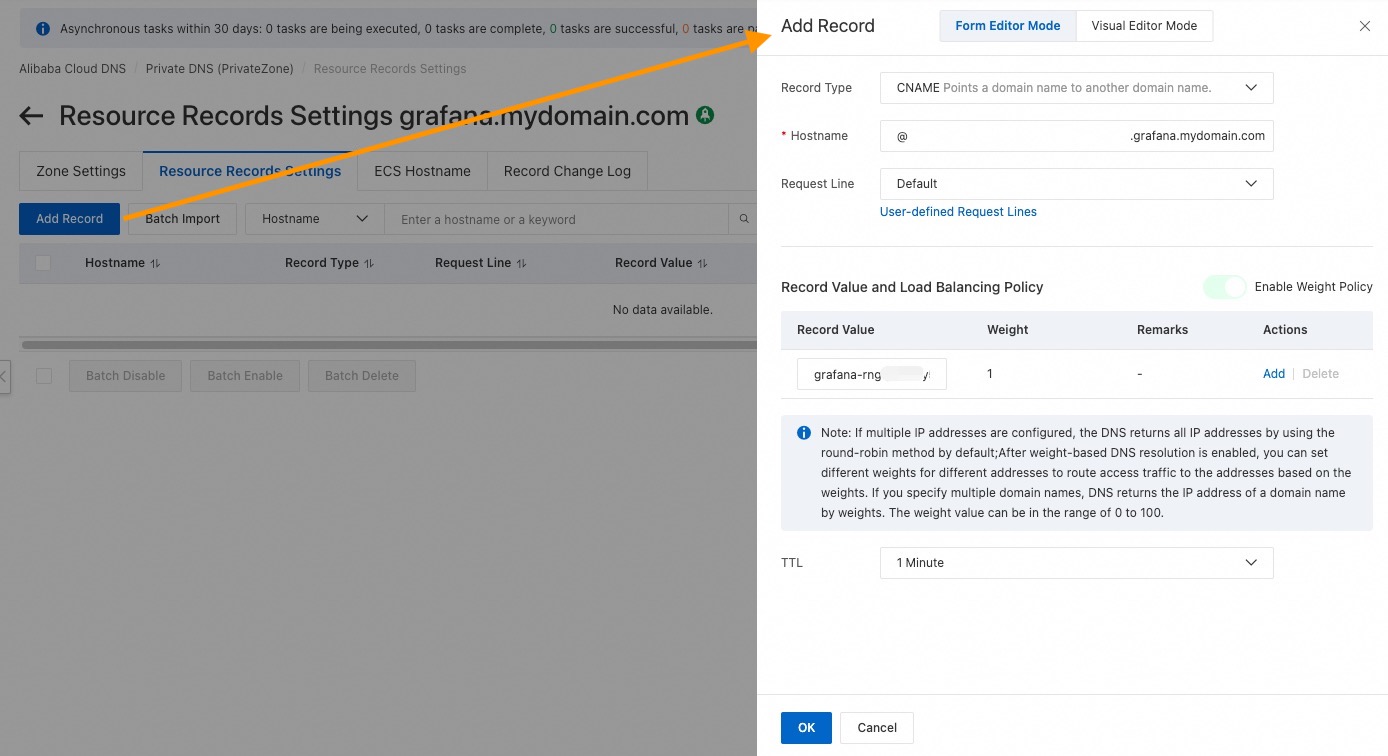
In the Change Resource Record Confirmation dialog, click OK.
Set the effective scope
Return to the Private DNS (PrivateZone) page. Find the zone and click Effective Scope Settings in the Actions column.
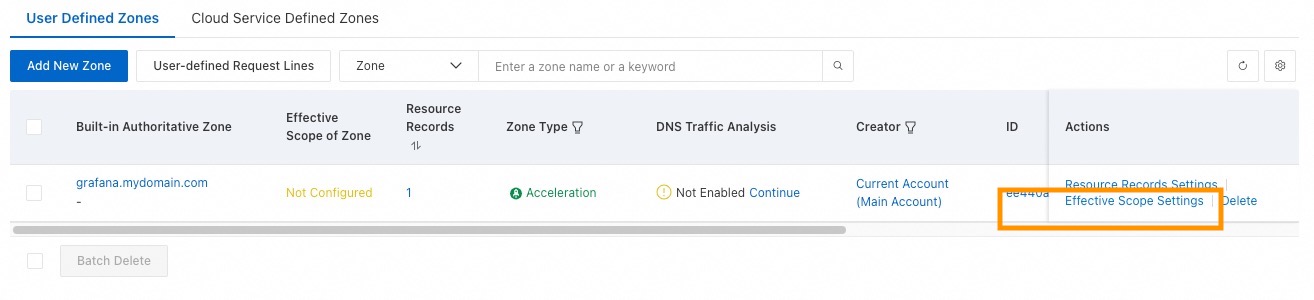
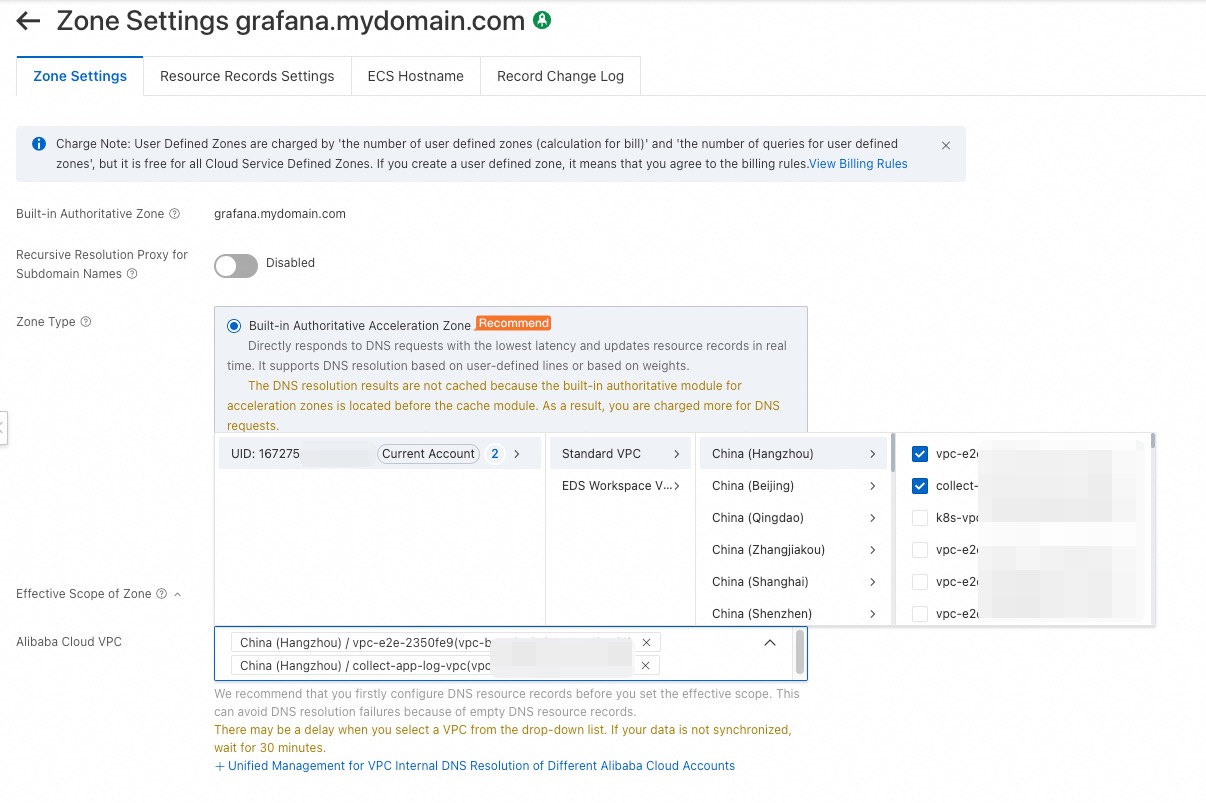
On the Zone Settings tab, select the VPC where the domain name should take effect and click OK.
Verify the domain name
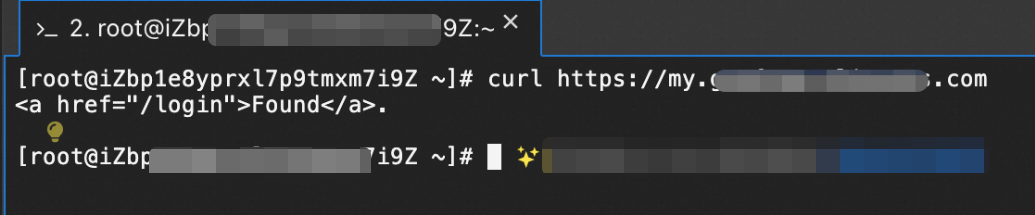
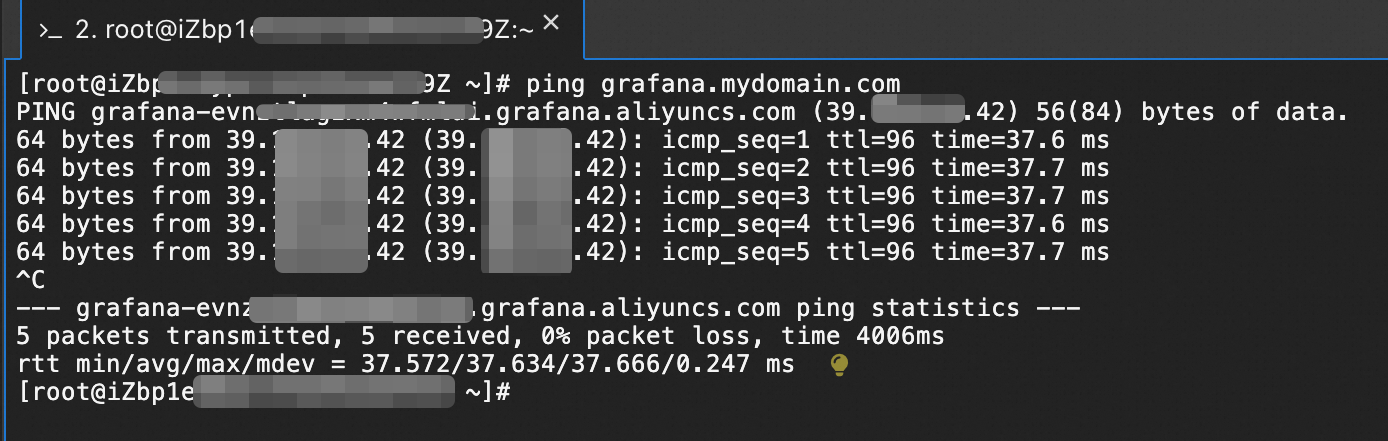
From an ECS instance in the selected VPC, ping the custom domain or access it in a browser:
ping grafana.mydomain.comOr open http://grafana.mydomain.com in a browser.
Set up an HTTPS private domain name with NGINX
Deploy NGINX as a reverse proxy on an ECS instance to terminate TLS and forward requests to the Grafana workspace over HTTP.
Install NGINX
Download and extract NGINX on the ECS instance:
   wget https://nginx.org/download/nginx-1.24.0.tar.gz
   cp nginx-1.24.0.tar.gz /usr/local/nginx/
   cd /usr/local/nginx/
   tar -zxvf nginx-1.24.0.tar.gz
   cd nginx-1.24.0/
Install the SSL and build dependencies:
yum -y install make zlib-devel gcc-c++ libtool openssl openssl-develConfigure the build with SSL support:
   ./configure --user=nobody --group=nobody --prefix=/usr/local/nginx \
     --with-http_stub_status_module --with-http_gzip_static_module \
     --with-http_realip_module --with-http_sub_module --with-http_ssl_module
Compile and install:
   make
   make install
Prepare the SSL certificate
Copy your certificate and private key to the ECS instance:
/usr/local/nginx/ssl/cert.pem
/usr/local/nginx/ssl/cert.key
Configure NGINX
Edit /usr/local/nginx/conf/nginx.conf and add the following server block:
server {
    listen       443 ssl;
    server_name  <your-custom-domain>;

    ssl_certificate      /usr/local/nginx/ssl/cert.pem;
    ssl_certificate_key  /usr/local/nginx/ssl/cert.key;

    ssl_session_cache    shared:SSL:1m;
    ssl_session_timeout  5m;

    ssl_ciphers  HIGH:!aNULL:!MD5;
    ssl_prefer_server_ciphers  on;

    location / {
        add_header Access-Control-Allow-Origin *;
        add_header Access-Control-Allow-Methods 'GET, POST, OPTIONS';
        add_header Access-Control-Allow-Headers 'DNT,X-Mx-ReqToken,Keep-Alive,User-Agent,X-Requested-With,If-Modified-Since,Cache-Control,Content-Type,Authorization';
        proxy_set_header Host $host;
        proxy_set_header X-Real-IP $remote_addr;
        proxy_set_header X-Forwarded-For $proxy_add_x_forwarded_for;
        proxy_pass http://<grafana-private-domain>:80;
    }
}
Replace the following placeholders with your actual values:
| Placeholder | Description | Example |
|---|---|---|
<your-custom-domain> | The custom domain name for your Grafana workspace | grafana.mydomain.com |
<grafana-private-domain> | The private domain name of the Grafana workspace | grafana-cn-kjp4*******-vpc.grafana.aliyuncs.com |
Validate and start NGINX
Test the configuration:
NoteIf the test fails, check for common issues: certificate file not found, incorrect certificate format, configuration format not compliant with NGINX requirements, line break comments not valid, or separators containing Chinese characters.
   cd /usr/local/nginx/sbin/
   ./nginx -t
Start NGINX:
./nginx
Configure domain name resolution
Follow the Private DNS setup in Set up an HTTP private domain name with the following difference: set Record Type to A and set Record Value to the private IP address of the ECS instance (instead of a CNAME record pointing to the Grafana workspace domain).
After the DNS record takes effect, open https://grafana.mydomain.com from an ECS instance in the target VPC to verify the setup.
Set up an HTTPS private domain name with ALB
Use Application Load Balancer (ALB) to terminate TLS and forward traffic to the Grafana workspace. ALB handles certificate management and eliminates the need for a self-managed proxy.
Get the Grafana workspace IP address
Ping the private domain name to get the IP address:
ping grafana-cn-kjp4*******-vpc.grafana.aliyuncs.comThe private IP address of a Grafana workspace generally does not change unless the workspace is stopped or the private domain name is disabled.
Add an HTTPS listener
Log on to the SLB console and navigate to ALB > Instances.
Find the ALB instance and click Create Listener in the Actions column.

In the Configure Listener step, set the listener protocol to HTTPS and port to 443.

In the Configure SSL Certificate step, select an SSL certificate. To create a new certificate, click Create SSL Certificate.
In the Select Server Group step, configure the following parameters: Click Add Server to add the private IP address obtained in the previous section, with port 80.
Parameter Description Example Server Group Type Select IP Type. IP Type Server Group Name Enter a name for the server group. Grafana Service Click Submit.
Verify that the listener status is Normal in the listener list.
For detailed instructions, see Add an HTTPS listener.
Configure domain name resolution
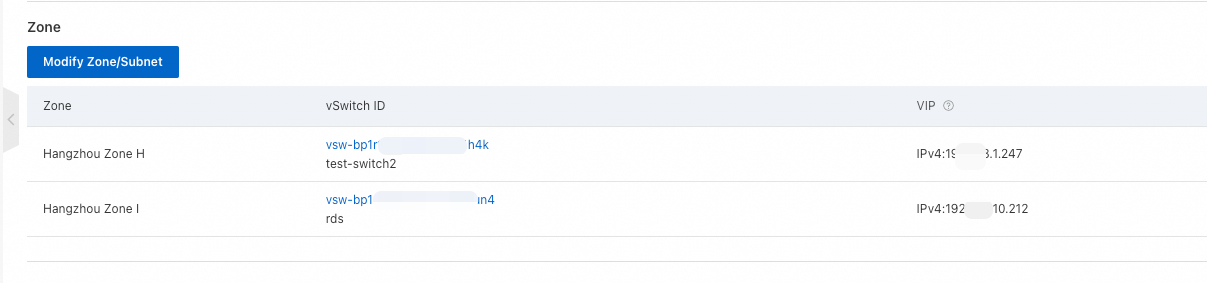
On the ALB instance details page, copy the VIP (virtual IP address).
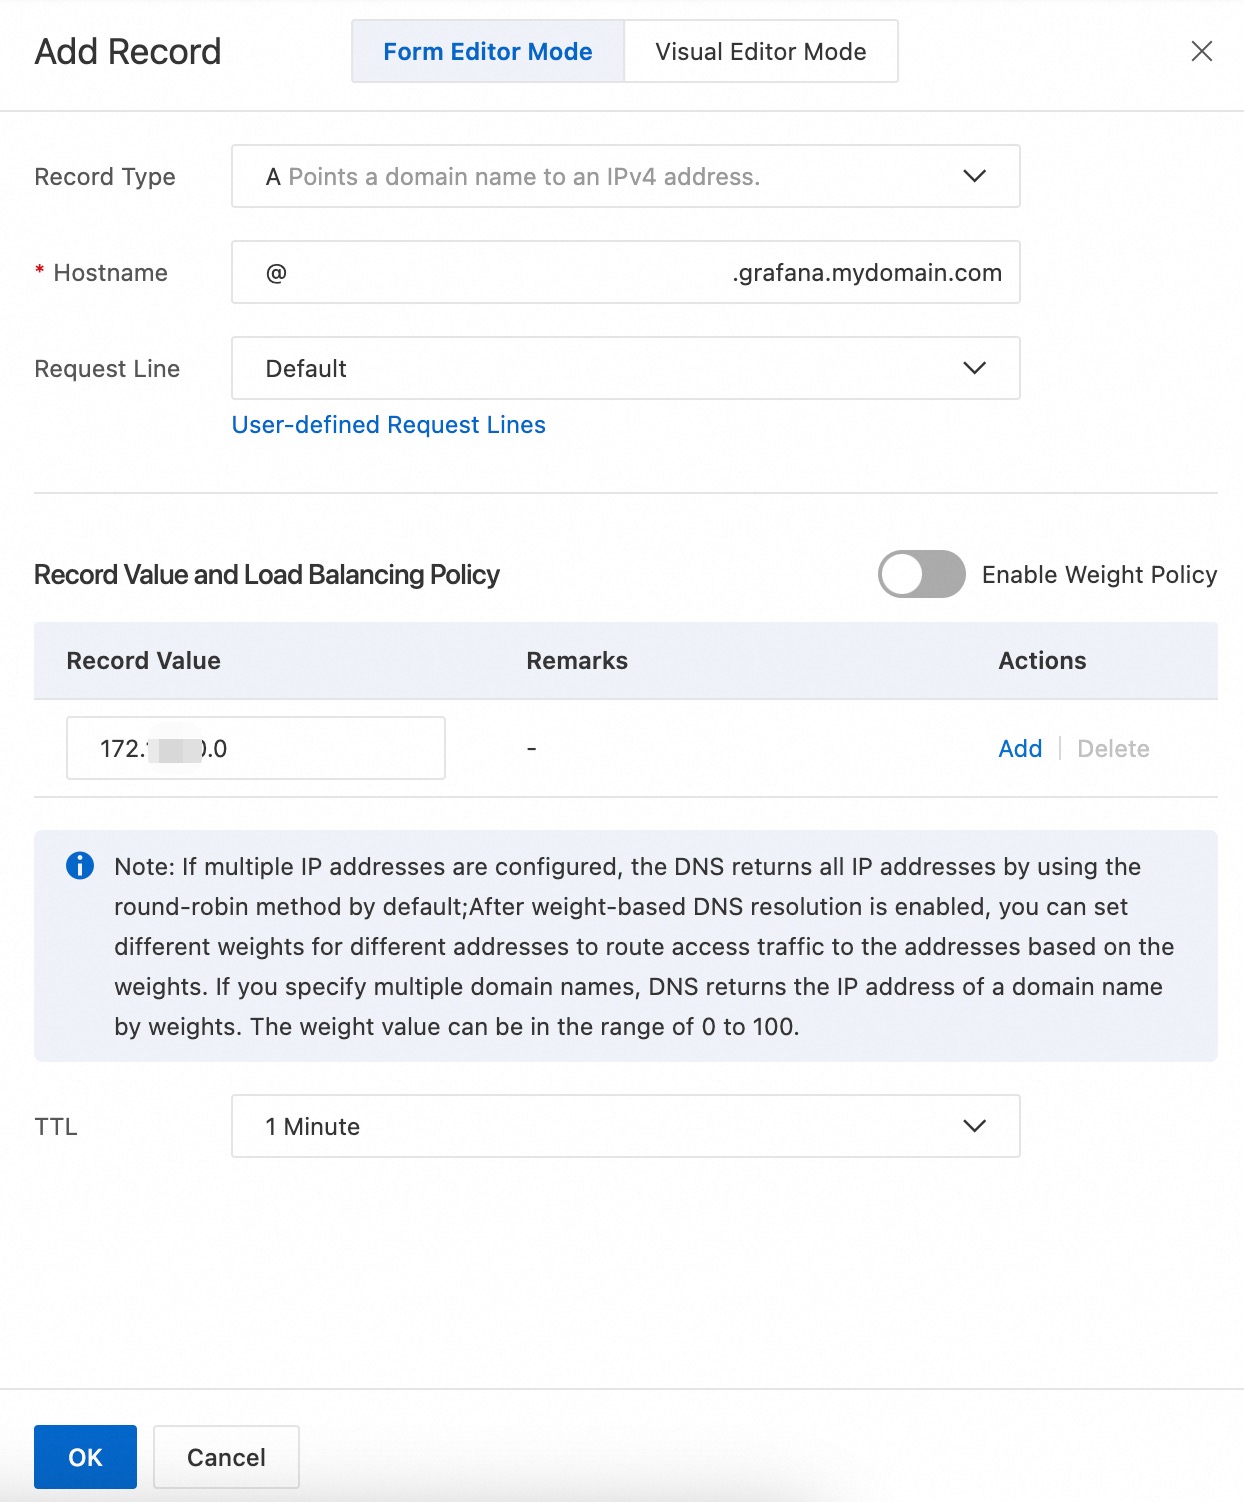
Follow the Private DNS setup in Set up an HTTP private domain name with the following differences:
Set Record Type to A.
Set Hostname to
@(or adjust based on your domain structure).Set Record Value to the ALB VIP.
Set the effective scope to include the target VPC.
Verify the domain name
Confirm that the custom domain resolves correctly and the HTTPS connection works: