In a data-driven world, the seamless operation of search and analytics engines like Elasticsearch is crucial for businesses. Elasticsearch, a distributed, RESTful search and analytics engine, is at the core of numerous industry-specific applications, providing powerful full-text search, data analytics, and scalability. As businesses evolve, migration to flexible, cost-effective cloud services becomes inevitable. One such transition entails migrating Elasticsearch index data from Amazon's OpenSearch Service to Alibaba Cloud Elasticsearch. This guide will walk you through the process step-by-step, ensuring a smooth transition while leveraging the powerful snapshot mechanism.
Alibaba Cloud Elasticsearch: Please Click here, Embark on Your 30-Day Free Trial !!
The choice to migrate to Alibaba Cloud Elasticsearch often comes down to specific business requirements such as cost-efficiency, enhanced features. Alibaba Cloud offers dedicated features like enterprise-class access control, security monitoring, alerting, and reporting capabilities, which can be a game-changer for businesses looking to scale their search services with ease.
Before delving into the migration process, ensure the version of your destination Elasticsearch cluster on Alibaba Cloud is the same or newer than your source AWS OpenSearch Service. This compatibility is vital for the restoration of snapshots, which forms the basis of the migration.
This solution is not limited to cloud service providers but depends on the Elasticsearch snapshot mechanism. For example, you can use the Data Online Migration service provided by Alibaba Cloud to migrate Elasticsearch data in snapshots from a Tencent Cloud Object Storage (COS) bucket to an Alibaba Cloud Object Storage Service (OSS) bucket. Then, restore the data to the destination cluster. For information about how to migrate data from a Tencent COS bucket to an Alibaba Cloud OSS bucket, see Migrate data. For information about how to restore data in snapshots, see Create manual snapshots and restore data from manual snapshots.
The version of the destination Elasticsearch cluster must be the same as or later than the source Elasticsearch object. For information about version compatibility, see Version compatibility of data restoration from snapshots.
The following figure shows the reference architecture for the migration.

To migrate data from an Amazon OpenSearch Service domain to an Alibaba Cloud Elasticsearch cluster, perform the following steps:
1)Create a baseline index.
2)Process incremental snapshots on a regular basis. Repeat the preceding steps to restore data from incremental snapshots.
3)Identify the final snapshot and perform a service switchover.
You have completed the following operations:
1)Create an Amazon OpenSearch Service domain of Elasticsearch 5.5.2 in the Singapore region.For more information, see Create an Amazon OpenSearch Service domain.
2)Create an Alibaba Cloud Elasticsearch V5.5.3 cluster in the China (Hangzhou) region.For more information, see Create an Alibaba Cloud Elasticsearch cluster.
3)Create an OSS bucket.In this example, an OSS bucket is created in the China (Hangzhou) region. The storage class of the bucket is Standard, and the access control list (ACL) of the bucket is Private. Default settings are used for other parameters. For more information, see Create buckets.
4)Prepare the index whose data you want to migrate. The movies index is used in this example.
Amazon OpenSearch Service automatically creates snapshots for the primary index shards in a domain every day and stores them in a pre-configured S3 bucket. These snapshots are retained for a maximum of 14 days free of charge. You can use these snapshots to restore data to the domain. However, you cannot use them to migrate data to other domains. To migrate data to another domain, you must use manual snapshots stored in your S3 bucket. Standard S3 charges apply to manual snapshots.
To create manual snapshots and restore data from the snapshots, you must use AWS Identity and Access Management (IAM) and S3. Before you create snapshots, perform the operations that are listed in the following table.
| Operation | Description |
|---|---|
| Create an S3 bucket | The bucket is used to store the manual snapshots of the Amazon OpenSearch Service domain. |
| Create an IAM role | The role is used to grant permissions on Amazon OpenSearch Service. When you add a trust relationship for the role, you must specify Amazon OpenSearch Service in the Principal element. This role is also required when you register a snapshot repository with Amazon OpenSearch Service. Only IAM users that assume this role can register the snapshot repository. |
| Create an IAM policy | This policy specifies the actions that S3 can perform on the S3 bucket. The policy must be attached to the IAM role that is used to grant permissions on Amazon OpenSearch Service. You must specify the S3 bucket in the Resource element of the policy. |
1)Create an S3 bucket
You need an S3 bucket to store manual snapshots. Take note of its Amazon Resource Name (ARN). The ARN is used by the following items:
2)Resource element in the IAM policy that is attached to your IAM role
3)Python client that is used to register a snapshot repository
The following code provides the ARN of an S3 bucket:
arn:aws:s3:::eric-es-index-backups4)Create an IAM role
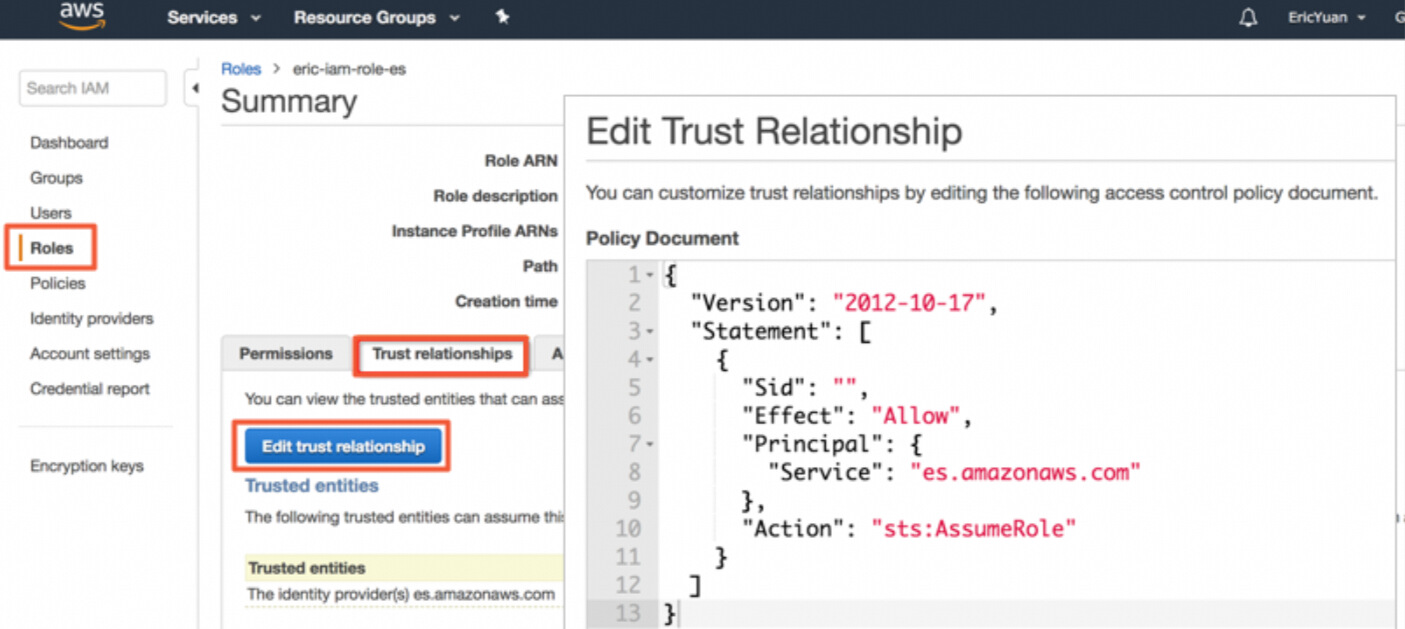
You must have an IAM role, for which Amazon OpenSearch Service (es.amazonaws.com) is specified in the Service element in its trust relationship. Example:
{
  "Version": "2012-10-17",
  "Statement": [
    {
      "Sid": "",
      "Effect": "Allow",
      "Principal": {
        "Service": "es.amazonaws.com"
      },
      "Action": "sts:AssumeRole"
    }
  ]
}
You can view the trust relationship details in the IAM console.
Note
When you create a role in the IAM console, Amazon OpenSearch Service is not included in the Select role type drop-down list. You can select Amazon EC2 from the drop-down list and create the role as prompted. Then, change ec2.amazonaws.com in the trust relationship of the role to es.amazonaws.com.
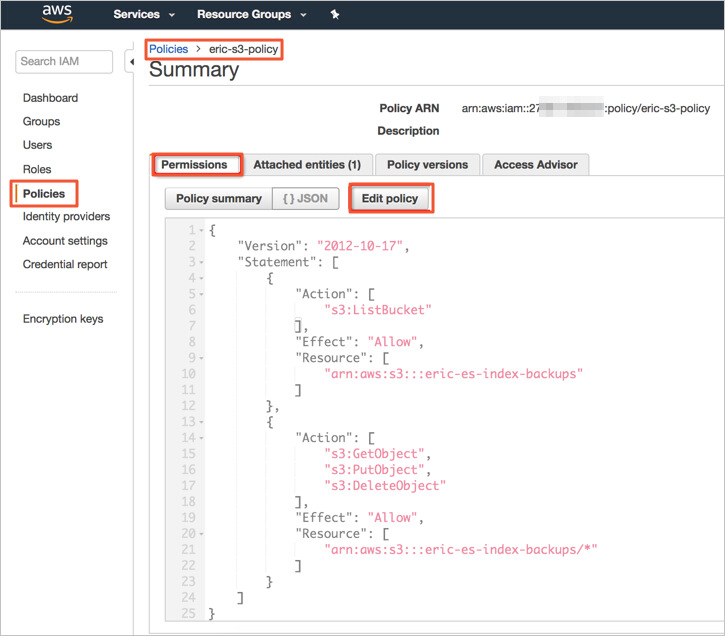
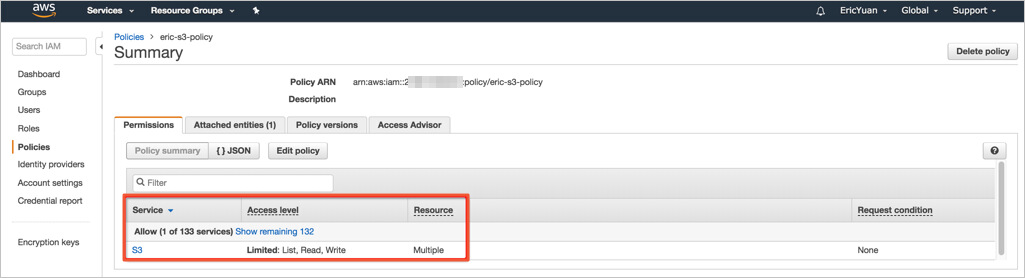
5)Create an IAM policy
You must attach an IAM policy to the IAM role. The policy specifies the S3 bucket that is used to store the manual snapshots of the Amazon OpenSearch Service domain. The following code shows a sample policy. In the policy, the ARN of the eric-es-index-backups bucket is specified.
{
    "Version": "2012-10-17",
    "Statement": [
        {
            "Action": [
                "s3:ListBucket"
            ],
            "Effect": "Allow",
            "Resource": [
                "arn:aws:s3:::eric-es-index-backups"
            ]
        },
        {
            "Action": [
                "s3:GetObject",
                "s3:PutObject",
                "s3:DeleteObject"
            ],
            "Effect": "Allow",
            "Resource": [
                "arn:aws:s3:::eric-es-index-backups/*"
            ]
        }
    ]
}
Copy the policy content to the Edit policy section.
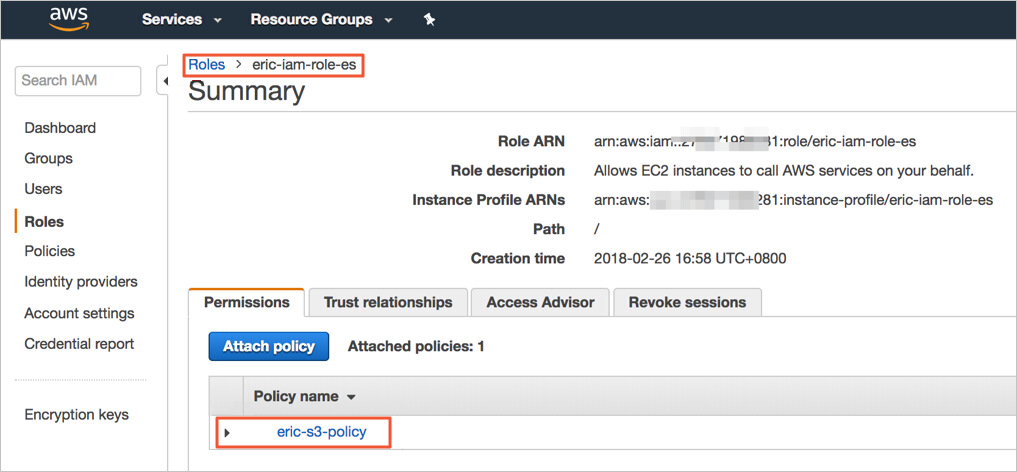
Check whether the policy is correct.
Attach the policy to the role.
You can create manual snapshots only after you register a snapshot repository with Amazon OpenSearch Service. Before you create manual snapshots, sign your AWS request to the user or role specified in the trust relationship of the IAM role. For more information, see Prerequisites for creating manual snapshots in an Amazon OpenSearch Service domain.
Important
You cannot use a cURL command to register a snapshot repository because the command does not support AWS request signing. Instead, use the sample Python client to register a snapshot repository.
1)Download the Sample Python Client file.
2)Modify the file.Change the values highlighted in yellow in the file based on actual conditions. Then, copy the content into a Python file named snapshot.py.The following table describes the parameters in the Sample Python Client file.
| Parameter | Description |
|---|---|
| region | The AWS region in which the snapshot repository is created. |
| host | The endpoint of the Amazon OpenSearch Service domain. |
| aws_access_key_id | The ID of your IAM credential. |
| aws_secret_access_key | The key of your IAM credential. |
| path | The path of the snapshot repository. |
| data | The value must include the name and ARN of the S3 bucket for the IAM role that you created in Prerequisites for creating manual snapshots in an Amazon OpenSearch Service domain .Important |
3)Install Amazon Web Services Library boto-2.48.0.The preceding sample Python client requires that you install the boto package of version 2.x on the computer where you register a snapshot repository.
If you want to enable server-side encryption with S3-managed keys for the snapshot repository, add "server_side_encryption": true to the settings JSON array.
If the S3 bucket resides in the ap-southeast-1 region, replace "region": "ap-southeast-1" with "endpoint": "s3.amazonaws.com".
# wget https://pypi.python.org/packages/66/e7/fe1db6a5ed53831b53b8a6695a8f134a58833cadb5f2740802bc3730ac15/boto-2.48.0.tar.gz#md5=ce4589dd9c1d7f5d347363223ae1b970
# tar zxvf boto-2.48.0.tar.gz
# cd boto-2.48.0
# sudo python setup.py install
4)Run the Python client to register the snapshot repository.
# python snapshot.py5)Log on to the Kibana console of the Amazon OpenSearch Service domain. In the left-side navigation pane, click Dev Tools. On the Console tab of the page that appears, run the following command to view the registration result:
GET _snapshot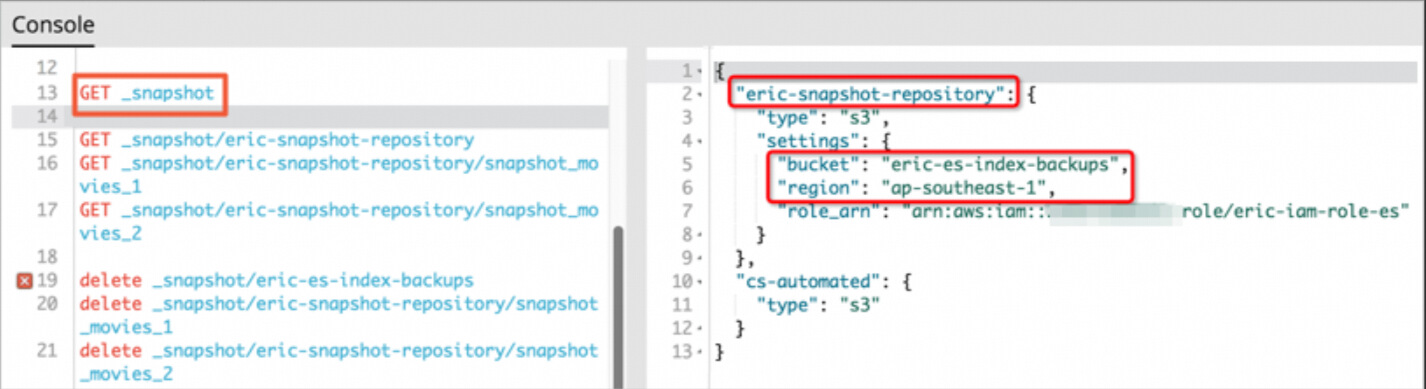
1)Create a snapshot in the Amazon OpenSearch Service domain. NoteYou can run the following commands in the Kibana console or by using cURL commands in the Linux or Mac OS X command line interface (CLI).
Create a snapshot named snapshot_movies_1 for the movies index in the eric-snapshot-repository snapshot repository.
PUT _snapshot/eric-snapshot-repository/snapshot_movies_1
{
"indices": "movies"
}
View the status of the snapshot.
GET _snapshot/ eric-snapshot-repository/snapshot_movies_1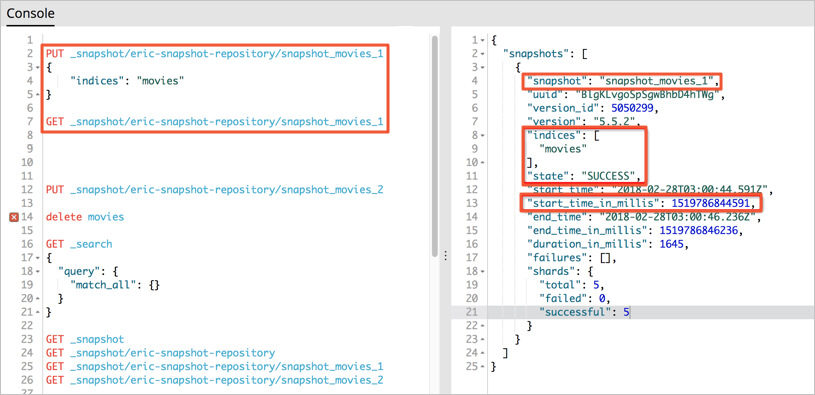
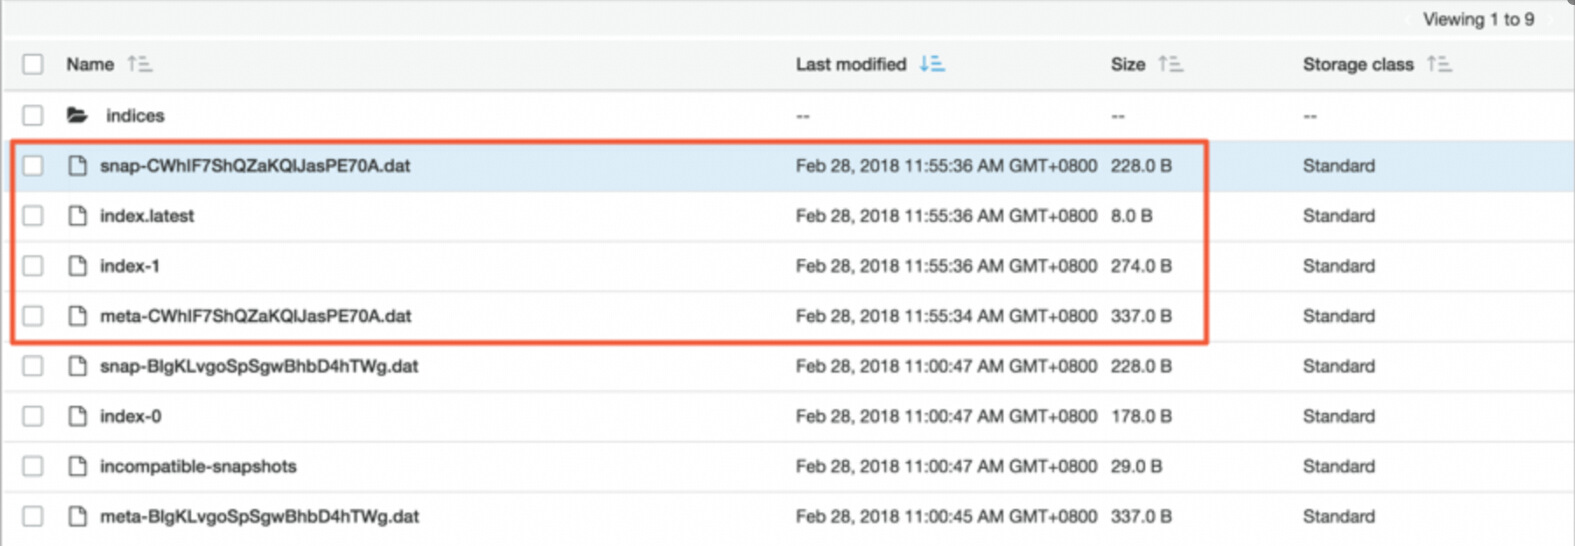
In the S3 console, view snapshot objects.

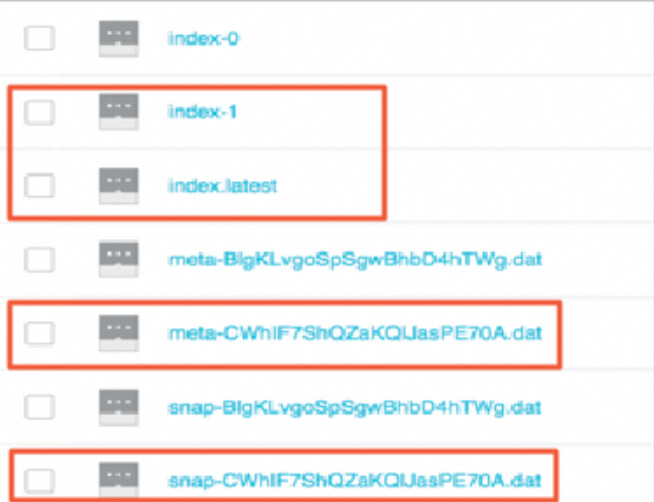
2)Transfer the created snapshot from the S3 bucket to the OSS bucket.For more information, see Migrate data from Amazon S3 to Alibaba Cloud OSS.After the snapshot is transferred, view the snapshot in the OSS console.

3)Restore data from the snapshot to the Alibaba Cloud Elasticsearch cluster.
Create a snapshot repository.Log on to the Kibana console of the Elasticsearch cluster. For more information, see Log on to the Kibana console. Then, in the left-side navigation pane, click Dev Tools. On the Console tab of the page that appears, run the following command to create a snapshot repository. The name of the snapshot repository must be the same as that of the snapshot repository registered with Amazon OpenSearch Service.
PUT _snapshot/eric-snapshot-repository
{
"type": "oss",
"settings": {
            "endpoint": "http://oss-cn-hangzhou-internal.aliyuncs.com",
            "access_key_id": "your AccessKeyID",
            "secret_access_key": "your AccessKeySecret ",
            "bucket": "eric-oss-aws-es-snapshot-s3",
            "compress": true
      }
}
View the status of the snapshot named snapshot_movies_1.
GET _snapshot/eric-snapshot-repository/snapshot_movies_1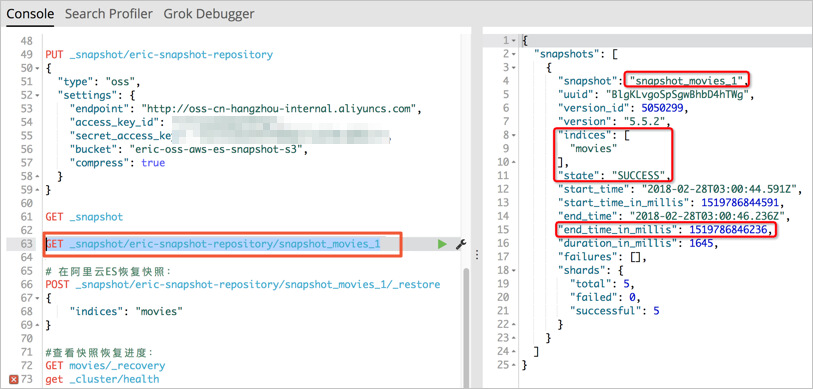
Note
Take note of the start time and end time of the snapshot creation operation. This record is used when you use ossimport to migrate data in incremental snapshots. Example:
- "start_time_in_millis": 1519786844591
- "end_time_in_millis": 1519786846236
4)Restore data from the snapshot.
POST _snapshot/eric-snapshot-repository/snapshot_movies_1/_restore
{
    "indices": "movies"
}
Run the following command to check the availability of the movies index:
GET movies/_recoveryAfter the command is successfully run, you can view three sets of data in the movies index. In addition, the data is the same as that in the Amazon OpenSearch Service domain.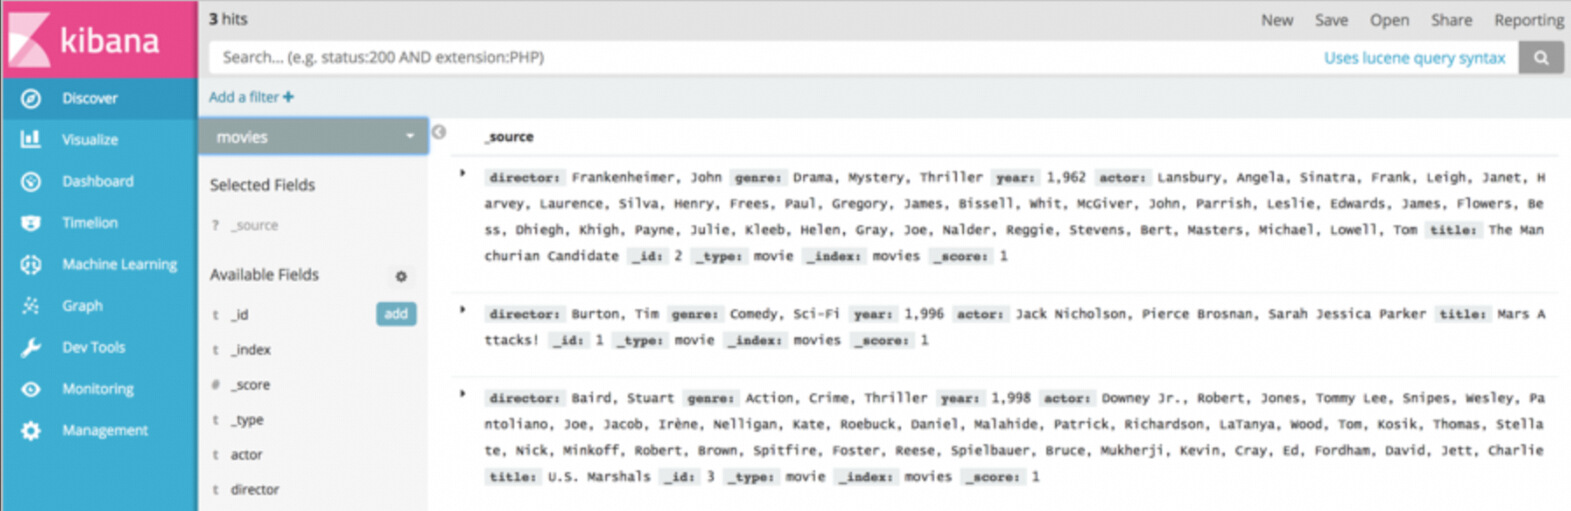
1)Insert data into the movies index in the Amazon OpenSearch Service domain.The movies index contains three sets of data. Insert another two sets of data.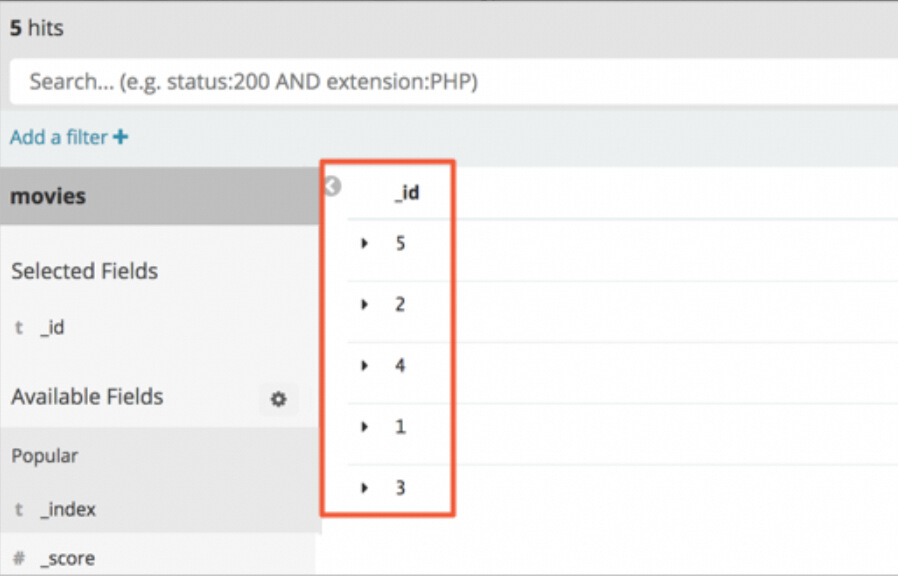
You can run the GET movies/_count command to view the data volume of the index.
2)Create a snapshot.
Run the following command to create a snapshot. For more information, see Create a snapshot in the Amazon OpenSearch Service domain.
PUT _snapshot/eric-snapshot-repository/snapshot_movies_2
{
"indices": "movies"
}
After the snapshot is created, run the following command to view the status of the snapshot:
GET _snapshot/eric-snapshot-repository/snapshot_movies_2View objects in the S3 bucket.
3)Transfer the snapshot from the S3 bucket to the OSS bucket.
You can use ossimport to transfer the snapshot. The S3 bucket stores two snapshot objects. You can change the value of the isSkipExistFile variable in the local_job.cfg file to migrate the incremental snapshot object.
The isSkipExistFile variable indicates whether existing objects are skipped during data migration. The value of this variable is of the Boolean type. The default value is false. If you set the value to true, objects are skipped based on the size and LastModifiedTime settings. If you set the value to false, existing objects are overwritten. If jobType is set to audit, this variable is invalid.
Then, you can view the incremental snapshot object in the OSS bucket.
4)Restore data from the incremental snapshot.
For more information, see Step 2: Create the first snapshot and restore data from the snapshot. Before you restore data, you must disable the movies index. After the restoration, you can enable the index.
POST /movies/_closeGET movies/_statsPOST _snapshot/eric-snapshot-repository/snapshot_movies_2/_restore
{
"indices": "movies"
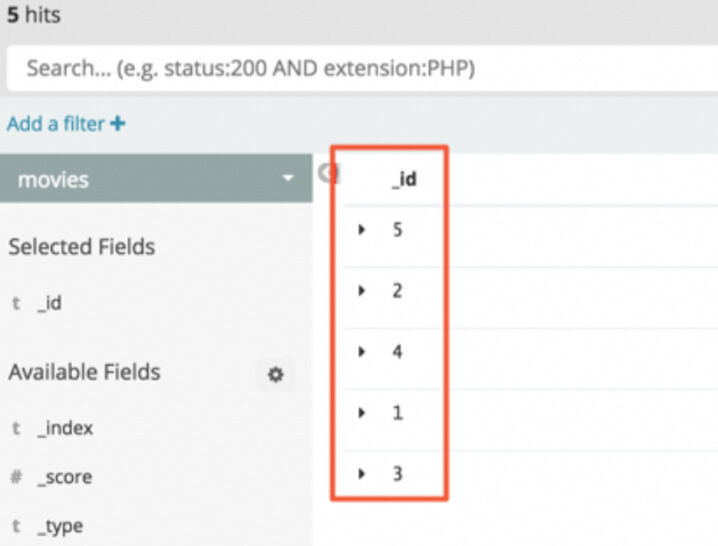
}POST /movies/_openAfter data is restored from the snapshot, the number of documents in the movies index of the Elasticsearch cluster is 5. This number is the same as that in the index of the Amazon OpenSearch Service domain.
You can use the snapshot and restore feature to migrate data from an Amazon OpenSearch Service domain to an Alibaba Cloud Elasticsearch cluster. This feature requires that you disable the index whose data you want to migrate to avoid requests and write operations during the migration.
For more information, see the following topics:
Open source Elasticsearch documentation
Working with Amazon Elasticsearch Service Index Snapshots
Migrate data from Amazon S3 to Alibaba Cloud OSS
ossimport description and configuration
Ready to start your journey with semantic search on Alibaba Cloud? Explore our tailored Cloud solutions and services to take the first step towards transforming your data into a visual masterpiece.
Please Click here, Embark on Your 30-Day Free Trial !!
Learn more about New Features of Alibaba Cloud Elasticsearch
1)Elasticsearch: a distributed, RESTful search and analytics engine designed for various scenarios. As the core of the Elastic Stack, Elasticsearch stores your data in a centralized manner and searches for and analyzes data.
2)Kibana: provides a visual interface for you to search for and analyze data.
3)Amazon OpenSearch Service: In September 2021, Amazon Elasticsearch Service is renamed to Amazon OpenSearch Service. Amazon OpenSearch Service is a managed service that offers easy-to-use Elasticsearch APIs and real-time analytics capabilities. This service also provides the availability, scalability, and security that are required for production workloads. You can use Amazon OpenSearch Service to easily deploy, protect, manage, and scale Elasticsearch clusters for scenarios such as log analytics, full-text searches, and application monitoring.
4)Alibaba Cloud Elasticsearch: It is designed based on open source Elasticsearch for scenarios such as data analytics and searches. Based on open source Elasticsearch, Alibaba Cloud Elasticsearch provides enterprise-class access control, security monitoring and alerting, and automatic reporting.
5)Snapshot and restore: You can store snapshots of individual indexes or an entire cluster in a remote repository like a shared file system, such as Amazon Simple Storage Service (Amazon S3) or HDFS. The snapshots can be used to restore data. However, the data can be restored only to Elasticsearch clusters of specific versions:
How to Use Elasticsearch with Python Client: A Step-by-Step Tutorial
Guide to Managing Alibaba Cloud Elasticsearch Clusters with API Operations
Data Geek - June 6, 2024
Data Geek - April 28, 2024
Data Geek - May 9, 2024
Data Geek - May 9, 2024
Data Geek - October 8, 2024
Alibaba Cloud Community - September 1, 2023
 Alibaba Cloud Elasticsearch
Alibaba Cloud Elasticsearch helps users easy to build AI-powered search applications seamlessly integrated with large language models, and featuring for the enterprise: robust access control, security monitoring, and automatic updates.
Learn More OpenSearch
OpenSearch helps develop intelligent search services.
Learn More Hybrid Cloud Solution
Highly reliable and secure deployment solutions for enterprises to fully experience the unique benefits of the hybrid cloud
Learn More FinTech on Cloud Solution
This solution enables FinTech companies to run workloads on the cloud, bringing greater customer satisfaction with lower latency and higher scalability.
Learn MoreMore Posts by Data Geek


