NVIDIA GPU Cloud (NGC) は、NVIDIAによって開発された深層学習エコシステムです。 NGCを使用すると、深層学習ソフトウェアスタックに無料でアクセスし、スタックを使用して深層学習用の開発環境を構築できます。 このトピックでは、TensorFlow深層学習フレームワークを例として、深層学習開発のためにGPUアクセラレーションインスタンスにNGC環境をデプロイする方法について説明します。
背景情報
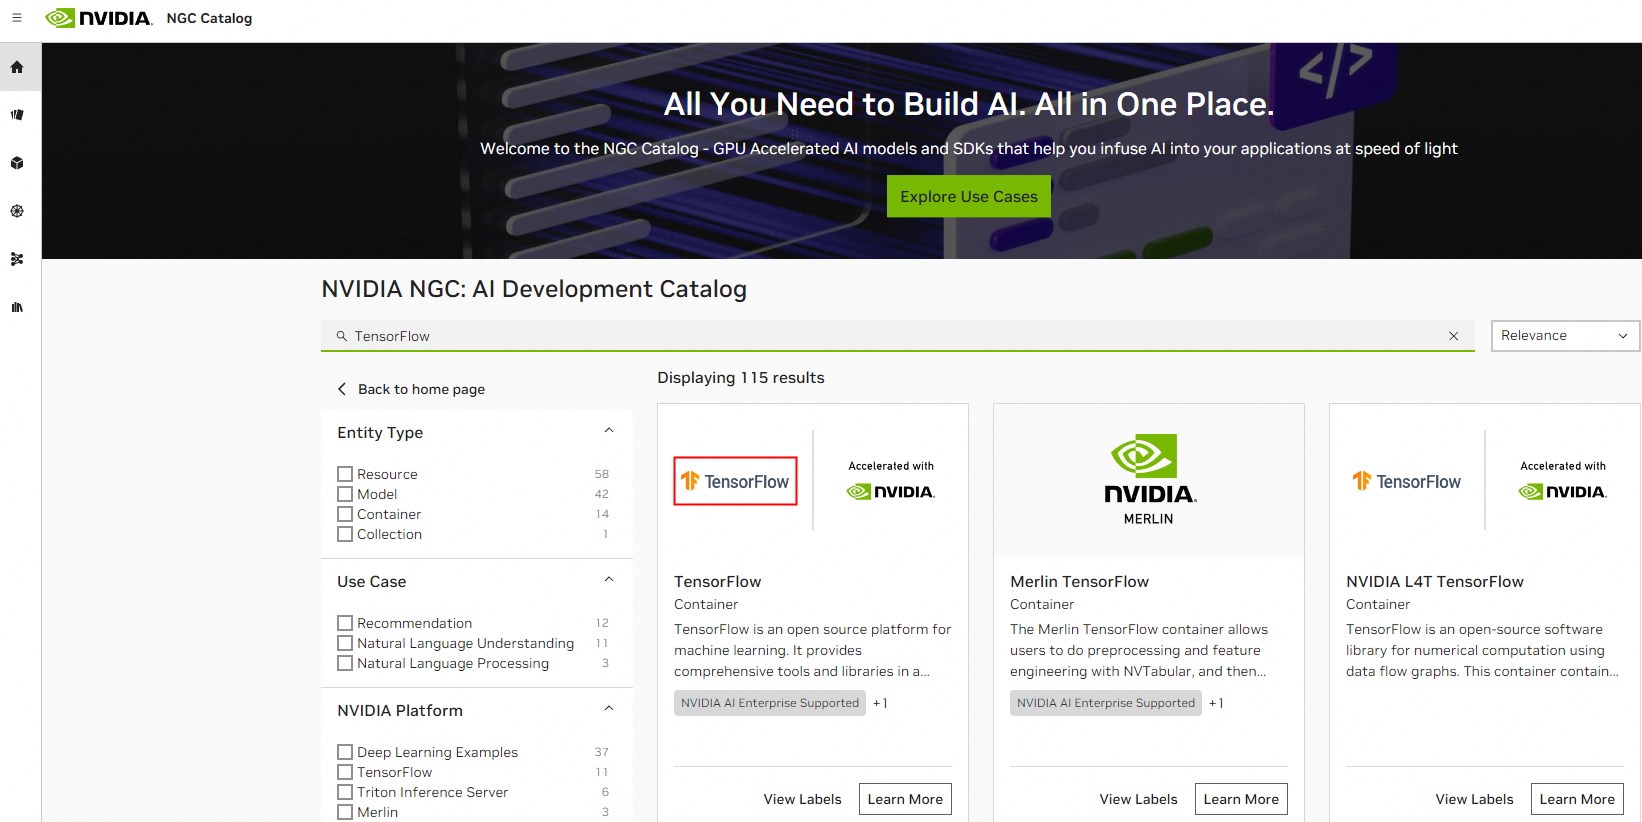
NGC Webサイトには、Caffe、Caffe2、Microsoft Cognitive Toolkit (CNTK) 、MXNet、TensorFlow、Theano、Torchなど、さまざまなバージョンの主流の深層学習フレームワークの画像が表示されます。 ビジネス要件に基づいてNGCコンテナ環境をデプロイするイメージを選択できます。 この例では、TensorFlow深層学習フレームワークが使用されています。
Alibaba Cloudは、Alibaba Cloud MarketplaceのNVIDIA Pascal GPU用に最適化されたNGCコンテナイメージを提供しています。 GPU高速化インスタンスを作成するときに、NGCコンテナイメージを選択してNGCコンテナ環境をすばやくデプロイし、最適化された深層学習フレームワークに即座にアクセスできます。 これにより、サービスの開発とデプロイ、および開発環境のプリインストールを効率的に行うことができます。 NGCコンテナイメージは、最適化されたアルゴリズムフレームワークと一定の更新もサポートします。
制限事項
次のいずれかのインスタンスファミリーに属するインスタンスにNGC環境をデプロイできます。
gn5i、gn6v、gn6i、gn6e、gn7i、gn7e、およびgn7s
ebmgn6i、ebmgn6v、ebmgn6e、ebmgn7i、およびebmgn7e
詳細については、「GPU-accelerated compute-optimizedインスタンスファミリー」をご参照ください。
前提条件
NGC環境をGPU高速化インスタンスにデプロイする前に、NGCアカウントがNGC Webサイトに作成されていることを確認してください。
NGC環境をデプロイする前に、TensorFlowコンテナイメージのURLを取得します。
NGC Webサイトにログインします。
検索ボックスにTensorFlowと入力します。 TensorFlowカードを見つけて、TensorFlowをクリックします。
On theTensorFlowページをクリックし、タグタブをクリックし、必要なTensorFlowコンテナイメージのURLをコピーします。
この例では、
22.05-tf1-py3イメージのURLはnvcr.io/nvidia/tensorflow:22.05-tf1-py3です。 このURLは、GPUアクセラレーションインスタンスにTensorFlowイメージをダウンロードするために使用されます。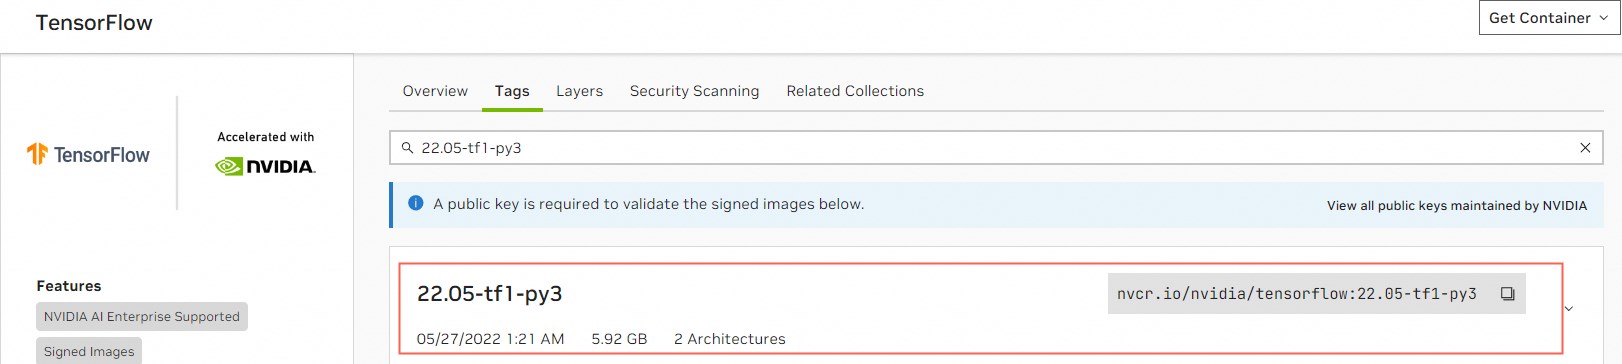 重要
重要TensorFlowイメージのCUDAバージョンは、GPUアクセラレーションインスタンスのドライバーバージョンと一致する必要があります。 そうしないと、TensorFlow開発環境のデプロイに失敗します。 GPUアクセラレーションインスタンスのTensorFlowイメージバージョン、CUDAバージョン、およびドライバーバージョン間の関係の詳細については、「TensorFlowリリースノート」をご参照ください。
手順
このトピックでは、gn7iインスタンスを例として使用して、GPUアクセラレーションインスタンスを作成するときにNGC環境をデプロイする方法を示します。
GPU高速化インスタンスを作成します。
詳細については、「カスタム起動タブでインスタンスを作成する」をご参照ください。 次のセクションでは、キーパラメーターの設定方法について説明します。
パラメーター
説明
リージョン
GPU高速化インスタンスが使用可能なリージョンを選択します。
[各リージョンで使用可能なインスタンスタイプ] ページに移動して、各リージョンで使用可能なGPUアクセラレーションインスタンスを表示できます。
インスタンス
インスタンスタイプを選択します。 この例では、gn7iが使用される。
[イメージ]
[Marketplaceイメージ] タブで、[Alibaba Cloud Marketplaceからイメージを選択 (オペレーティングシステムを使用)] をクリックします。
[Alibaba Cloud Marketplace] ダイアログボックスで、検索ボックスに [NVIDIA GPU Cloud Virtual Machine Image] と入力し、[検索] をクリックします。
使用する画像を見つけて、[選択] をクリックします。
パブリック IP アドレス
[パブリックIPv4アドレスの割り当て] を選択します。
説明パブリックIPアドレスが割り当てられていない場合は、インスタンスの作成後にelastic IPアドレス (EIP) をインスタンスに関連付ける必要があります。 詳細については、「1つ以上のEIPをインスタンスに関連付ける」をご参照ください。
[セキュリティグループ]
セキュリティグループを選択します。 セキュリティグループのTCPポート22を有効にする必要があります。 インスタンスがHTTPSまたはDeep Learning GPU Training System (DIGITS) 6をサポートする必要がある場合は、HTTPSのTCPポート443またはDIGITS 6のTCPポート5000を有効にする必要があります。
次の表に示す方法のいずれかを使用して、インスタンスに接続します。
移動方法
関連ドキュメント
[ワークベンチ]
VNC
nvidia-smiコマンドを実行して、現在のGPUに関する情報を表示します。ドライバのバージョンが515.48.07です。 インスタンスのドライバーバージョン (515以降) は、
22.05-tf1-py3TensorFlowイメージのCUDAバージョン (11.7) と一致します。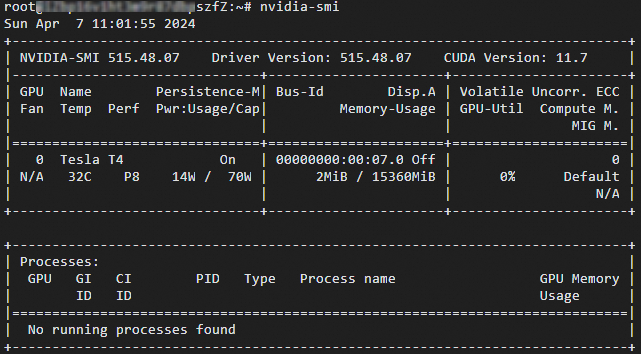
次のコマンドを実行して、TensorFlowコンテナイメージをダウンロードします。
docker pull nvcr.io/nvidia/tensorflow:22.05-tf1-py3重要TensorFlowコンテナイメージのダウンロードに時間がかかる場合があります。
次のコマンドを実行して、ダウンロードしたTensorFlowコンテナイメージに関する情報を表示します。
docker image ls
次のコマンドを実行して、コンテナーを実行してTensorFlow開発環境をデプロイします。
docker run -- gpus all -- rm -it nvcr.io/nvidia/tensorflow:22.05-tf1-py3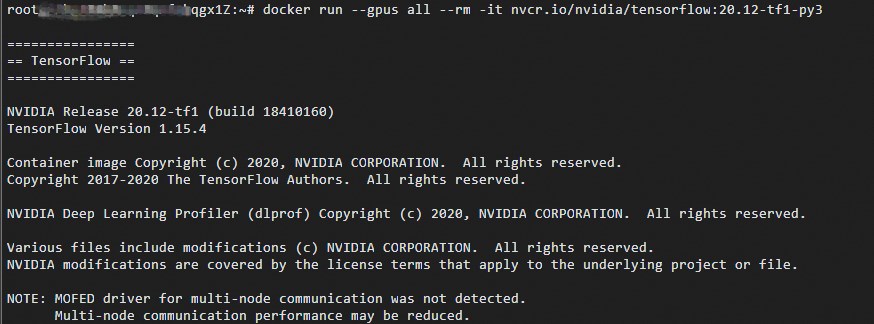
TensorFlowの簡単なテストを実行するには、次のコマンドを順番に実行します。
pythonimport tensorflow as tf hello = tf.constant('Hello, TensorFlow!') with tf.compat.v1.Session() as sess: result = sess.run(hello) print(result.decode())TensorFlowが期待どおりにGPUデバイスをロードする場合、
こんにちは、TensorFlow!結果が表示されます。 以下の図は一例です。
変更したTensorFlowイメージを保存します。
GPU接続ページで、リモート接続用の新しいウィンドウを開きます。
次のコマンドを実行して、
CONTAINER_IDで指定されたコンテナIDを照会します。docker ps
次のコマンドを実行して、変更されたTensorFlowイメージを保存します。
# Replace CONTAINER_ID with the container ID that is queried by using the docker ps command, such as f76a5a4347d. docker commit -m "commit docker" CONTAINER_ID nvcr.io/nvidia/tensorflow:20.01-tf1-py3重要変更されたTensorFlowイメージが正しく保存されていることを確認します。 そうしないと、次回インスタンスにログインしたときに変更が失われる可能性があります。