Flow provides an end-to-end Node.js project test and build solution. Flow helps you efficiently configure continuous integration or continuous delivery (CI/CD) pipelines and automates testing, code compilation, dependency management, and build artifact upload. This topic describes how to configure the Node.js · Test, Build pipeline in the Flow console.
Step 1: Create a test build pipeline
Log on to the Flow console. In the console, click Create Pipeline in the upper-right corner.
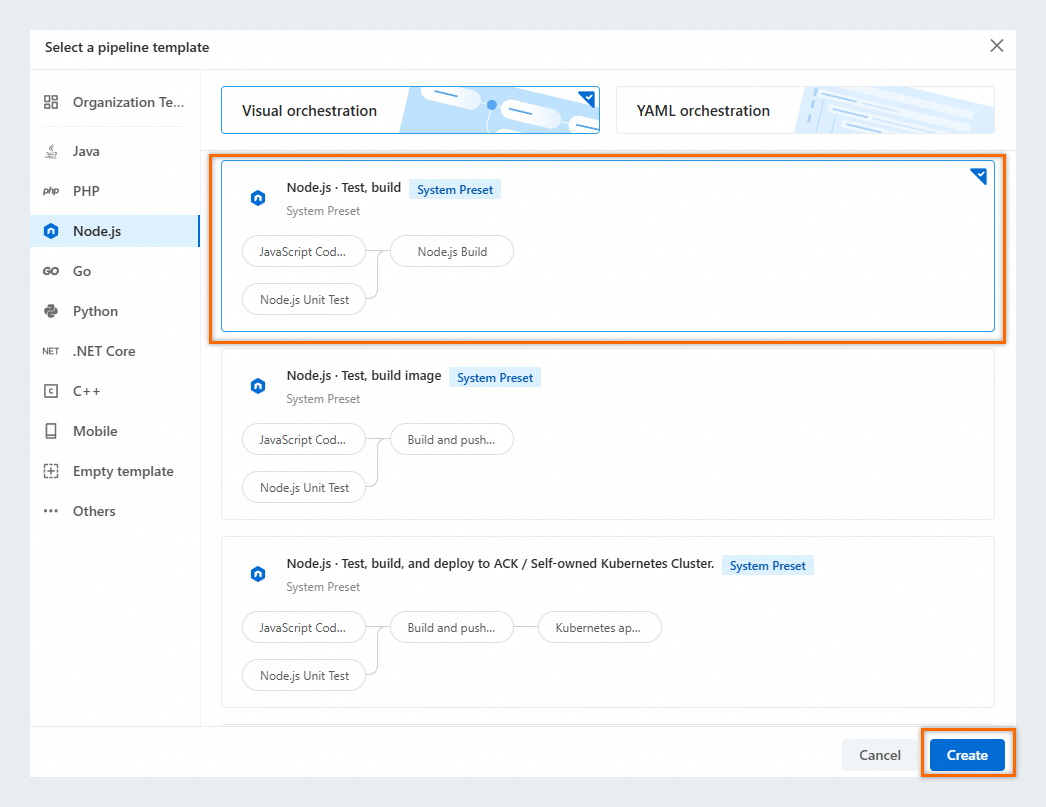
In the Select a pipeline template dialog box, select the Node.js · Test, Build template and click Create.
Step 2: Configure a pipeline source
On the Process Configuration page of the new pipeline, click Add Pipeline Source in Pipeline Source.
Click Code Source. In this topic, select Sample Code Source, select NodeJS as Code Type, and click Add.
Step 3: Configure the test build
The Node.js · Test, build template includes the preset JavaScript Code Scan, Node.js Unit Testing, and Node.js Build jobs. Those jobs have similar configurations. This step describes how to configure the Node.js Build job.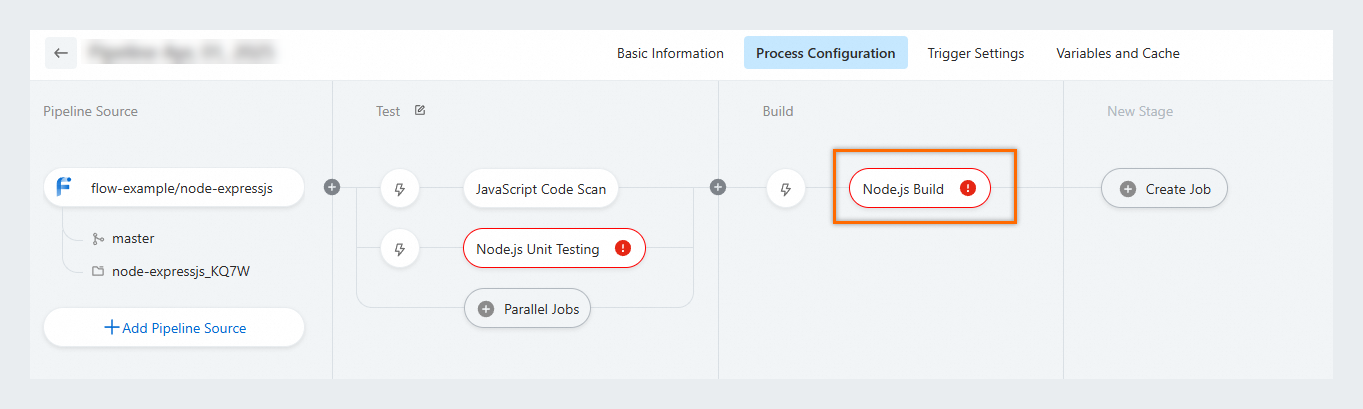
Configure the Node.js Build job
Configure basic parameters.
Parameter
Description
Job Name
You can specify a job name or use the default name.
Build Cluster
The following build clusters are supported:
Build Environment
The following build environments are supported:
Specify Container Environment (default build cluster provided by Alibaba Cloud DevOps): Flow starts the specified container on the build machine and builds a single-container environment. Alibaba Cloud DevOps provides Flow System Images. You can also specify your image as the build environment.
Default VM Environment (supported only by self-hosted build clusters): You must select a value from the Specify Build Nodes drop-down list. Flow directly installs the environment on the build machine and runs the job. To increase job build efficiency, we recommend that you install the related SDK and environment on the build machine in advance.
NoteDuring job execution, the pipeline job build environment is assigned to you. You have the permissions to use the build environment and can create a custom job execution script.
Download Source
The configured source file can be downloaded to the corresponding working directory. The following three download methods are available:
Download All Pipeline Sources
Do Not Download Pipeline Sources
Download Selected Pipeline Sources
Configure Build Steps.
Specified Container Environment/Default VM Environment
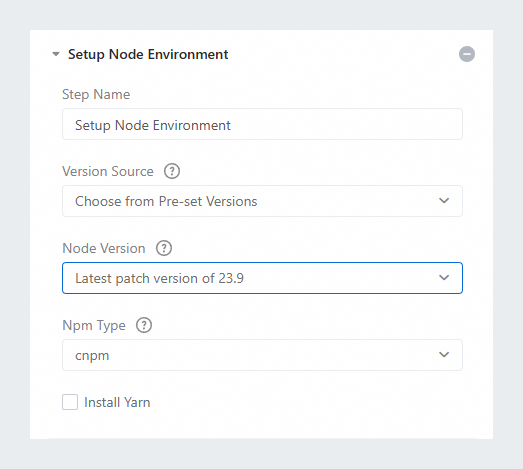
Setup Node Environment
Configure parameters including Node Version and Npm Type.
ImportantYou can select Choose from Pre-set Version, Enter a Specified Version, or ...specified in the '.nvmrc' file in the code repository from the Version Source drop-down list. However, if a .nvmrc file exists, the .nvmrc file is used, regardless of which option is selected.
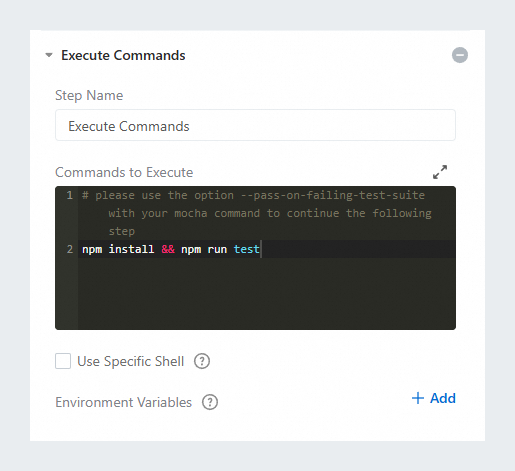
Execute Commands
Specify custom build commands to be executed and select Use Specific Shell. If required, configure environment variables by referring to Environment variables.
Artifact Upload
Upload build artifacts to Packages for centralized management
Parameter description:
Parameter
Description
Add a service connection
Click Add a service connection. Create a service connection from Flow to Alibaba Cloud DevOps Packages. For more information, see Manage service connection.
Repository
After a service connection is added, select the Generic repositor type in Packages.
NoteFor more information about Generic repositories, see Generic artifact management.
Artifact Name
This parameter is used to distinguish between different artifacts generated by multiple builds. The artifact name is used in component deployment. We recommend that you specify the name by using a dynamic variable.
Artifacts_${PIPELINE_ID}is used by default. You can also specify an artifact name, such astarget1.Product version
Uniquely identifies your artifact file. Repeated versions are not allowed for the same file. We recommend that you specify the name by using a dynamic variable. Example:
${DATETIME}.Package Path
Set the starting position as the relative path of the project folder. Example:
target/. You can set multiple file paths.The directory containing the package path in the product
If this option is selected, the generated package contains the complete packaging path. Otherwise, the package contains only files. When multiple packaging paths are set, this option is selected automatically.
Configuration example:

Parameters of the JavaScript Code Scan job
Parameter | Description |
Use local ESLint configuration | Specifies whether to use the local ESLint configuration instead of the system rule set for scanning. After you enable this option, you must specify the required dependencies for the Dependencies Required to Run a Local ESLint Configuration parameter and make that an .eslintrc.* file exists in the repository root directory. |
Dependencies Required to Run a Local ESLint Configuration | The dependencies that are required to run a local ESLint configuration. Separate multiple dependencies with spaces. This parameter is specified after Important This parameter is valid only if the Use local ESLint configuration option is selected. |
Enable incremental scan mode | If this option is not selected, a full code scan will be performed. |
Subdirectories to be Excluded | The directory or file to be excluded from the scan scope. You can refer to the |
Redline Information | Determine whether code scan is successful. The following dimensions can be set:
|
Parameters of the Node.js Unit Testing job
Parameter | Description |
Execute Commands | Specify custom commands for Node.js unit testing. |
Path of Test Report | The path of test reports generated after test commands are executed. Example: |
Reporter | Select a testing tool or framework. Example: |
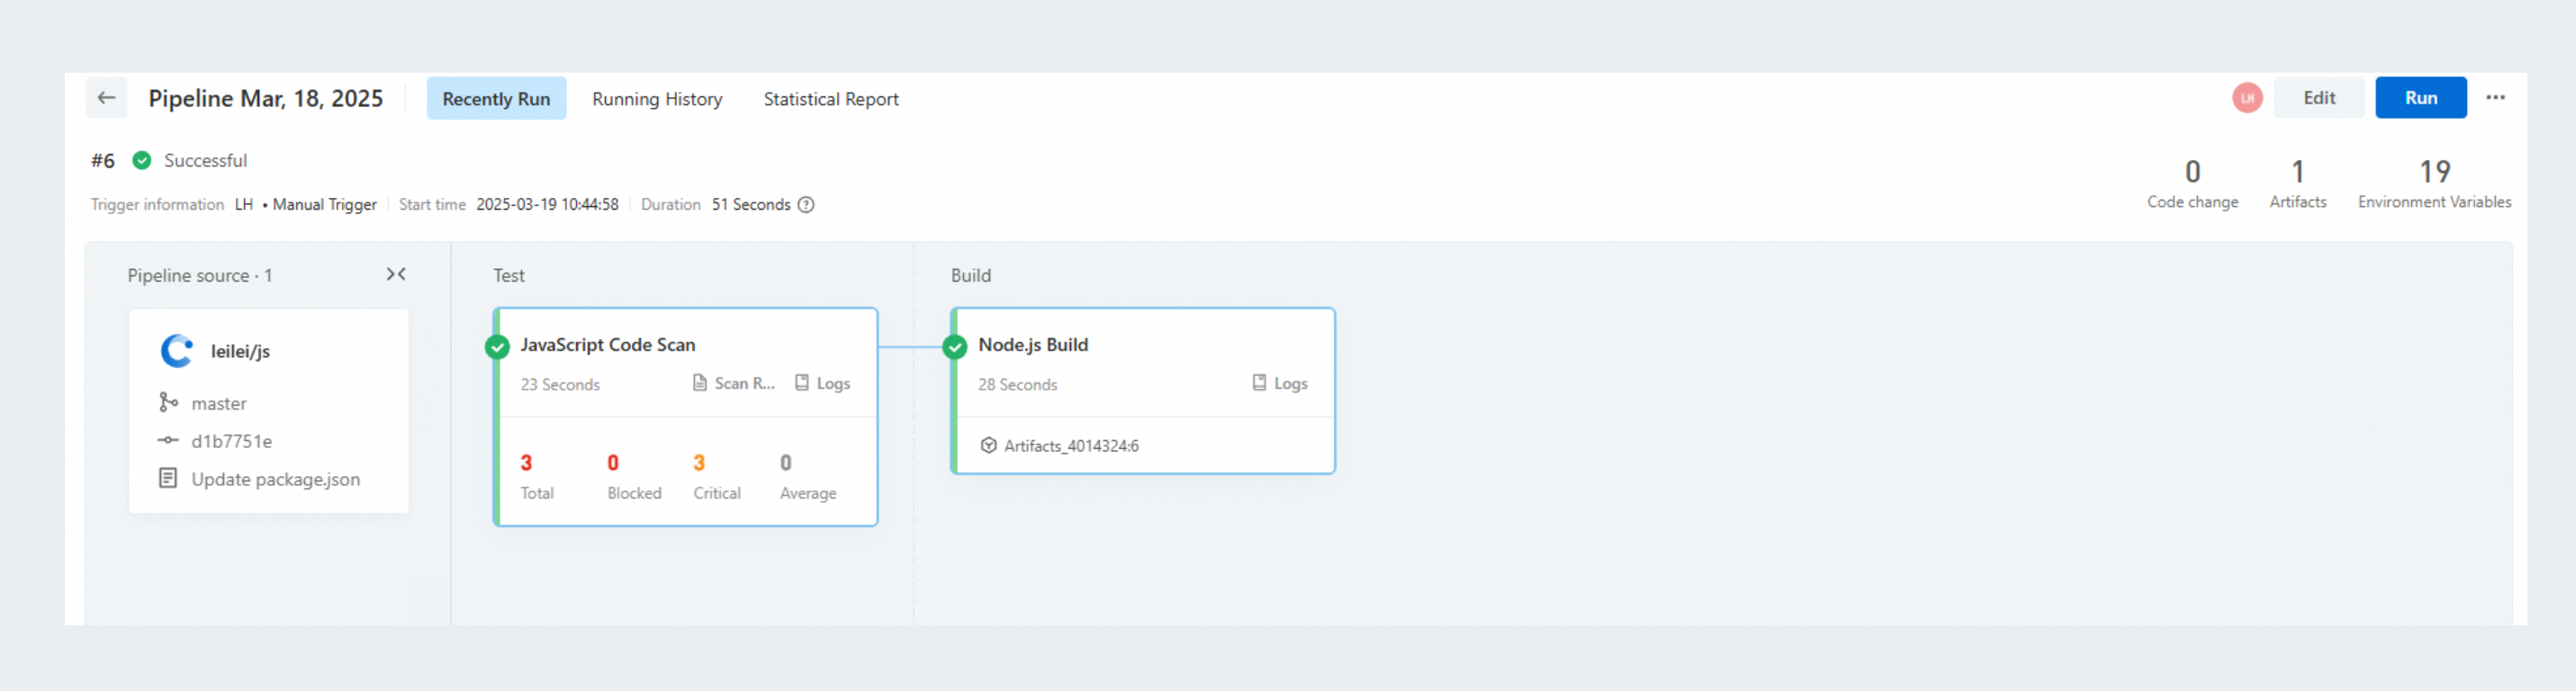
Step 4: Run and view a pipeline job
After the process configuration is complete, click Save and Run in the upper-right corner. In the dialog box that appears, click Run to run the pipeline job.
After the pipeline job is complete, in the build image job node, click Logs in the lower right part to view the execution process and result logs of the pipeline job.