Terminal policies control the behavior of Wuying clients, which include desktop clients, mobile clients, and hardware terminals. To simplify management, terminal policies apply to terminal groups, not individual terminals. A policy affects all terminals in its group. This lets you manage terminals in groups as needed. This topic describes how to manage terminal groups and policies.
Create a terminal policy
To ensure all policy settings take effect, make sure the terminal is updated to the latest version and connected to the internet.
Log on to the EDS enterprise console.
In the left-side navigation pane, choose Clients > Terminals Group & Policy.
On the Terminal Groups and Policies page, click the Terminal Policies tab, and then click Create Policy.
On the Create Policy page, configure the following parameters as needed and click OK.
Policy Item
Description
Supported Terminal Models
Supported Terminal Versions
Basic information
Policy Name
Enter a custom policy name. The name can be up to 30 characters long.
Not applicable
Not applicable
General policies
NoteThe settings in the Logon Portals section apply to both desktop clients and hardware terminals.
Logon portals
Scan-to-log-on (enterprise edition)
If you disable this option, the scan-to-log-on (enterprise edition) portal is hidden on the terminal.
All models
V7.8 or later
Enterprise edition SMS logon
If you disable this option, the enterprise edition SMS logon portal is hidden on the terminal.
All models
V7.8 or later
Auto-connect settings for a single cloud desktop
Auto-connect for a single cloud desktop
End User customized
Administrator Controlled
NoteAfter configuration, the user cannot edit the setting.
When a user logs on to the client, if there is only one cloud desktop in the account, the selected actions are automatically performed:
Running cloud desktop — Auto-connect
Hibernated cloud desktop — Auto-wake and connect
Shut down cloud desktop — Auto-start and connect
Administrator Disabled
NoteAfter being disabled, the user cannot edit the setting.
All models
V8.0 or later
Desktop client policies
NoteAll the following settings apply only to desktop clients.
Immersive Mode
If you disable this option, all other Immersive Mode settings do not take effect.
NoteEffective mechanism: After you enable or disable Immersive Mode in the policy, your users must log out of and then log back on to the client, and then restart their local computer for the setting to take effect.
Scope: If enabled at the organization ID level, it applies to all users under the current organization ID. If enabled at the terminal level, it applies to the specified client. The client-level setting has a higher priority than the user-level setting.
Effect: Immersive Mode modifies the local Windows Registry information of your users. In Immersive Mode, your users cannot open some applications on their local devices, such as the local Task Manager and local browsers.
Common issue: If the setting does not take effect, it might be blocked by the local security software of your users.
Only Windows Wuying clients are supported
NoteUse Windows client V7.10 or later.
System Control Panel
If you disable this option, the entry for the System Control Panel feature is hidden on the client and is not visible to the user.
NoteThe setting takes effect after the user logs on to the client account again.
Hardware terminal policies
NoteAll the following settings apply only to hardware terminals.
Hardware terminal mode
Terminal Mode
Computer Mode
All models
V7.5 or later
BackgroundMode:
A special mode provided by Wuying hardware terminals. It supports automatic connection when the cloud desktop is running and hides the cloud desktop management and interaction interface from the user. This mode is stable, private, scalable, and easy to maintain. It is suitable for scenarios such as Robotic Process Automation (RPA) with a clean IP address.
After you enable background mode, the following option is available:
Screensaver text: You can customize the screensaver text. The text can be 2 to 25 characters in length and supports both English and Chinese.
NoteAfter you enable background mode, make sure not to trigger scheduled disconnection tasks for the cloud desktop or log out from the terminal.
After you disable background mode, the setting does not take effect immediately. The terminal must be shut down or restarted.
All models
V7.5 or later
Projection Mode:
When enabled, the terminal can only act as a screen sharing receiver.
NoteIn screen sharing mode, the screen lock and manual lock features must be disabled. Otherwise, the screen sharing feature is unavailable.
The initiator can click Screen Sharing in the floating ball menu of the Wuying cloud desktop and enter the screen sharing code displayed on the terminal.
NoteMake sure that the administrator enables the Screen Sharing item in Cloud Desktop Floating Ball Management in the cloud desktop policy.
After you enable screen sharing mode, the following options are available:
Screen sharing text: The default text is the terminal alias, which you can edit in the hardware terminal list.
Screen sharing wallpaper
Default wallpaper
Custom wallpaper: Upload a custom wallpaper from your local device.
NoteSupported formats: .jpg and .png
Supported dimensions: 1320 × 1080 px
Maximum size: 10 MB
Maximum number of images: 3. The images can be displayed in a slideshow.
WUYING Magic Cube
V7.7.5 or later
Bluetooth/Wi-Fi
Bluetooth
Options:
User-defined
Forcibly disabled by administrator
ImportantDisabling this feature may affect normal use by the user. Proceed with caution.
All models
V6.8 or later
Wi-Fi
Options:
User-defined
Administrator-configured (Prioritize connection to a specified Wi-Fi network)
NoteAfter this feature is enabled, you can still manually switch to another Wi-Fi network. However, the configuration is re-enabled every time the hardware terminal is restarted or powered on.
Forcibly disabled by administrator
ImportantDisabling this feature may affect normal use by the user. Proceed with caution.
All models
V6.8 or later
Screen display
Resolution
Options:
User-defined
Administrator-controlled
All models
V7.0 or later
Resolution settings
If Resolution is set to Administrator-controlled, this parameter is displayed. It specifies the screen resolution of the hardware terminal. If the resolution you set here exceeds the actual maximum resolution of the terminal, the latter prevails.
All models
V7.0 or later
Scaling ratio
Options:
User-defined
Administrator-controlled
Scaling ratio settings
If Scaling ratio is set to Administrator-controlled, this parameter is displayed. It specifies the UI scaling ratio of the hardware terminal.
NoteThis parameter sets the scaling ratio for the hardware terminal display. The cloud desktop scaling ratio inherits this setting by default. However, you can also set a custom scaling ratio for the cloud desktop. The custom scaling ratio has a higher priority than the one set in the hardware terminal policy.
All models
V7.0 or later
Extended display mode
Options:
User-defined
Administrator-controlled
WUYING Magic Cube Pro/WUYING Ark Pro
V7.0 or later
Extended display mode settings
If Extended display mode is set to Administrator-controlled, this parameter is displayed. It specifies the display mode for the second monitor when it is connected to the hardware terminal. The modes include Mirror mode and Extend mode.
WUYING Magic Cube Pro/WUYING Ark Pro
V7.0 or later
Volume settings
Synchronize output volume between terminal and cloud
User-defined
Administrator-controlled
When enabled, the output volume of the cloud desktop and the local device are always synchronized.
When disabled, the output volumes of the cloud desktop and the local device must be set independently. The final volume is the combined result of both.
All models
V8.0 or later
Screen lock management
Screen lock settings
If disabled, you cannot set an automatic screen lock or a screen lock password, or trigger the manual screen lock feature in System Settings > Screen Lock Settings.
When enabled, the user must set a screen lock password to use the idle auto-lock feature.
NoteIf screen sharing mode is enabled, you cannot enable this option. Disable screen sharing mode and then enable this option.
All models
V6.8 or later
Manual screen lock
If disabled, the terminal does not respond to any screen lock operations.
When enabled, the terminal can still respond to actions such as closing the lid, using a shortcut key, or short-pressing the power button to lock the screen for screen protection. No password is required to unlock.
NoteIf screen sharing mode is enabled, you cannot enable this option. Disable screen sharing mode and then enable this option.
Unlock method
Options:
Unlock with PIN:
This is a device-level screen lock. Each device has only one PIN.
Unlock with the password of a convenience account or an Active Directory (AD) account:
The screen can be locked only when the user is logged on. The screen lock operation cannot be performed when the user is not logged on.
Automatic logon does not take effect. The PIN and fingerprint ID are automatically disabled.
Do not select this method for single sign-on (SSO) accounts or password-free logon. Otherwise, a logical conflict occurs and the screen lock feature is unavailable.
V7.12 or later
Force users to set a PIN
If enabled, the user must set a PIN to continue using the terminal.
Idle auto-lock
Options:
User-defined
Administrator-controlled
If you select Administrator-controlled, you must select Never lock or a specific idle duration. The hardware terminal automatically locks when there is no keyboard or mouse activity for the specified duration. After the screen is automatically locked, the user still needs to set the screen lock password.
All models
User-defined: V6.8 or later
Administrator-controlled: V7.7 or later
Power management
Idle timeout power policy
Options:
User-defined
Administrator-controlled
All models
V6.8 or later
Idle timeout power settings
This parameter is displayed if Idle timeout power policy is set to Administrator-controlled. If you select Disable, no power management operations are performed regardless of the idle duration.
All models
V6.8 or later
If idle time exceeds
This parameter is displayed if the Idle timeout power settings switch is turned on. It specifies the duration of continuous inactivity (no keyboard or mouse operations) on the hardware terminal.
ImportantThis setting also takes effect if the terminal is connected to a cloud desktop and there is no keyboard or mouse activity for a long time. Configure this setting with caution.
All models
V6.8 or later
Then automatically perform power action
This parameter is displayed if the Idle timeout power settings switch is turned on. It specifies the power action to be performed when the idle duration reaches the specified limit. You can set it to Hibernation or Shutdown.
All models
V6.8 or later
Scheduled shutdown policy
Options:
User-defined
Administrator-controlled
All models
V6.8 or later
Scheduled shutdown time
This parameter is displayed if Scheduled shutdown policy is set to Administrator-controlled. It specifies the time for the scheduled shutdown of the terminal.
NoteThe scheduled shutdown time and the scheduled restart time must be at least 10 minutes apart.
All models
V6.8 or later
Scheduled restart policy
Options:
User-defined
Administrator-controlled
All models
V6.8 or later
Scheduled restart time
This parameter is displayed if Scheduled restart policy is set to Administrator-controlled. It specifies the time for the scheduled restart of the terminal.
NoteThe scheduled restart time and the scheduled shutdown time must be at least 10 minutes apart.
All models
V6.8 or later
Cloud desktop shutdown action synchronization
Options:
User-defined
Administrator-controlled: Select the action to be automatically performed when the user shuts down the cloud desktop from the floating ball menu, the cloud desktop card, or the power options within the cloud desktop system.
Shut down only the cloud desktop
Shut down both the cloud desktop and the Wuying proprietary hardware terminal
All models
V7.7 or later
Cloud desktop restart action synchronization
Options:
User-defined
Administrator-controlled: Select the action to be automatically performed when the user restarts the cloud desktop from the floating ball menu, the cloud desktop card, or the power options within the cloud desktop system.
Restart only the cloud desktop
Restart both the cloud desktop and the Wuying proprietary hardware terminal
All models
V7.7 or later
Custom hardware operation behavior
Hardware terminal shutdown action synchronization
Options:
User-defined
Administrator-controlled: Select the action to be automatically performed when the user presses the power button on the terminal or clicks Shutdown in the system power options.
Shut down only the terminal device
Shut down both the terminal device and all cloud desktops
NoteThis setting takes effect only when all the following conditions are met:
The administrator has enabled power action synchronization.
The terminal device is logged on and not locked.
The cloud desktop is in one of the following states:
In Use
Running
Hibernated
All models
V7.10 or later
Hardware terminal restart action synchronization
Options:
User-defined
Administrator-controlled: Select the action to be automatically performed when the user restarts the terminal from the system power options.
Restart only the terminal device
Restart both the terminal device and all cloud desktops
NoteThis setting takes effect only when all the following conditions are met:
The administrator has enabled power action synchronization.
The terminal device is logged on and not locked.
The cloud desktop is in one of the following states:
In Use
Running
All models
V7.10 or later
Startup method after power connection
Options:
User-defined
Administrator-controlled
WUYING Magic Cube
V6.8 or later
Startup method settings
This parameter is displayed if Startup method after power connection is set to Administrator-controlled. It specifies the system startup policy for the hardware terminal after it is connected to a power source. You can select Wait for startup or Automatic startup.
WUYING Magic Cube
V6.8 or later
Short-press power button behavior
The behavior when the power button is short-pressed.
NoteA long press of the power button shuts down the terminal. This setting cannot be changed.
Box-type Wuying terminal/WUYING Magic Cube/WUYING Magic Cube Pro/WUYING Ark Pro
V6.8 or later
WUYING Magic Cube series products
Options:
User-defined
Administrator-controlled
Box-type Wuying terminal/WUYING Magic Cube/WUYING Magic Cube Pro
V6.8 or later
Short-press power button behavior settings
This parameter is displayed if WUYING Magic Cube series products is set to Administrator-controlled. It specifies the behavior when the power button is short-pressed. The options include Hibernation, Lock screen, or Shutdown.
Box-type Wuying terminal/WUYING Magic Cube/WUYING Magic Cube Pro
V6.8 or later
Wuying Laptop
Options:
User-defined
Administrator-controlled
WUYING Ark Pro
V6.8 or later
Short-press power button behavior settings
This parameter is displayed if Wuying Laptop is set to Administrator-controlled. It specifies the behavior when the power button is short-pressed. The options include Hibernation, Lock screen, or Shutdown.
WUYING Ark Pro /WUYING Ark
V6.8 or later
Shortcut key settings
Options:
Set the
win+Lshortcut key to respond to screen lock operations.Set the
win+Lshortcut key to respond to logoff operations. This setting conflicts with the screen lock feature. We recommend that you disable the screen lock feature at the same time. After you enable respond to logoff operations, select Disable screen lock feature and manual screen lock in the pop-up window and click OK.NoteThis setting does not take effect in password-free logon mode.
WUYING Magic Cube
V7.12 or later
Terminal system settings lock
Terminal system settings lock
Controls whether to lock the settings page of the terminal.
NoteSettings that are forcibly controlled by the administrator can never be modified by the user and are not affected by this setting.
This feature is disabled by default, which means users can directly modify policies that are configured as user-defined. If enabled, the user must enter the unlock password that you set in the console to access the terminal's settings page for configuration. For information about how to set the unlock password, see Set an unlock password for the root group.
All models
V7.5 or later
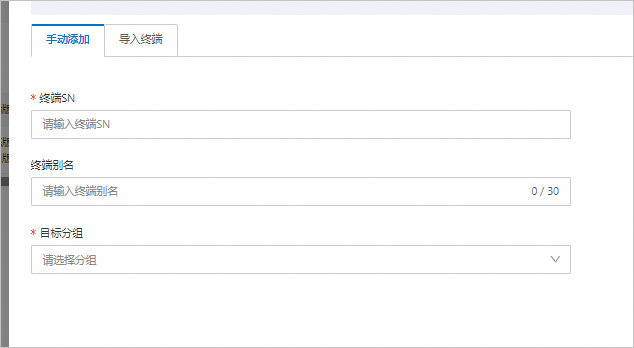
Manage terminal groups
Move specified terminals into custom groups for unified and efficient management. For example, terminal policies are bound to groups, not individual terminals, and take effect on all terminals within a group.
Create a custom group
The system automatically creates a default root group (Group ID: tg-default). You can create custom groups under the root group.
Log on to the EDS enterprise console.
In the left-side navigation pane, choose Clients > Terminals Group & Policy.
On the Terminal Groups and Policies page, click the Terminal Group tab, and then click Create Group.
In the Create Group panel, enter a group name that meets the requirements, select a parent group and a group policy (inherit the policy from the parent group or bind a custom group policy), and then click OK.
In the terminal group directory tree on the left, click the ⋮ icon next to a custom group to perform operations such as Rename, Change Policy, and Delete Group.
Move a terminal to a different group
By default, terminals belong to the default root group. You can move terminals to a specified custom group.
Software clients
Log on to the EDS enterprise console.
In the left-side navigation pane, choose Clients > Desktop & Mobile Clients.
On the Desktop & Mobile Clients page, perform one of the following operations as needed:
Single operation: Find the target client and click Move in the Actions column.
Batch operation: Select multiple target clients and click Move at the bottom of the list.
In the Move dialog box, select the target group and click OK.
NoteAfter a software client is moved to a new group, it is subject to the terminal policy bound to the new group, not the policy of the previous group.
Change the terminal policy for a group
By default, all managed terminals belong to the root group and are controlled by the default system policy bound to the root group. You can change the terminal policy that is bound to the root group or a custom group.
Log on to the EDS enterprise console.
In the left-side navigation pane, choose Clients > Terminals Group & Policy.
On the Terminal Groups and Policies page, click the Terminal Group tab, find the target group, and click Change Policy in the Actions column.
In the Change Policy panel, select the new policy to bind and click OK.
NoteWhen you change the group, you can select Inherit policy from parent group or Custom Group Policy.
The policy change takes effect only for the current group and its child groups that inherit the policy.
The policy takes effect after the terminal connects to the internet. Some policies require the terminal to be restarted.
Configure automatic input for logon for a level-1 group
Log on to the EDS enterprise console.
In the left-side navigation pane, choose Clients > Terminals Group & Policy.
On the Terminal Groups and Policies page, click the Terminal Group tab, find the target level-1 group, click the
 icon in the Actions column, and select Configure Remember Me Settings.Note
If the automatic input method for logon changes (for example, switching between skipping the organization ID and skipping the workspace ID, or switching from workspace A to B), all logged-on terminals are automatically logged out to ensure that the system promptly responds to the latest configuration. Proceed with caution.
Remember my organization ID
If you select this option, when users log on to hardware terminals in the current group and its child groups, they do not need to enter the organization ID. The organization ID is pre-filled (and cannot be modified) and the step is automatically skipped. Users only need to enter their passwords.
Remember my office network ID
If you select this option, when users log on to hardware terminals in the current group and its child groups, they do not need to enter the workspace ID. The workspace ID is pre-filled (and cannot be modified) and the step is automatically skipped. Users only need to enter their passwords.
Set an unlock password for the root group
If you enable the terminal system settings lock in a terminal policy, users must enter the unlock password that you set in the console to access the terminal's settings page. Set the unlock password as follows.
Log on to the EDS enterprise console.
In the left-side navigation pane, choose Clients > Terminals Group & Policy.
On the Terminal Groups and Policies page, click the Terminal Group tab, find the root group, and click Set Administration Password in the Actions column.
In the Set Administration Password dialog box, set a password that meets the requirements and click OK.