After you add your services to Web Application Firewall (WAF), you can use the custom response feature to configure the page returned to clients when their requests are blocked or trigger a slider verification. This feature allows you to align the page with your brand's UI and improve the user experience.
How it works
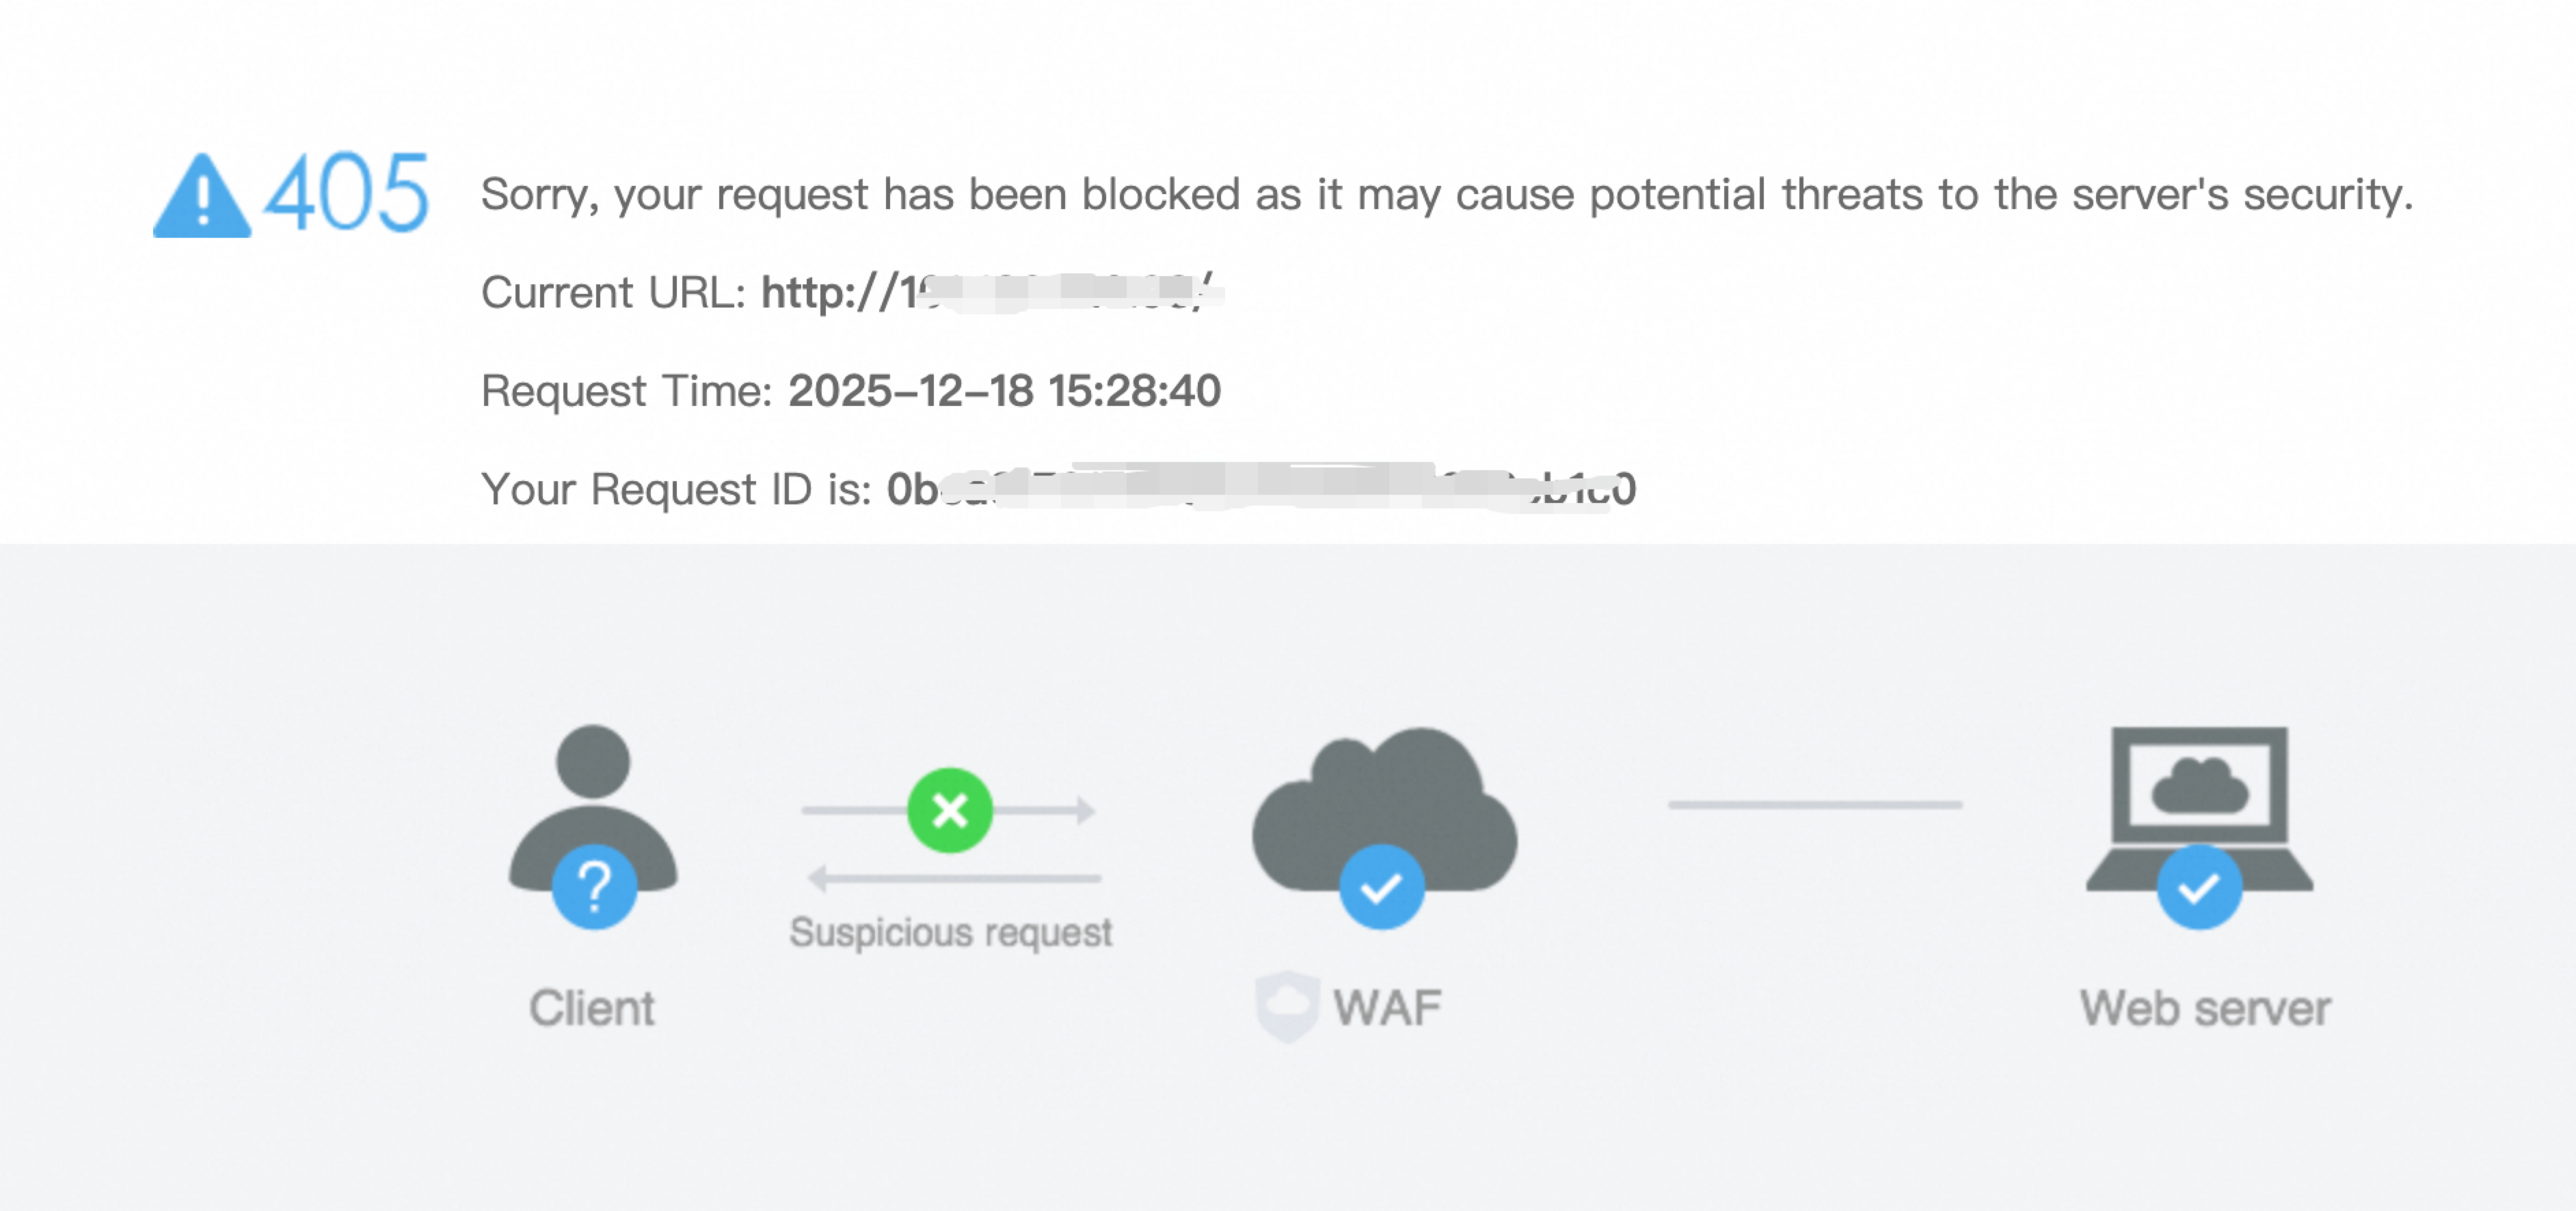
By default, when a client request matches a WAF protection rule and the rule action is set to Block, Slider CAPTCHA, or Strict CAPTCHA, WAF returns a default response page. You can use the Custom Response feature to define the following:
-
HTTP status code (for example, 403, 406, or 429)
-
response headers
-
response body in formats such as HTML or JSON
|
Default block page |
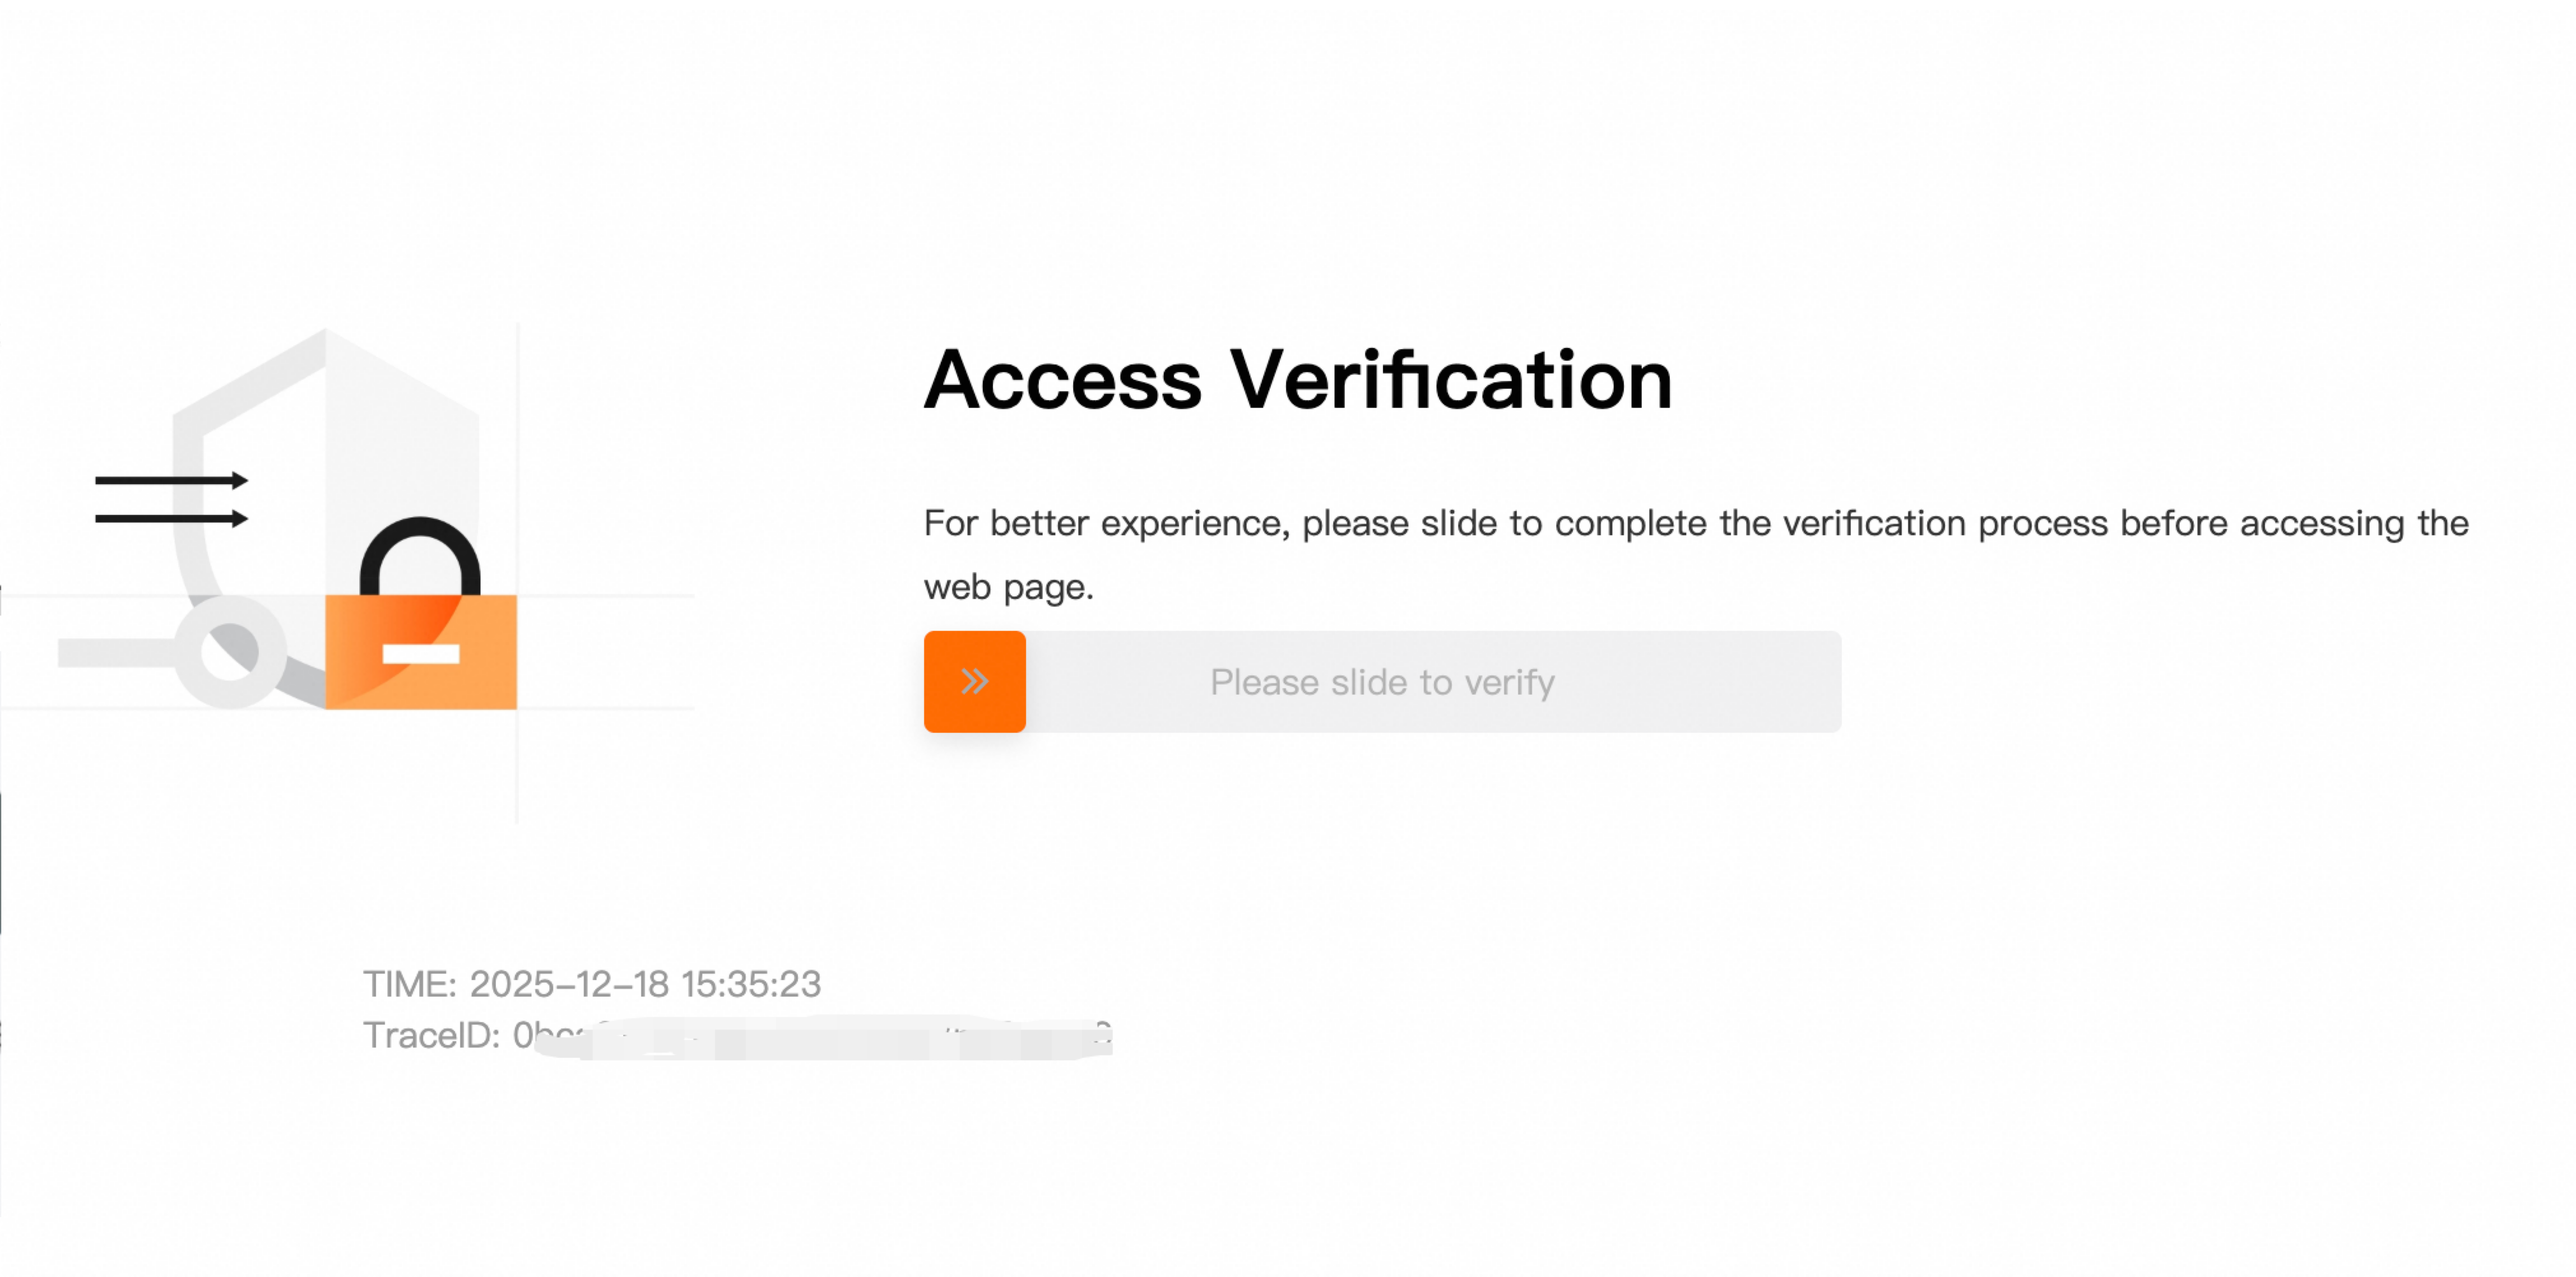
Default slider page |
|
|
|
Usage notes
-
Version requirements: This feature is available for subscription WAF instances (Enterprise Edition or Ultimate Edition) and pay-as-you-go WAF instances.
-
Prerequisites: You must have a protected object, which is created by adding a web service to WAF. If you have not added a service, see Access overview.
-
Supported protection modules: Except for the Core Protection Rule module, all modules whose rule action can be configured as Block, Slider CAPTCHA, or Strict CAPTCHA are supported.
-
Deployment mode limitations:
-
Function Compute is not supported.
-
Microservices Engine (MSE) must be version 2.0.18 or later.
-
API Gateway (APIG) must be version 2.1.13 or later.
-
Bot Management for app protection does not support custom slider pages. You must modify the SDK configuration instead.
-
Procedure
Configure a response page
-
Log on to the Web Application Firewall 3.0 console. From the top menu bar, select the resource group and region (Chinese Mainland or Outside Chinese Mainland) for the WAF instance.
-
In the left-side navigation pane, choose .
-
On the Configure Response Page page, select the Block Page or CAPTCHA Page tab, and then click Create.
Block Page
-
Name: Enter a descriptive name.
-
Status Code: Specify the HTTP status code that WAF returns to the client when a request is blocked. Valid values: 200 to 600. The default status code for a block action is 405. The status codes 204, 304, 600, and 498 are not supported.
-
Custom Header: Specify the response headers that WAF includes in the response when a request is blocked. Each header consists of a Header Name and a Header Value. You can add up to 10 headers.
-
Response Body: Enter the source code for the block page. The configuration must meet the following requirements:
-
Supported formats include HTML and JSON.
-
The code can be up to 4,000 characters long.
-
ImportantTo include the request ID on the response page, add the
{::trace_id::}string to the code. This ID helps you find the corresponding request in Log Service.Configuration example
-
Status Code: 403.
-
Custom Header:
-
Header Name:
Content-Type. -
Header Value:
text/html; charset=utf-8.
-
-
Response Body:
<!DOCTYPE html>
<html>
<head>
  <meta charset="UTF-8">
  <title>Request Blocked</title>
</head>
<body>
  <h1>Access Denied</h1>
  <p>Your request has been blocked by the security policy.</p>
  <p>Request ID: {::trace_id::}</p>
</body>
</html>
CAPTCHA Page
-
Name: Enter a descriptive name.
-
Status Code: The HTTP status code that WAF returns to the client when a request triggers a slider verification. The default value is 200 and cannot be changed.
-
Custom Header: Specify the response headers that WAF includes in the response when a request triggers a slider verification. Each header consists of a Header Name and a Header Value. You can add up to 10 headers. The following header is included by default and cannot be changed.
-
Header Name:
Content-Type. -
Header Value:
text/html; charset=utf-8.
-
-
Predefined or Custom style: Set the style of the slider verification page that WAF returns to the client. You can configure the language, icon, text, and whether to display the request ID. Click Preview to preview the slider verification page.
-
Apply to protection rules or objects
After you configure a response page, you can apply it to a protection rule or a protected object:
-
Apply to a protection rule: When a request matches the rule, WAF returns the custom response page assigned to that rule.
-
Apply to a protected object: When a request for the protected object triggers a protection rule, WAF returns the custom response page assigned to that object.
If a custom response page is configured for both a protection rule and a protected object, the protection rule's configuration takes precedence.
Apply to protection rules
For example, when you configure a protection rule in the Custom Rule module and set the Action to Block, Slider CAPTCHA, or Strict CAPTCHA, you can select an existing custom response page. For more information, see Add a protection rule to a custom rule template.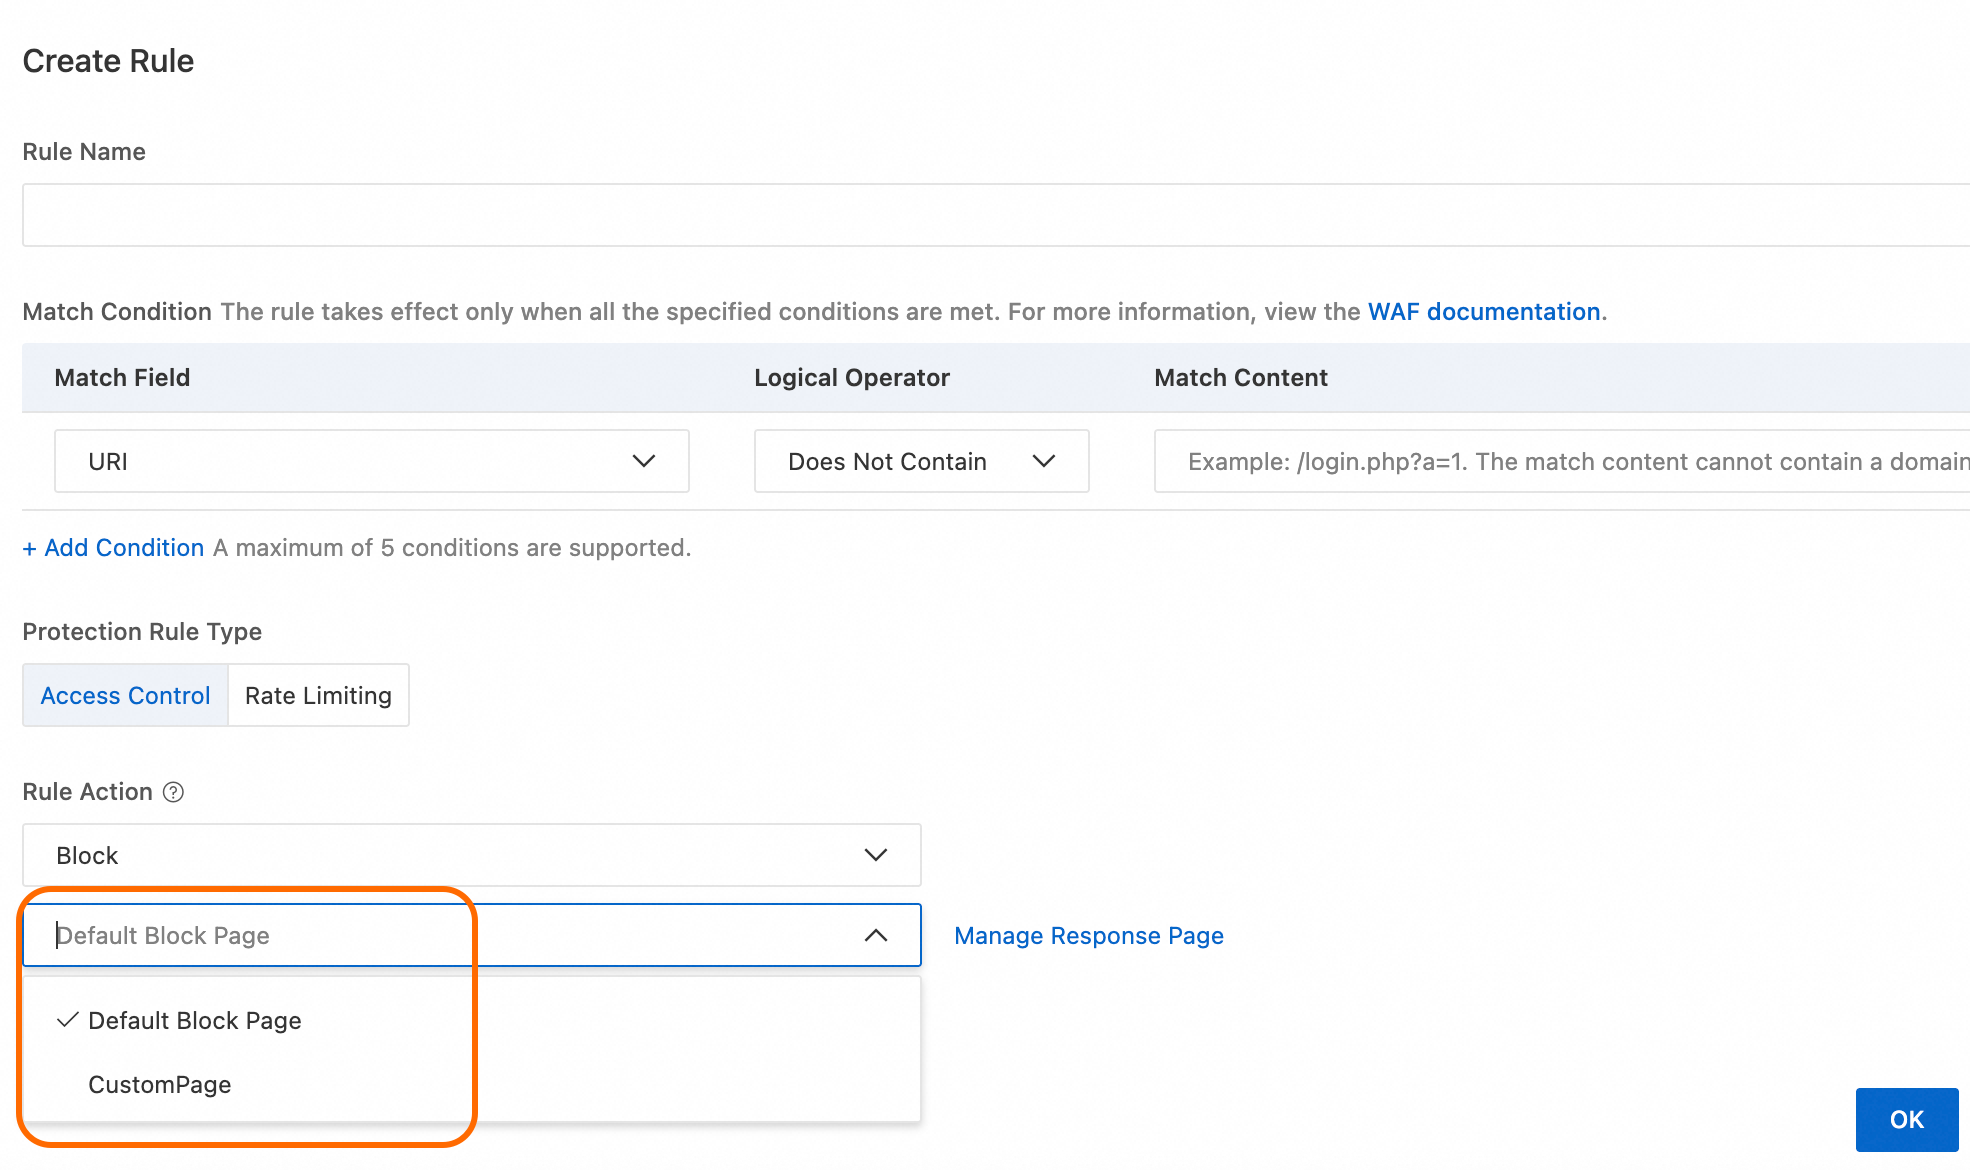
Apply to protected objects
-
Go to the page.
-
Go to the Configure Protected Object tab. Find the protected object that you want to configure, click Actions in the Configure column, and then replace the default Block Page or CAPTCHA Page.