This topic describes how to create a virtual machine (VM) and install an OS.
Prerequisites
The ISO image file of an OS is uploaded. For more information, see Upload an ISO image file in the vCenter console.
A workload network segment is created for the dedicated VMware environment. For more information, see Create a workload network segment.
Tasks
Create a VM
Install an OS
Create a VM
Procedure
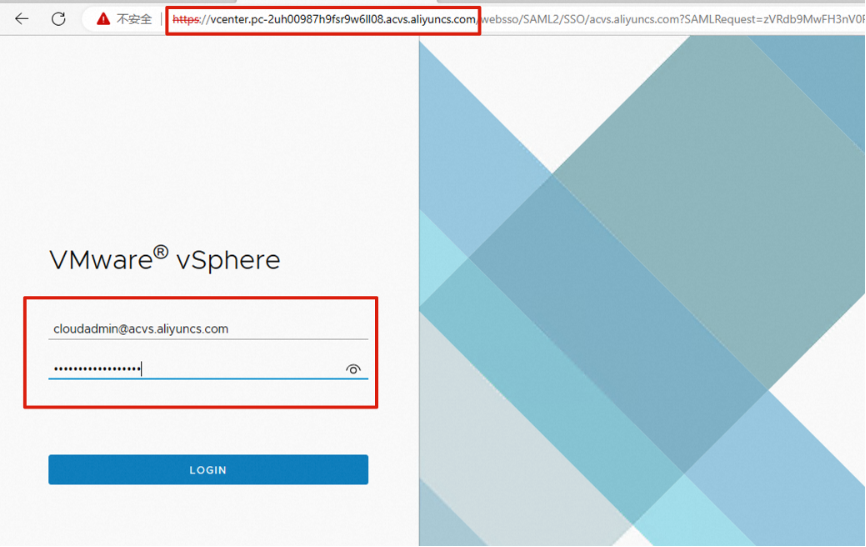
Open your browser, enter the logon address of vCenter in the address bar, and then press Enter. On the page that appears, enter the vCenter username and password, and then click LOGIN.
 Important
The username for vCenter is cloudadmin@acvs.aliyuncs.com, not administrator@vsphere.local. The password for vCenter is the one you specified when you create a dedicated VMware environment.
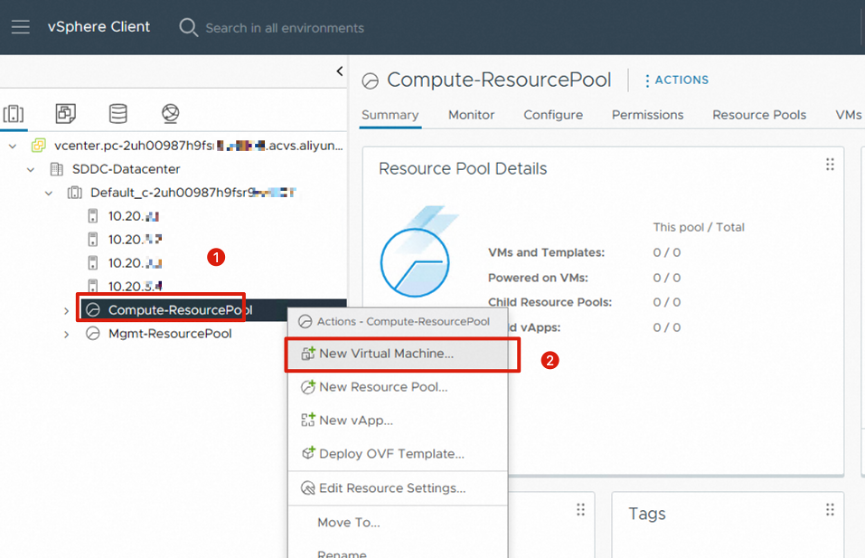
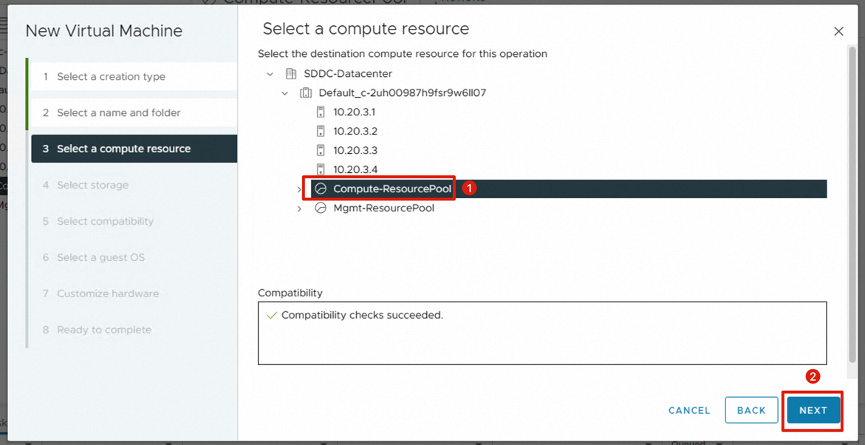
Right-click Compute-ResourcePool and select New Virtual Machine.
 Important
You are not allowed to select Mgmt-ResourcePool because you do not have permissions to create VMs in this resource pool. You can create other resource pools in Compute-ResourcePool based on your business requirements.
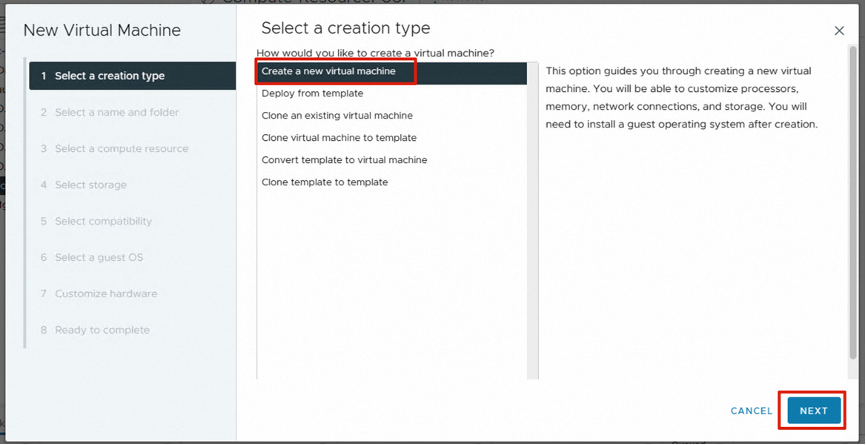
Select Create a new virtual machine and click NEXT.
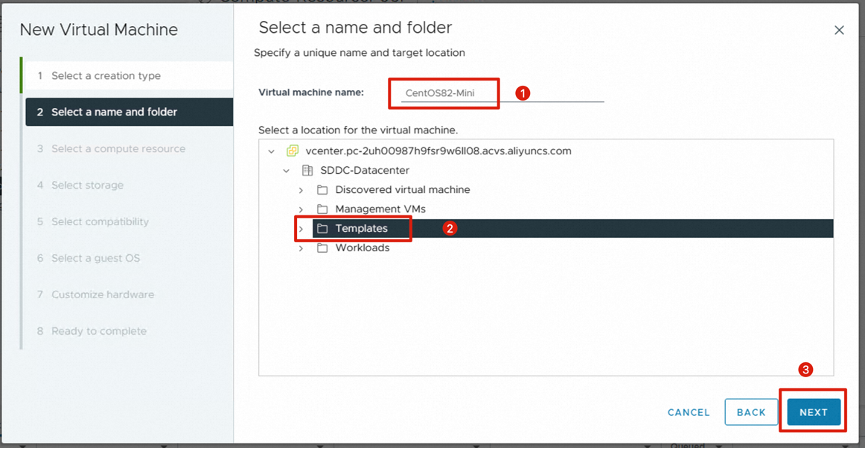
Set the Virtual machine name parameter to, for example, CentOS82-Mini, and then select a location for the VM.
 Important
You do not have permissions to select the "Management VMs" folder, which is used for the management components of the dedicated VMware environment.
Select Compute-ResourcePool.
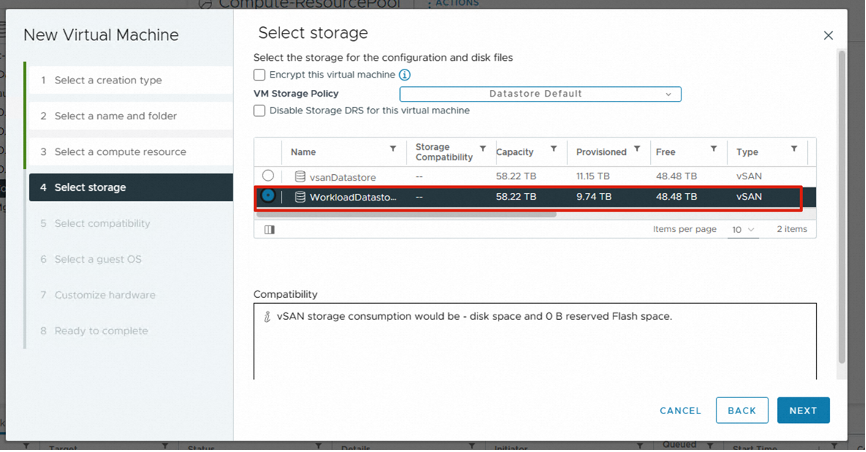
Select the vSAN storage space of WorkloadDatastore.
 Important
You do not have permissions to access the vsanDatastore storage space and can only select the WorkloadDatastore storage space.
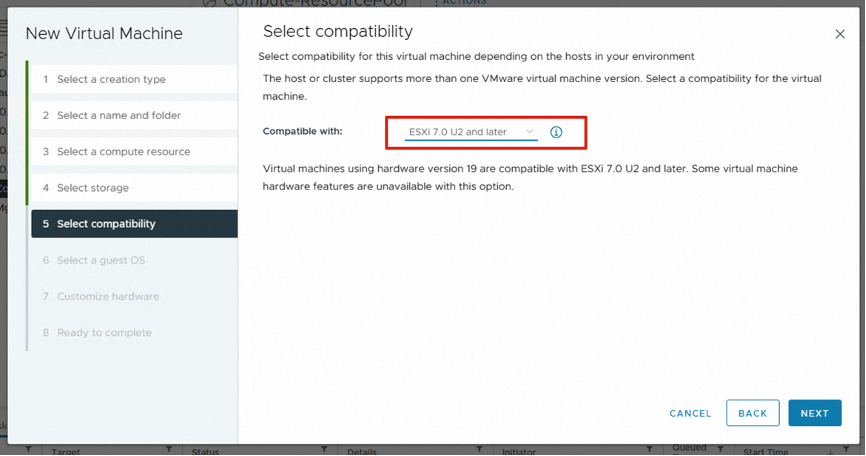
Retain the default compatibility setting. You can also modify the setting based on your business requirements.
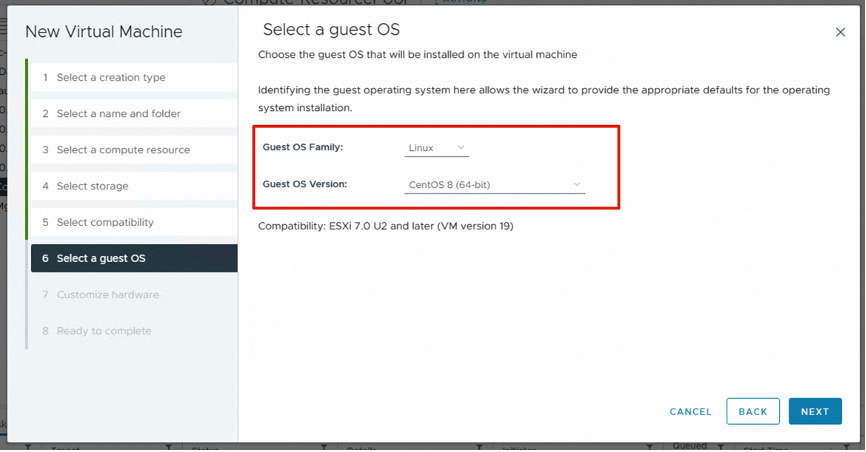
Select an OS and its version based on your business requirements, such as CentOS 8 Linux.
Set the hardware resources of the VM based on your business requirements, such as CPU, memory, hard disk size, and network resources.
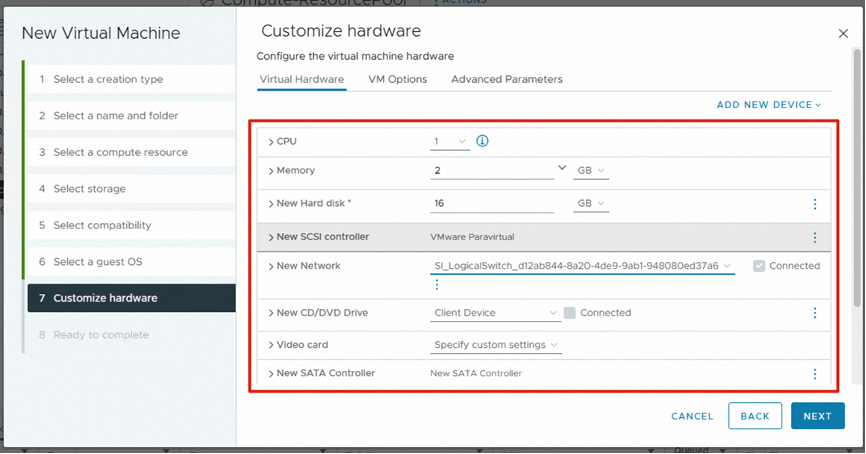
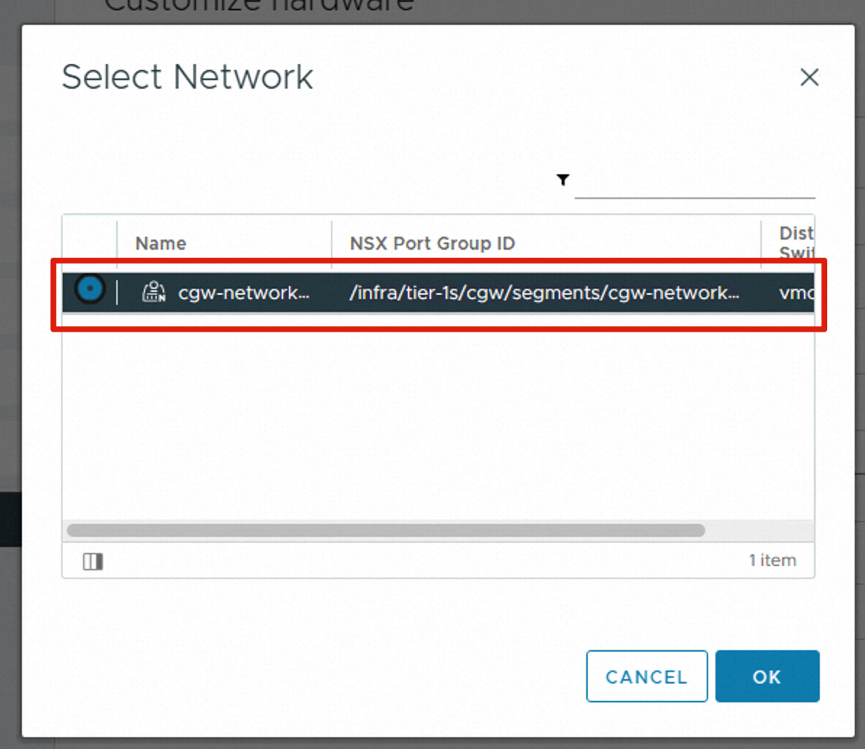
If multiple NSX-T segments are created, select the corresponding NSX-T segments from the New Network drop-down list.
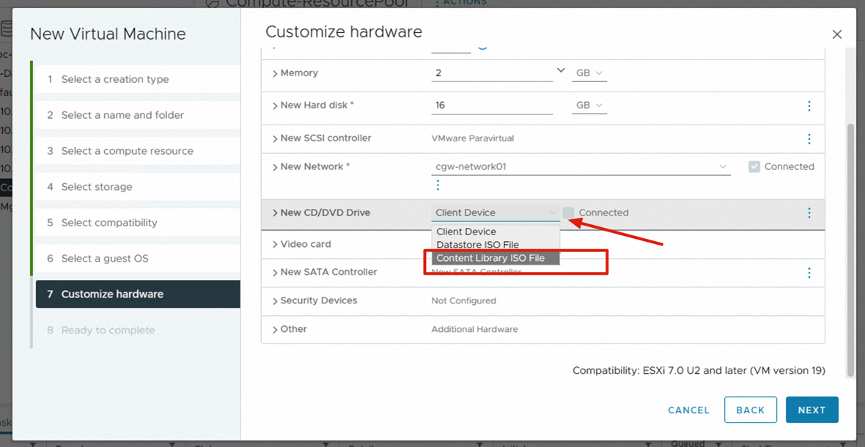
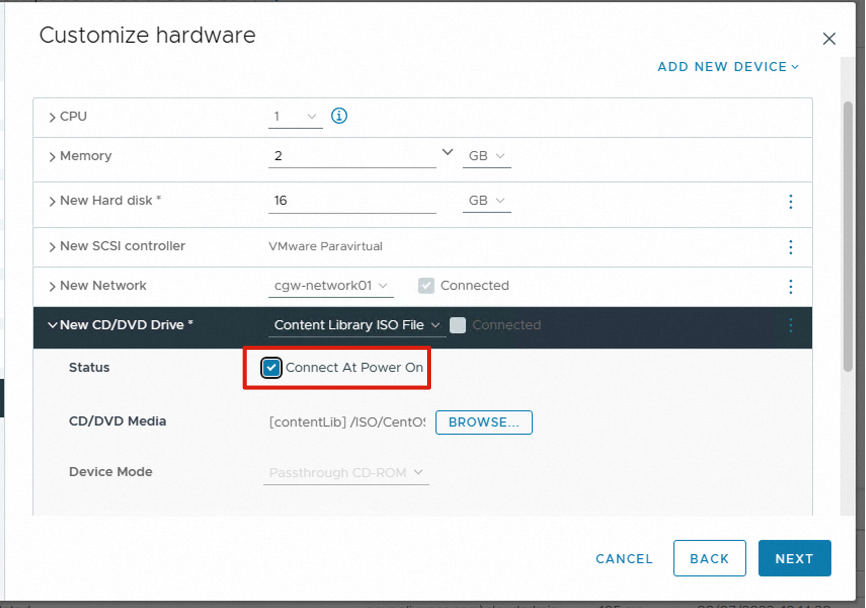
Select Content Library ISO File from the New CD/DVD Drive drop-down list.
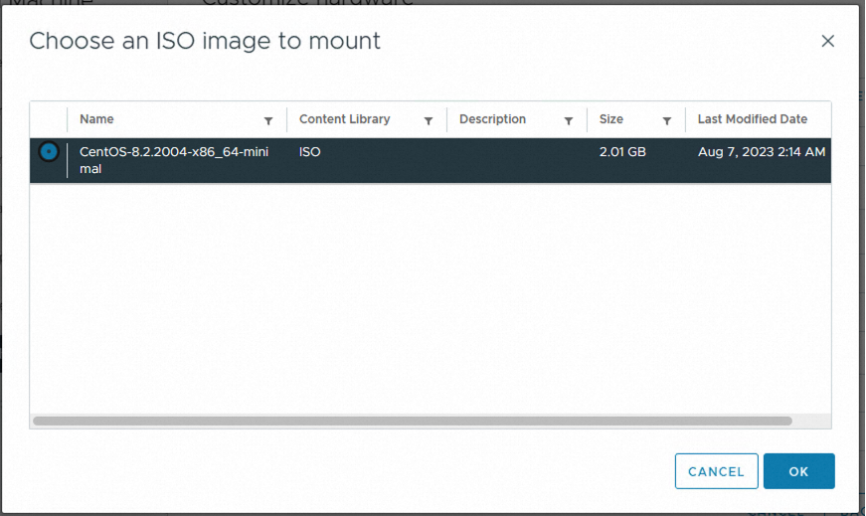
Select the ISO image file that has been uploaded to the content library, and then click OK.
Select Connect At Power On. After the VM is powered on, it is directly booted from the ISO CD.
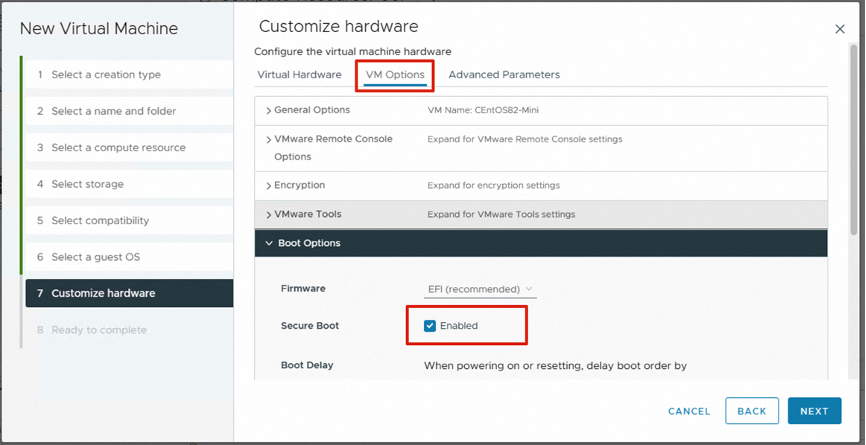
In the Boot Options section of the VM Options tab, select Enabled next to Secure Boot based on the OS requirements. Some OSs may not support Secure Boot.
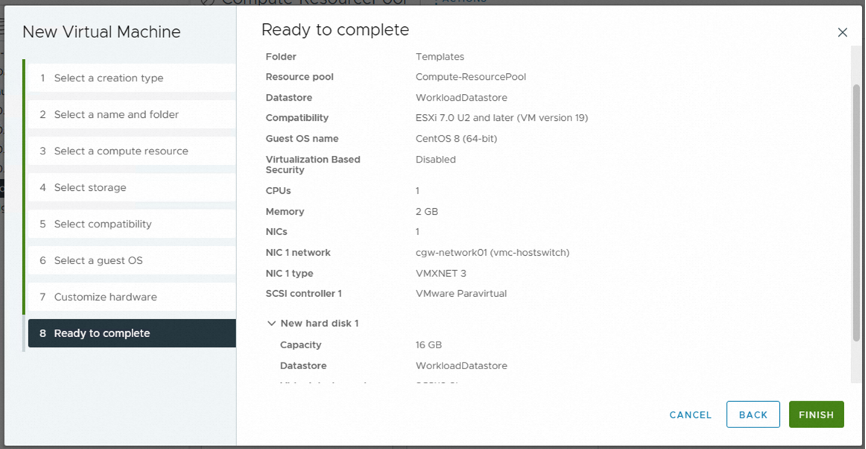
When all the configurations are complete, click NEXT.

The configurations of the VM are displayed. If all configurations are correct, click FINISH to start creating the VM.
Install an OS
Procedure
After a VM is created, power on the VM and start to install an OS.
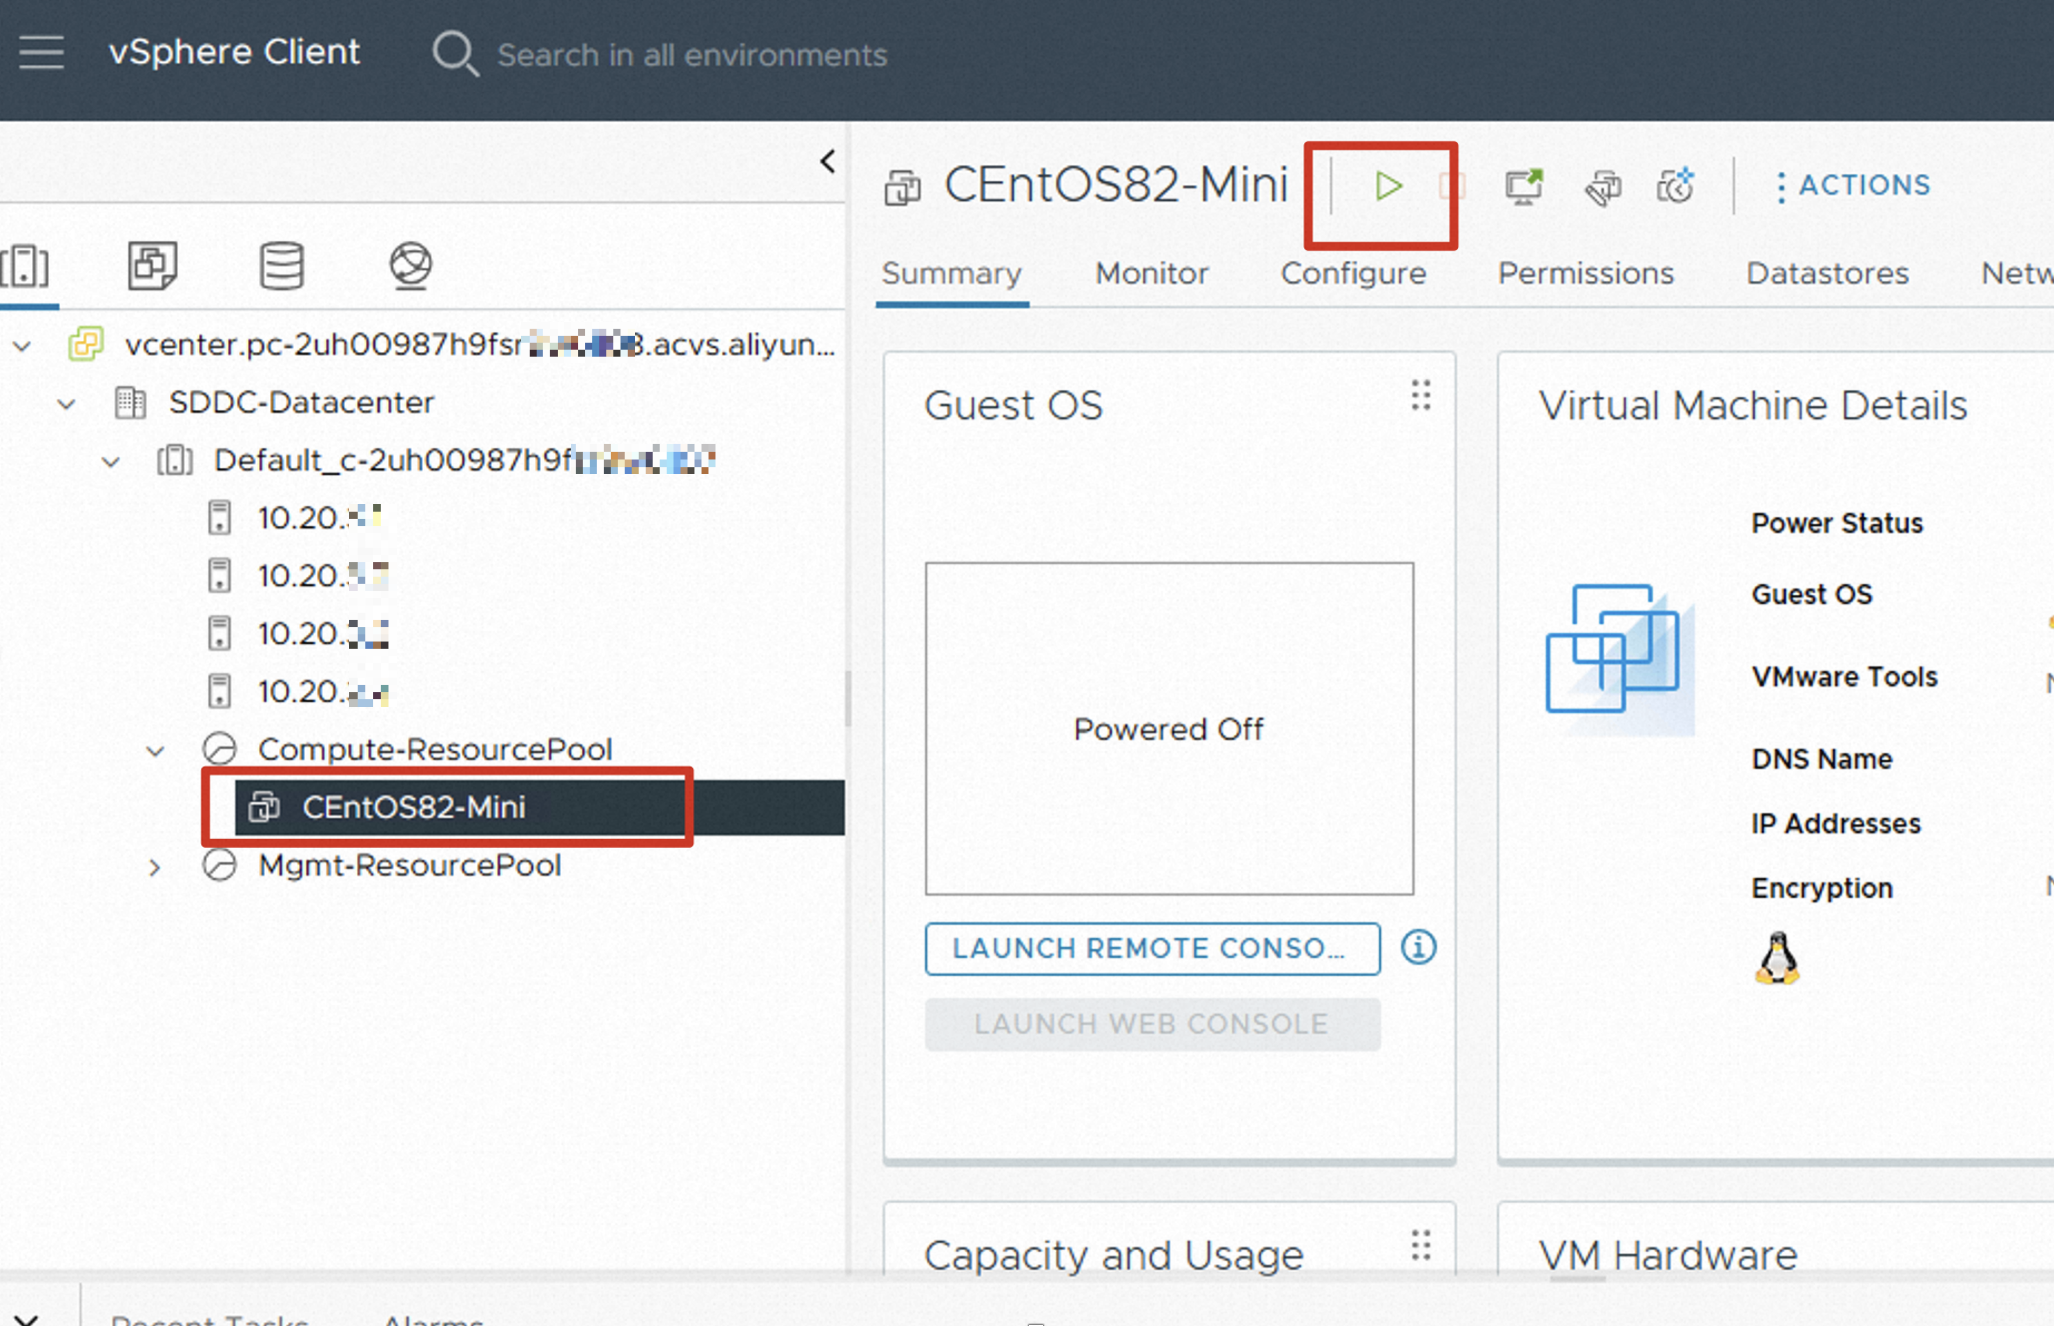
Select the VM and click LAUNCH WEB CONSOLE on the right.
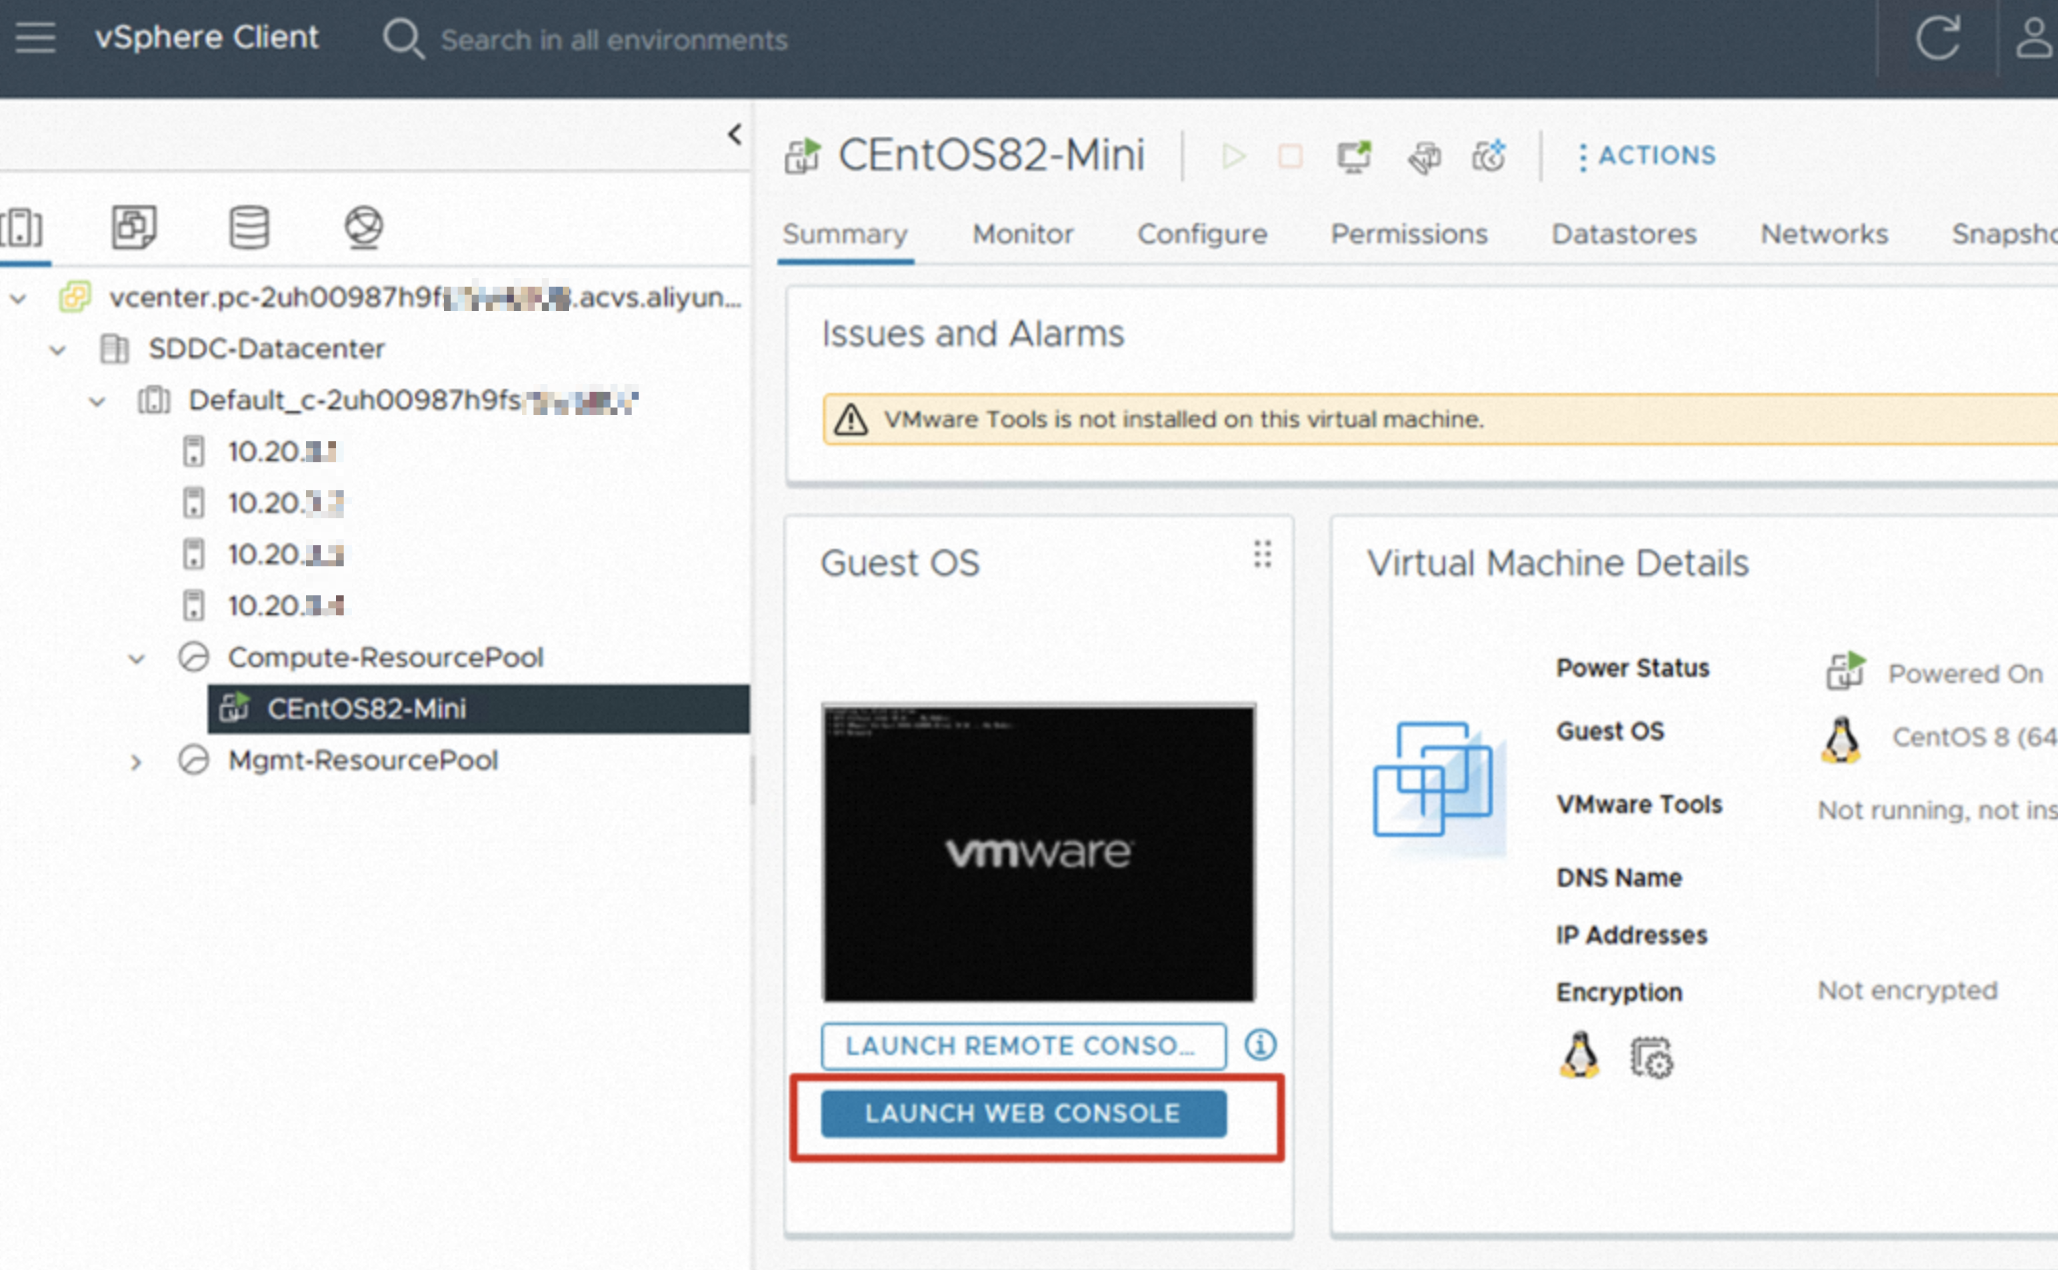 Important
Configure your browser to allow pop-up windows of the vCenter console.
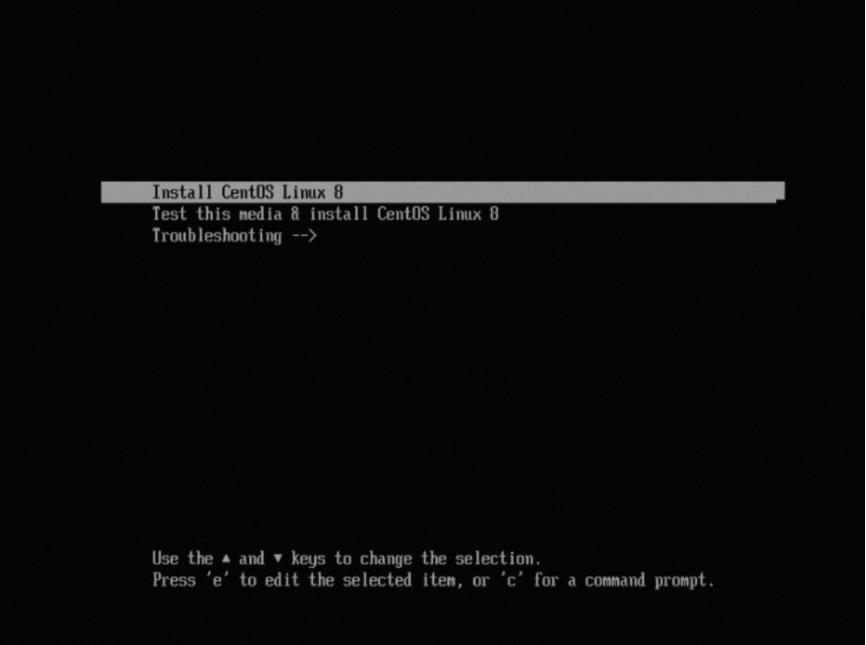
Install an OS in the VM console according to the installation method of the OS.
 Important
After the VM OS is installed, install VMware Tools in a timely manner.