This topic describes how to configure virtual machines (VMs) to access the Internet by using Source Network Address Translation (SNAT).
Prerequisites
An Internet NAT gateway is created and configured. For more information, see Before you begin.
A workload network segment is created for a dedicated VMware environment. For more information, see Create a workload network segment.
Tasks
Prepare an Internet NAT gateway
Enable the dedicated VMware environment to access the Internet by using SNAT
Add an NSX-T firewall rule
Advertise the default route in the VPC to CEN
Prepare an Internet NAT gateway
Procedure
Before you enable the dedicated VMware environment to access the Internet, create an Internet NAT gateway on the virtual private cloud (VPC) associated with the dedicated VMware environment. On the Service information tab in the Alibaba Cloud VMware Service (ACVS) console, view the VPC ID.

Log on to the VPC console. On the Internet NAT Gateway page, check whether the created Internet NAT gateway is associated with the correct VPC.
 Warning
If the Internet NAT gateway is not associated with the correct VPC, the dedicated VMware environment cannot be configured to access the Internet.
Check whether the Internet NAT gateway is associated with an elastic IP address (EIP). If not, associate the Internet NAT gateway with an EIP.
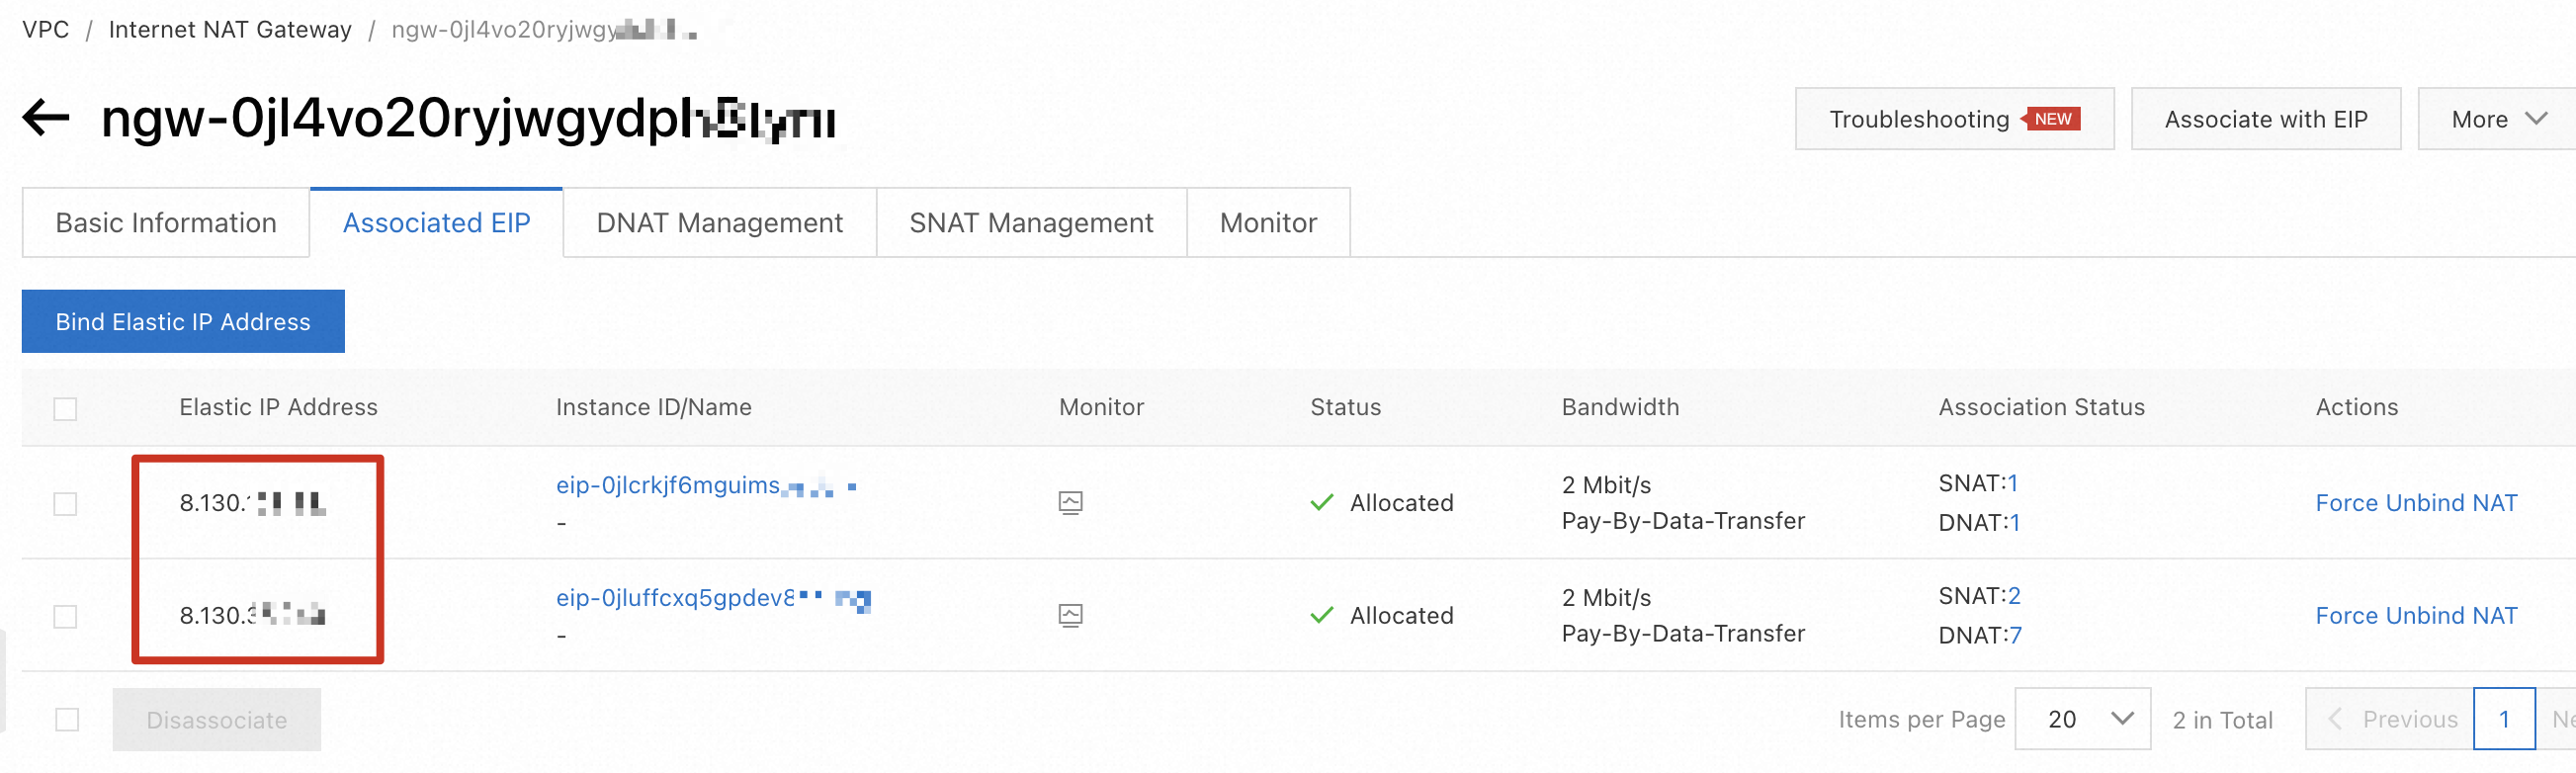
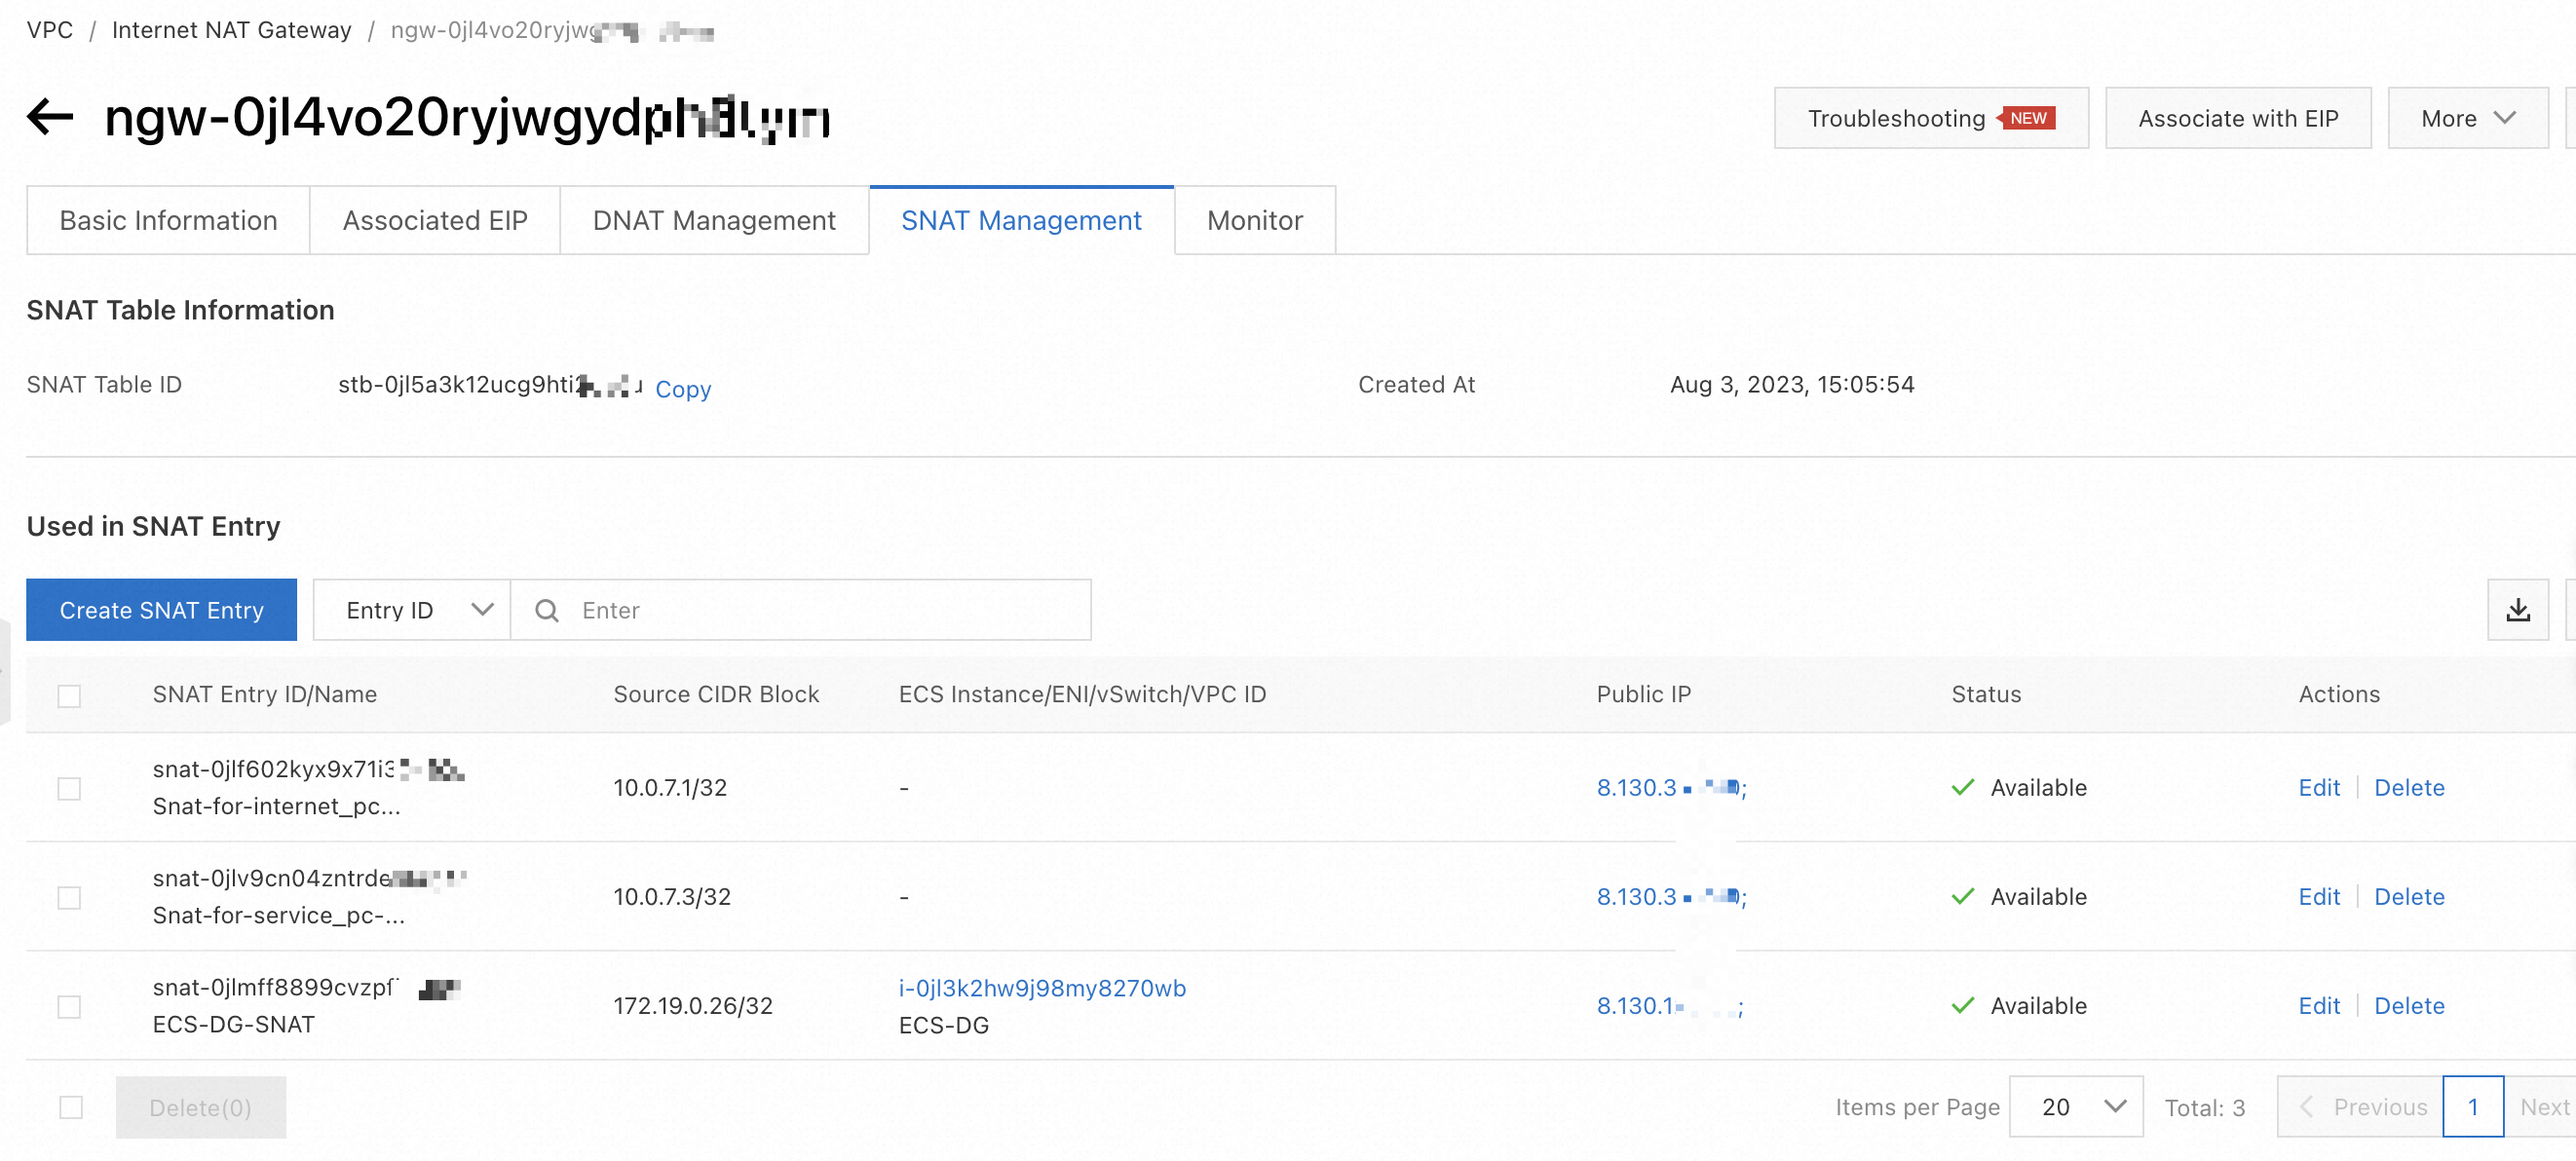
Check the SNAT entries of the Internet NAT gateway. This helps you compare the SNAT entries with those of the dedicated VMware environment after Internet access is enabled.
Enable the dedicated VMware environment to access the Internet by using SNAT
Procedure
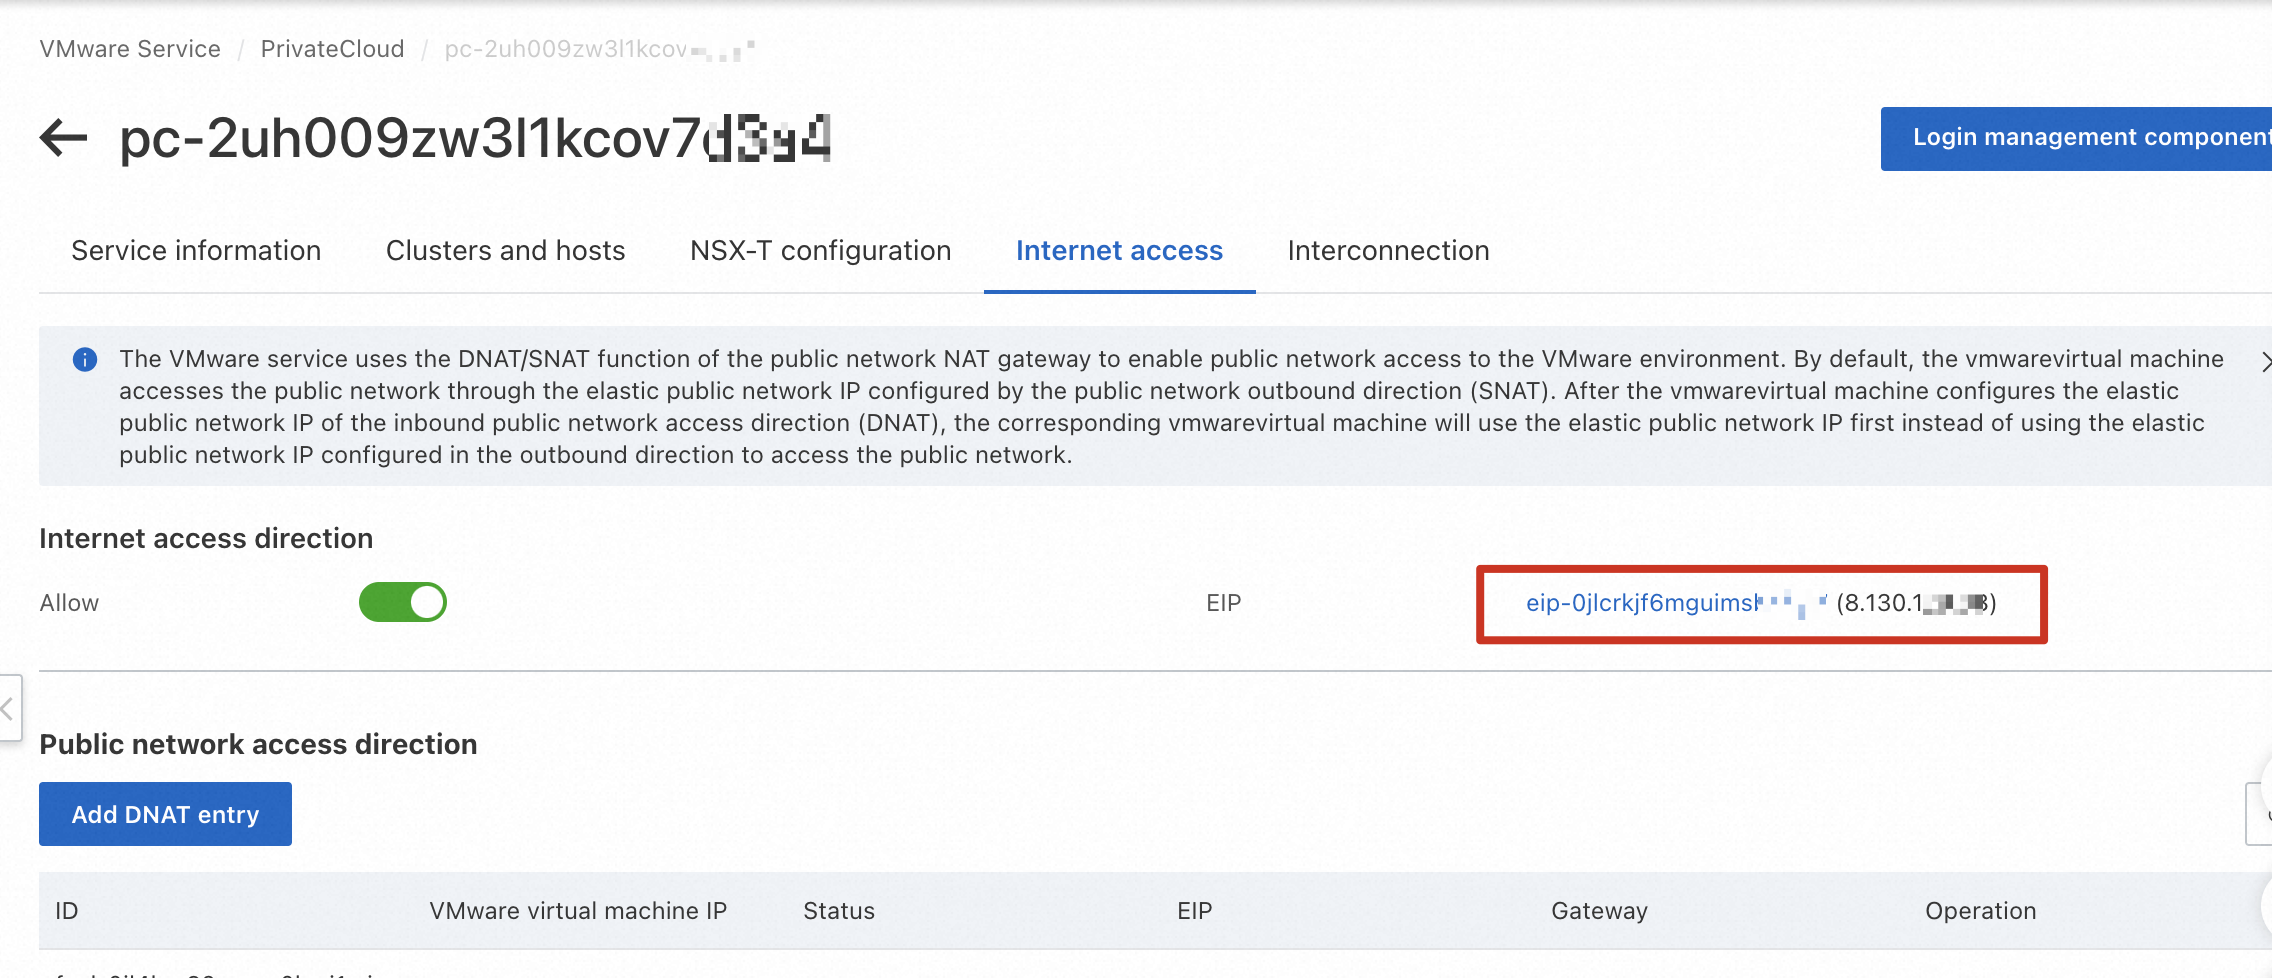
Log on to the ACVS console. Choose PrivateCloud. On the Internet access tab of the dedicated VMware environment, turn on the Allow switch in the Internet access direction section. The Access settings dialog box appears.

In the Access settings dialog box, select the Internet NAT gateway that is associated with the VPC, select the EIP, and then click OK.

Complete the configuration of Internet access in the outbound direction. On the Internet access tab, the EIP used for SNAT is displayed.
Return to the Internet NAT Gateway page. On the SNAT Management tab, two SNAT entries are added. You cannot delete these two SNAT entries.

Add an NSX-T firewall rule
Procedure
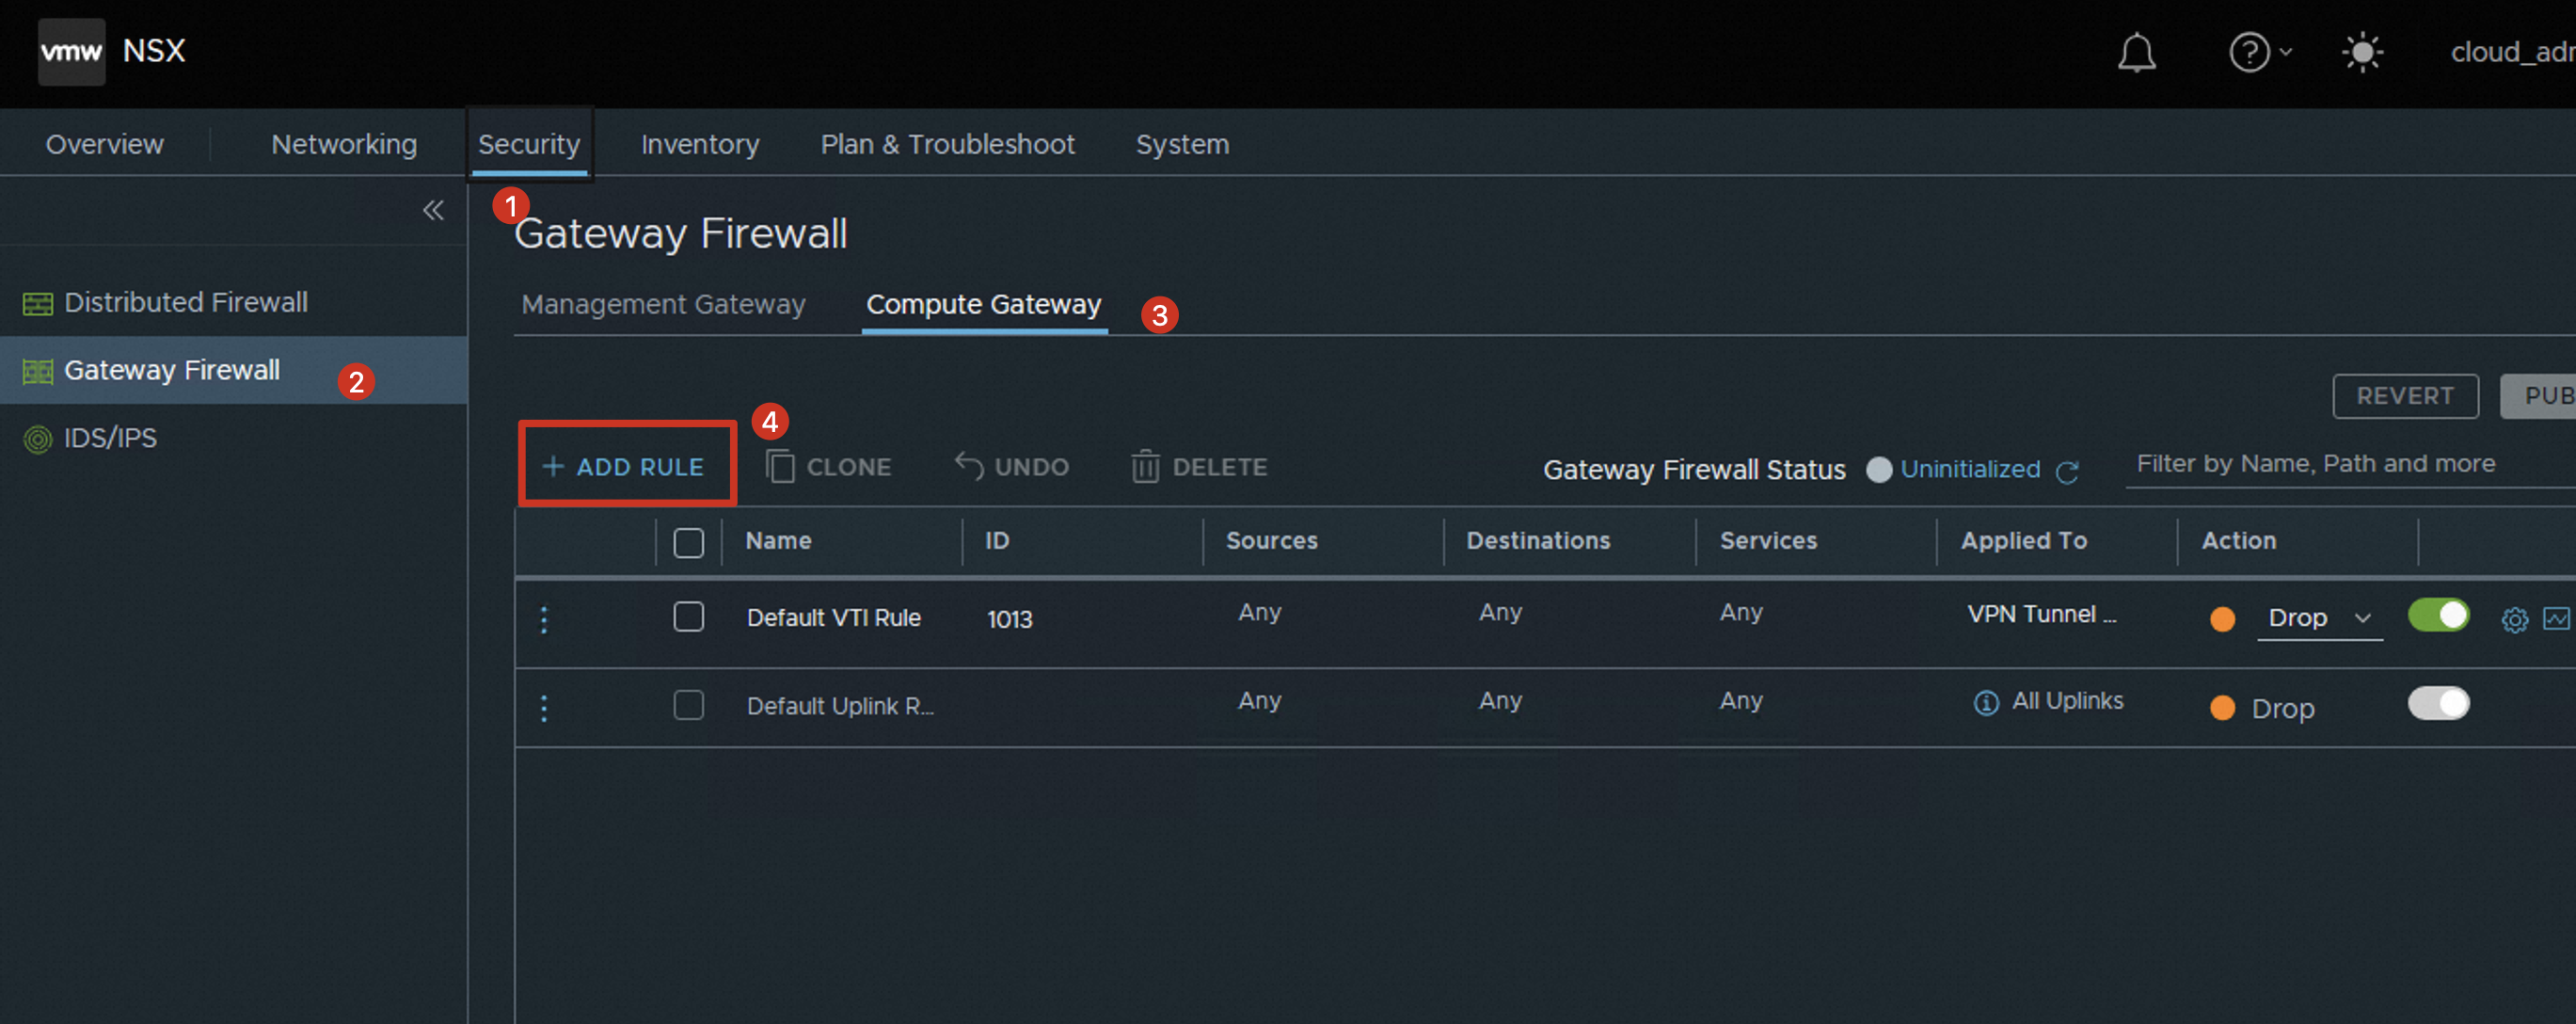
After you enable Internet access in the ACVS console, you must configure an NSX-T gateway firewall rule. Otherwise, VMs cannot access the Internet. Log on to the NSX-T console, choose Security > Gateway Firewall > Compute Gateway, and then click ADD RULE.
Configure a firewall rule based on your business requirements. The rule created in this example is used to allow VMs to access the Internet.
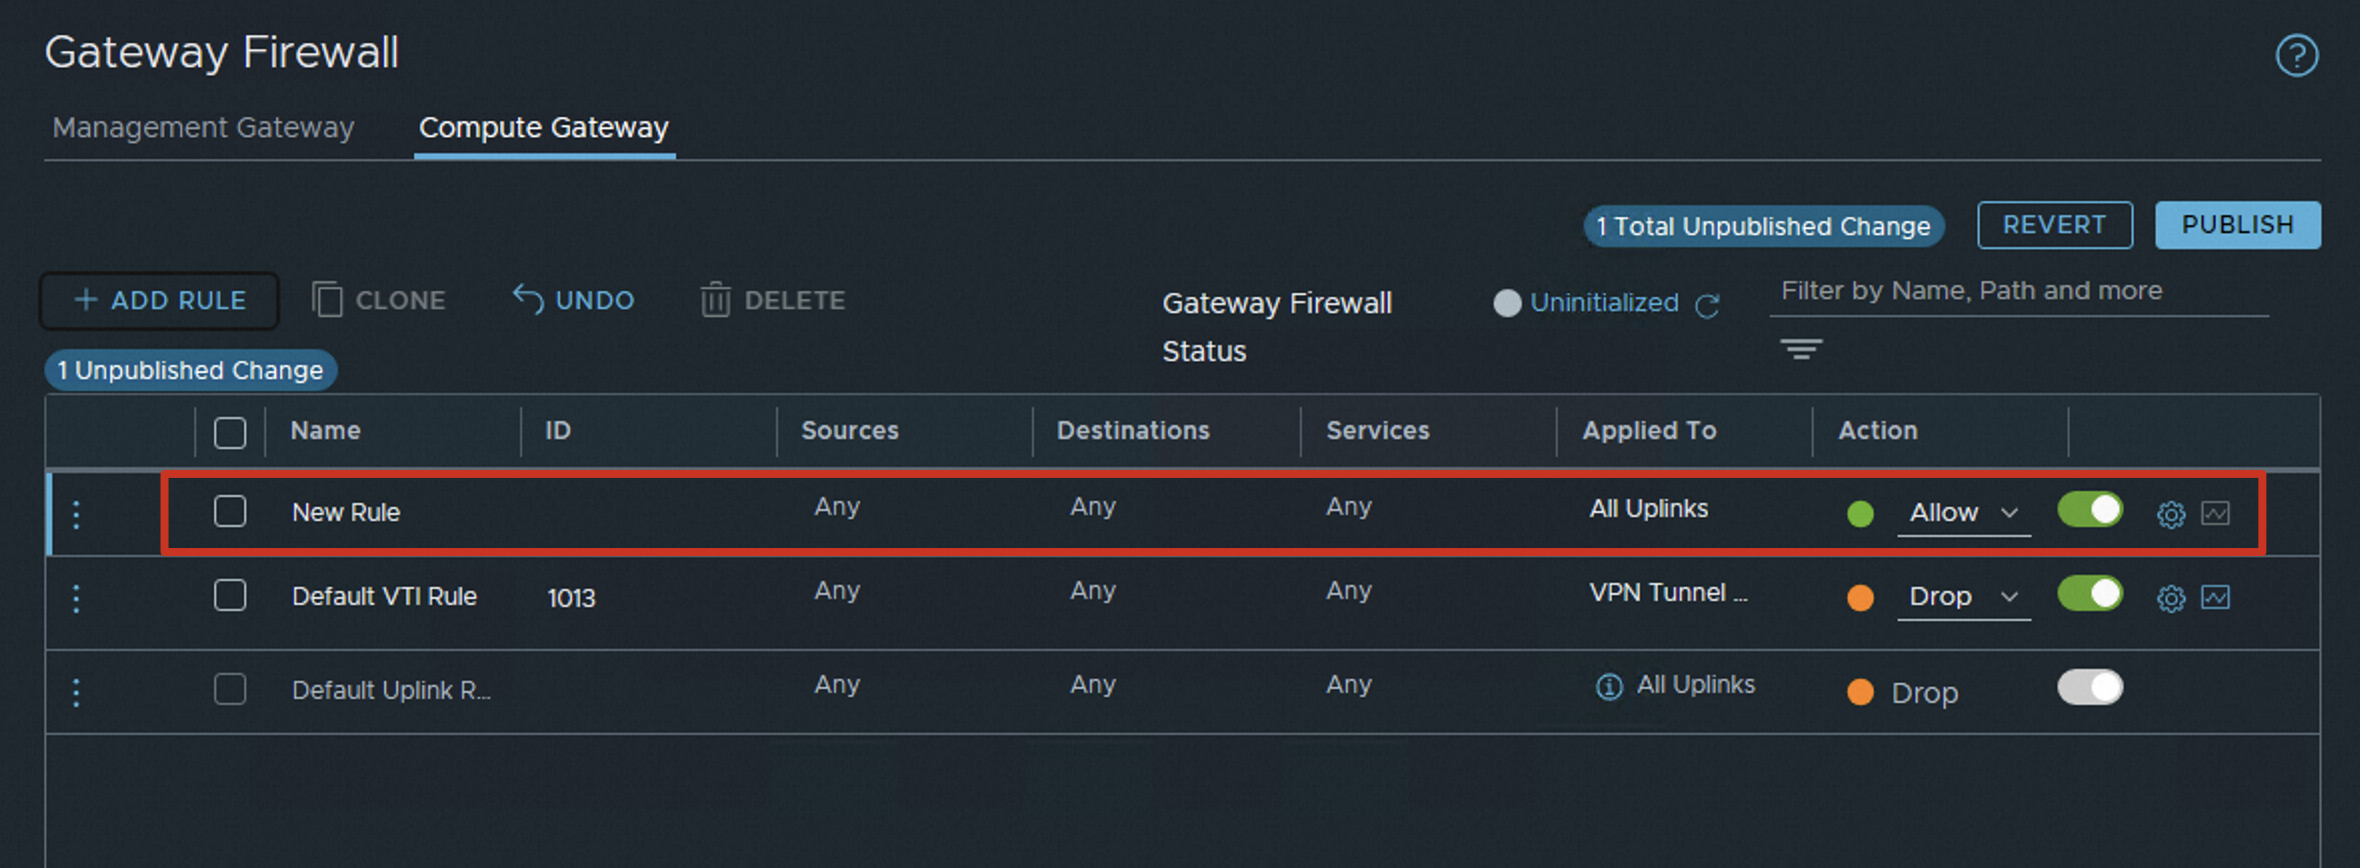
Click the name of New Rule and change the name of the rule to CGW To Internet.
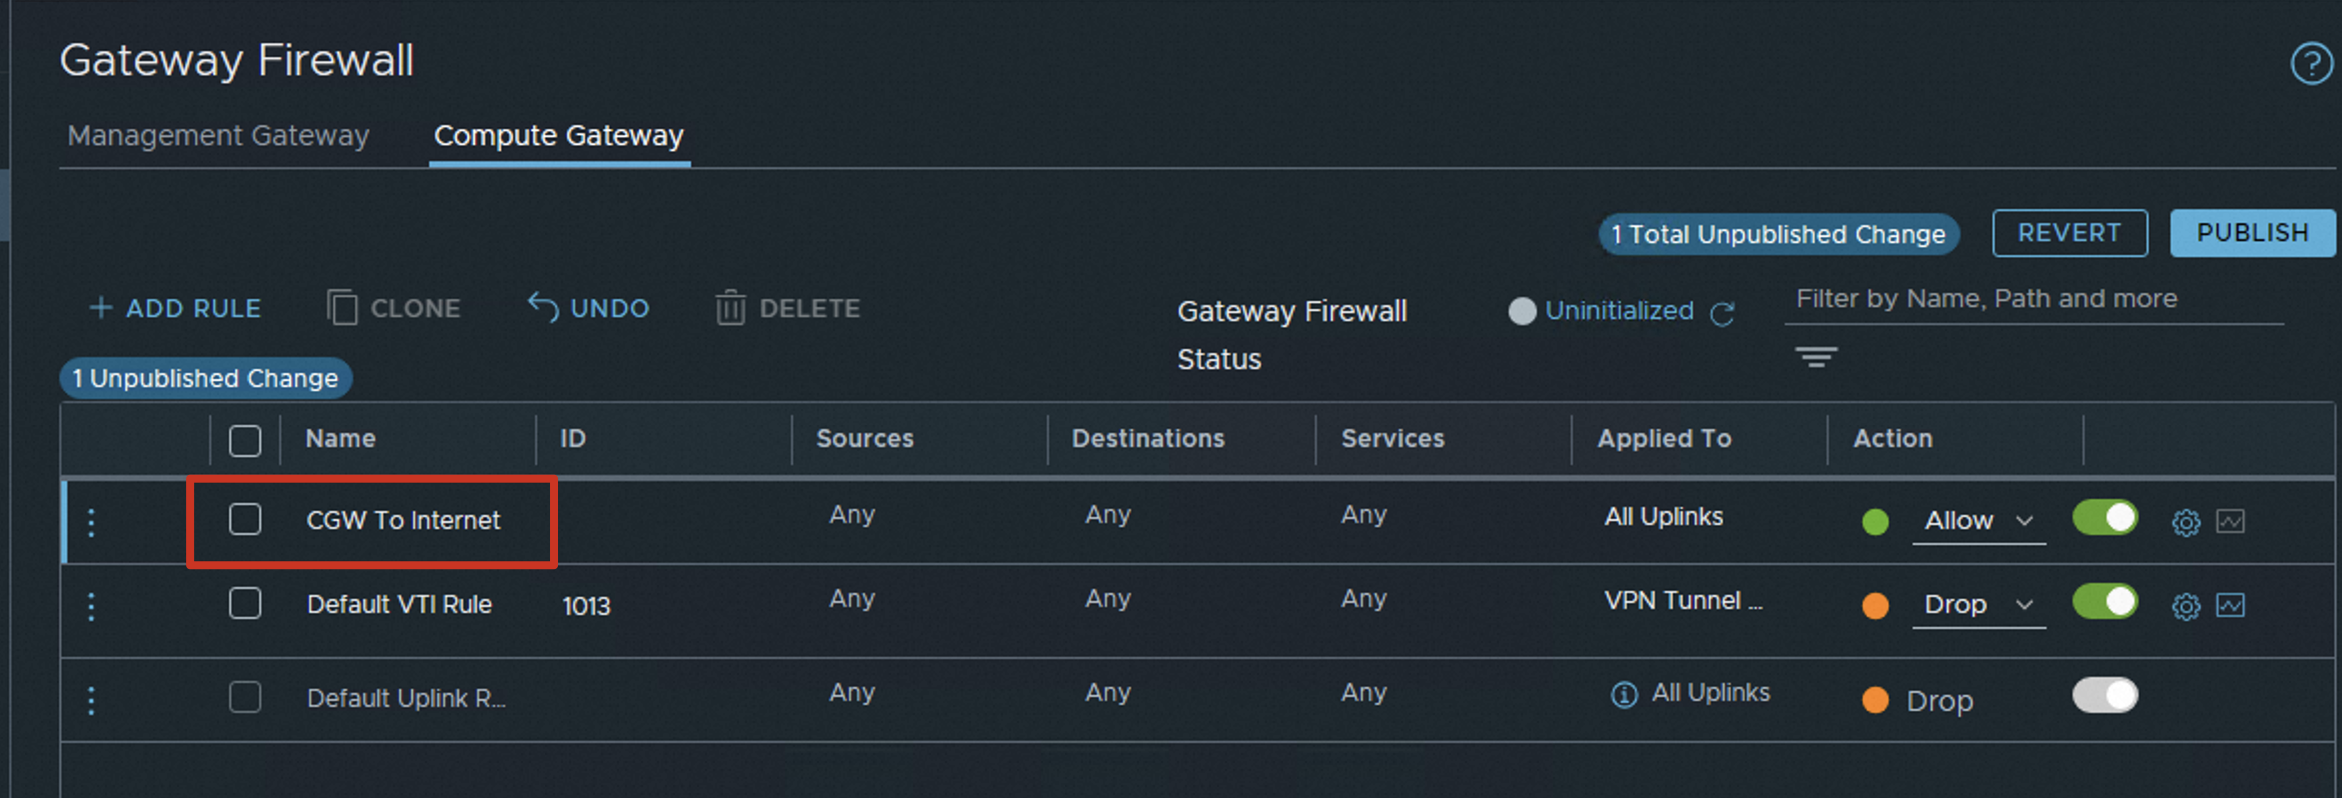
Click the edit icon for Sources that corresponds to the changed rule name.
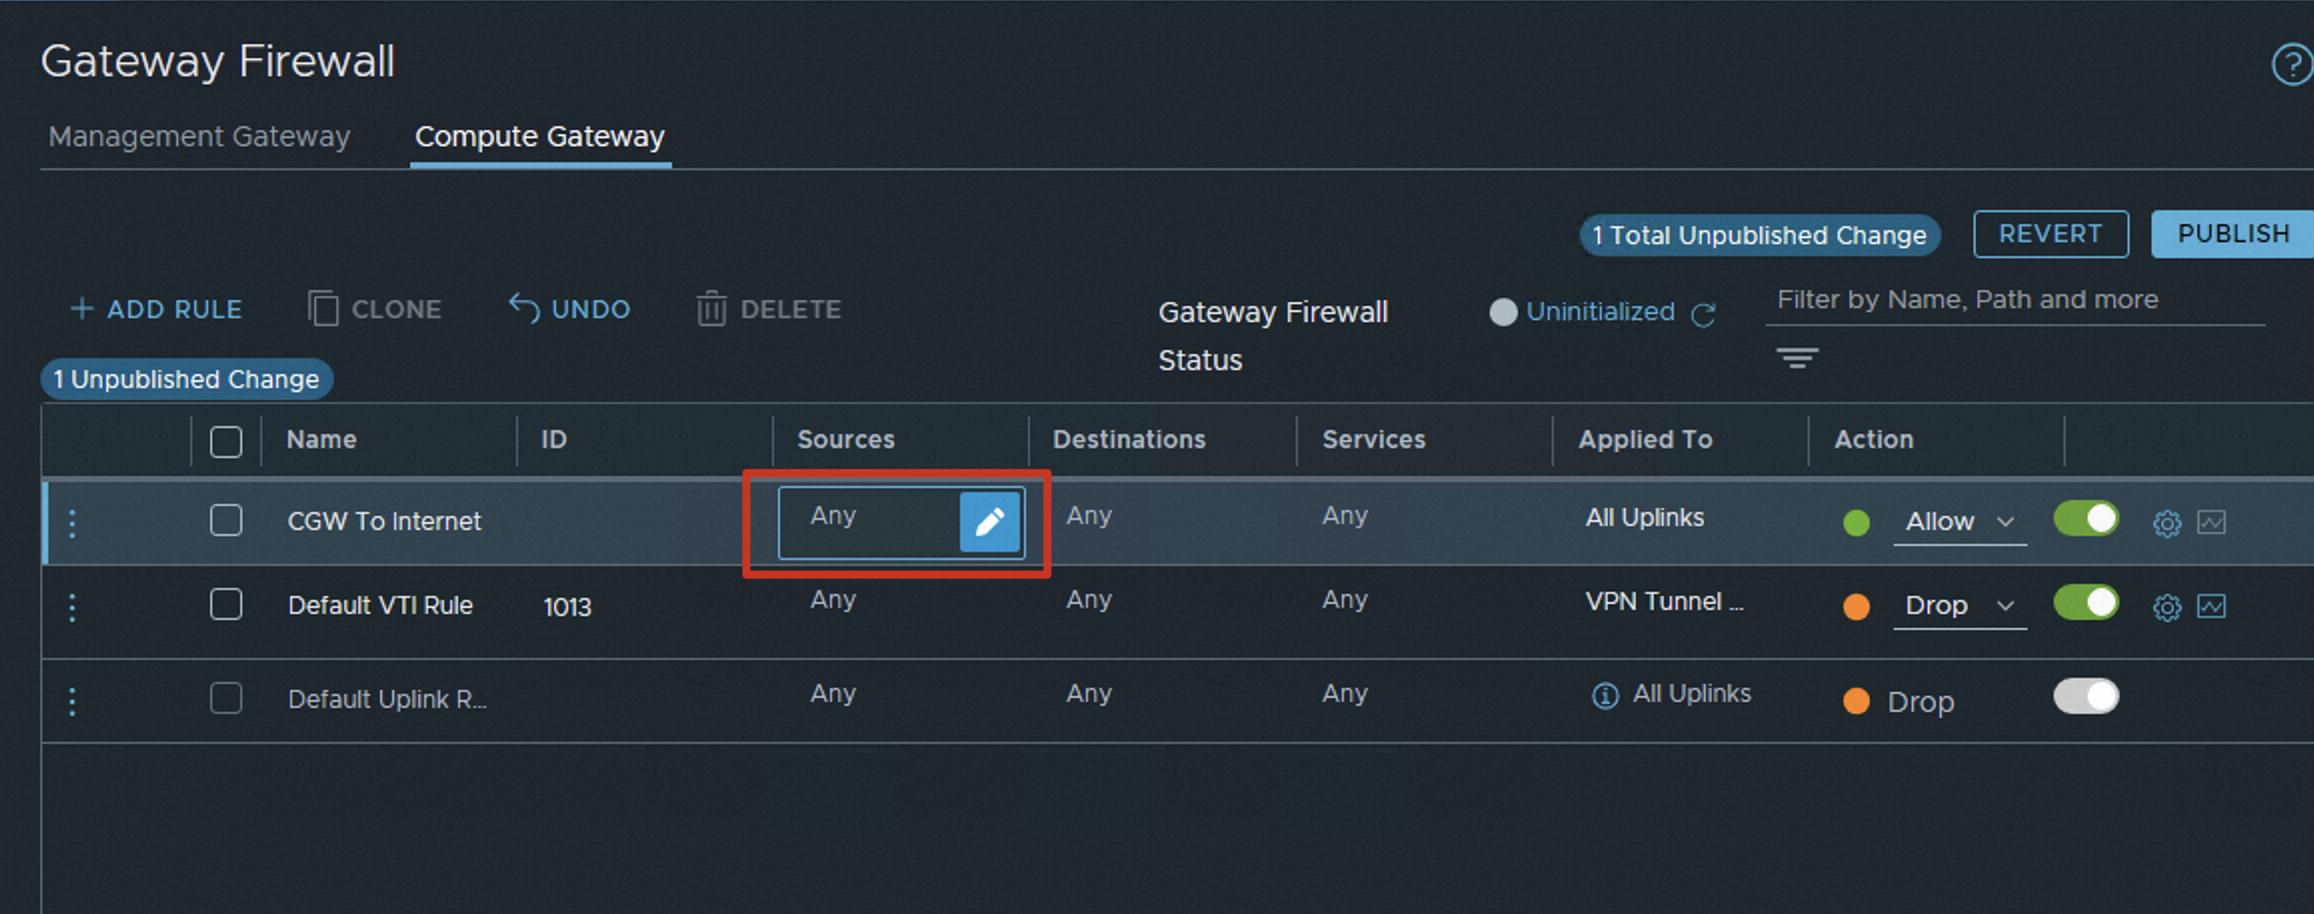
Click ADD GROUP.
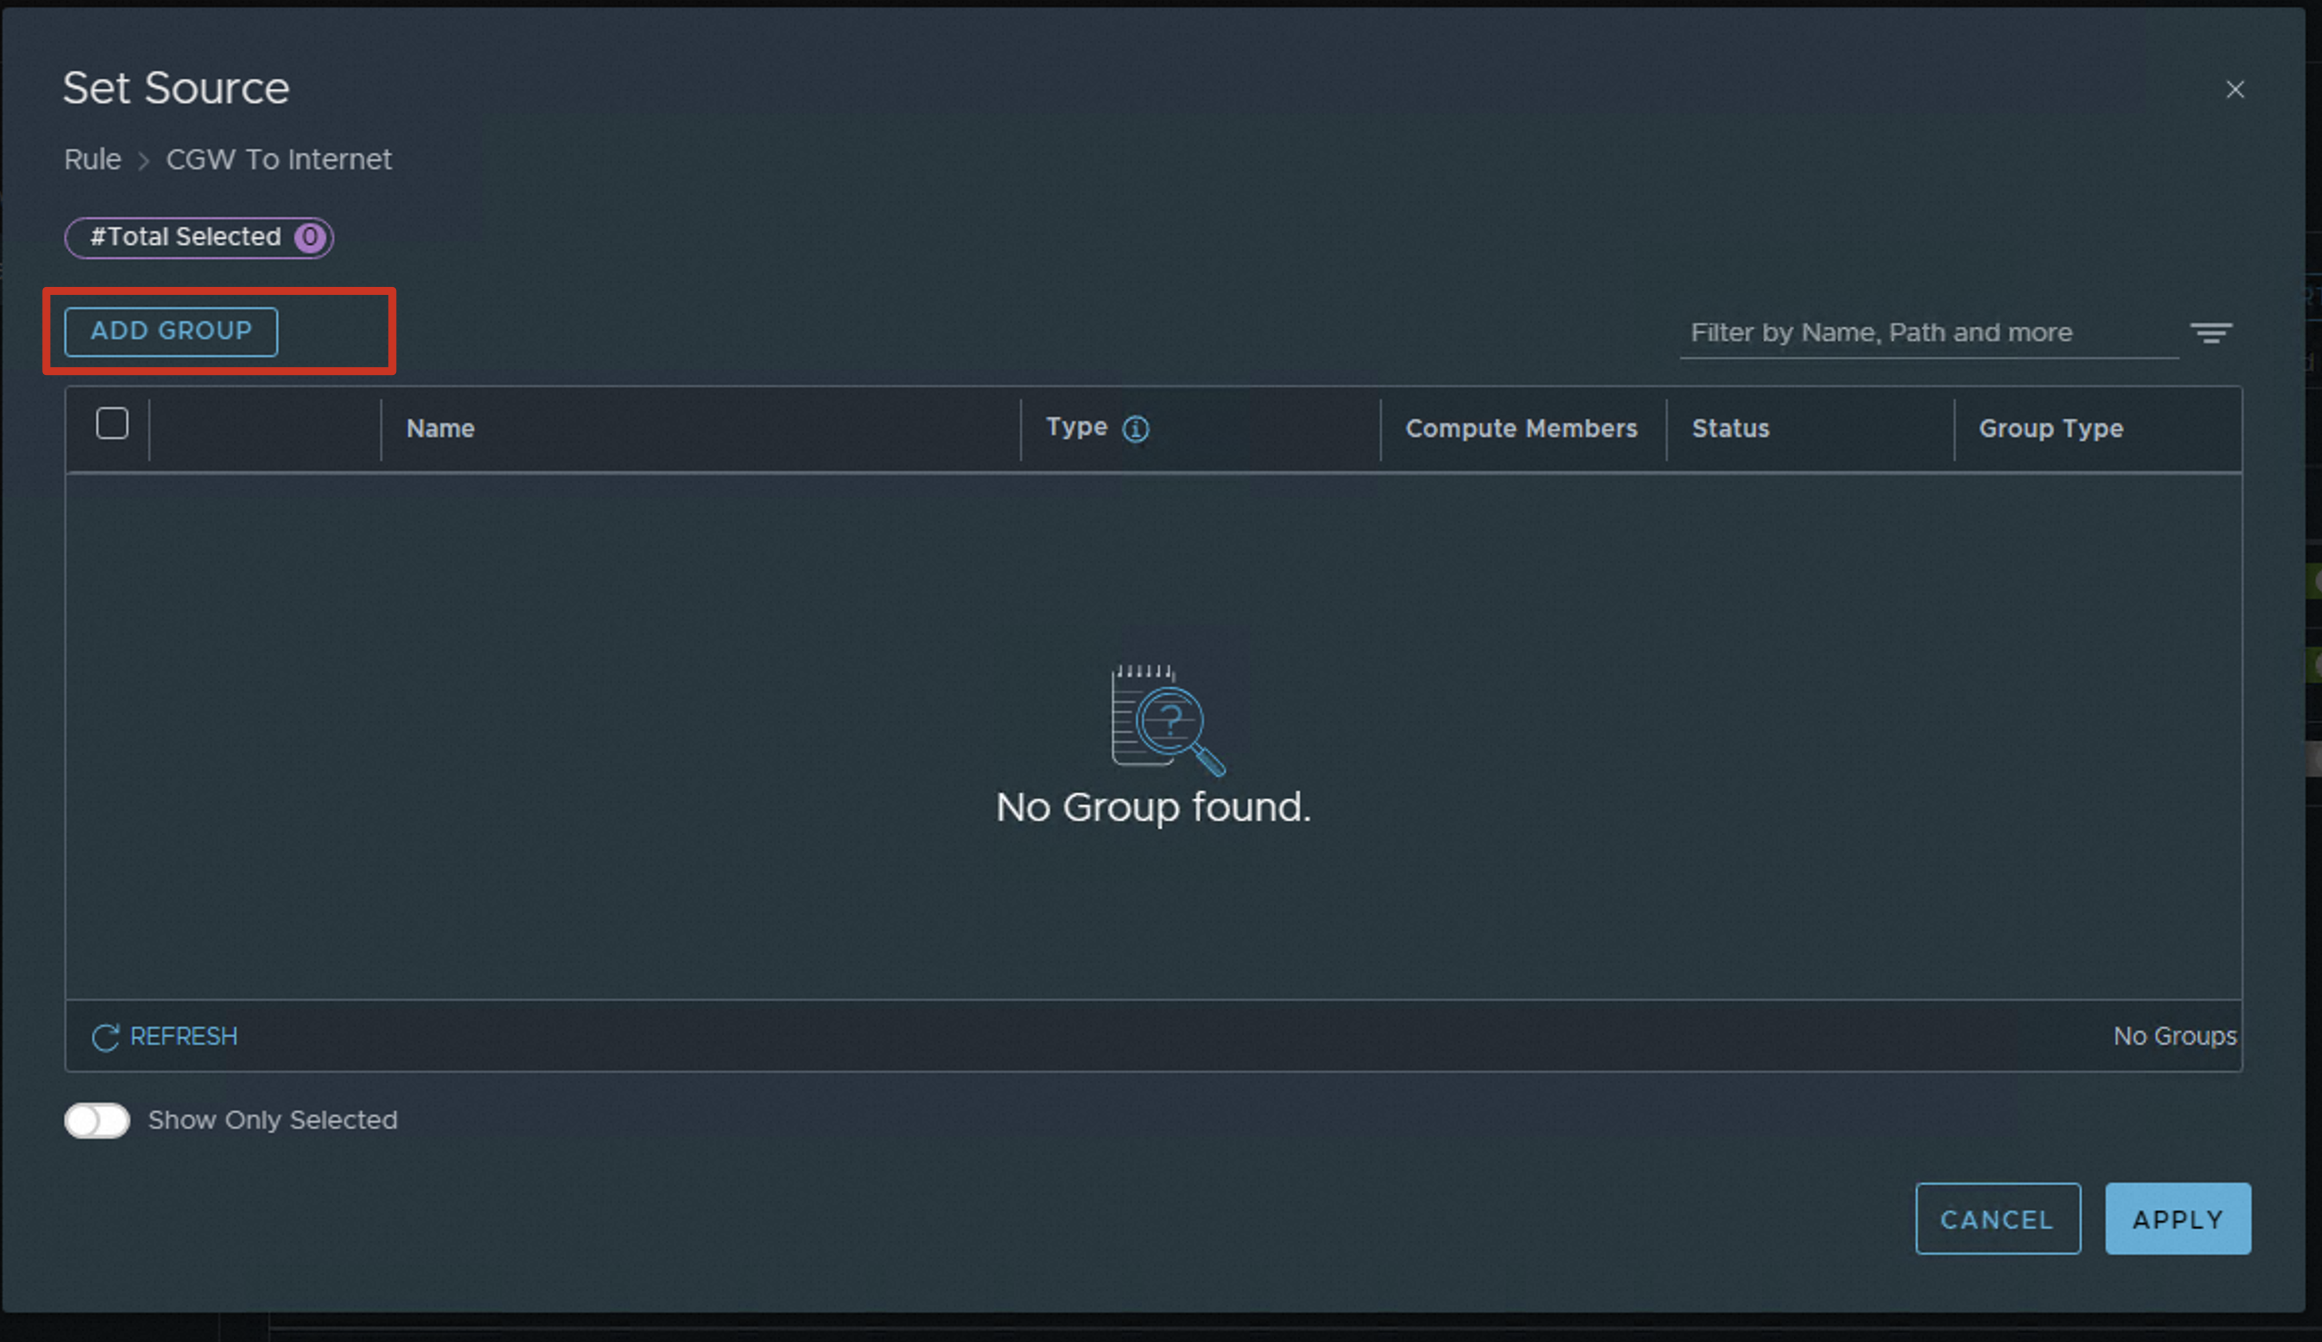
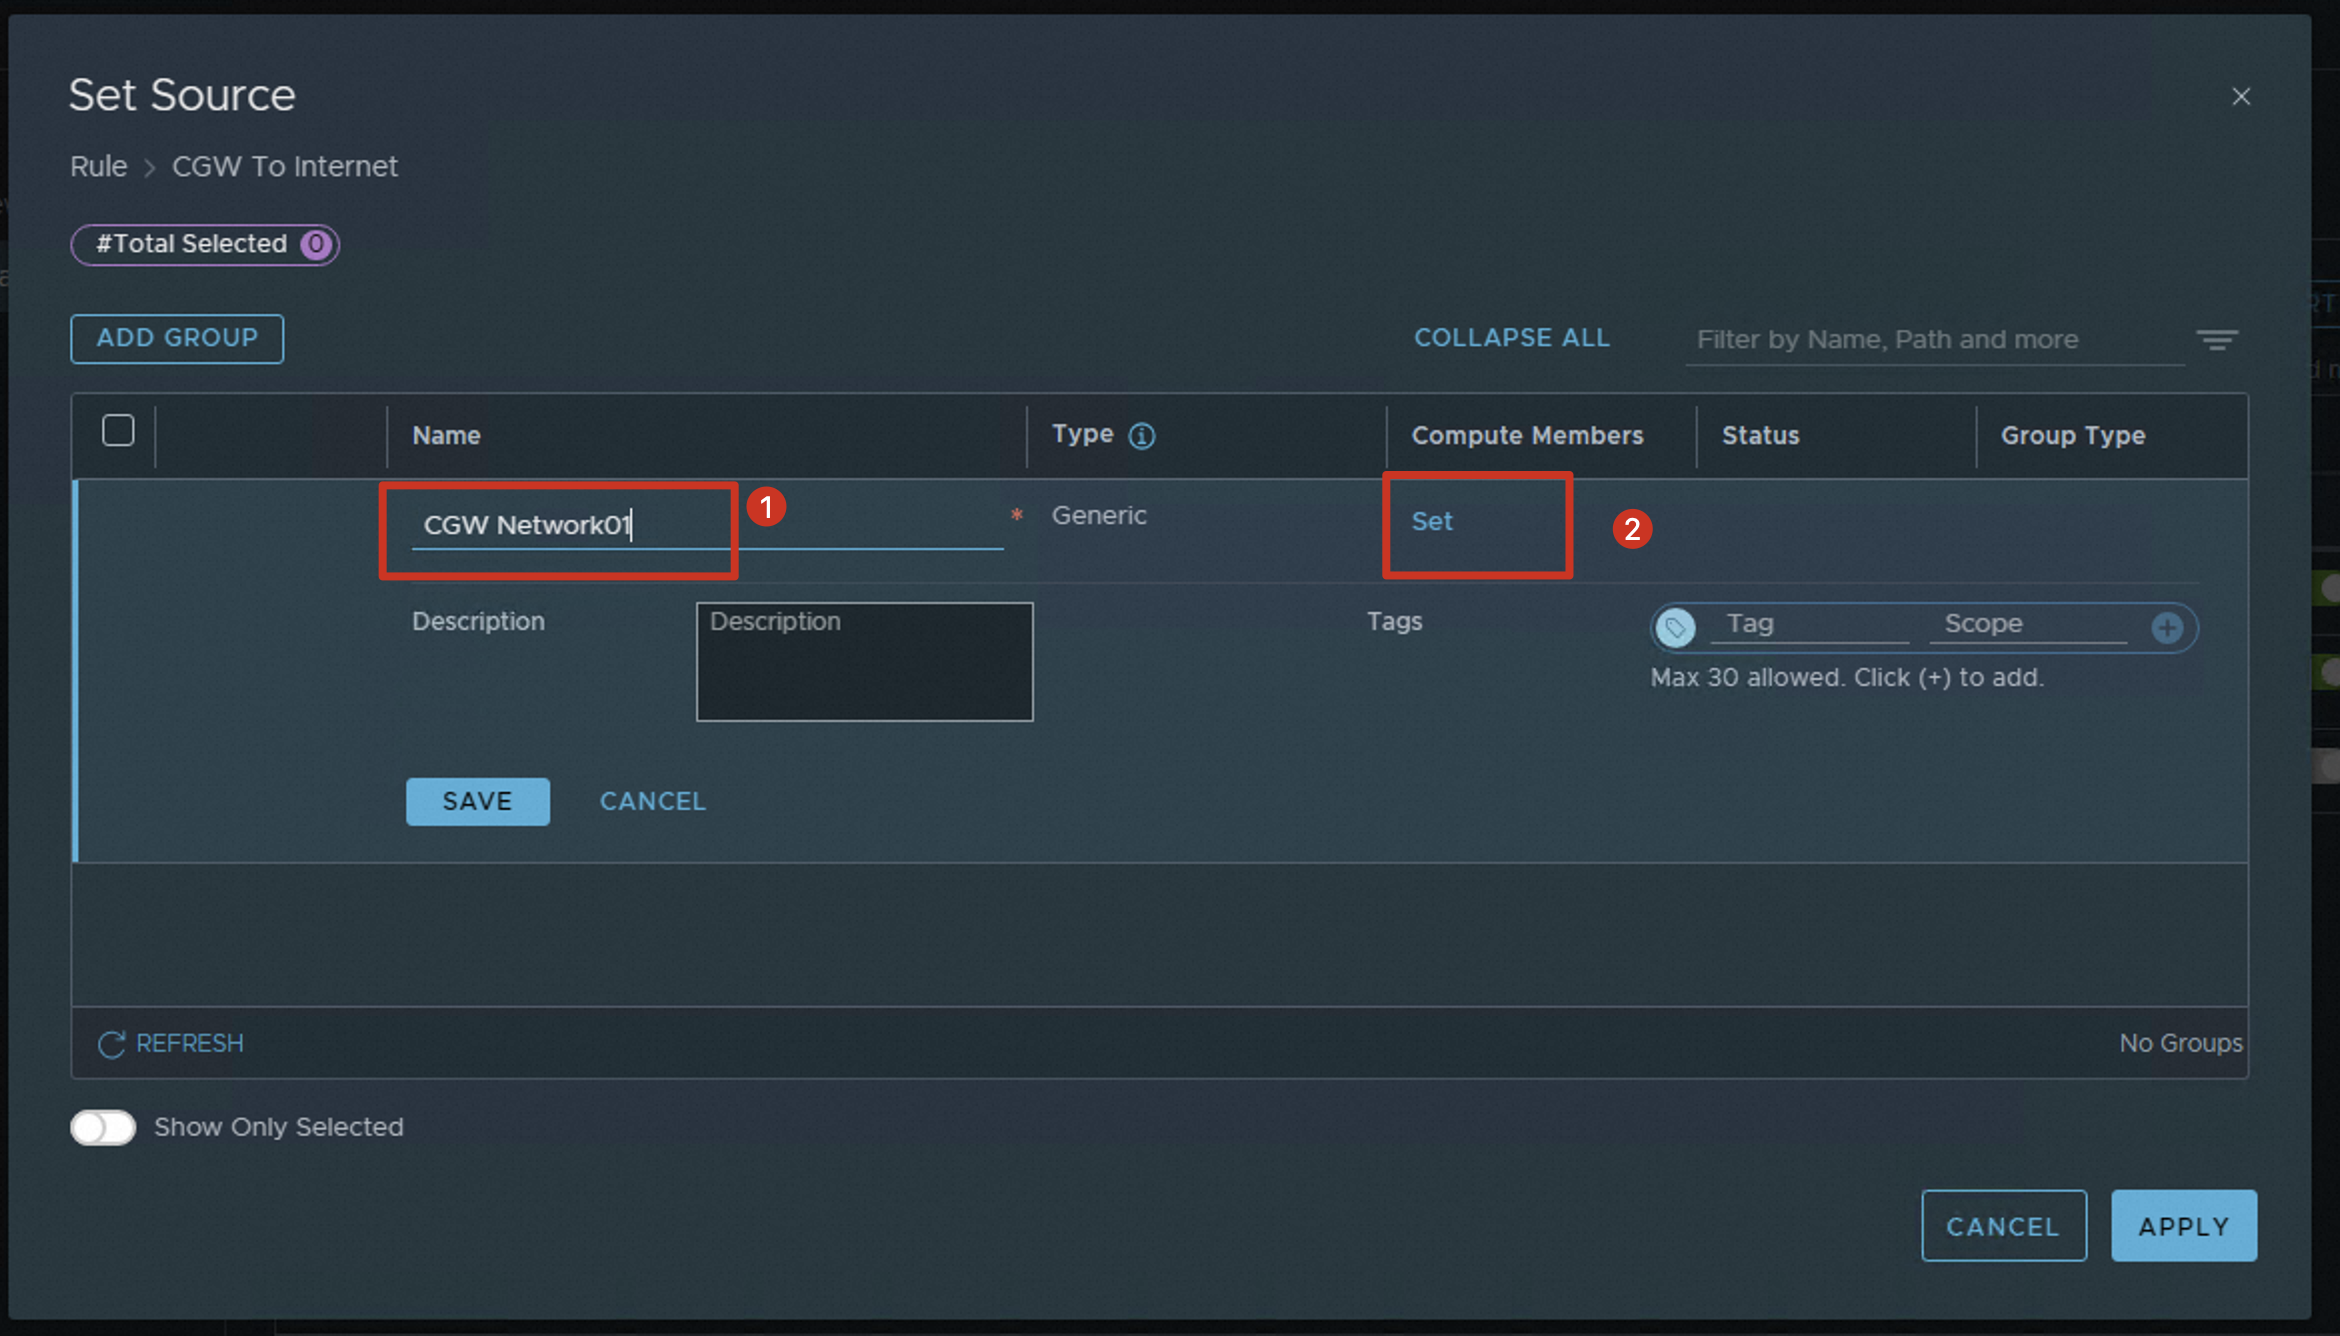
Enter a name for the group and click Set to add members to the group.
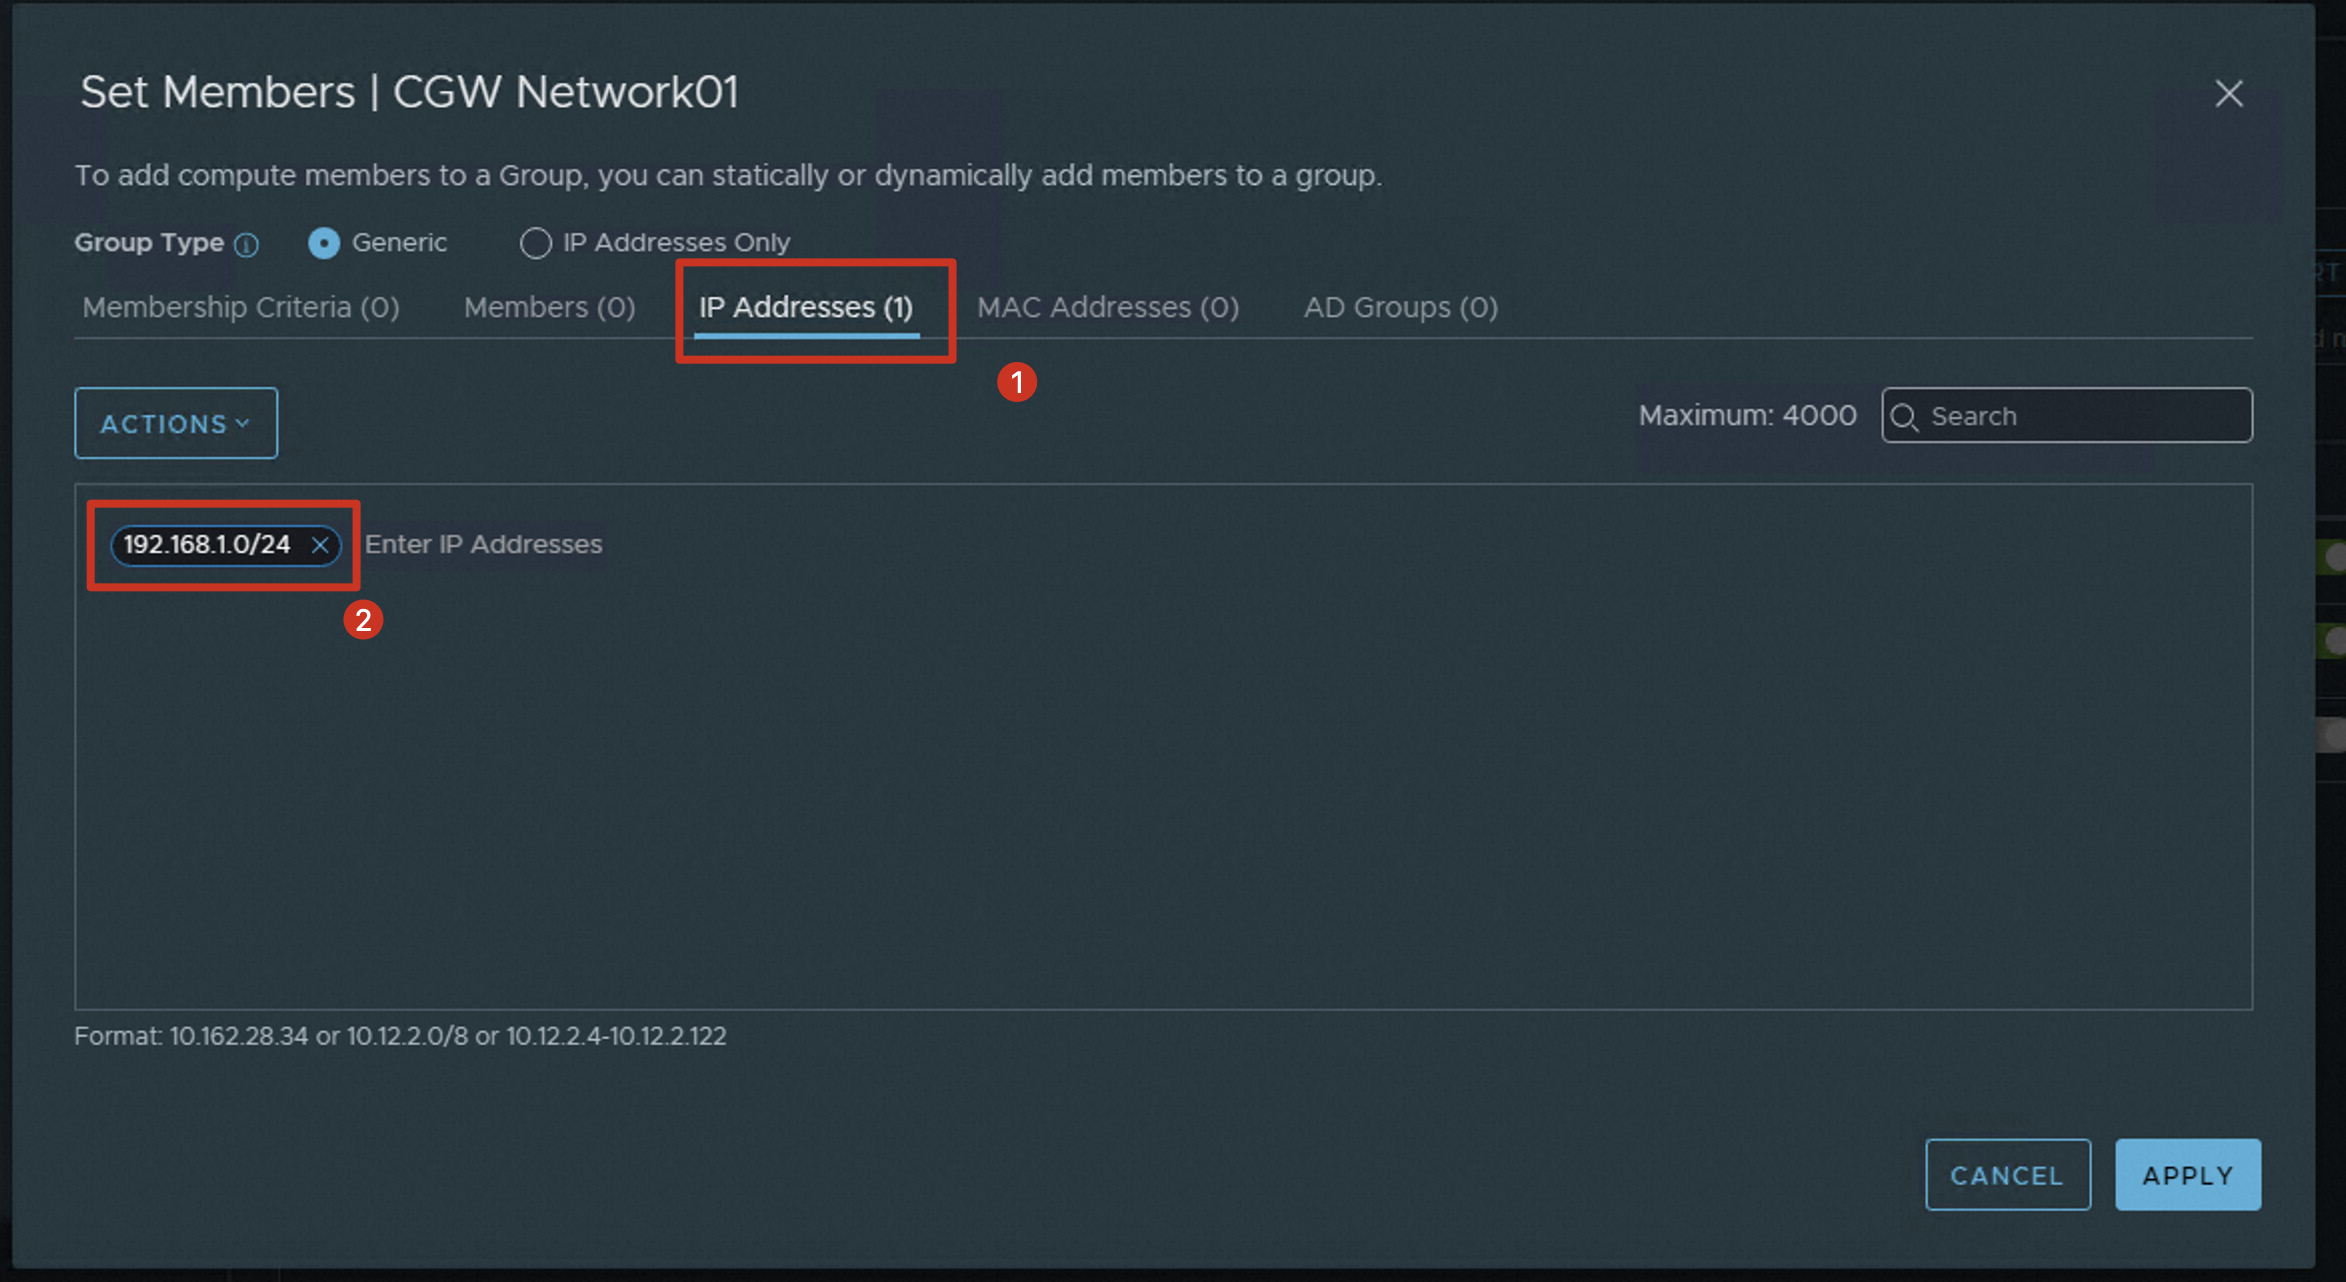
In the Set Members dialog box, click IP Addresses, enter the CIDR block 192.168.1.0/24, and then click APPLY.
 Note
NoteThe CIDR block 192.168.1.0/24 is the network addresses of the NSX-T segment created in the ACVS console.
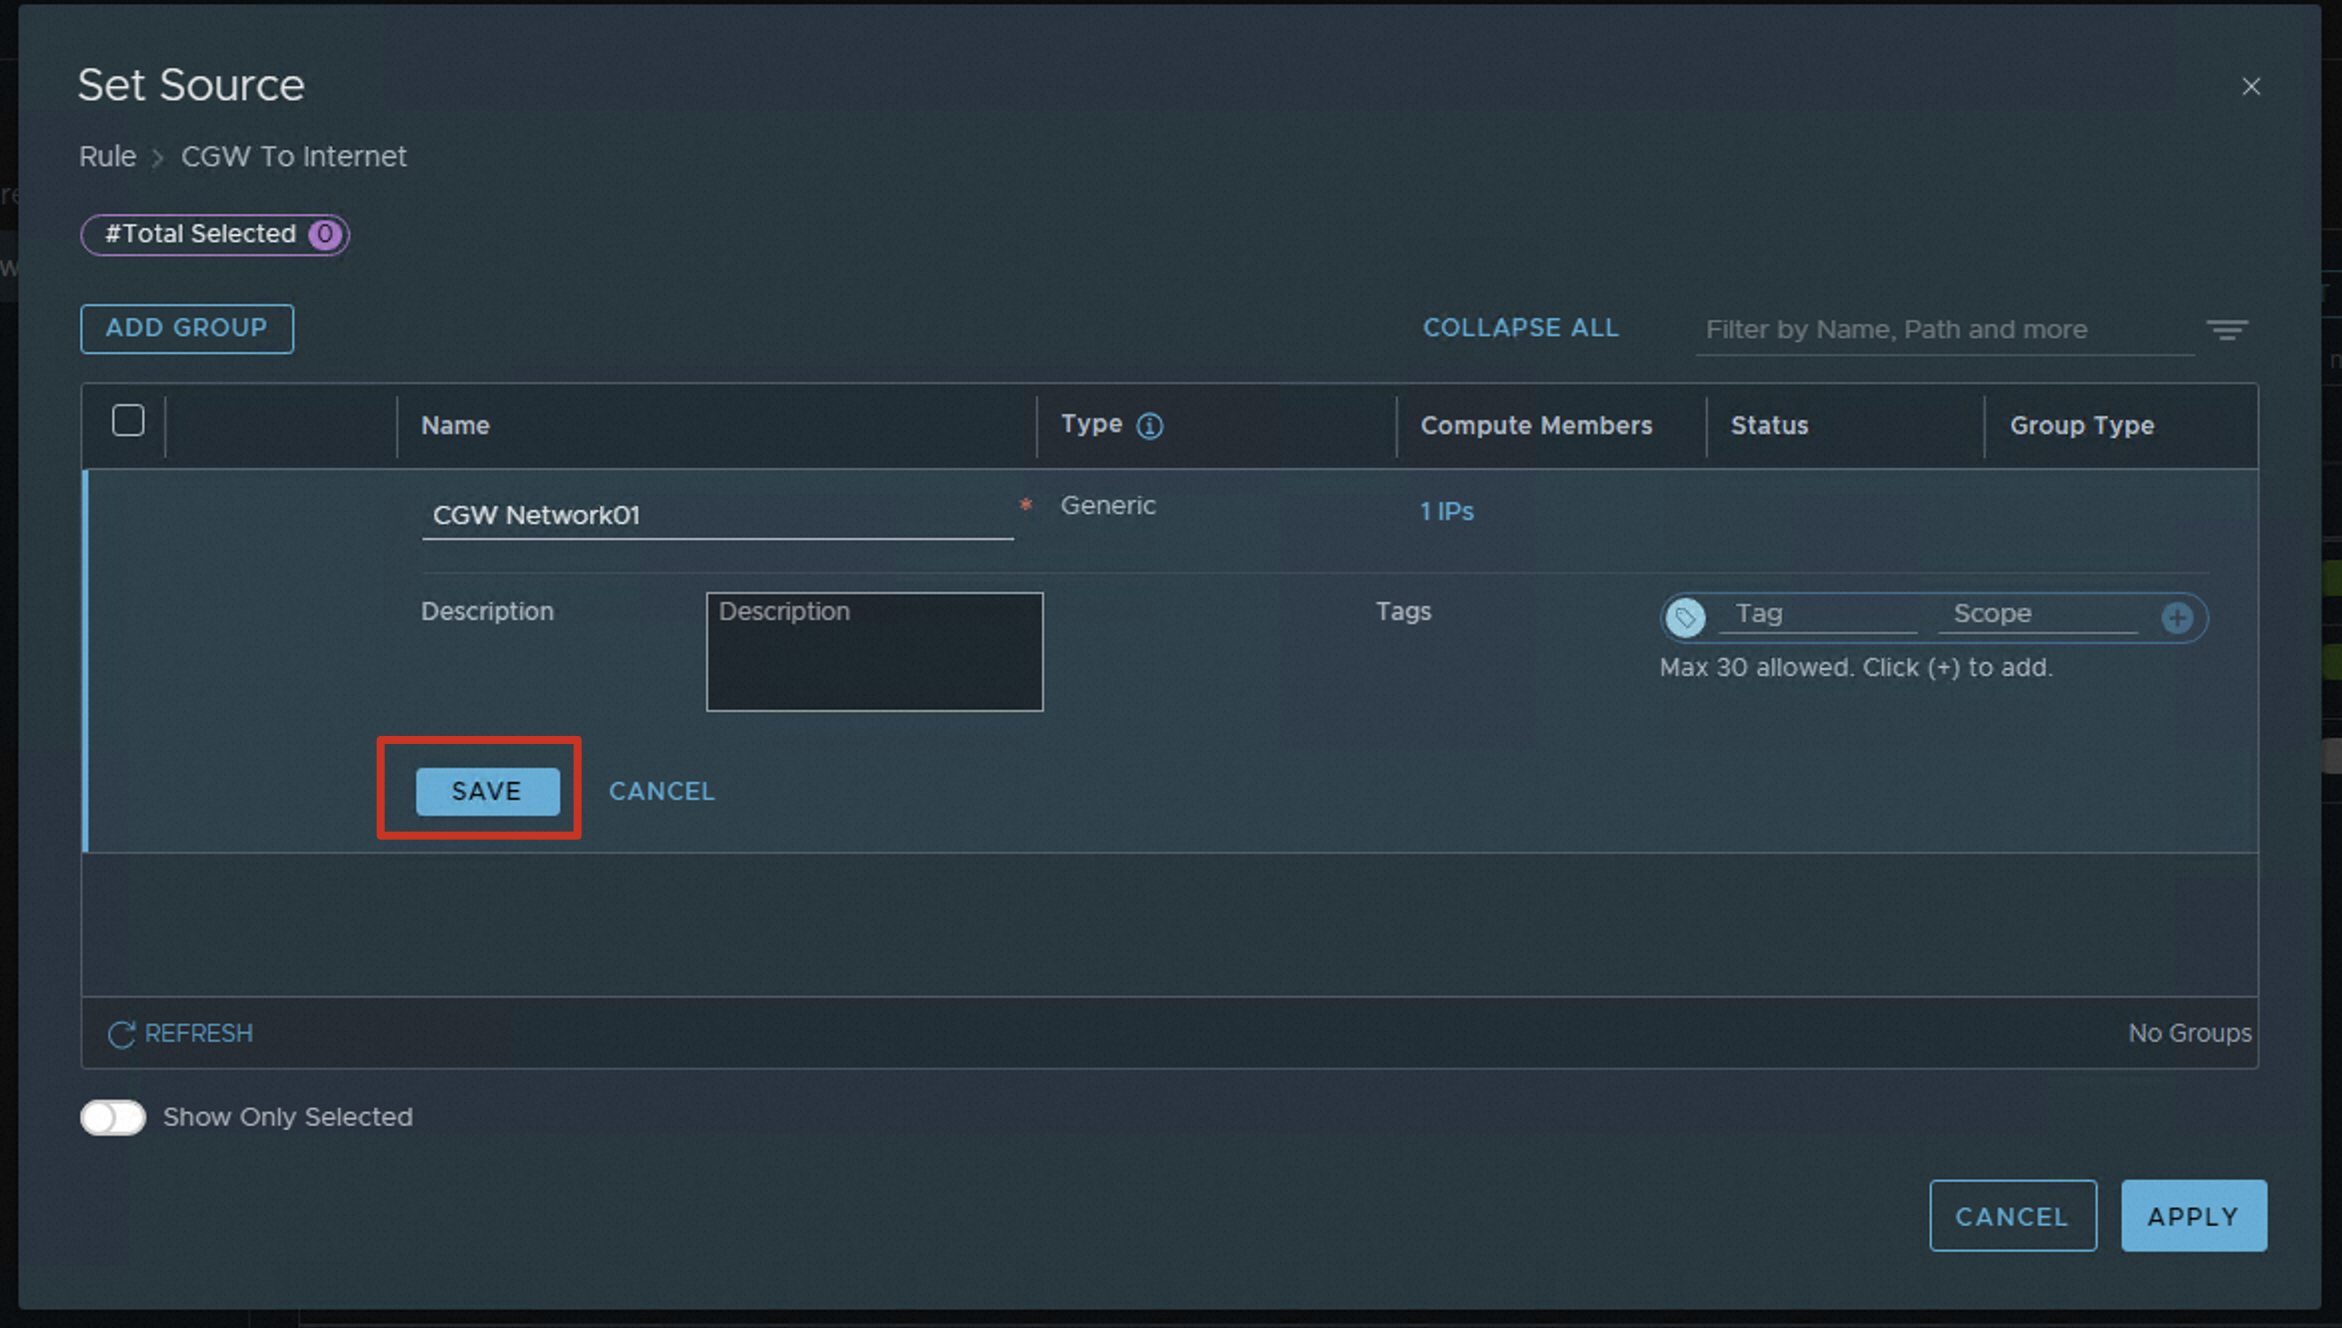
Click SAVE.
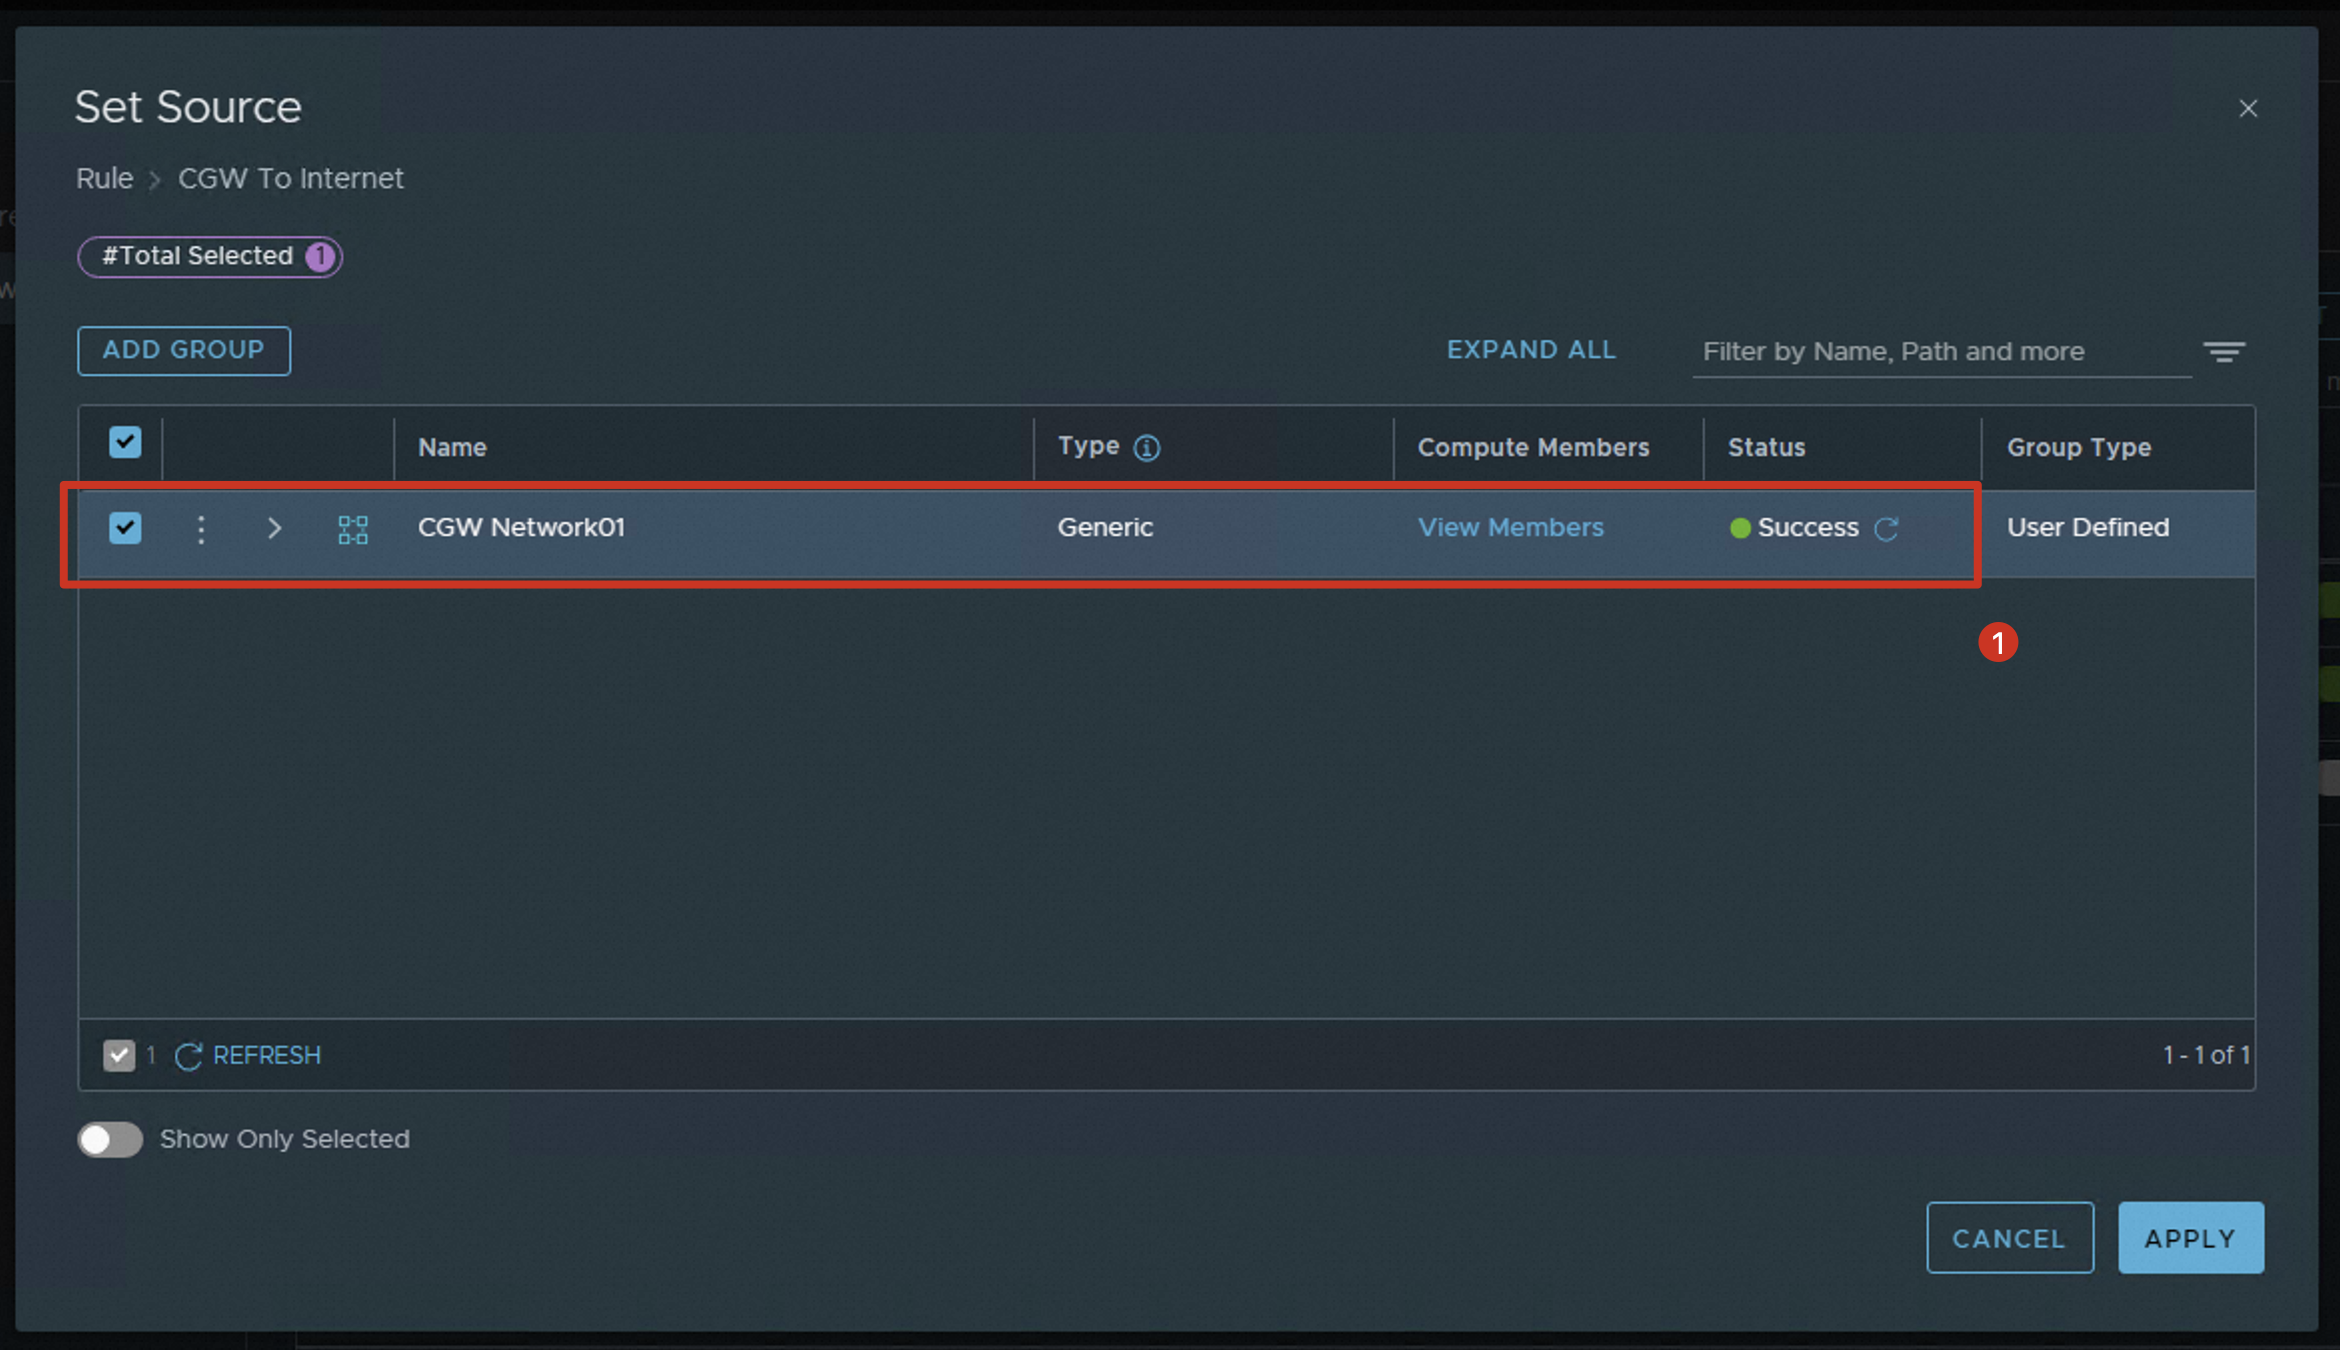
Select the created group so that all VMs bound to the CIDR block of the group can access the Internet. Click APPLY.
Click the edit icon for Applied To that corresponds to the changed rule name.
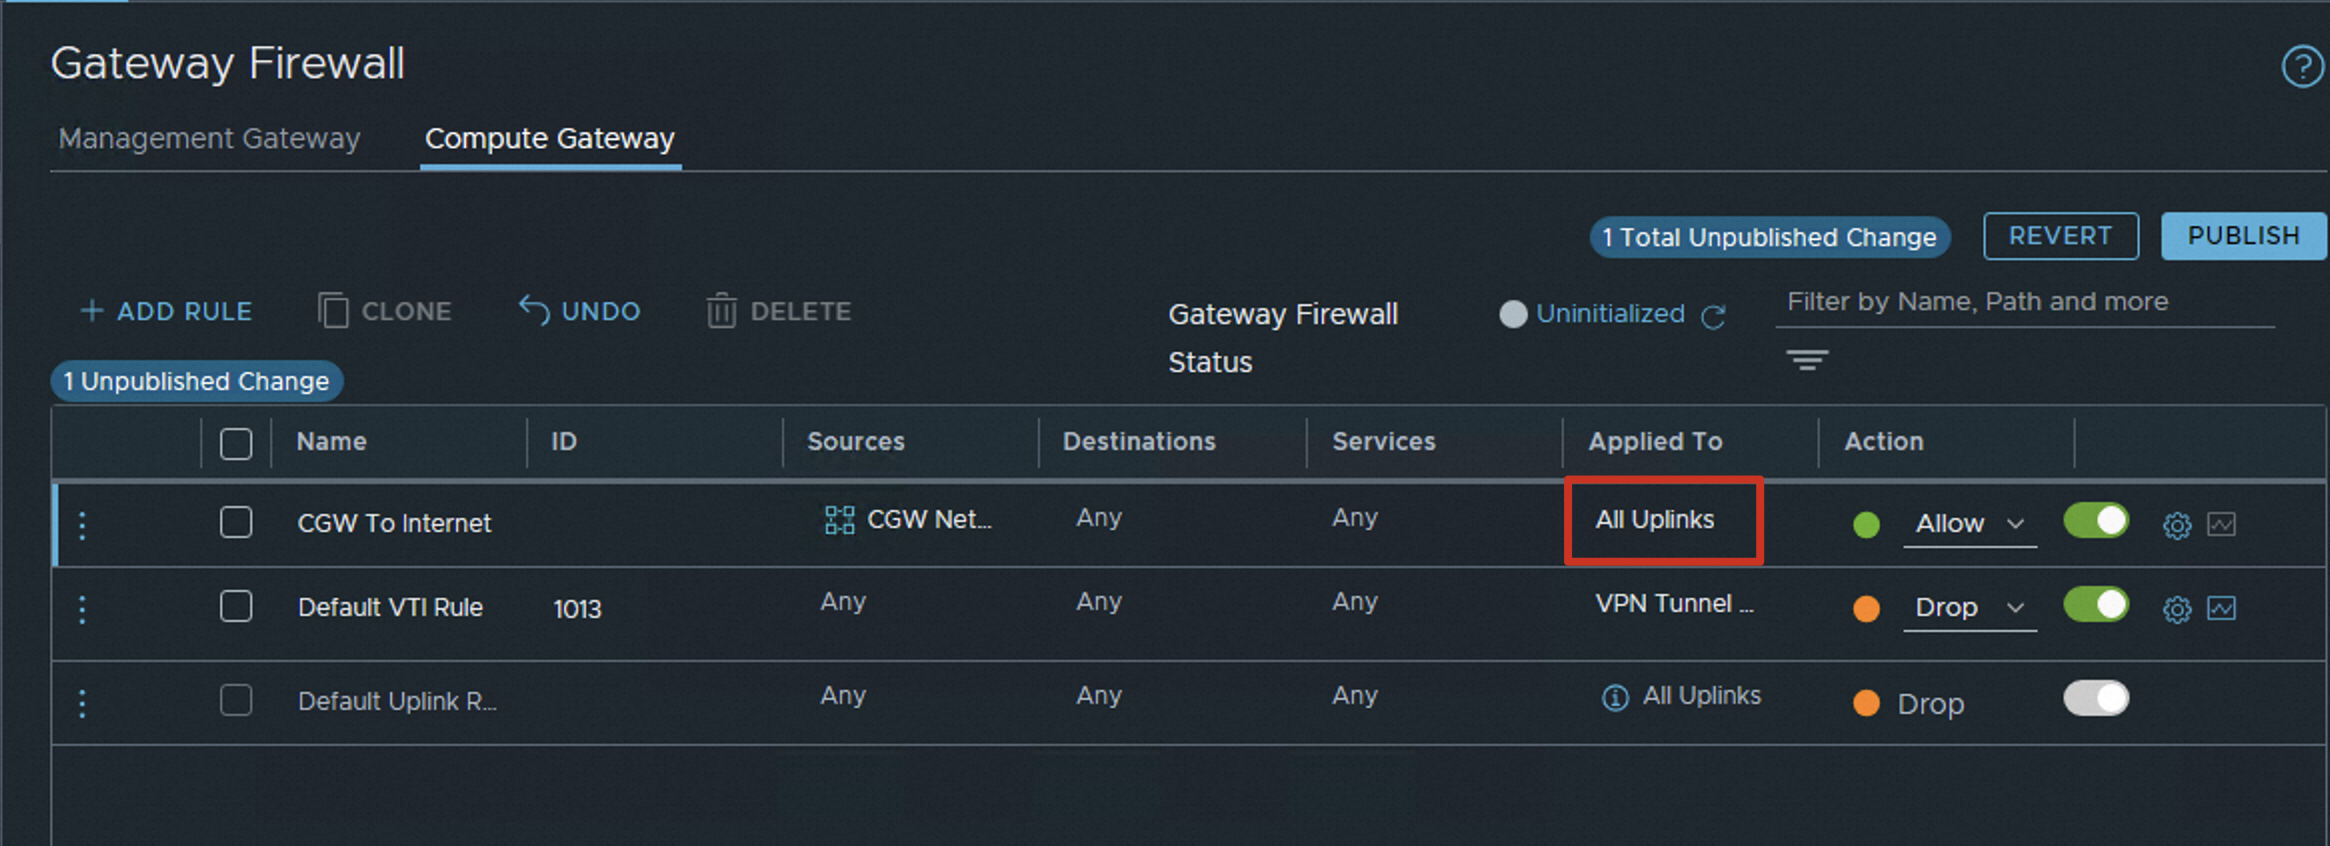
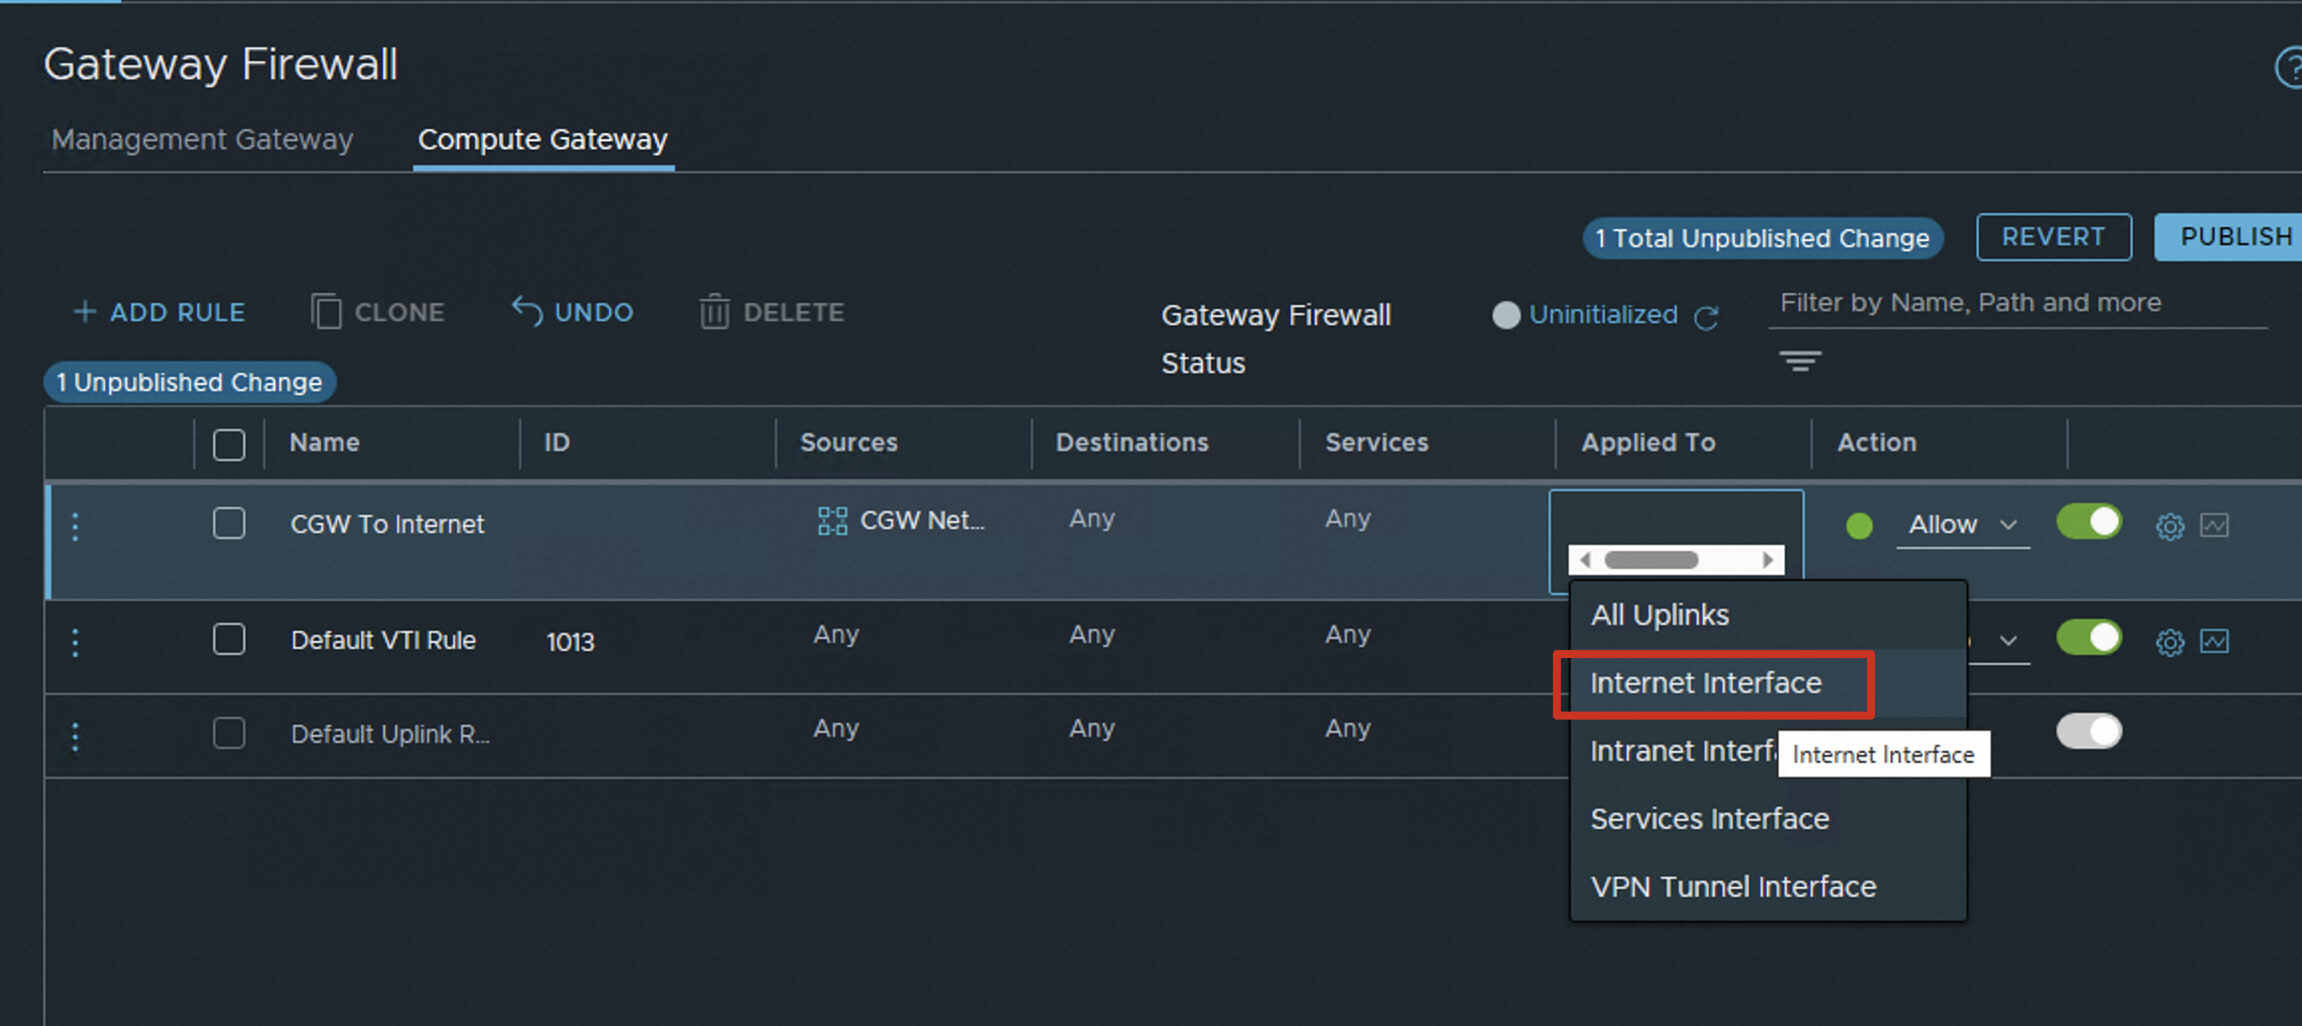
Remove All Uplinks and select Internet Interface.
 Note
NoteThe Applied To parameter can be set to the following values:
All Uplinks: includes three uplink interfaces: Internet Interface, Intranet Interface, and Services Interface.
Internet Interface: uplink interface used to access the Internet.
Intranet Interface: uplink interface used to access VPCs and on-premises environments.
Services Interface: used to access the Internet-facing services of Alibaba Cloud.
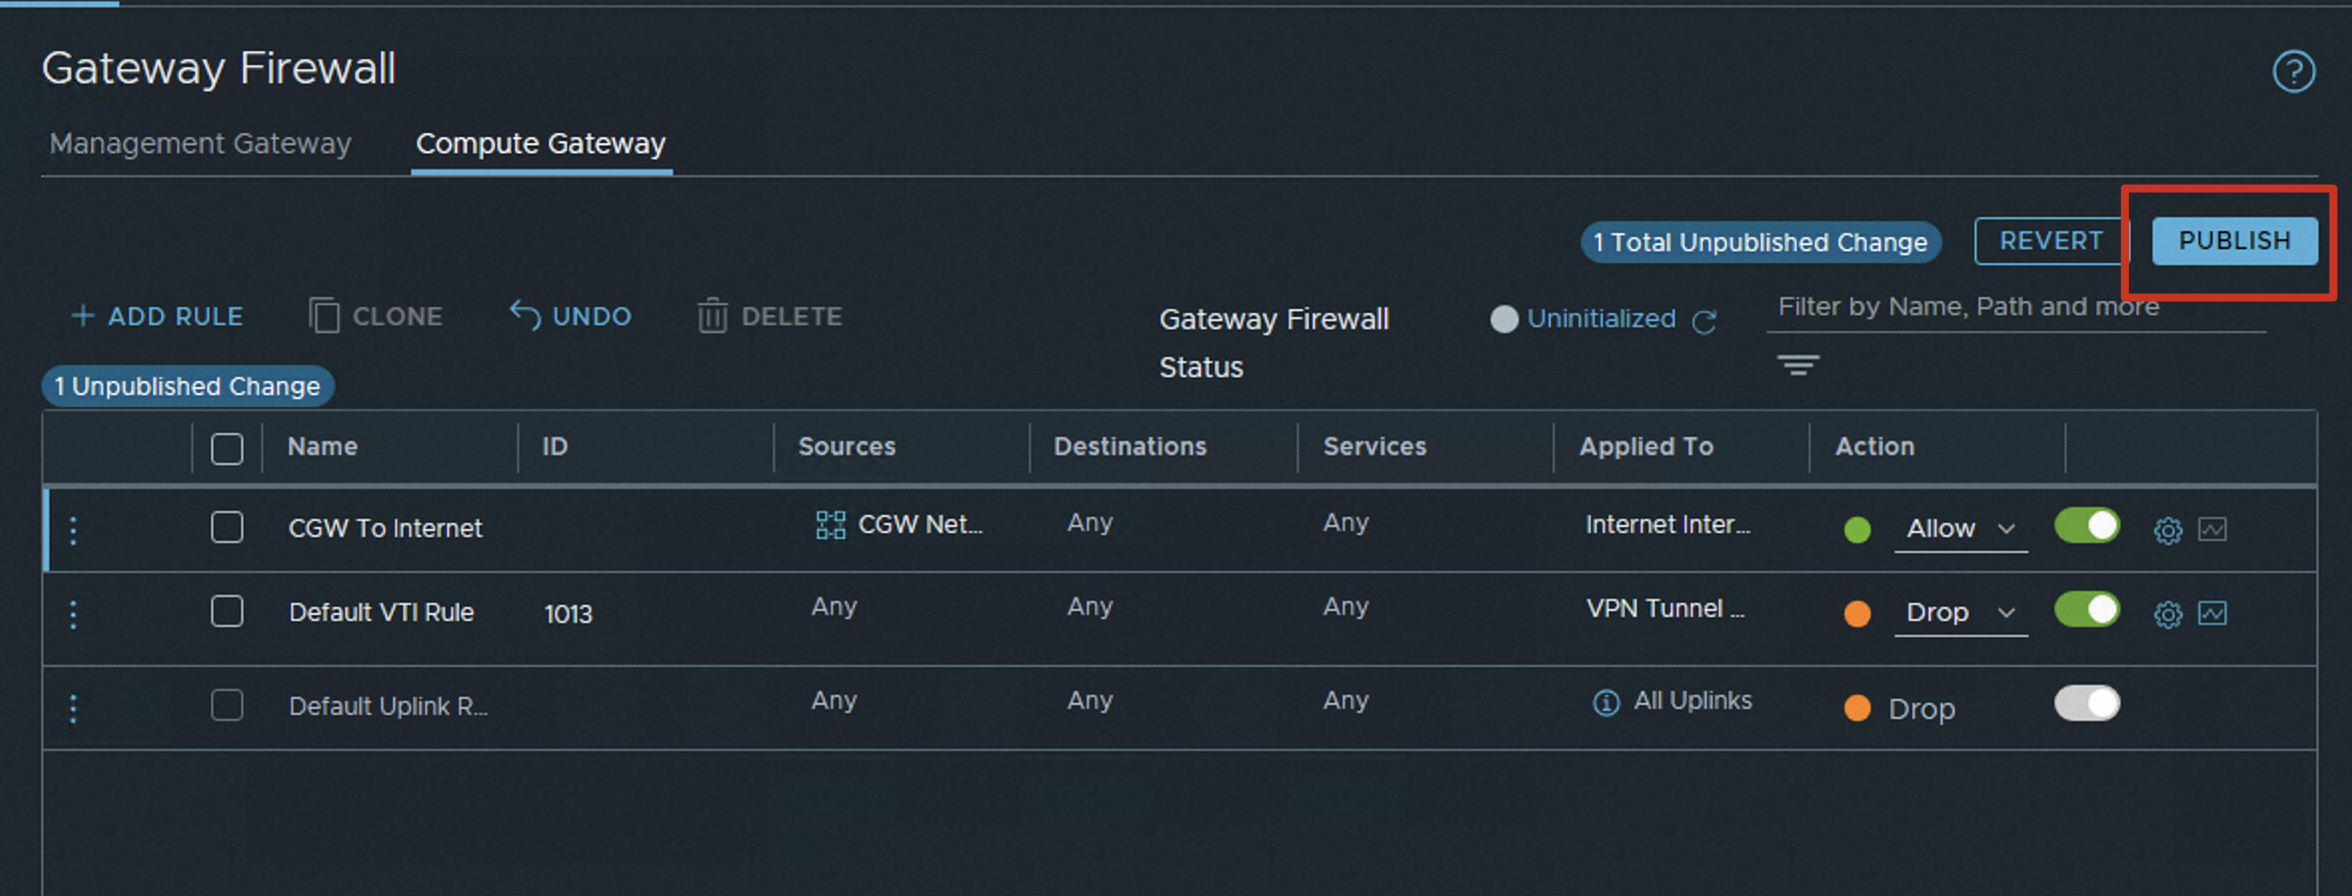
Click PUBLISH to apply the new rule.
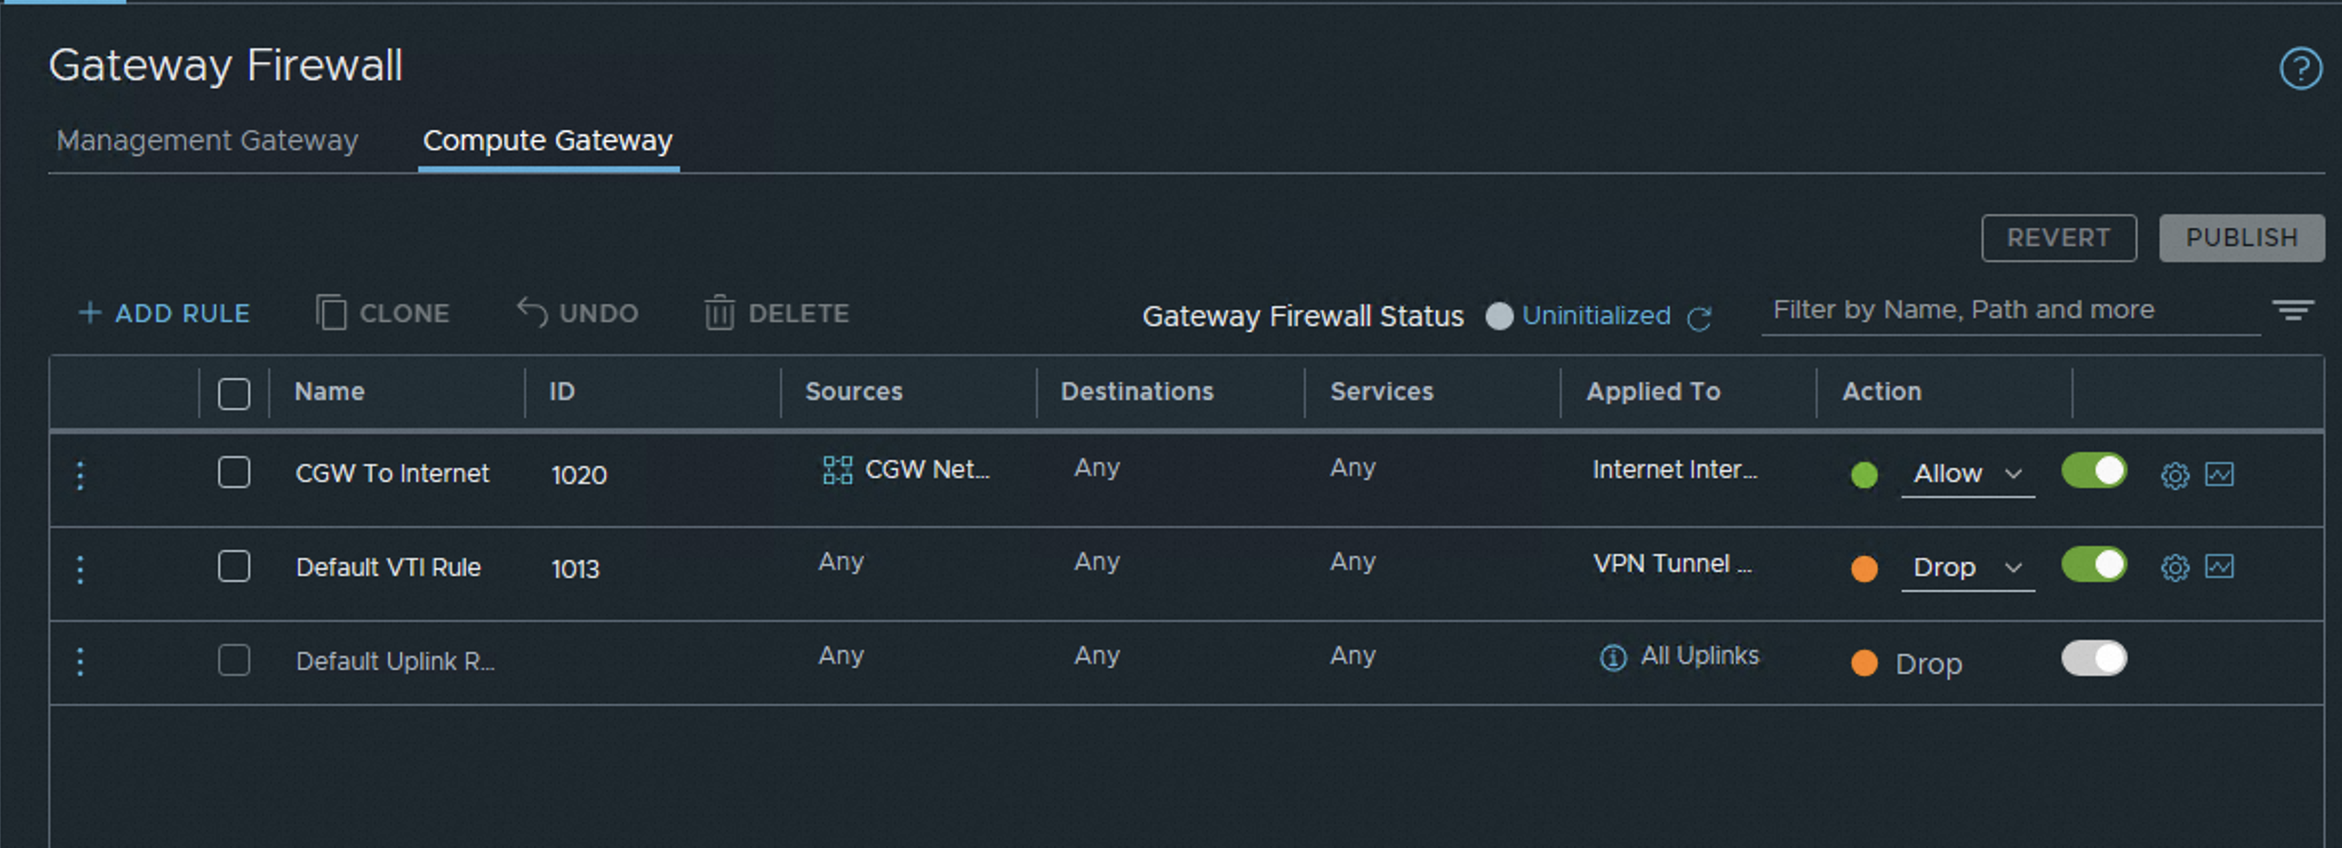
Complete the configuration of the NSX-T gateway firewall rule.
Advertise the default route in the VPC to CEN
Procedure
After you create an Internet NAT gateway, the default route 0.0.0.0/0 is added to the route table of the VPC. However, the default route is not advertised to Cloud Enterprise Network (CEN). You must manually advertise the default route to CEN.
Log on to the VPC console and choose Route Tables. Select the route table that is used for the VPC associated with the dedicated VMware environment.
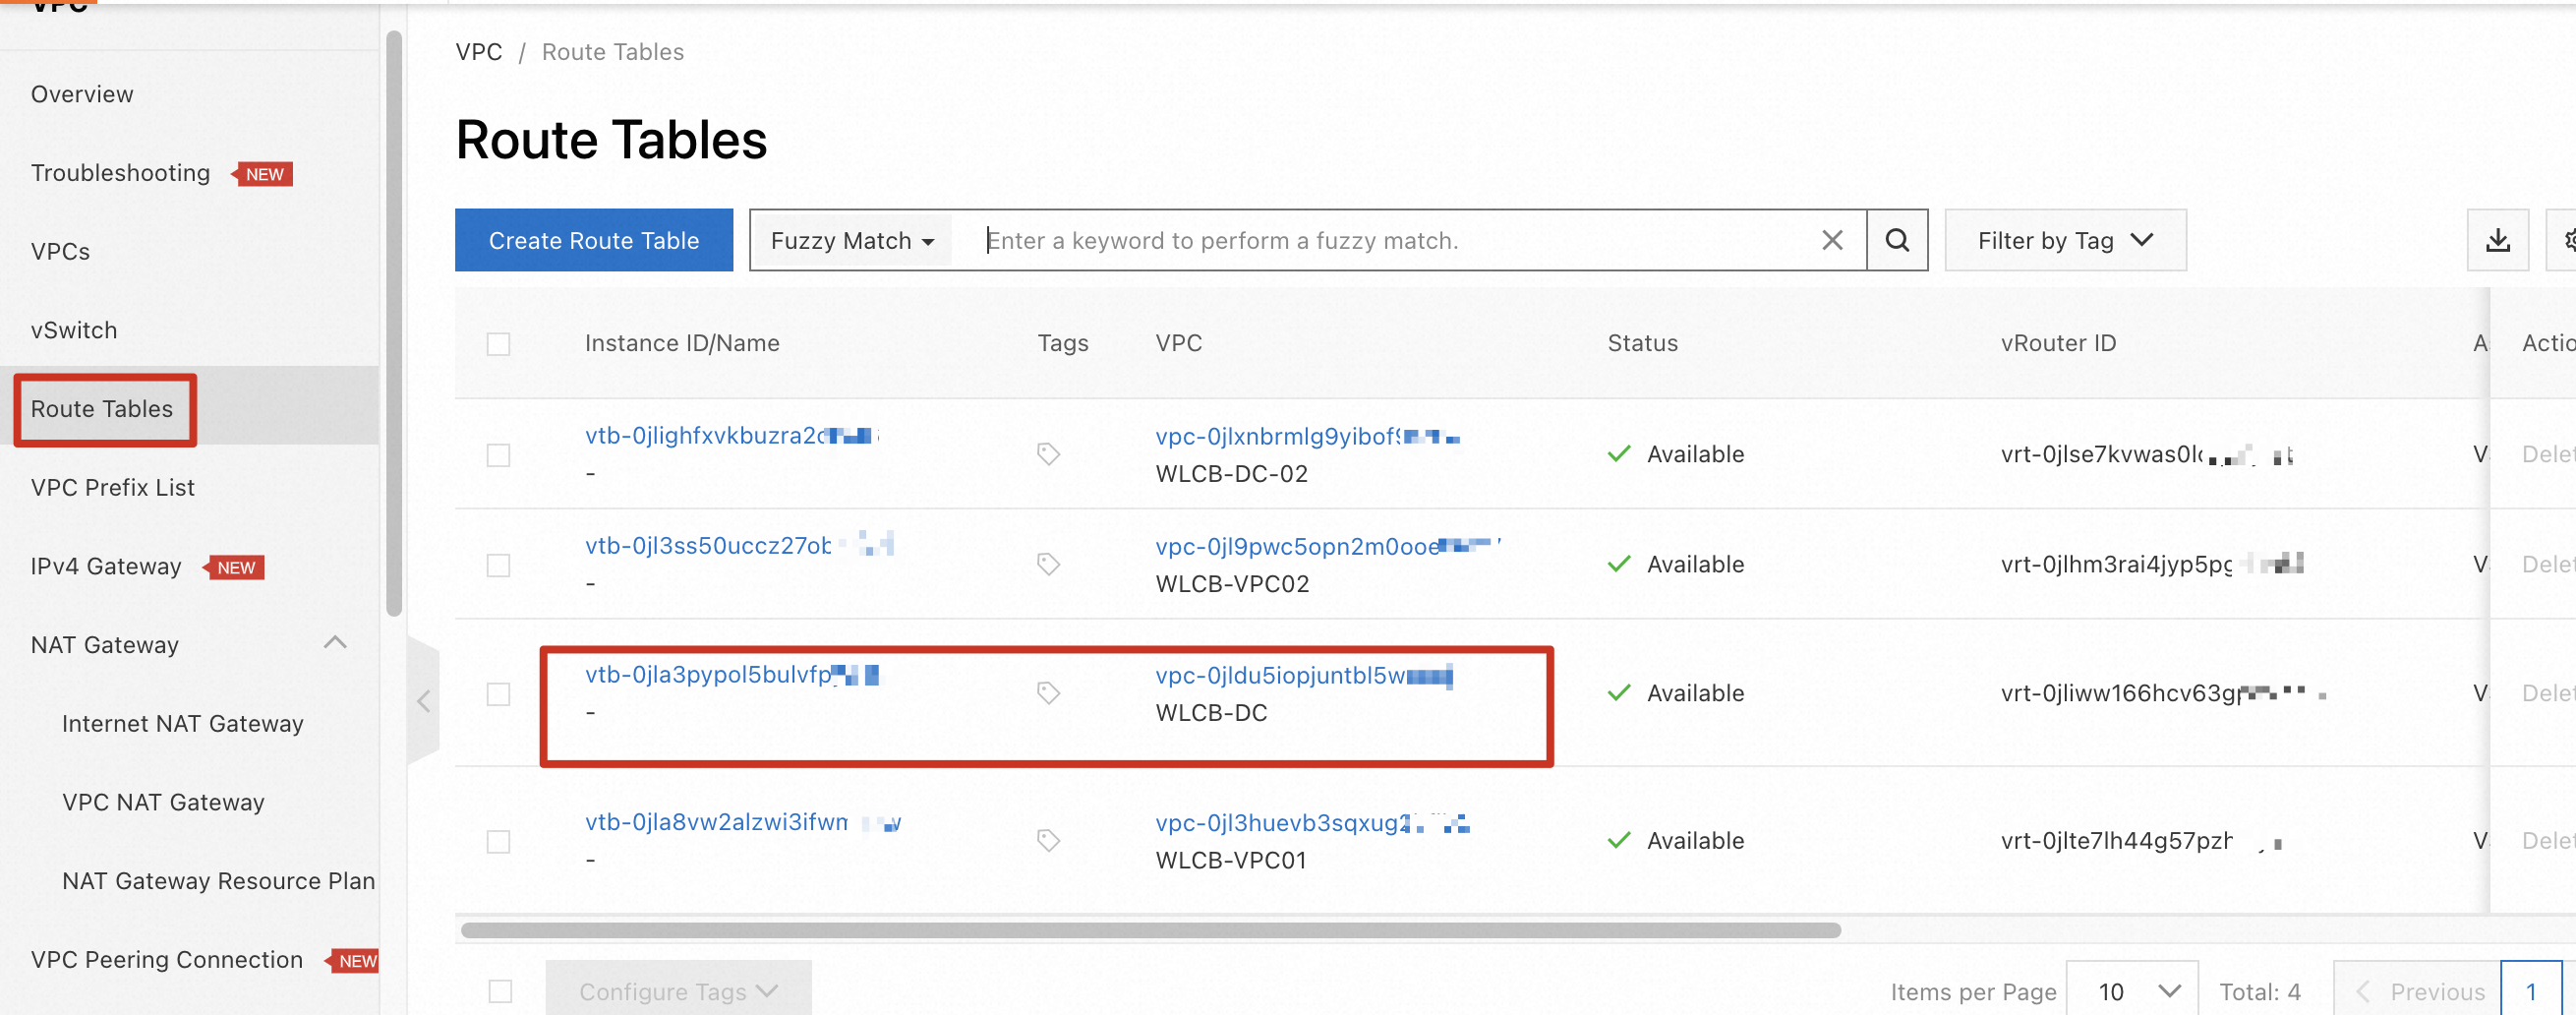
On the Route Entry List tab, click Custom Route and check whether Route Status in CEN for the default route is Advertised. If the state is Unadvertised, click Publish.
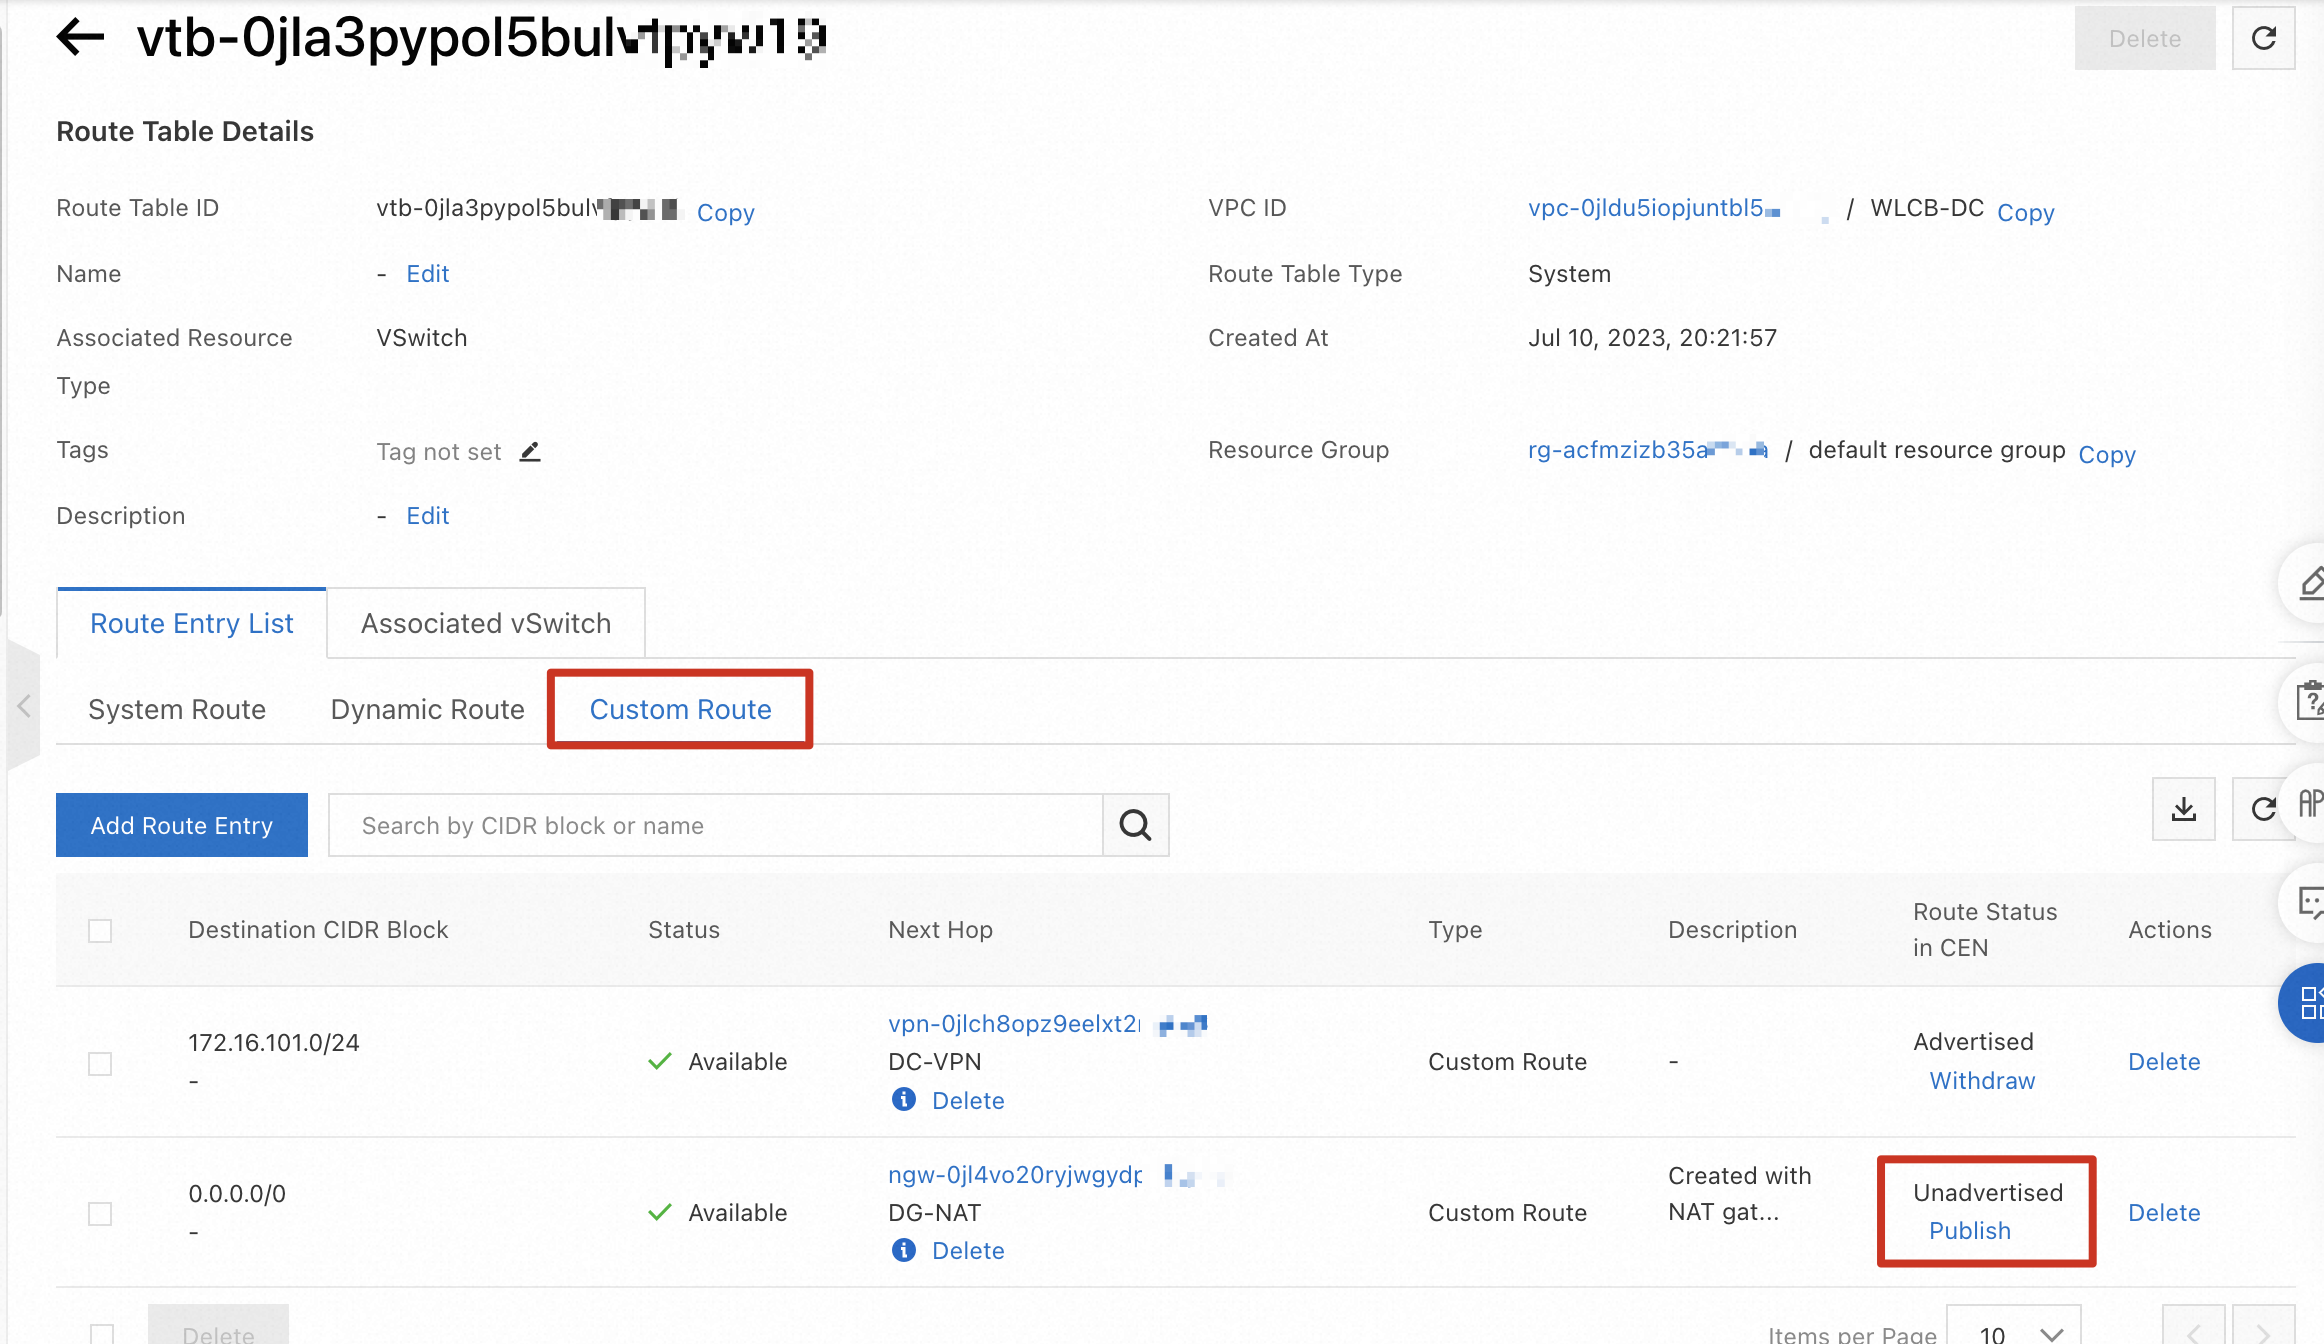
In the Publish Route Entry message, click OK.

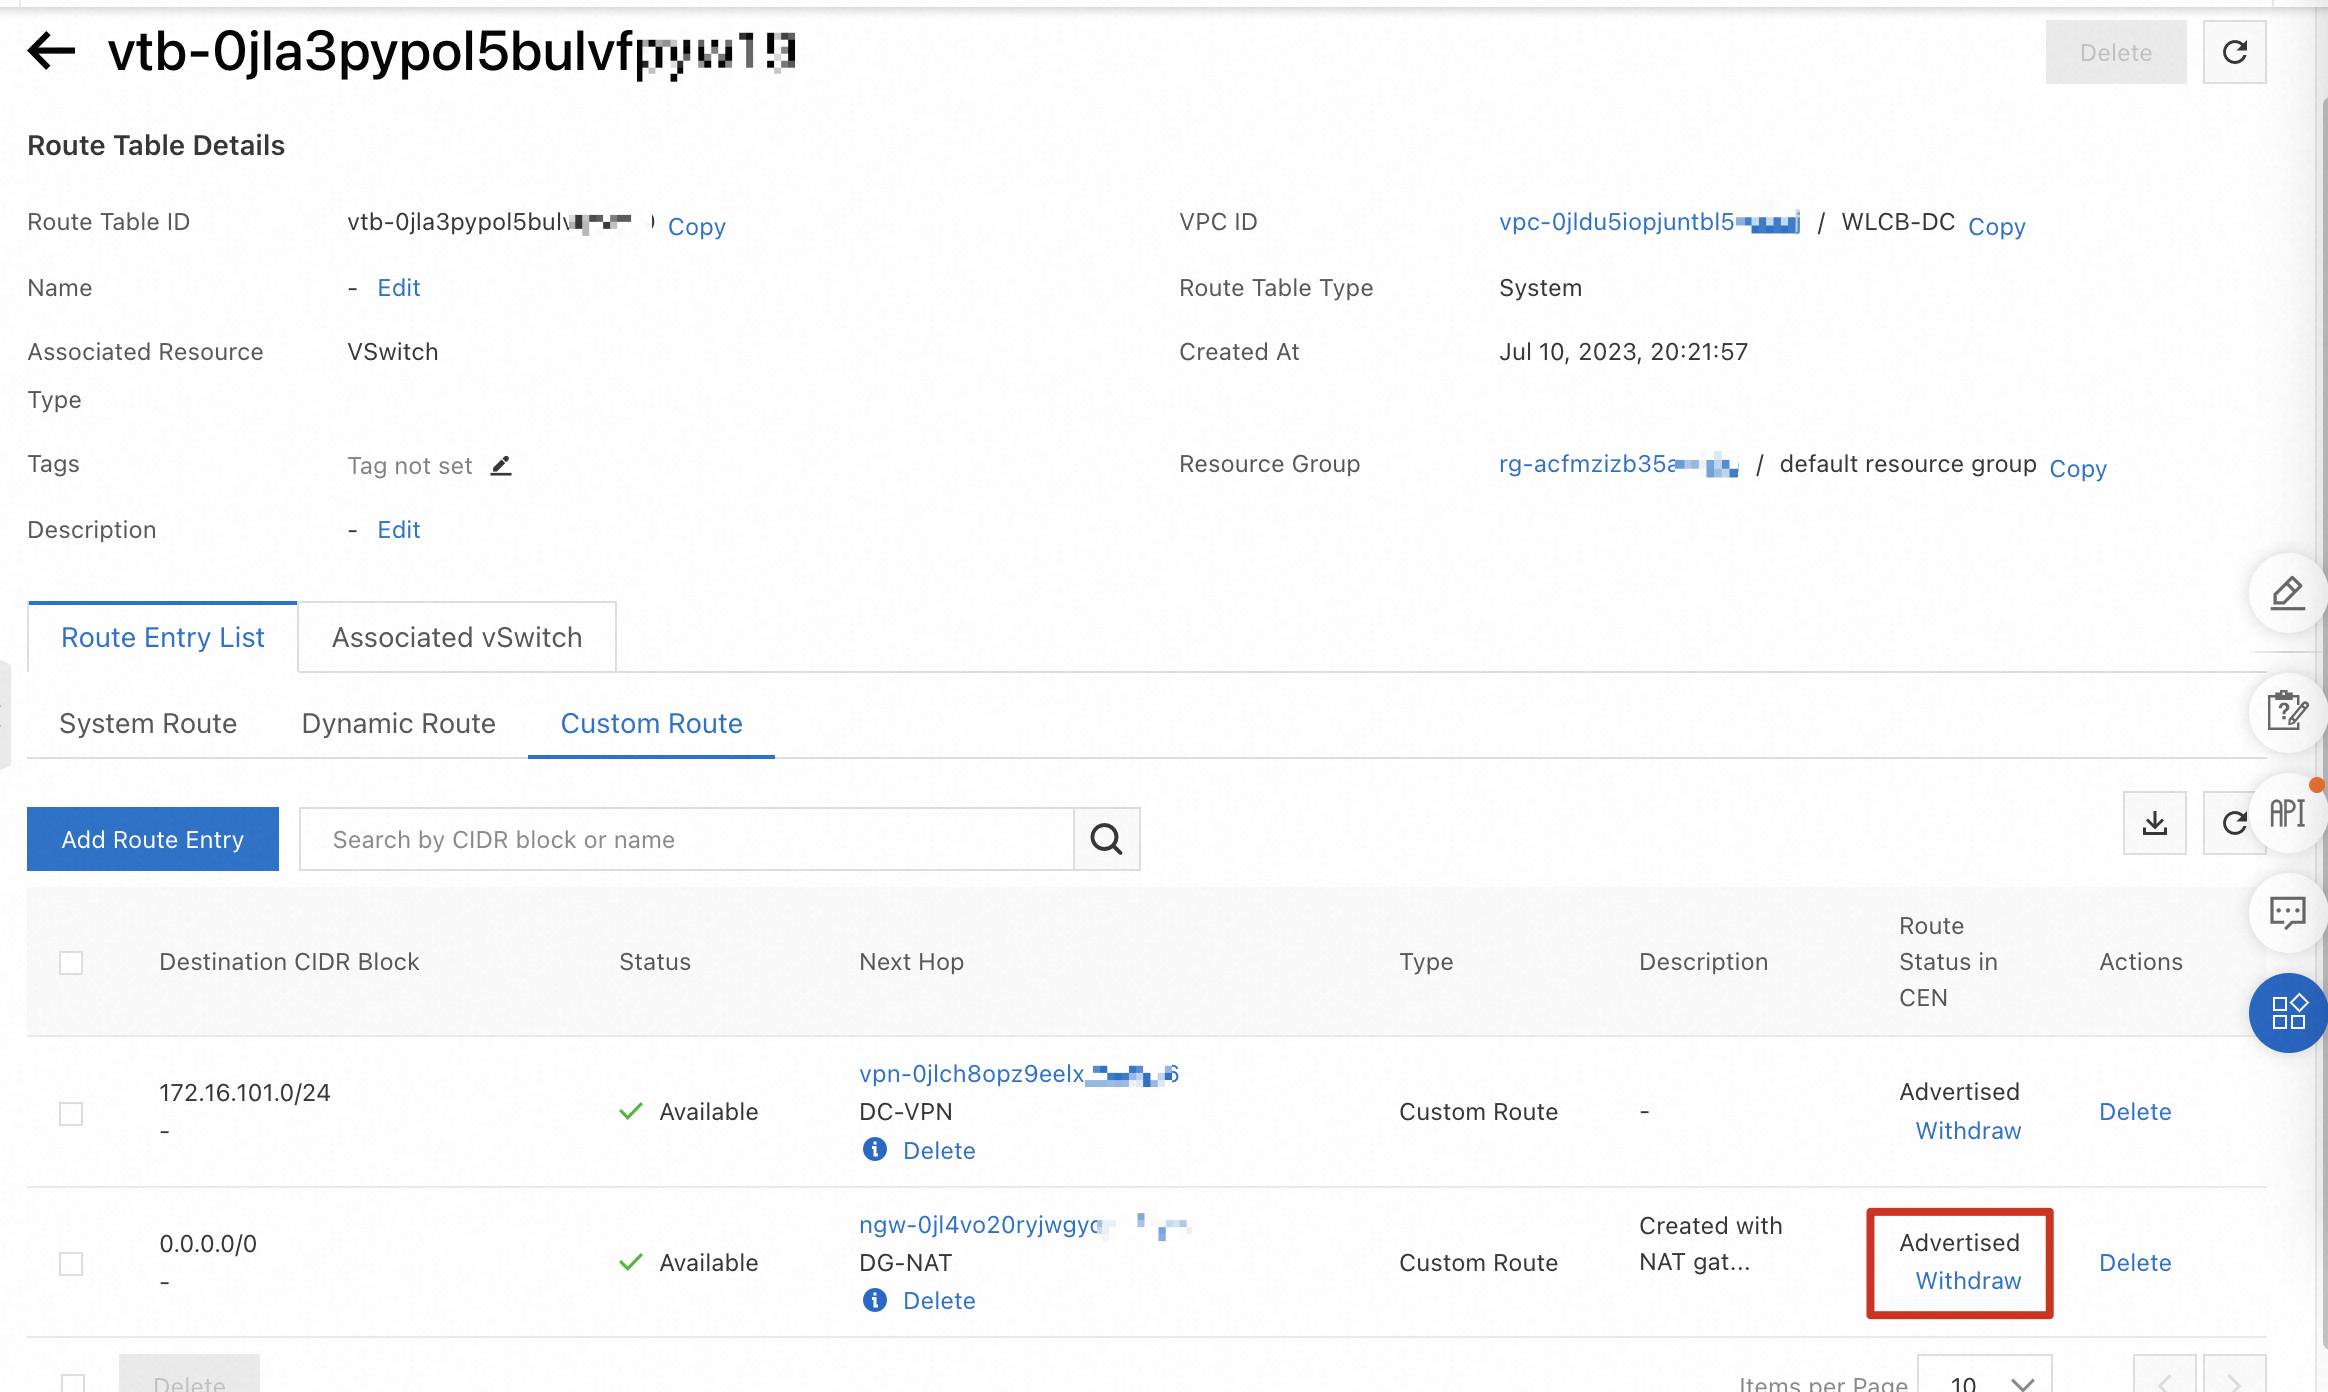
Wait for a period of time until the value of Route Status in CEN changes to Advertised.
 Warning
You must complete all the preceding operations before VMs can access the Internet.