1. Integration Overview
After successful configuration, users in your organization will be able to:
Access the Alibaba Cloud Enterprise Service app in Slack and jump to the service portal with one click
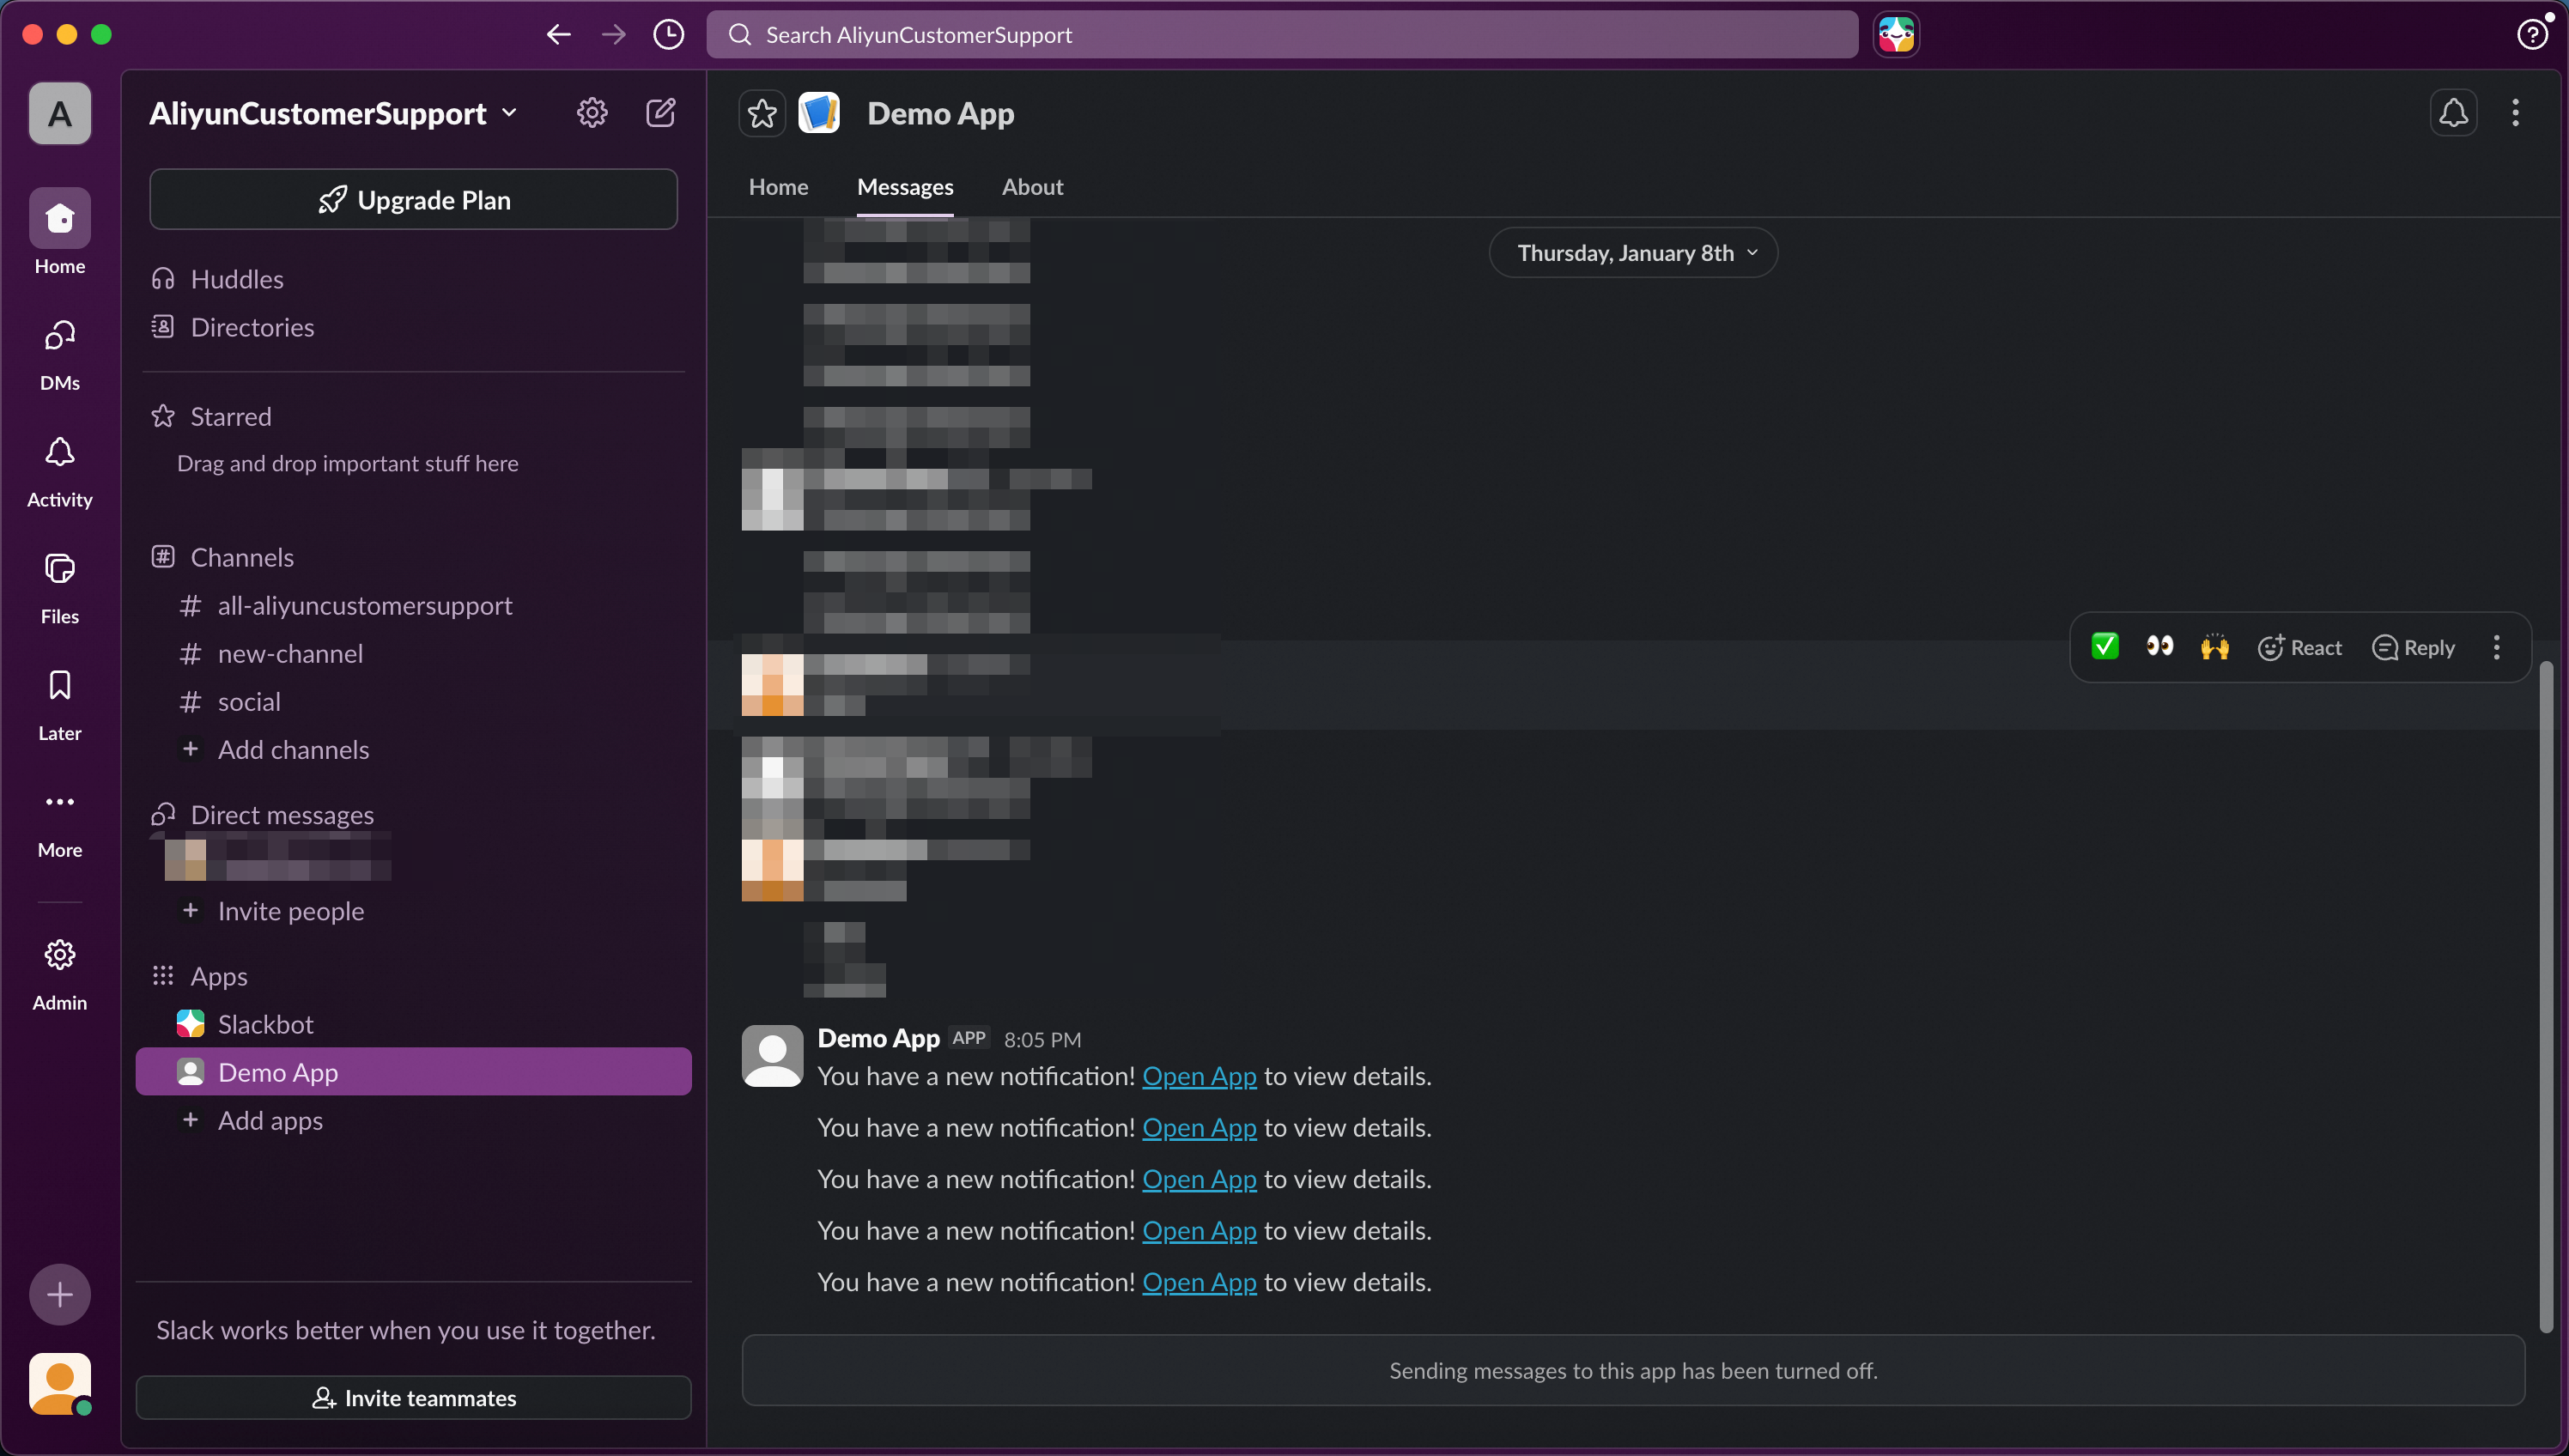
Communicate with TAM in real-time within the app, receive ticket notifications, and track service progress
When new messages appear in group chats, the Slack bot will automatically send reminders to relevant users
2. Prerequisites
You have administrator privileges for the Slack Workspace.
The Alibaba Cloud primary account has purchased the Enterprise Support Plan.
Primary accounts, RAM accounts, and RAM roles can all perform the activation operation.
3. Operation Steps
The entire integration process is divided into 3 phases, consisting of 7 steps:
Phase | Steps | Description |
Phase 1: Create Slack App | Steps 1 ~ 2 | Create an app on the Slack platform |
Phase 2: Submit Credentials to Alibaba Cloud | Steps 3 ~ 5 | Copy app credentials and submit to Alibaba Cloud |
Phase 3: Complete Integration Configuration | Steps 6 ~ 7 | After Alibaba Cloud verification, update callback URLs in the app |
Phase 1: Create Slack App
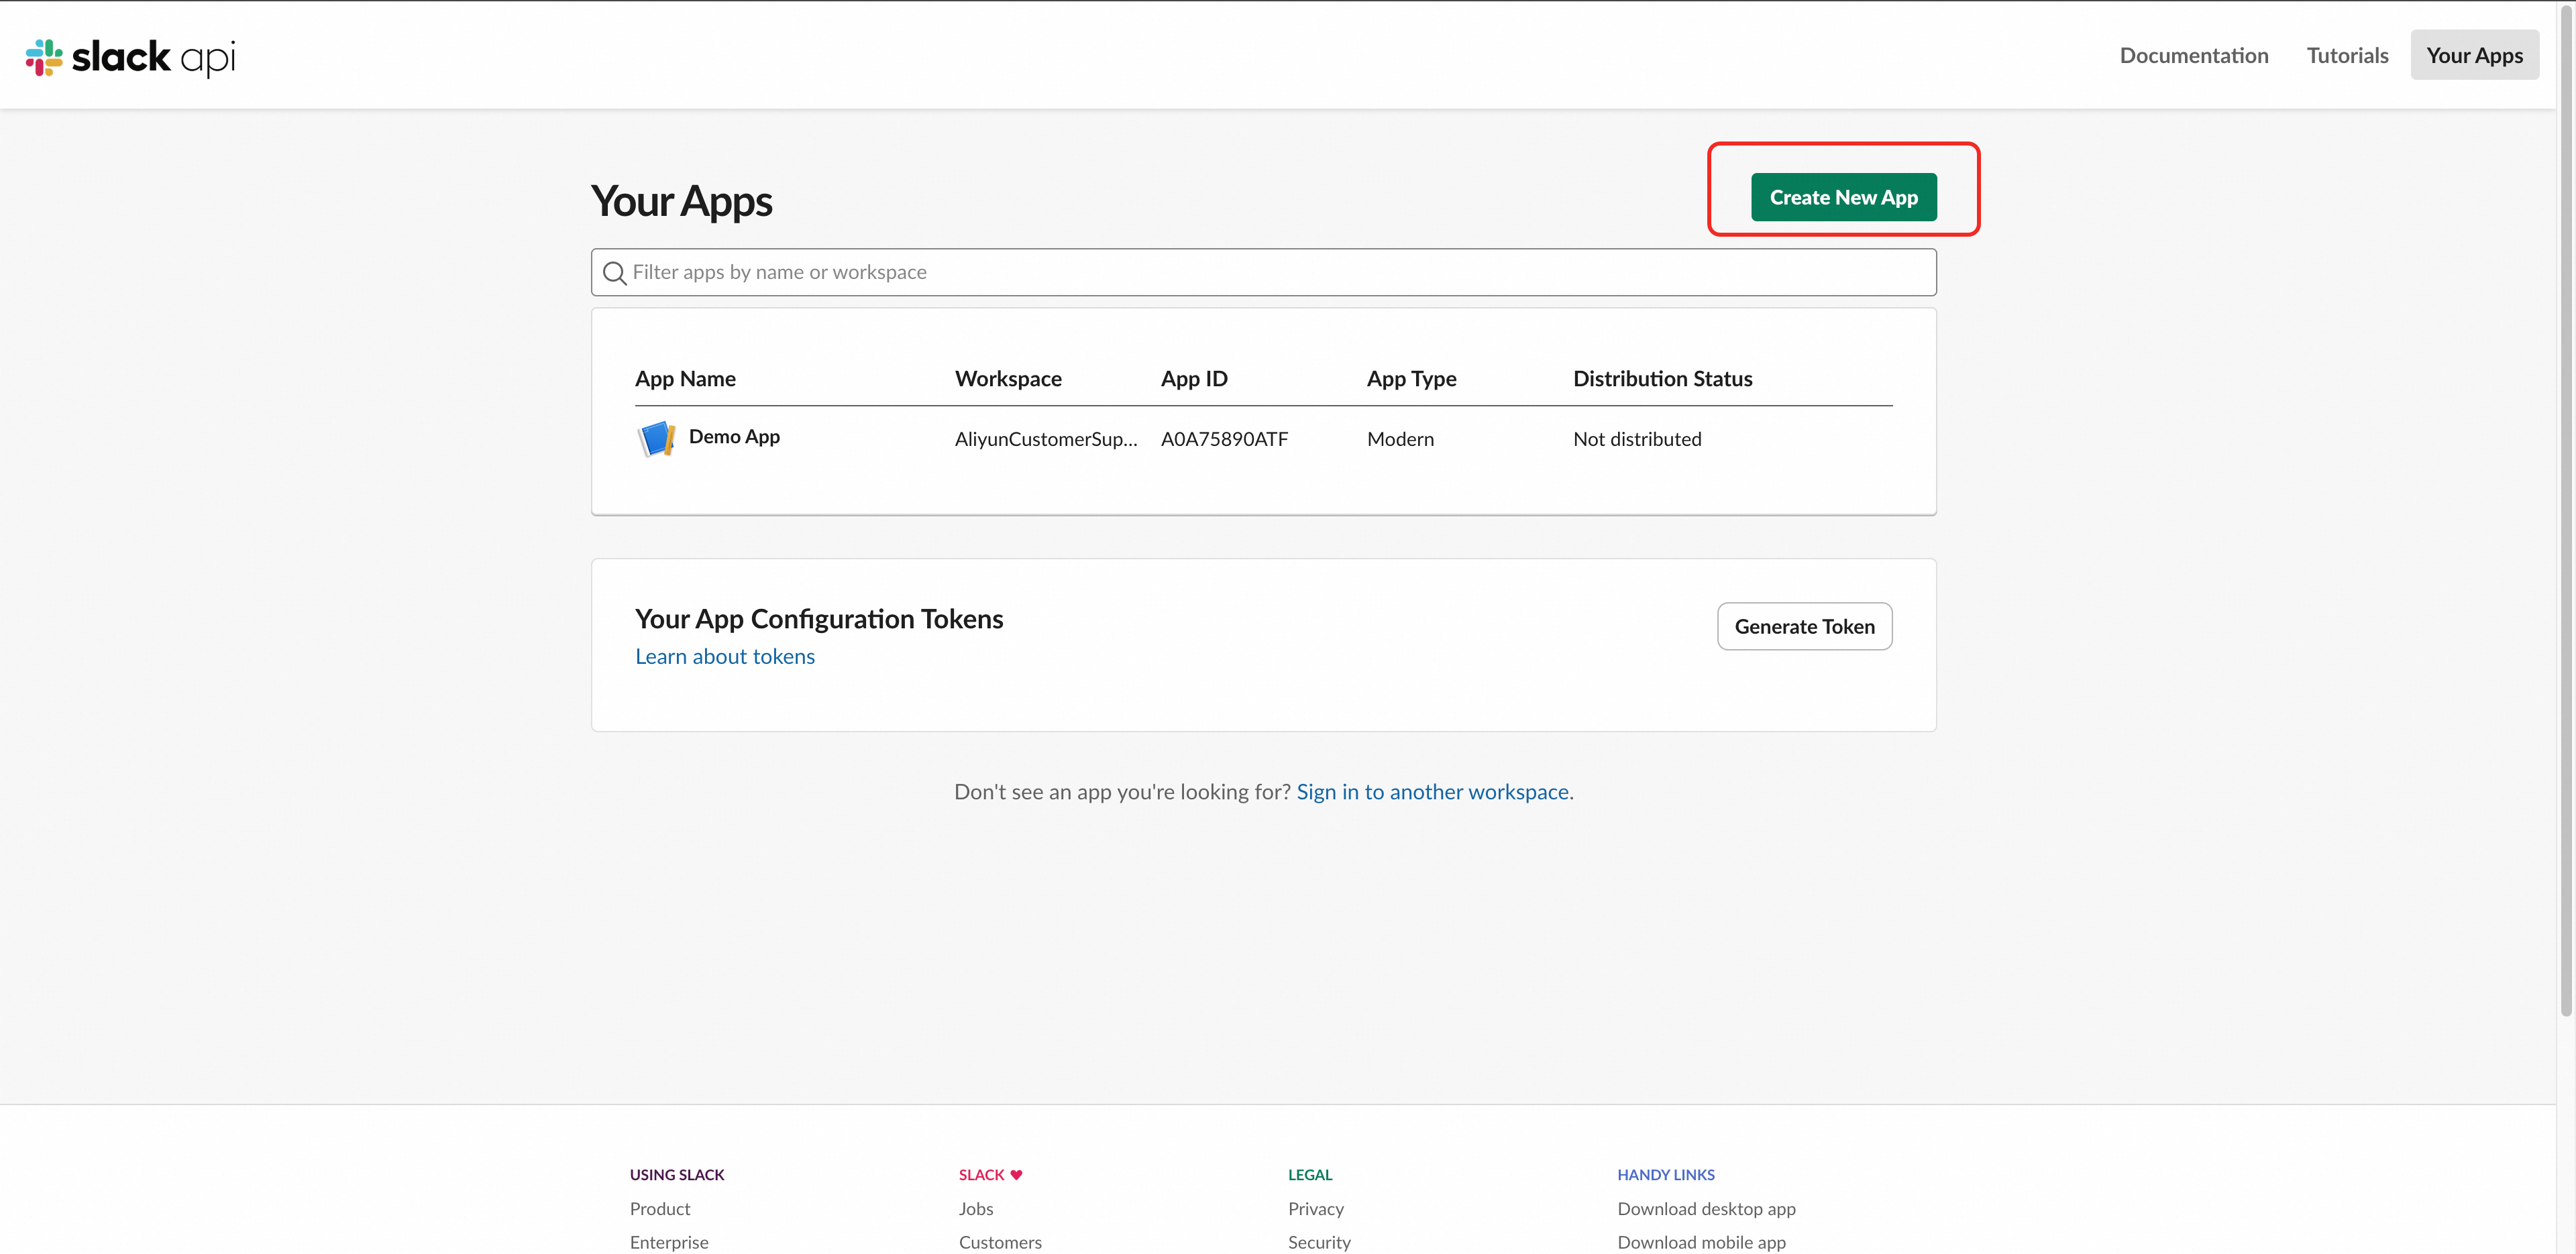
Step 1: Access Slack App Management Page
Open your browser and visit https://api.slack.com/apps
Log in with your Slack Workspace administrator account
Click the green "Create New App" button in the top right corner
Step 2: Create App from Manifest
In the popup window, select "From a manifest"
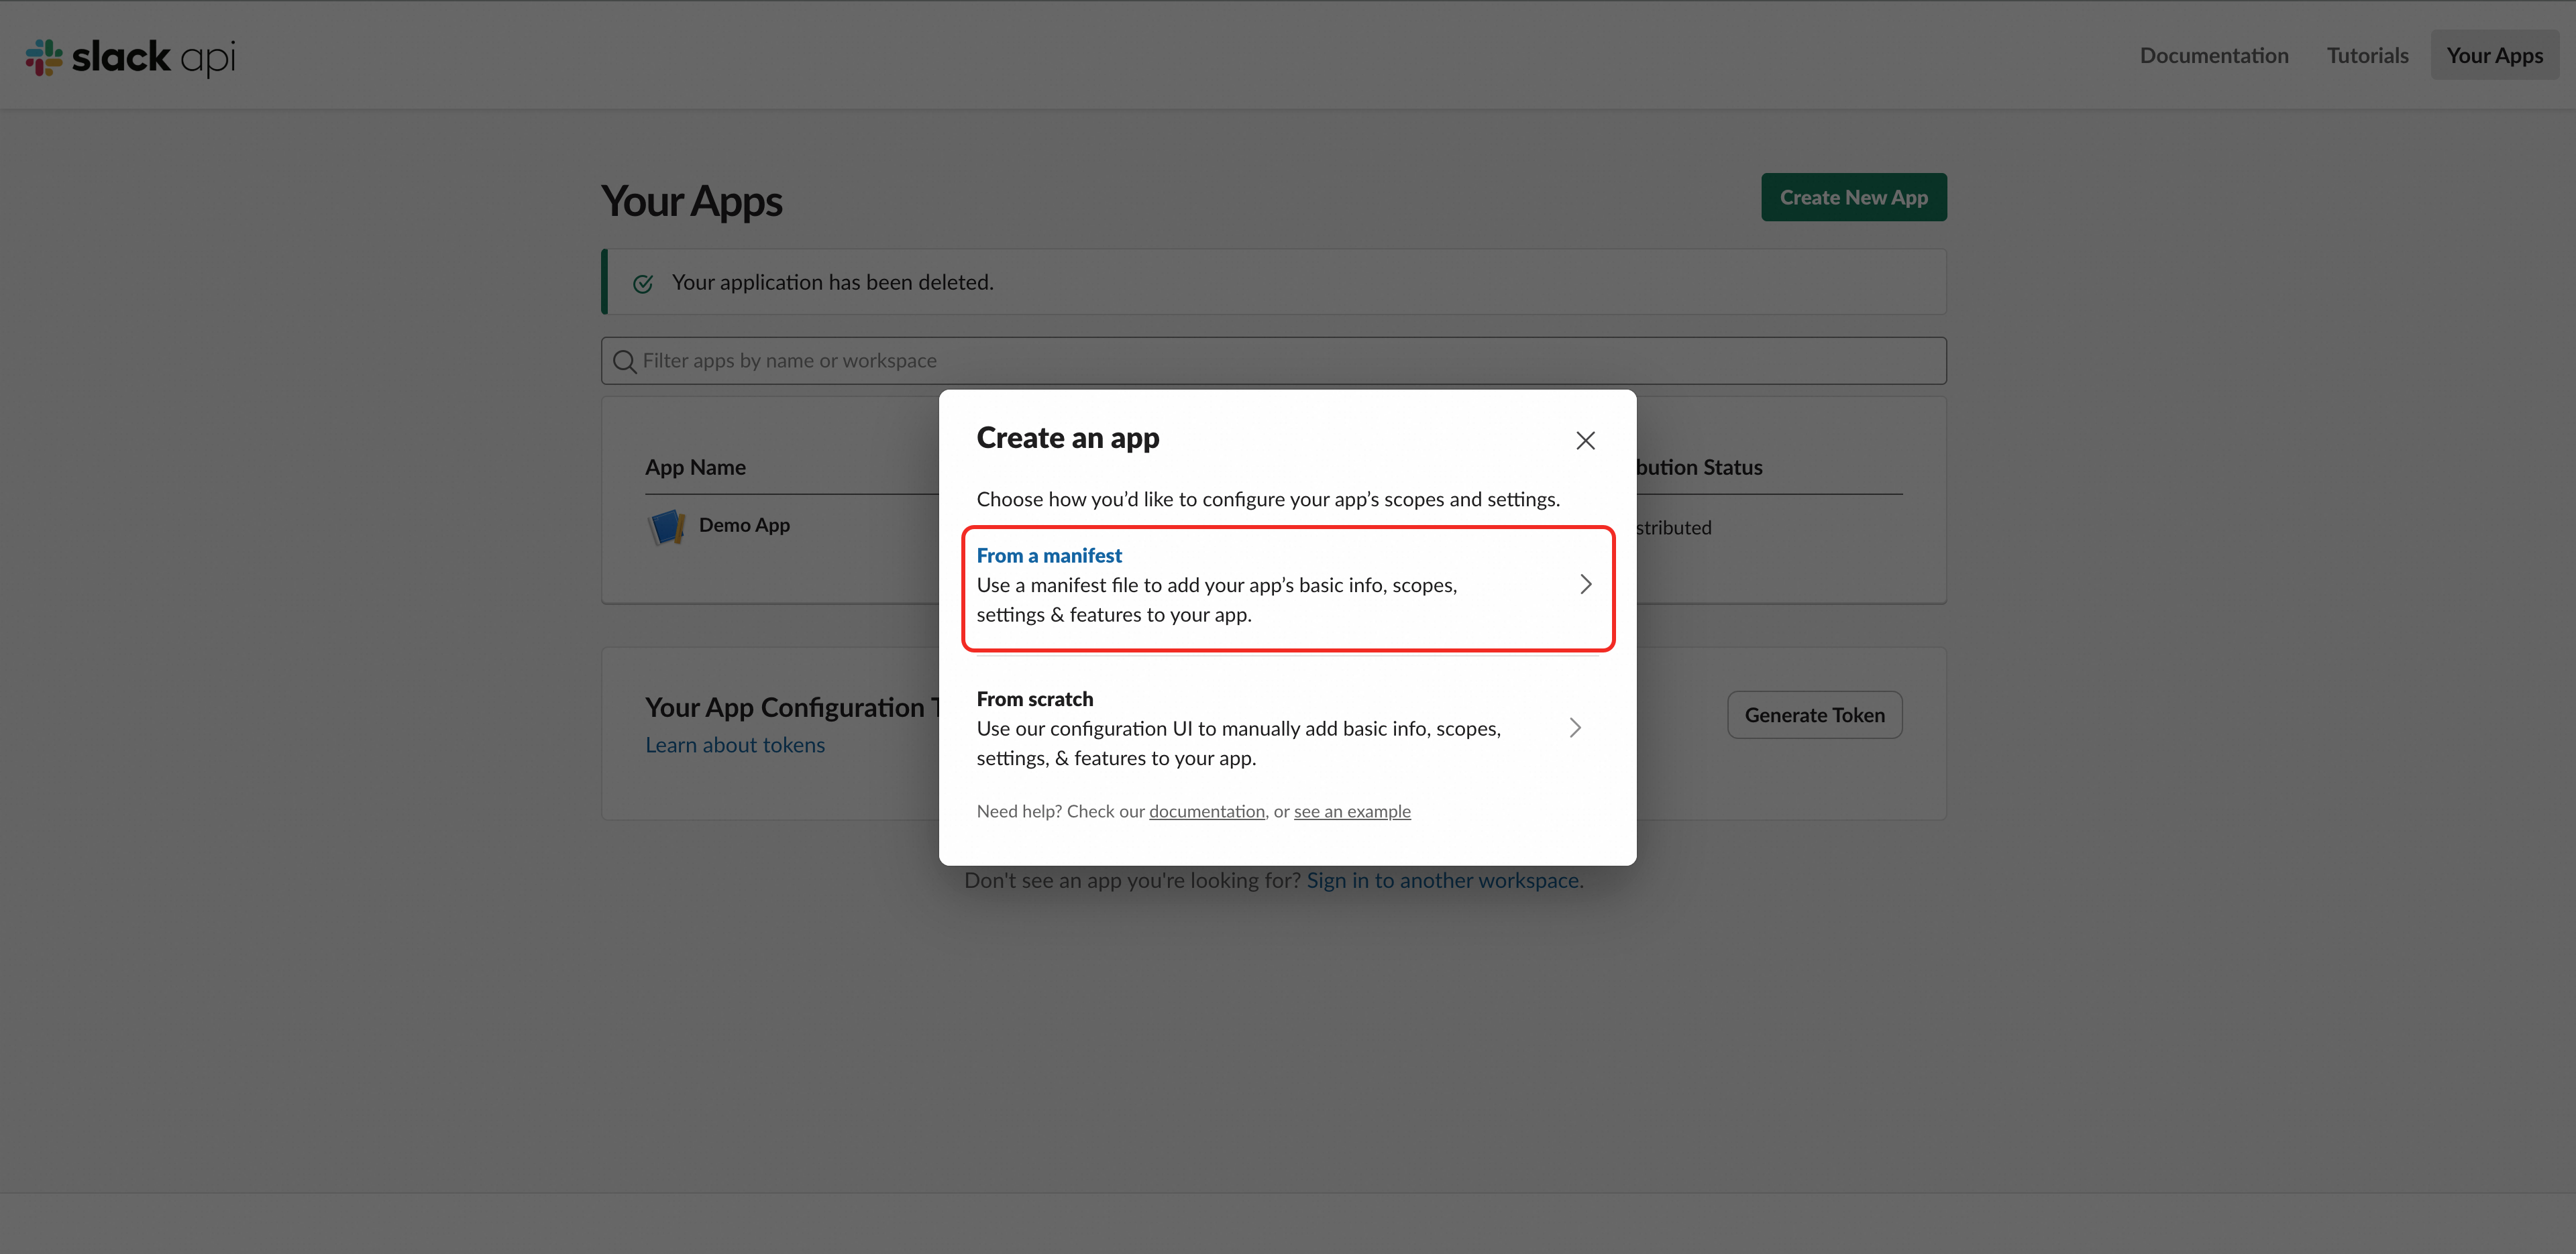
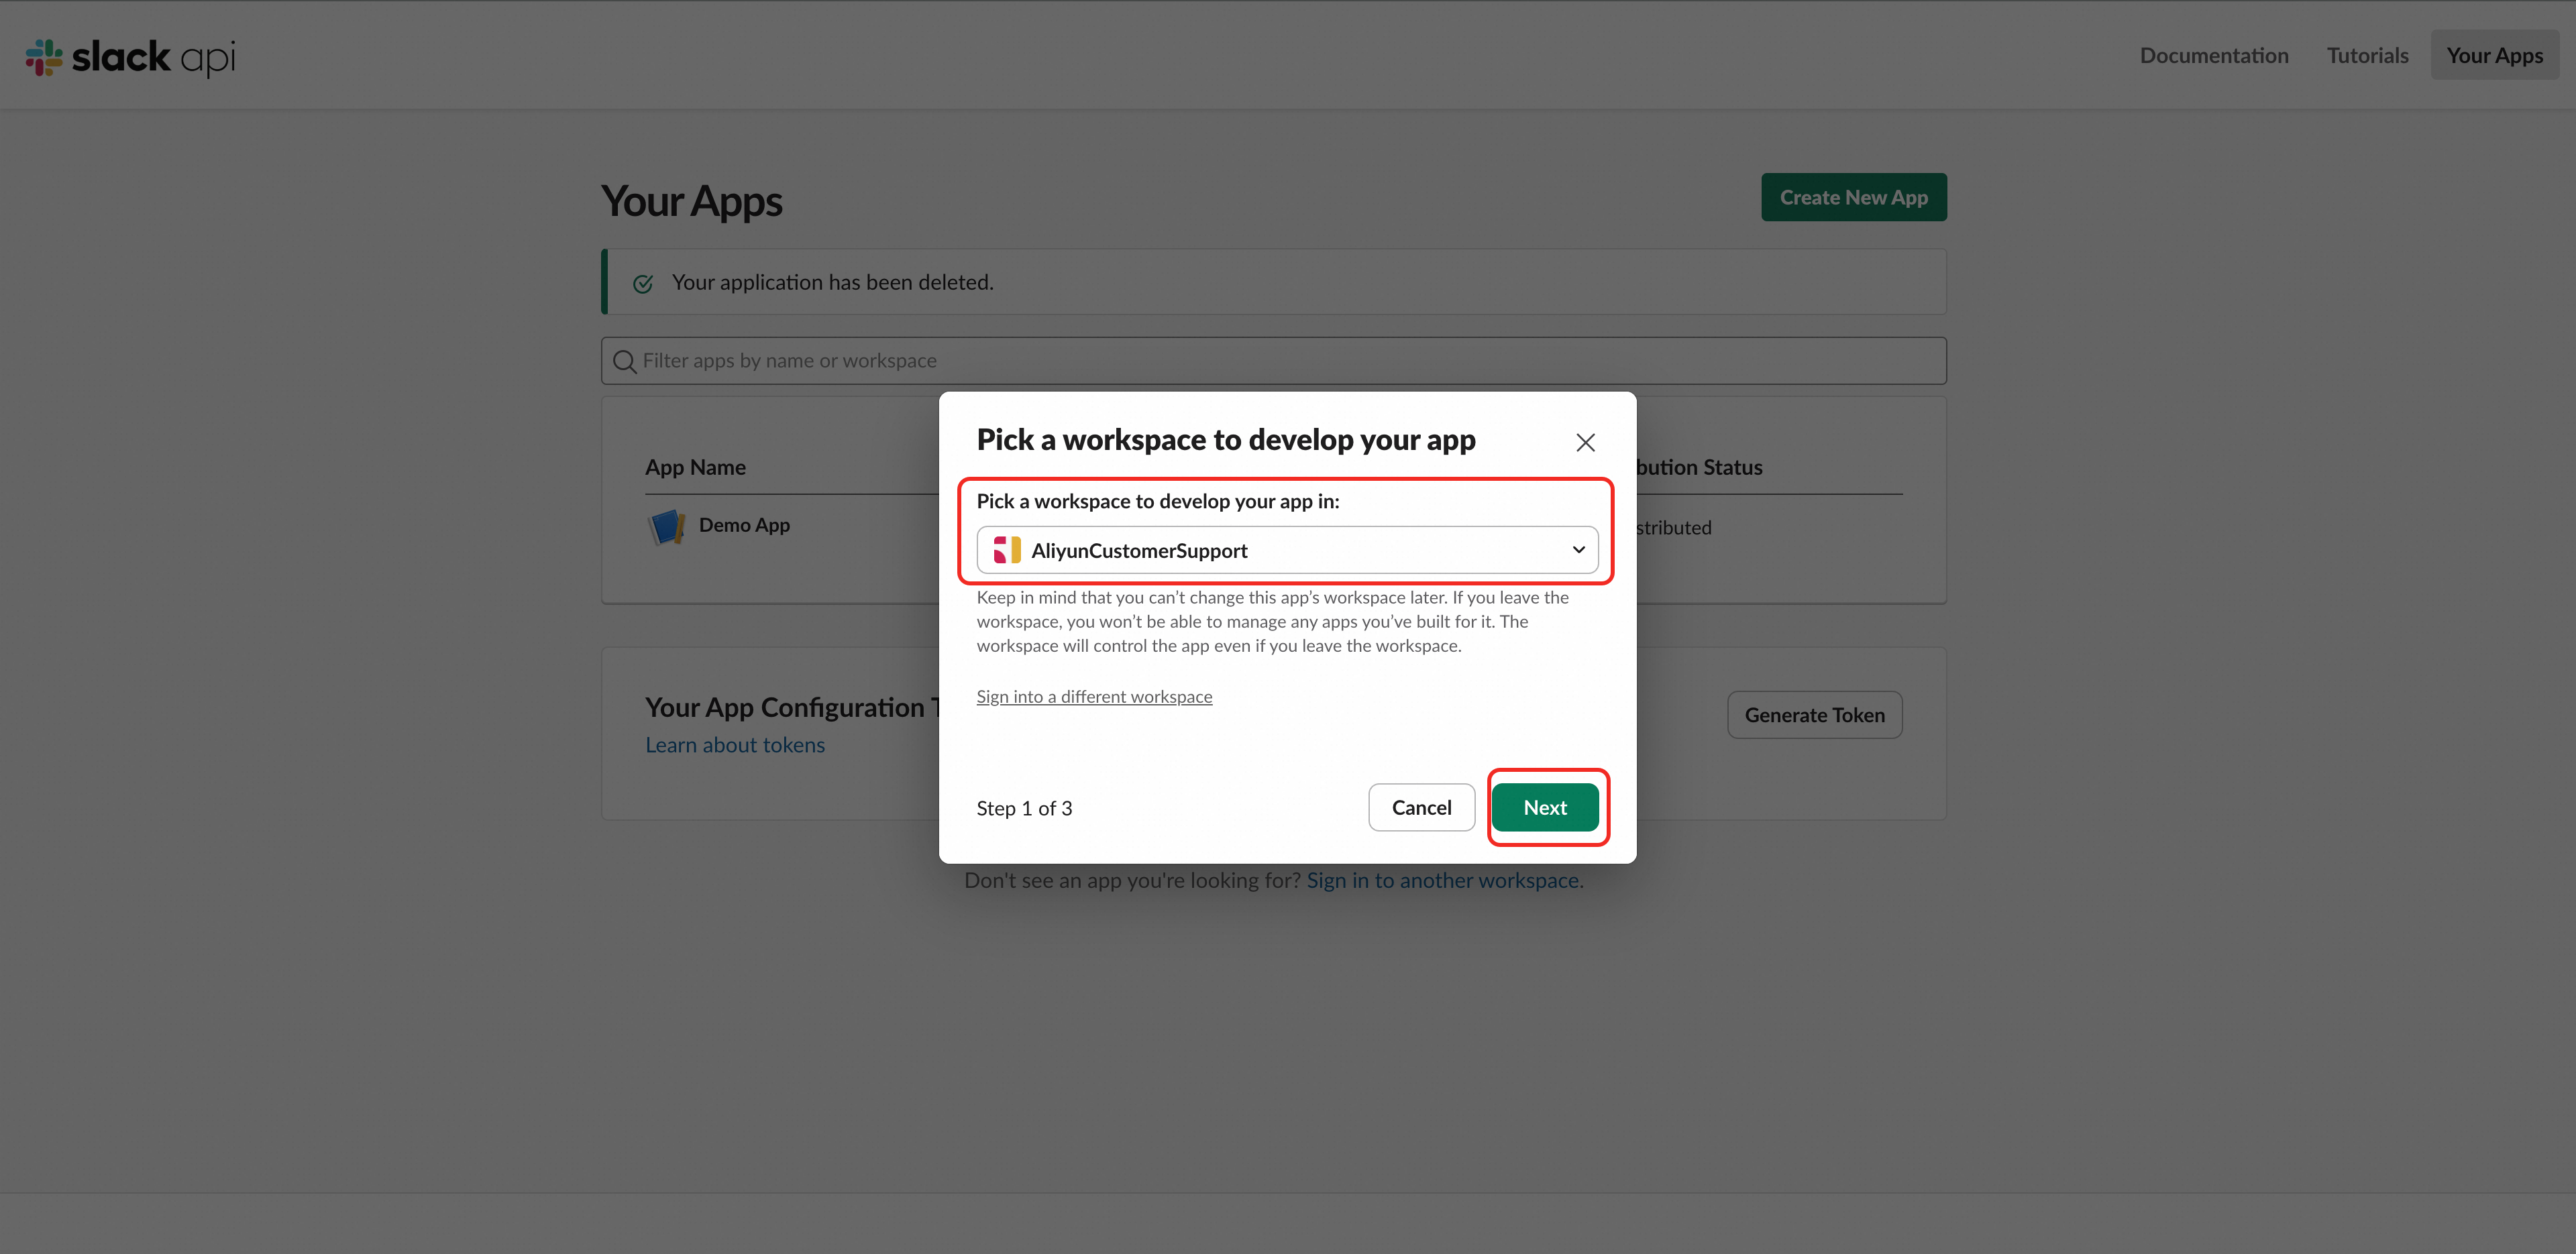
Select your target workspace from the dropdown menu and click "Next"
Select JSON format and paste the following content completely into the input box:
{
    "display_information": {
        "name": "Alibaba Cloud Enterprise Support",
        "description": "Alibaba Cloud Enterprise Support",
        "background_color": "#f72f02",
        "long_description": "Alibaba Cloud Enterprise Support Long description if written, it has to be more than 175 characters. \r\n阿里云企 Long description if written, it has to be more than 175 characters. \r\n阿里云企 Long description if written, it has to be more than 175 characters. \r\n阿里云企 Long description if written, it has to be more than 175 characters."
    },
    "features": {
        "app_home": {
            "home_tab_enabled": true,
            "messages_tab_enabled": true,
            "messages_tab_read_only_enabled": true
        },
        "bot_user": {
            "display_name": "Alibaba Cloud Enterprise Support",
            "always_online": false
        }
    },
    "oauth_config": {
        "redirect_urls": [
            "https://ailink.gts.work/thirdparty/slack/A0A75890ATF/oauth2/callback"
        ],
        "scopes": {
            "user": [
                "identity.basic",
                "identity.team"
            ],
            "bot": [
                "chat:write",
                "users:read",
                "im:write",
                "im:history"
            ]
        }
    },
    "settings": {
        "event_subscriptions": {
            "request_url": "https://ailink.gts.work/thirdparty/slack/A0A75890ATF/events",
            "bot_events": [
                "app_home_opened",
                "message.im"
            ]
        },
        "org_deploy_enabled": false,
        "socket_mode_enabled": false,
        "token_rotation_enabled": false
    }
}
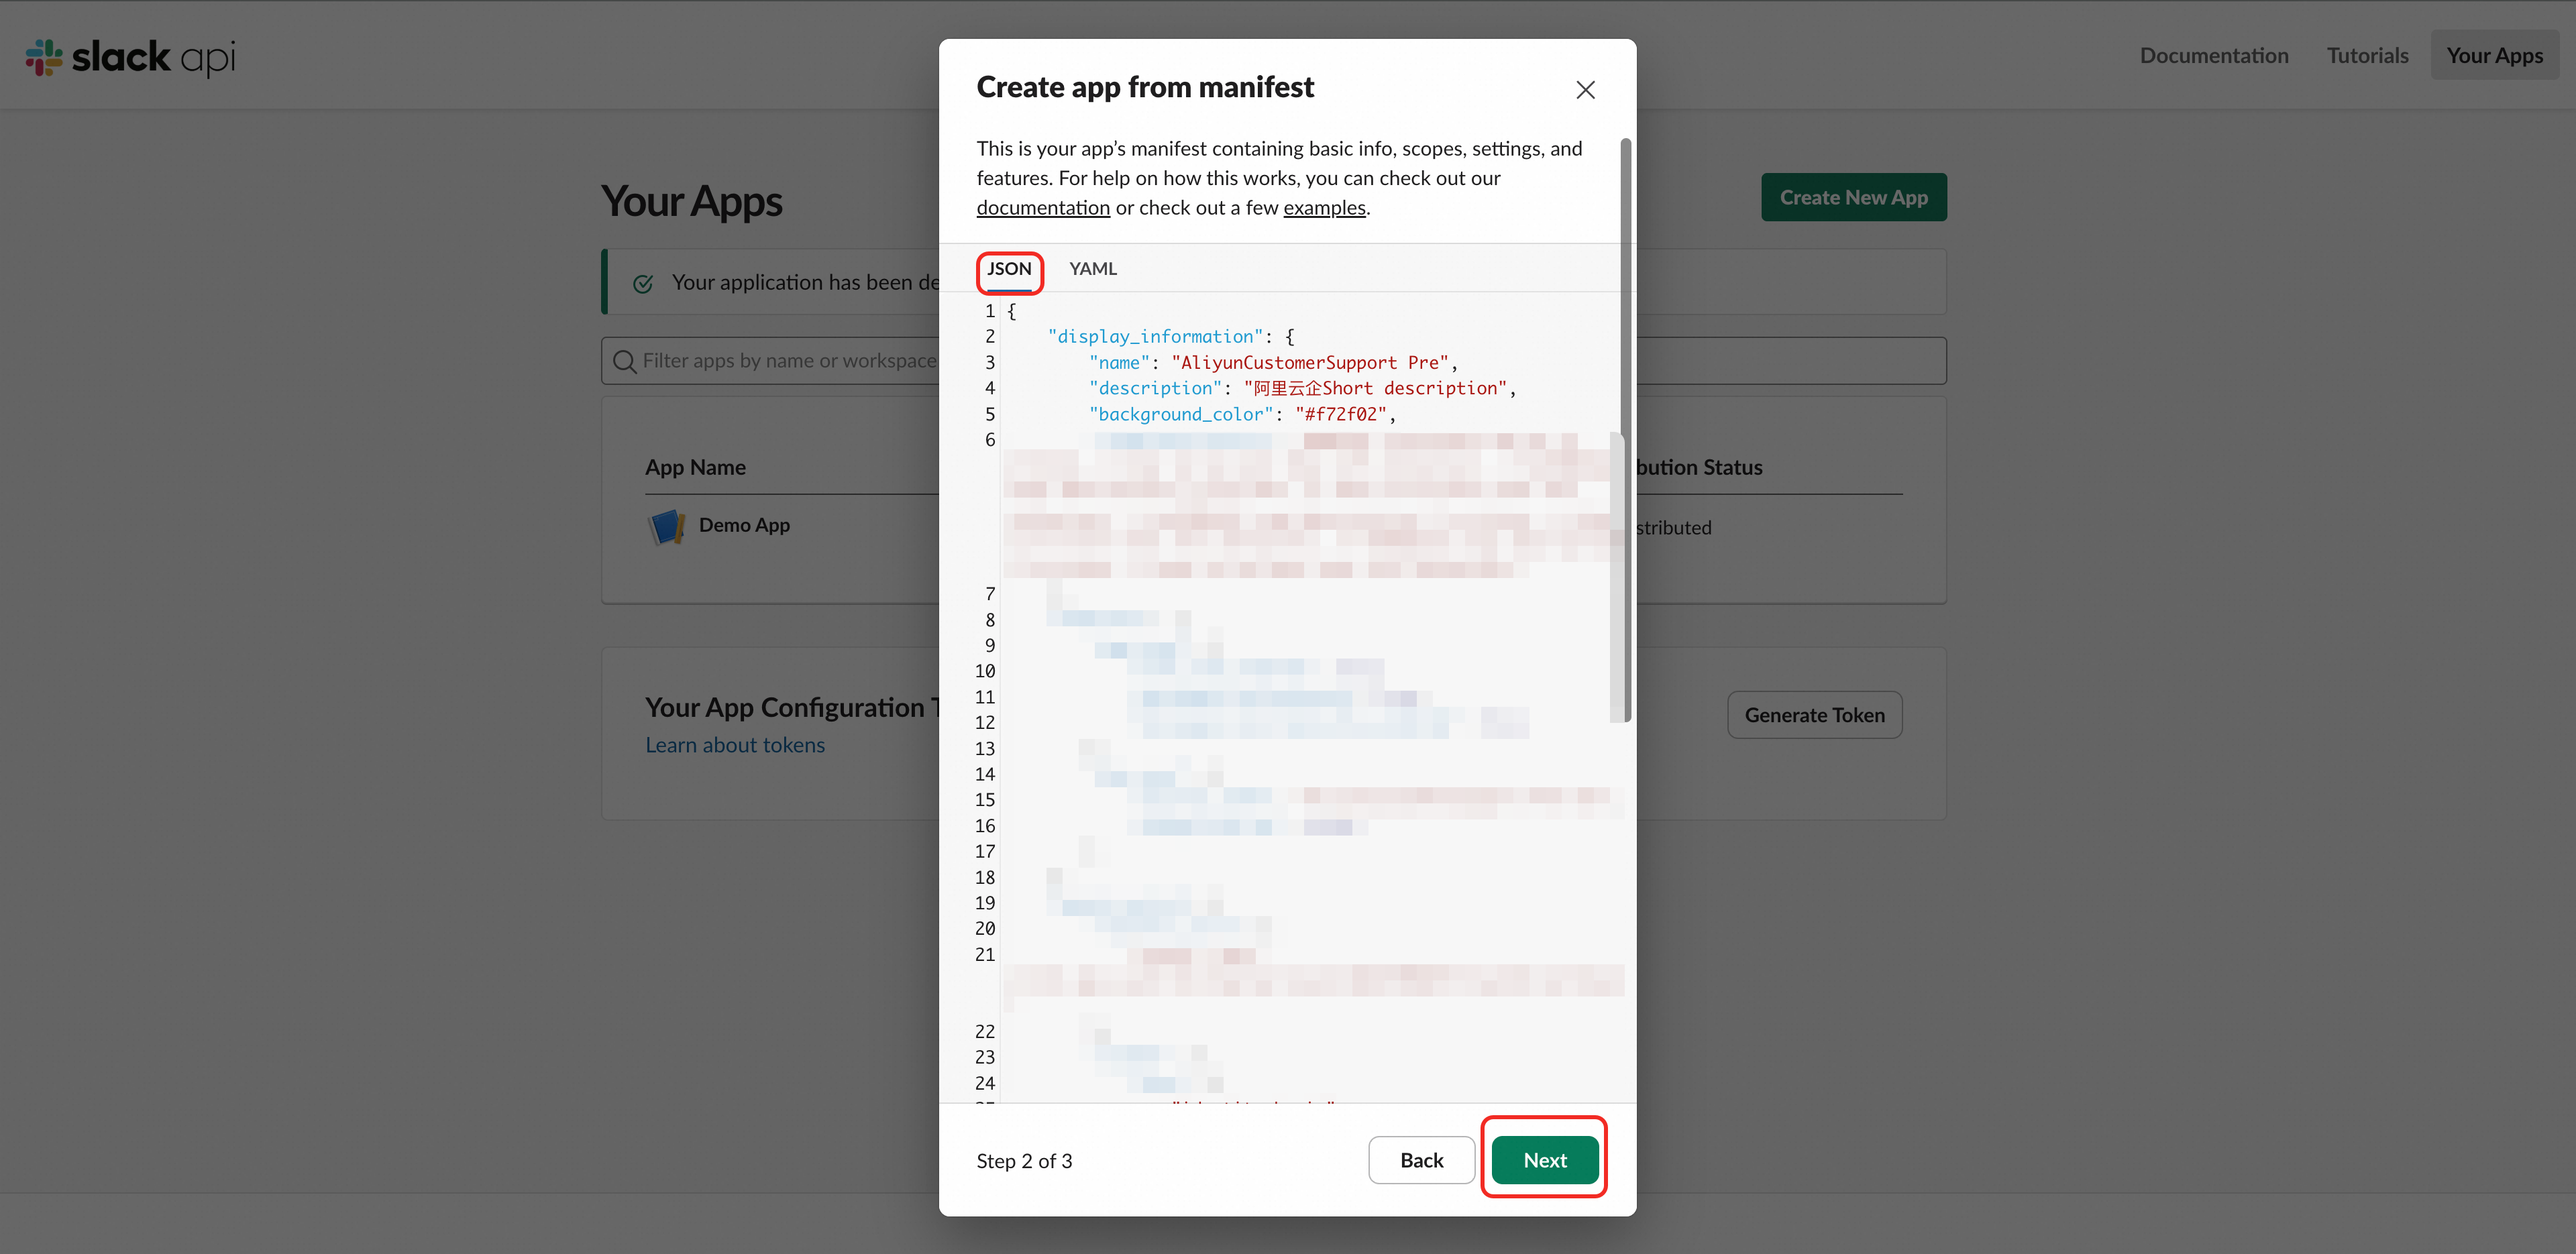
Click "Next" to preview the configuration
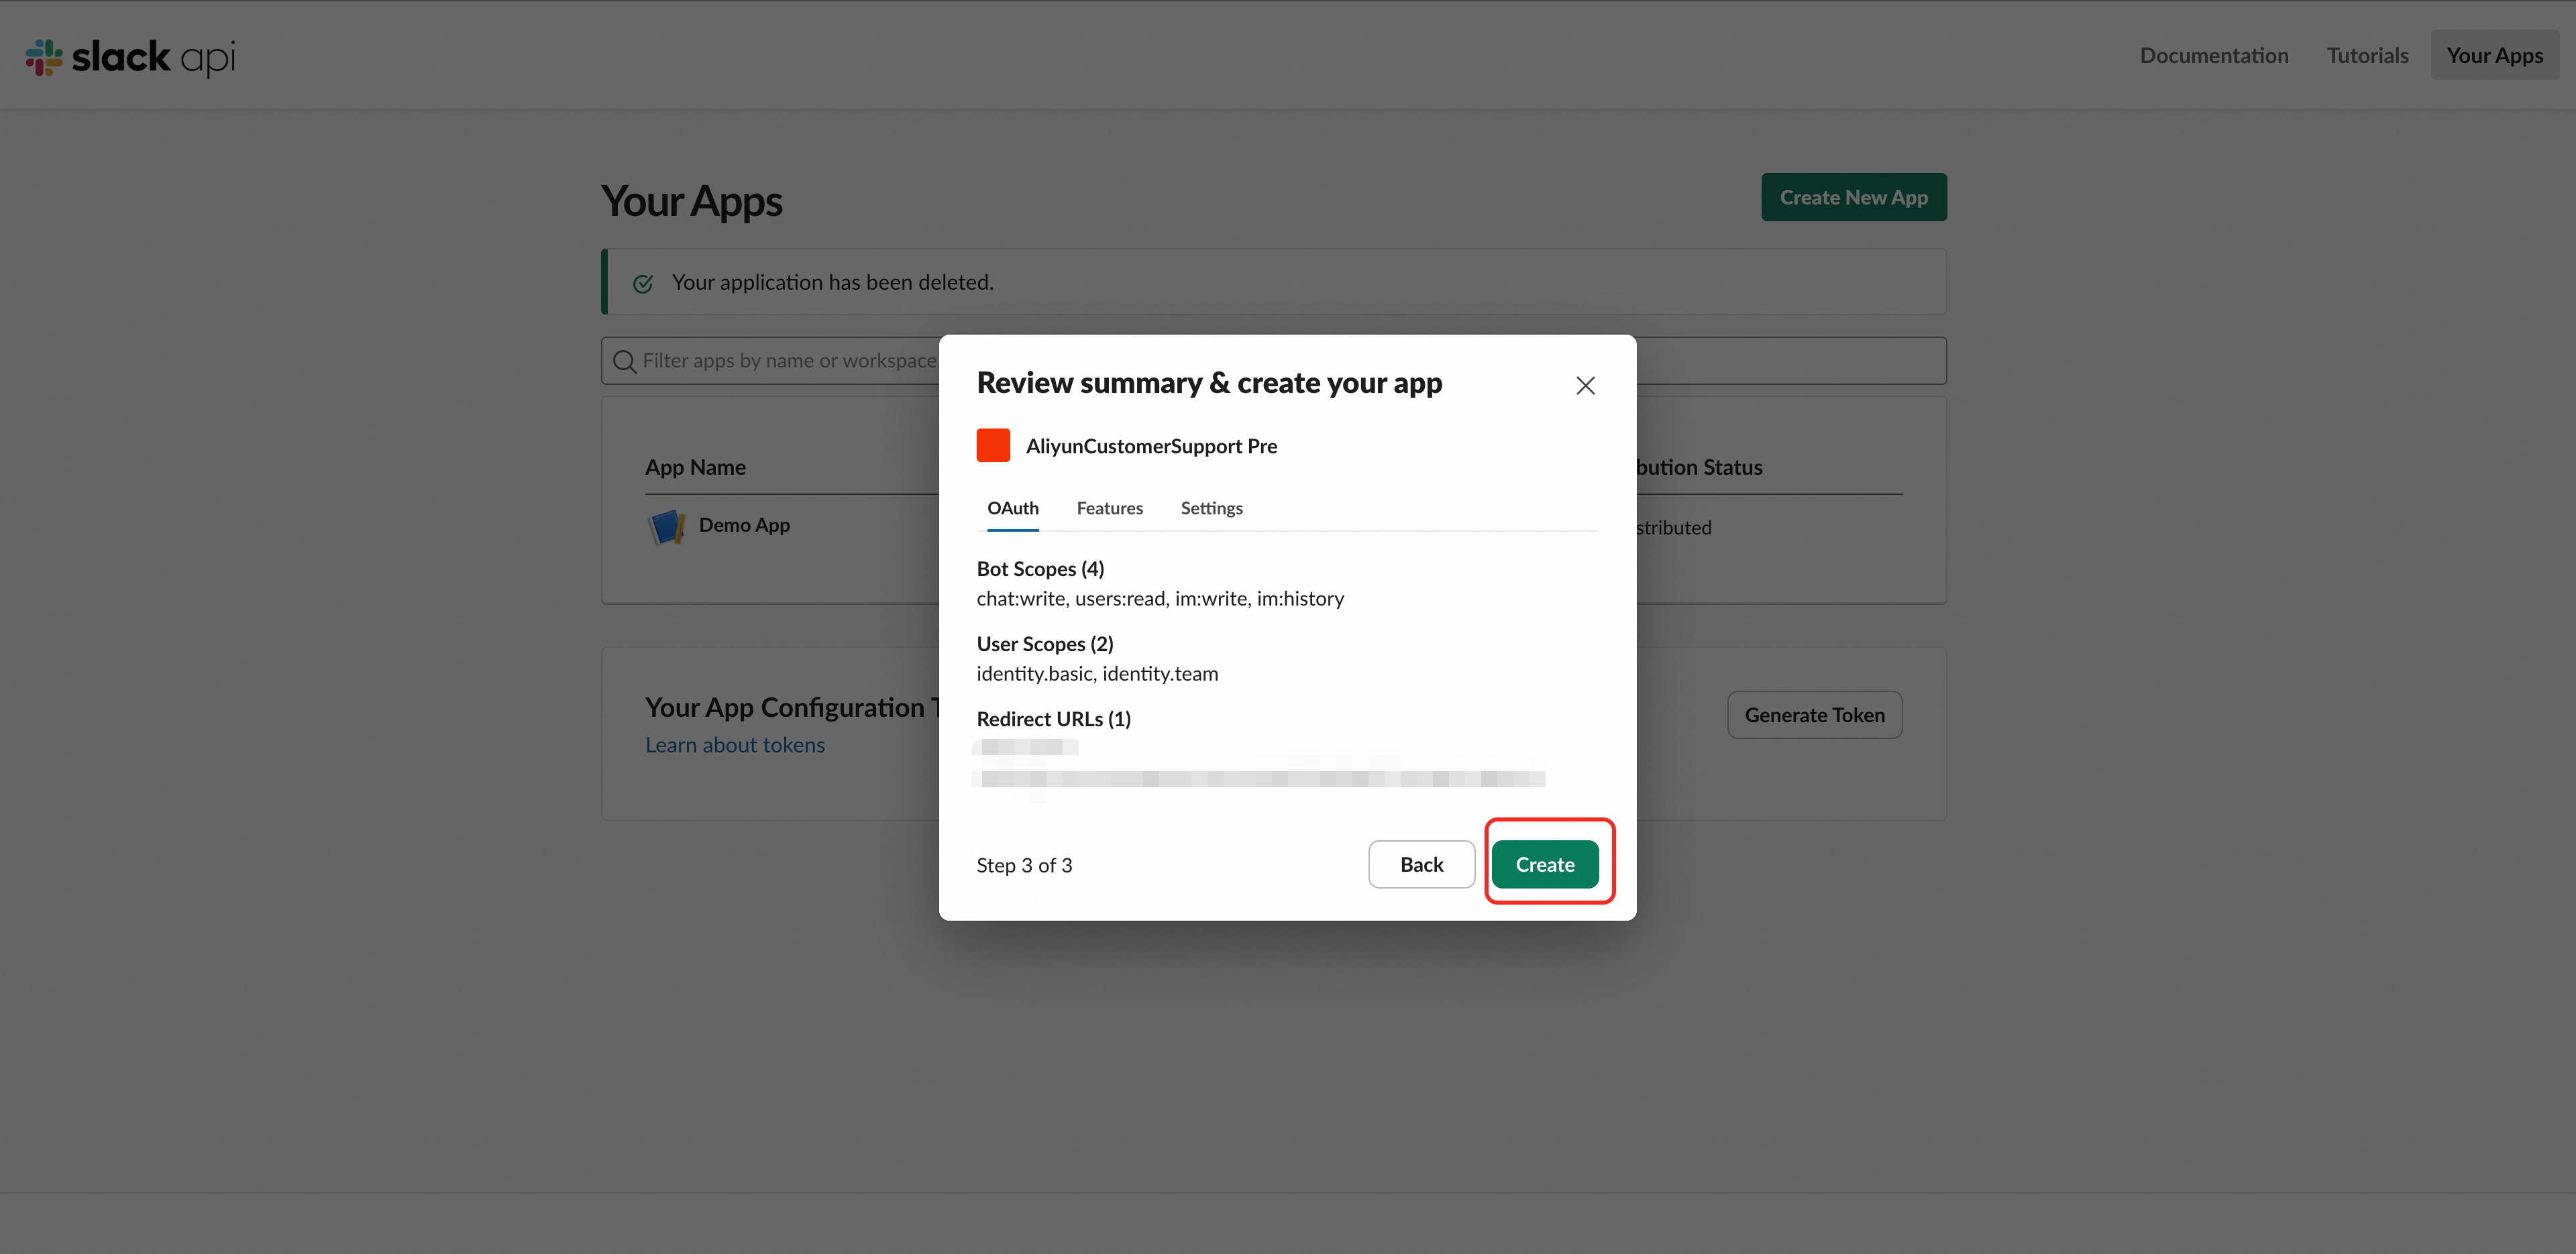
After confirming the information is correct, click "Create" to complete the creation
Phase 2: Submit Credentials to Alibaba Cloud
Step 3: Copy App Credentials
After the app is created, the page will automatically redirect to the "Basic Information" page.
Scroll down to the "App Credentials" section
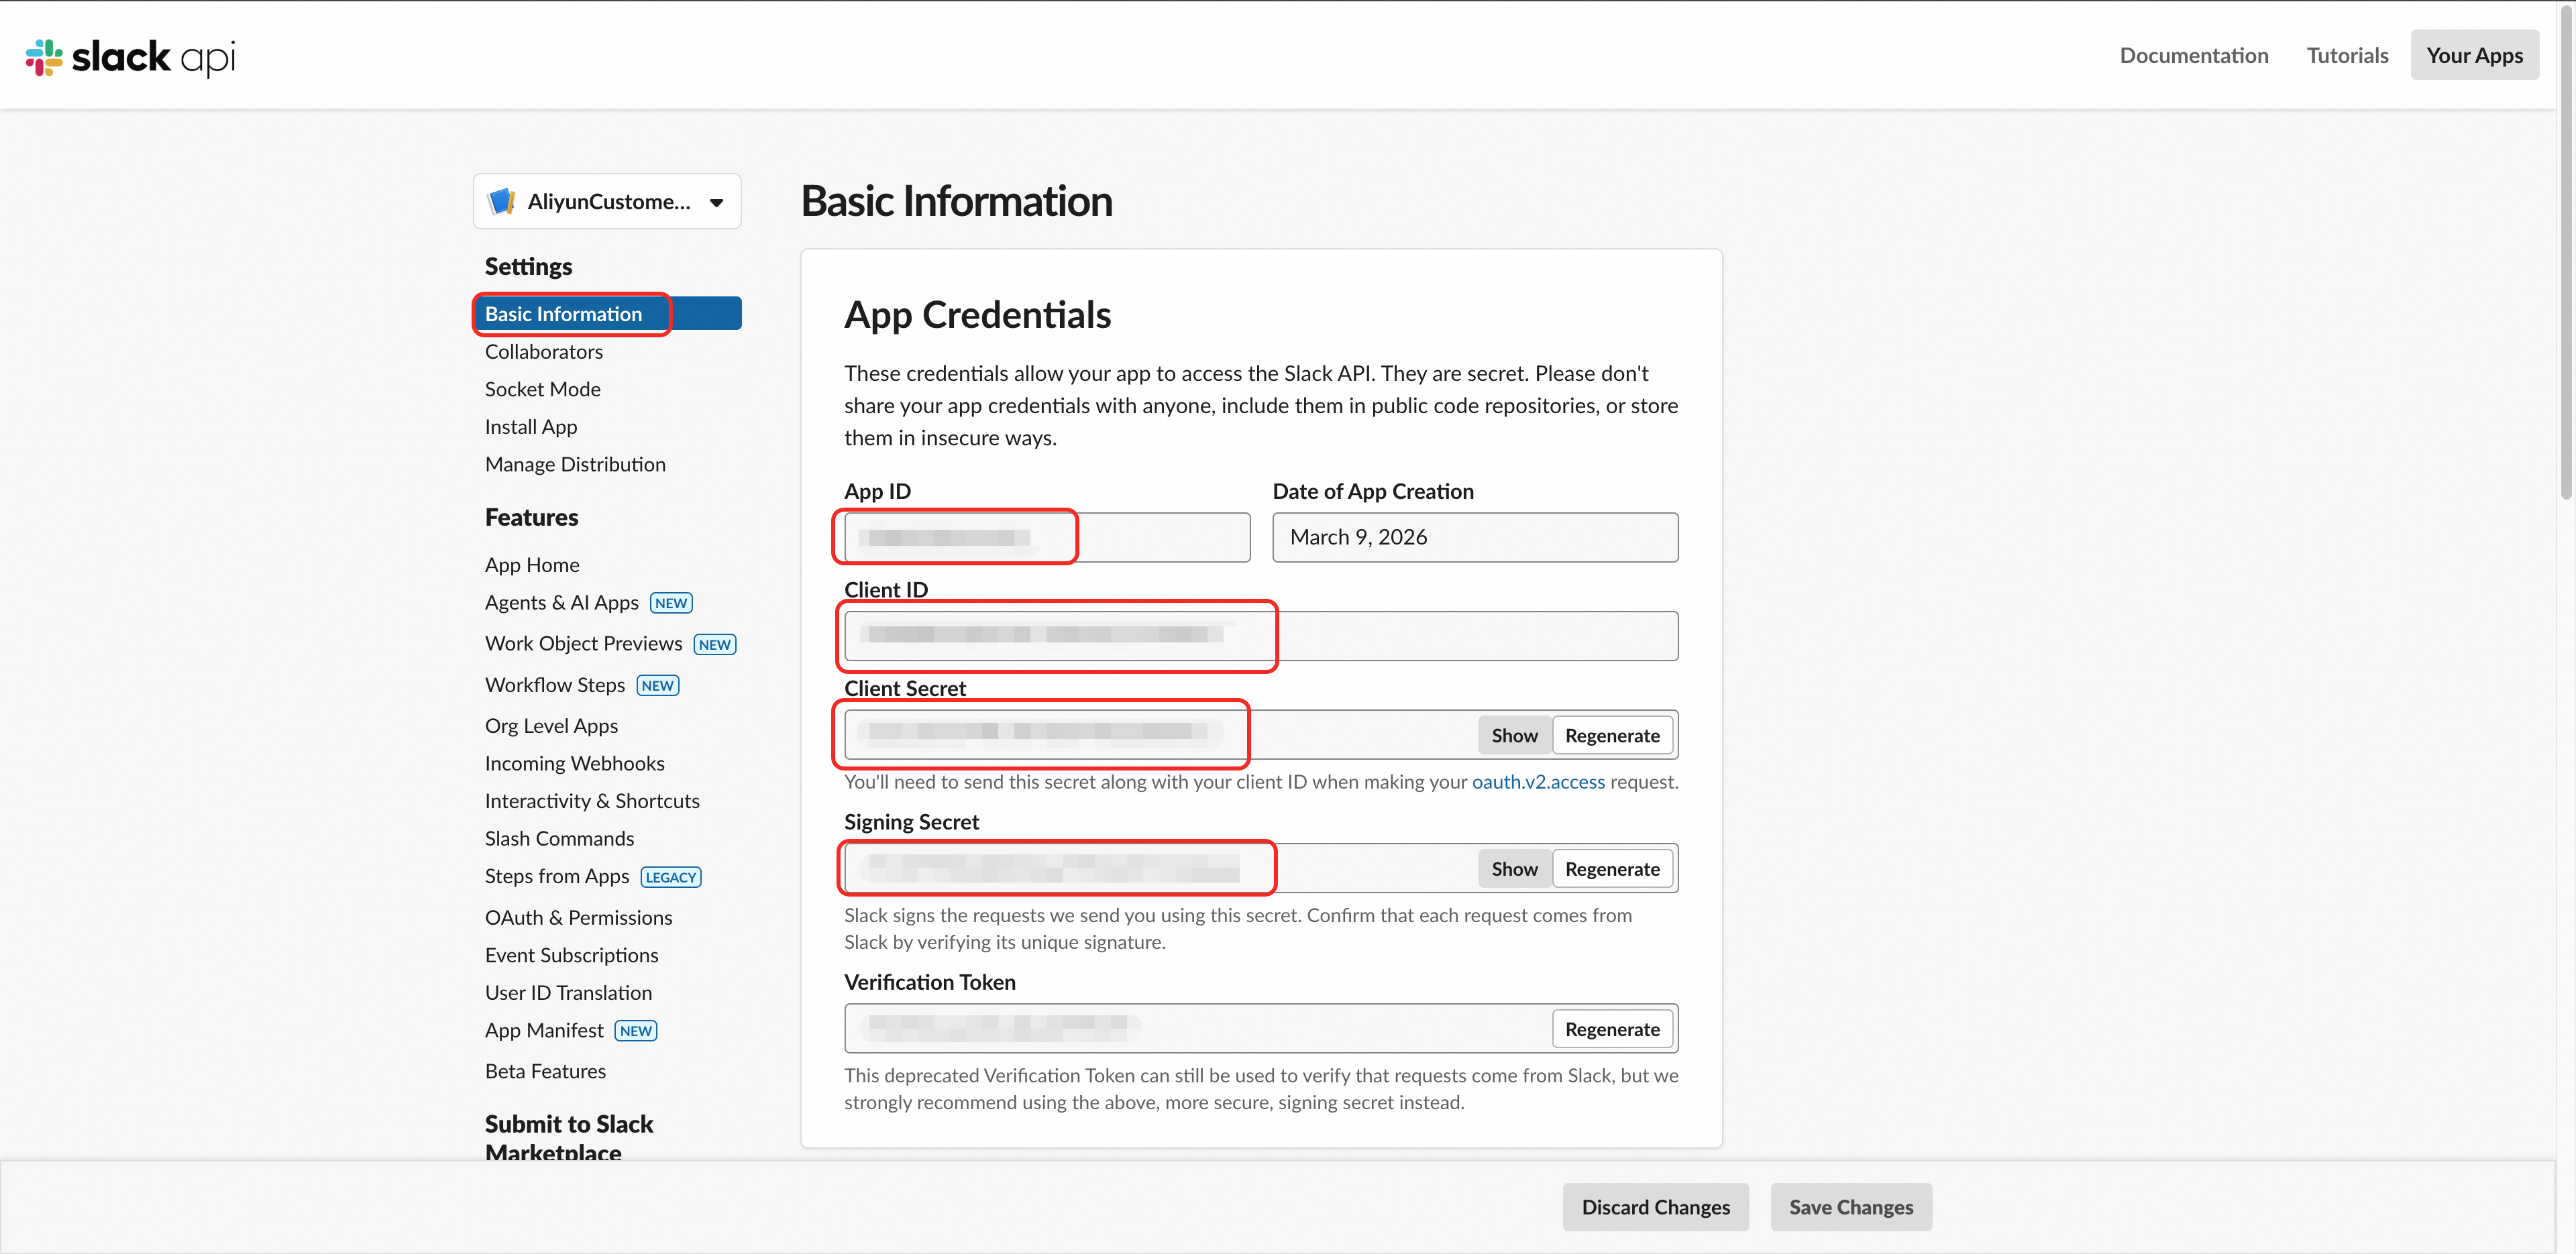
Copy the following 4 items one by one, they will be used in the following steps:
Credential Name | Format Example | Purpose |
Workspace Name | XXXXX | Organization Name |
App ID | A0XXXXXXXXX | Unique application identifier |
Client ID | XXXXXXXXXX.XXXXXXXXXX | OAuth login |
Client Secret | xxxxxxxxxxxxxxxxxxxxxxxxxxxxxxxx | OAuth token exchange (please keep secure) |
Signing Secret | xxxxxxxxxxxxxxxxxxxxxxxxxxxxxxxx | Webhook signature verification (please keep secure) |
Step 4: Obtain Bot Token
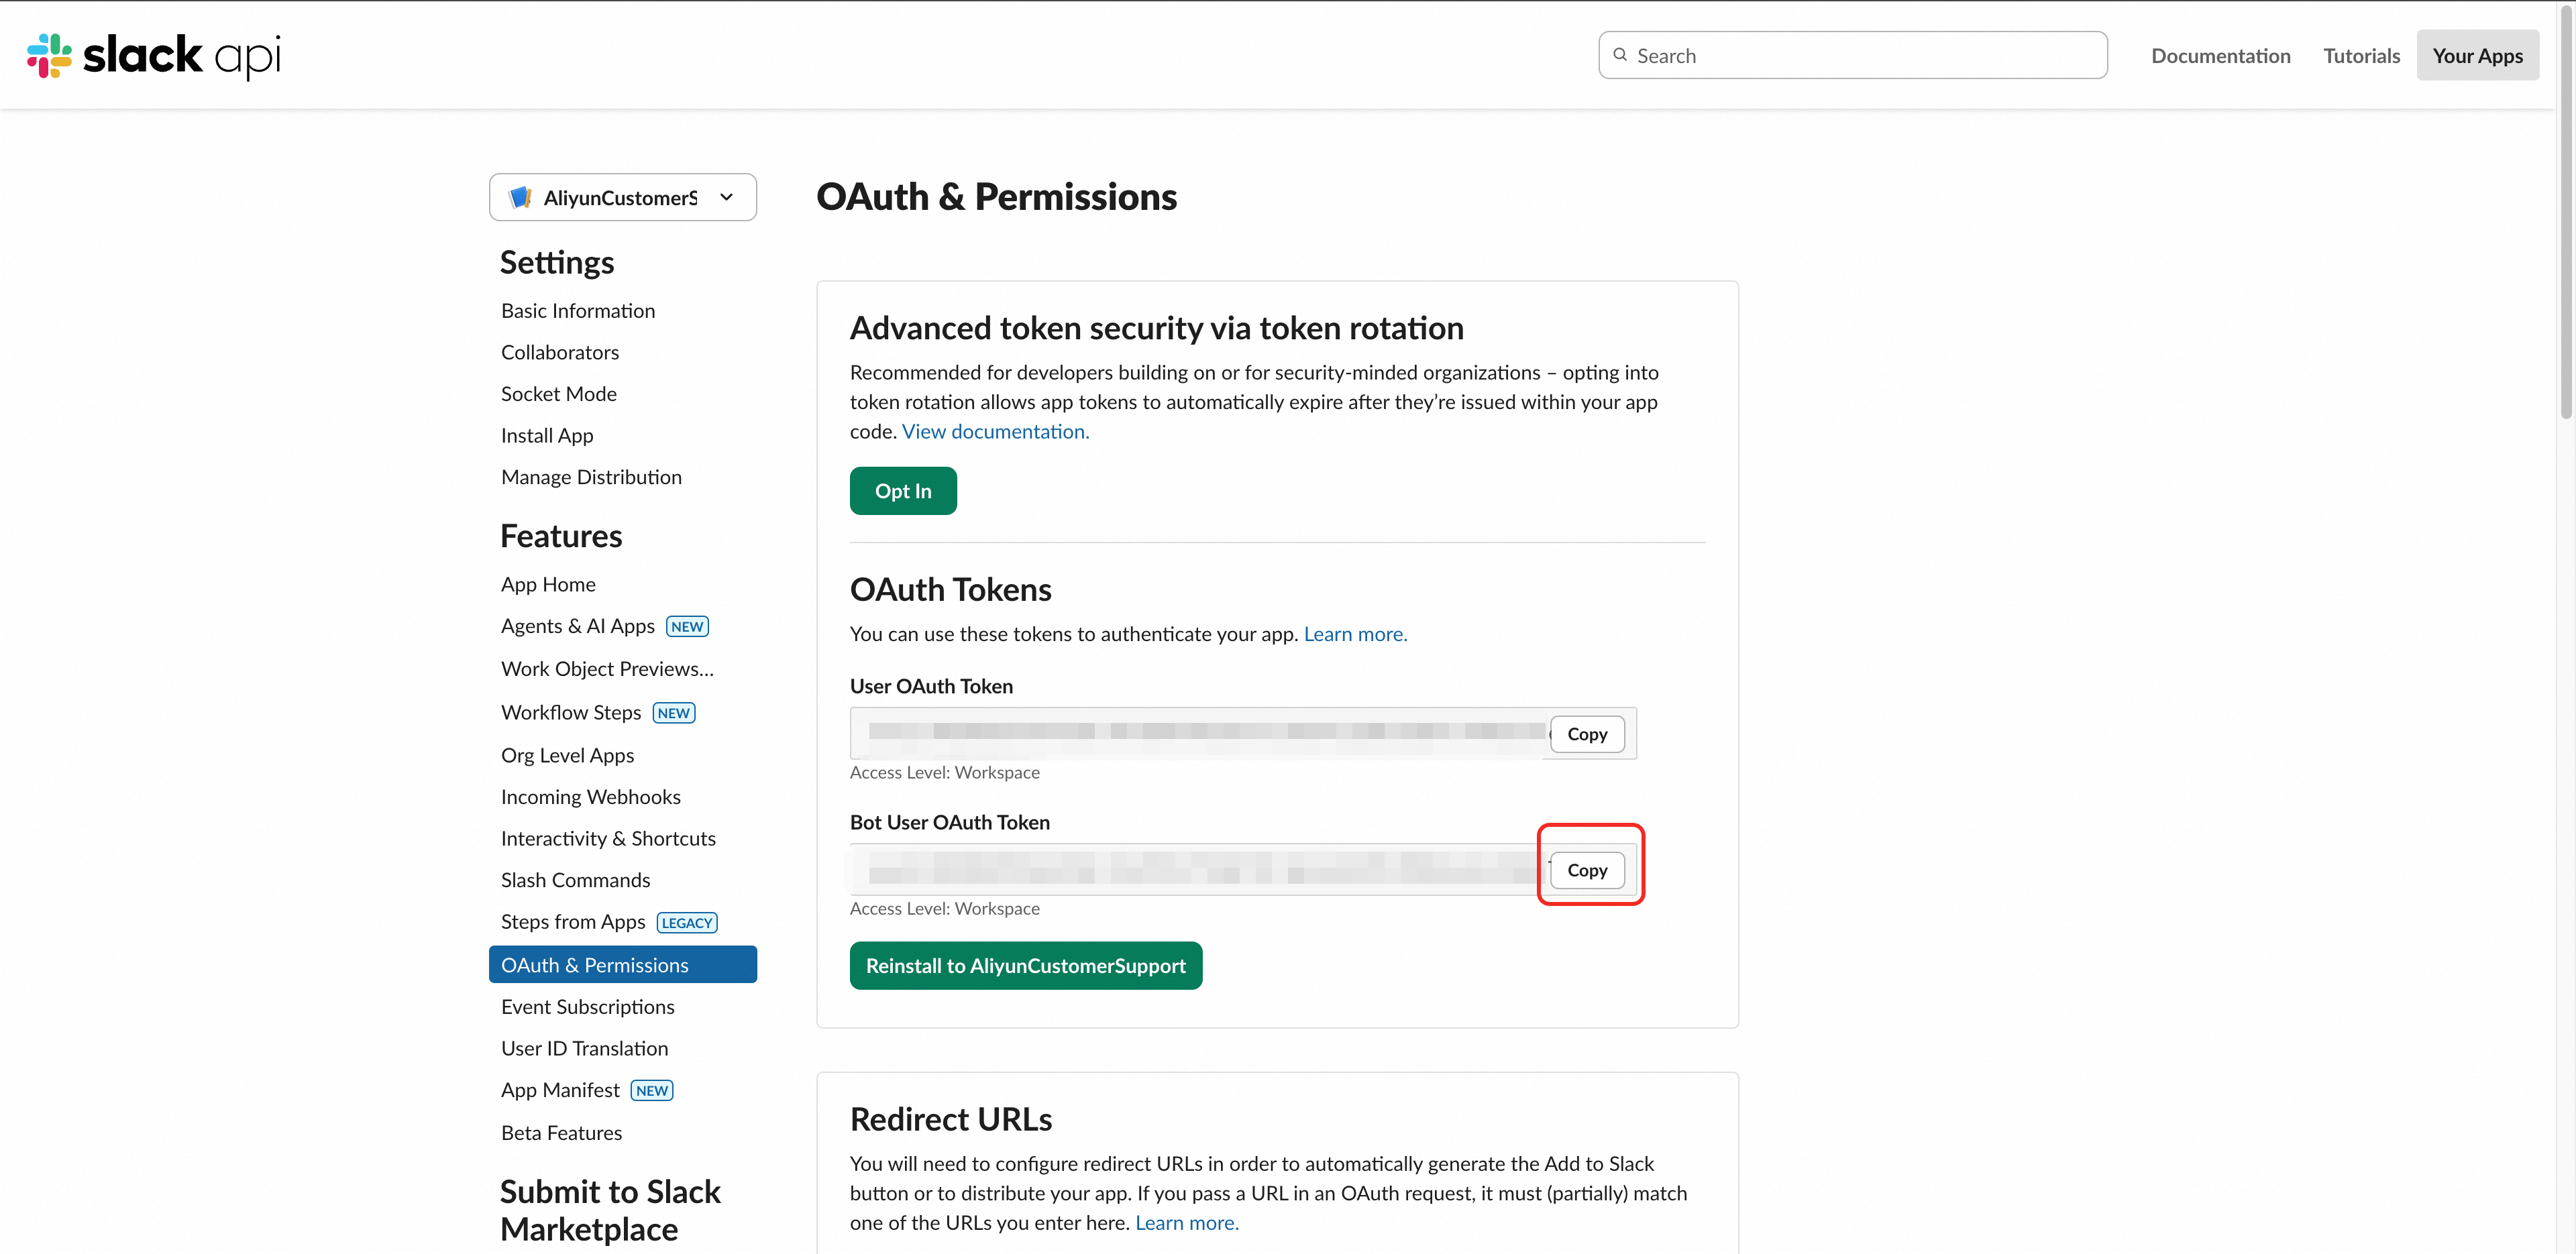
Click "OAuth & Permissions" in the left menu
In the "OAuth Tokens" section, click the "Install to AlibabaCloudEnterpriseSupport" button
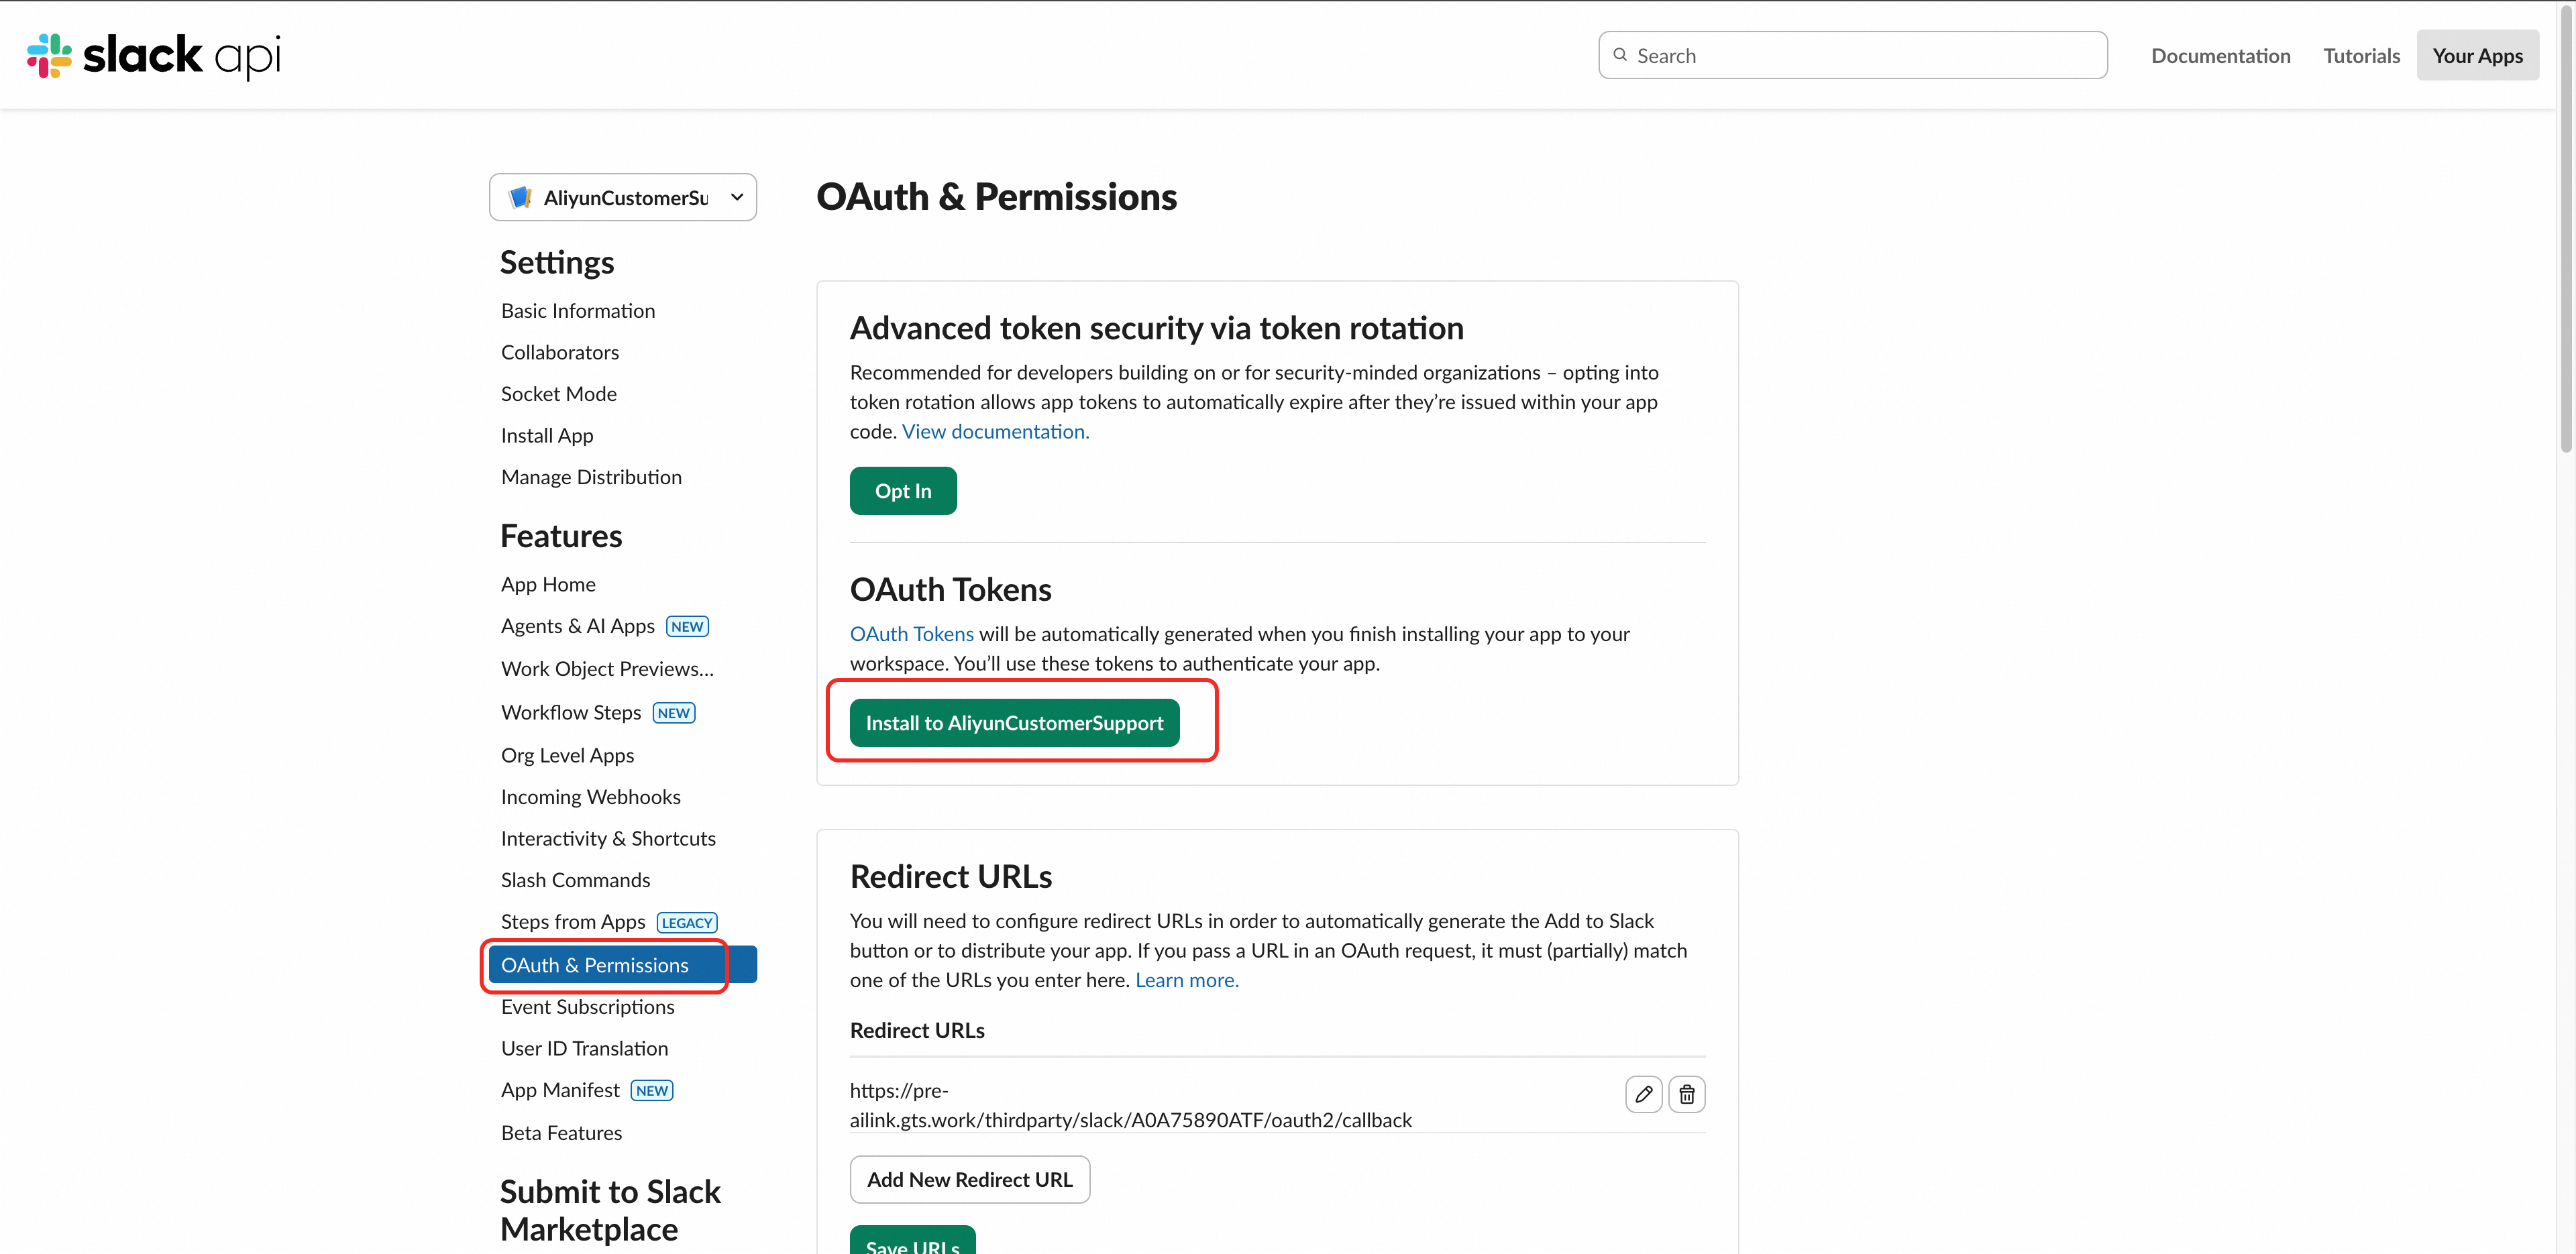
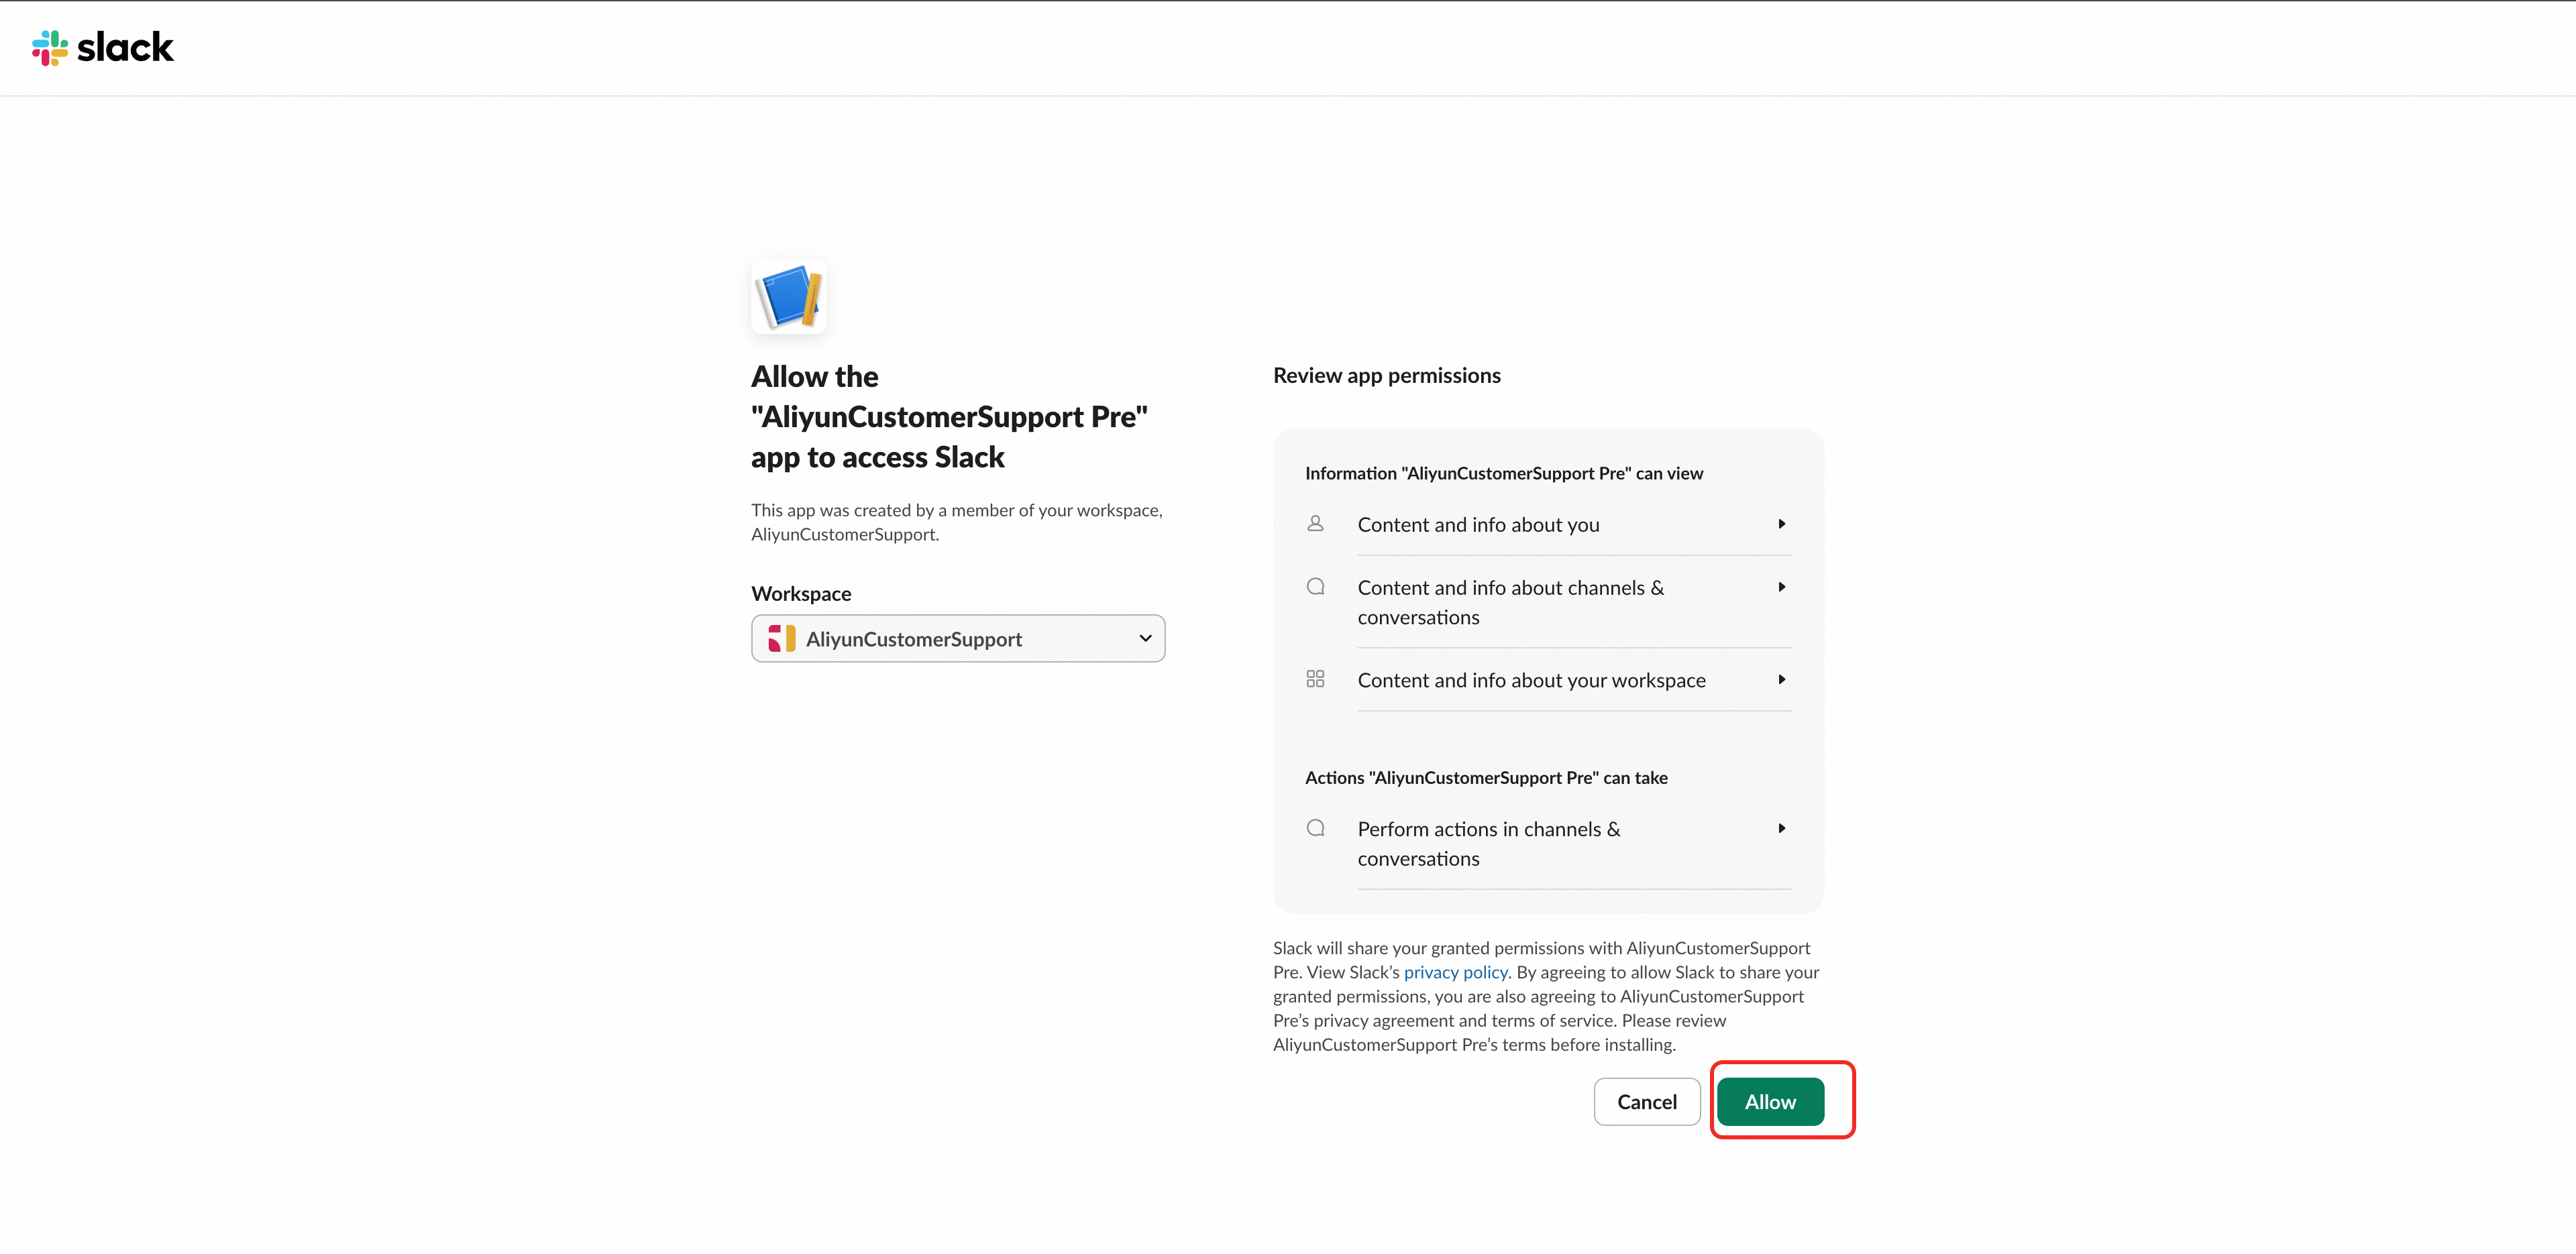
In the authorization popup, confirm the permission information and click "Allow" to complete the installation
After installation is complete, the page will automatically return to "OAuth & Permissions", and the generated Token will be displayed in the "OAuth Tokens" section
Find "Bot User OAuth Token" (format: xoxb-1234567890-1234567890123-xxxxxxxxxxxxxxxxxxxxxxxx), click "Copy" to copy it
The Bot Token is used for sending message notifications. Please be sure to copy and keep it secure.
Step 5: Submit Credentials to Alibaba Cloud
Please go to [Alibaba Cloud Value-Added Service Desk - My Expert Service- Channel Management - Add Channel - Slack Channel] and enter all 6 credentials obtained in Steps 3 and 4 in the popup (see table below).
Credential Name | Format Example | Purpose |
Workspace Name |
| Organization Name |
App ID |
| Unique application identifier |
Client ID |
| OAuth login |
Client Secret |
| OAuth token exchange |
Signing Secret |
| Webhook signature verification |
Bot User OAuth Token |
| Message notifications and homepage redirection |

After submission, Alibaba Cloud will verify the credentials:
Verification Passed: Please continue with Phase 3 operations.
Verification Failed: Please re-check whether all 5 credentials obtained in Steps 3 and 4 are correct, correct them, and resubmit.
Phase 3: Complete Integration Configuration
Step 6: Update OAuth Callback URL
Click "OAuth & Permissions" in the left menu
Scroll down to the "Redirect URLs" section
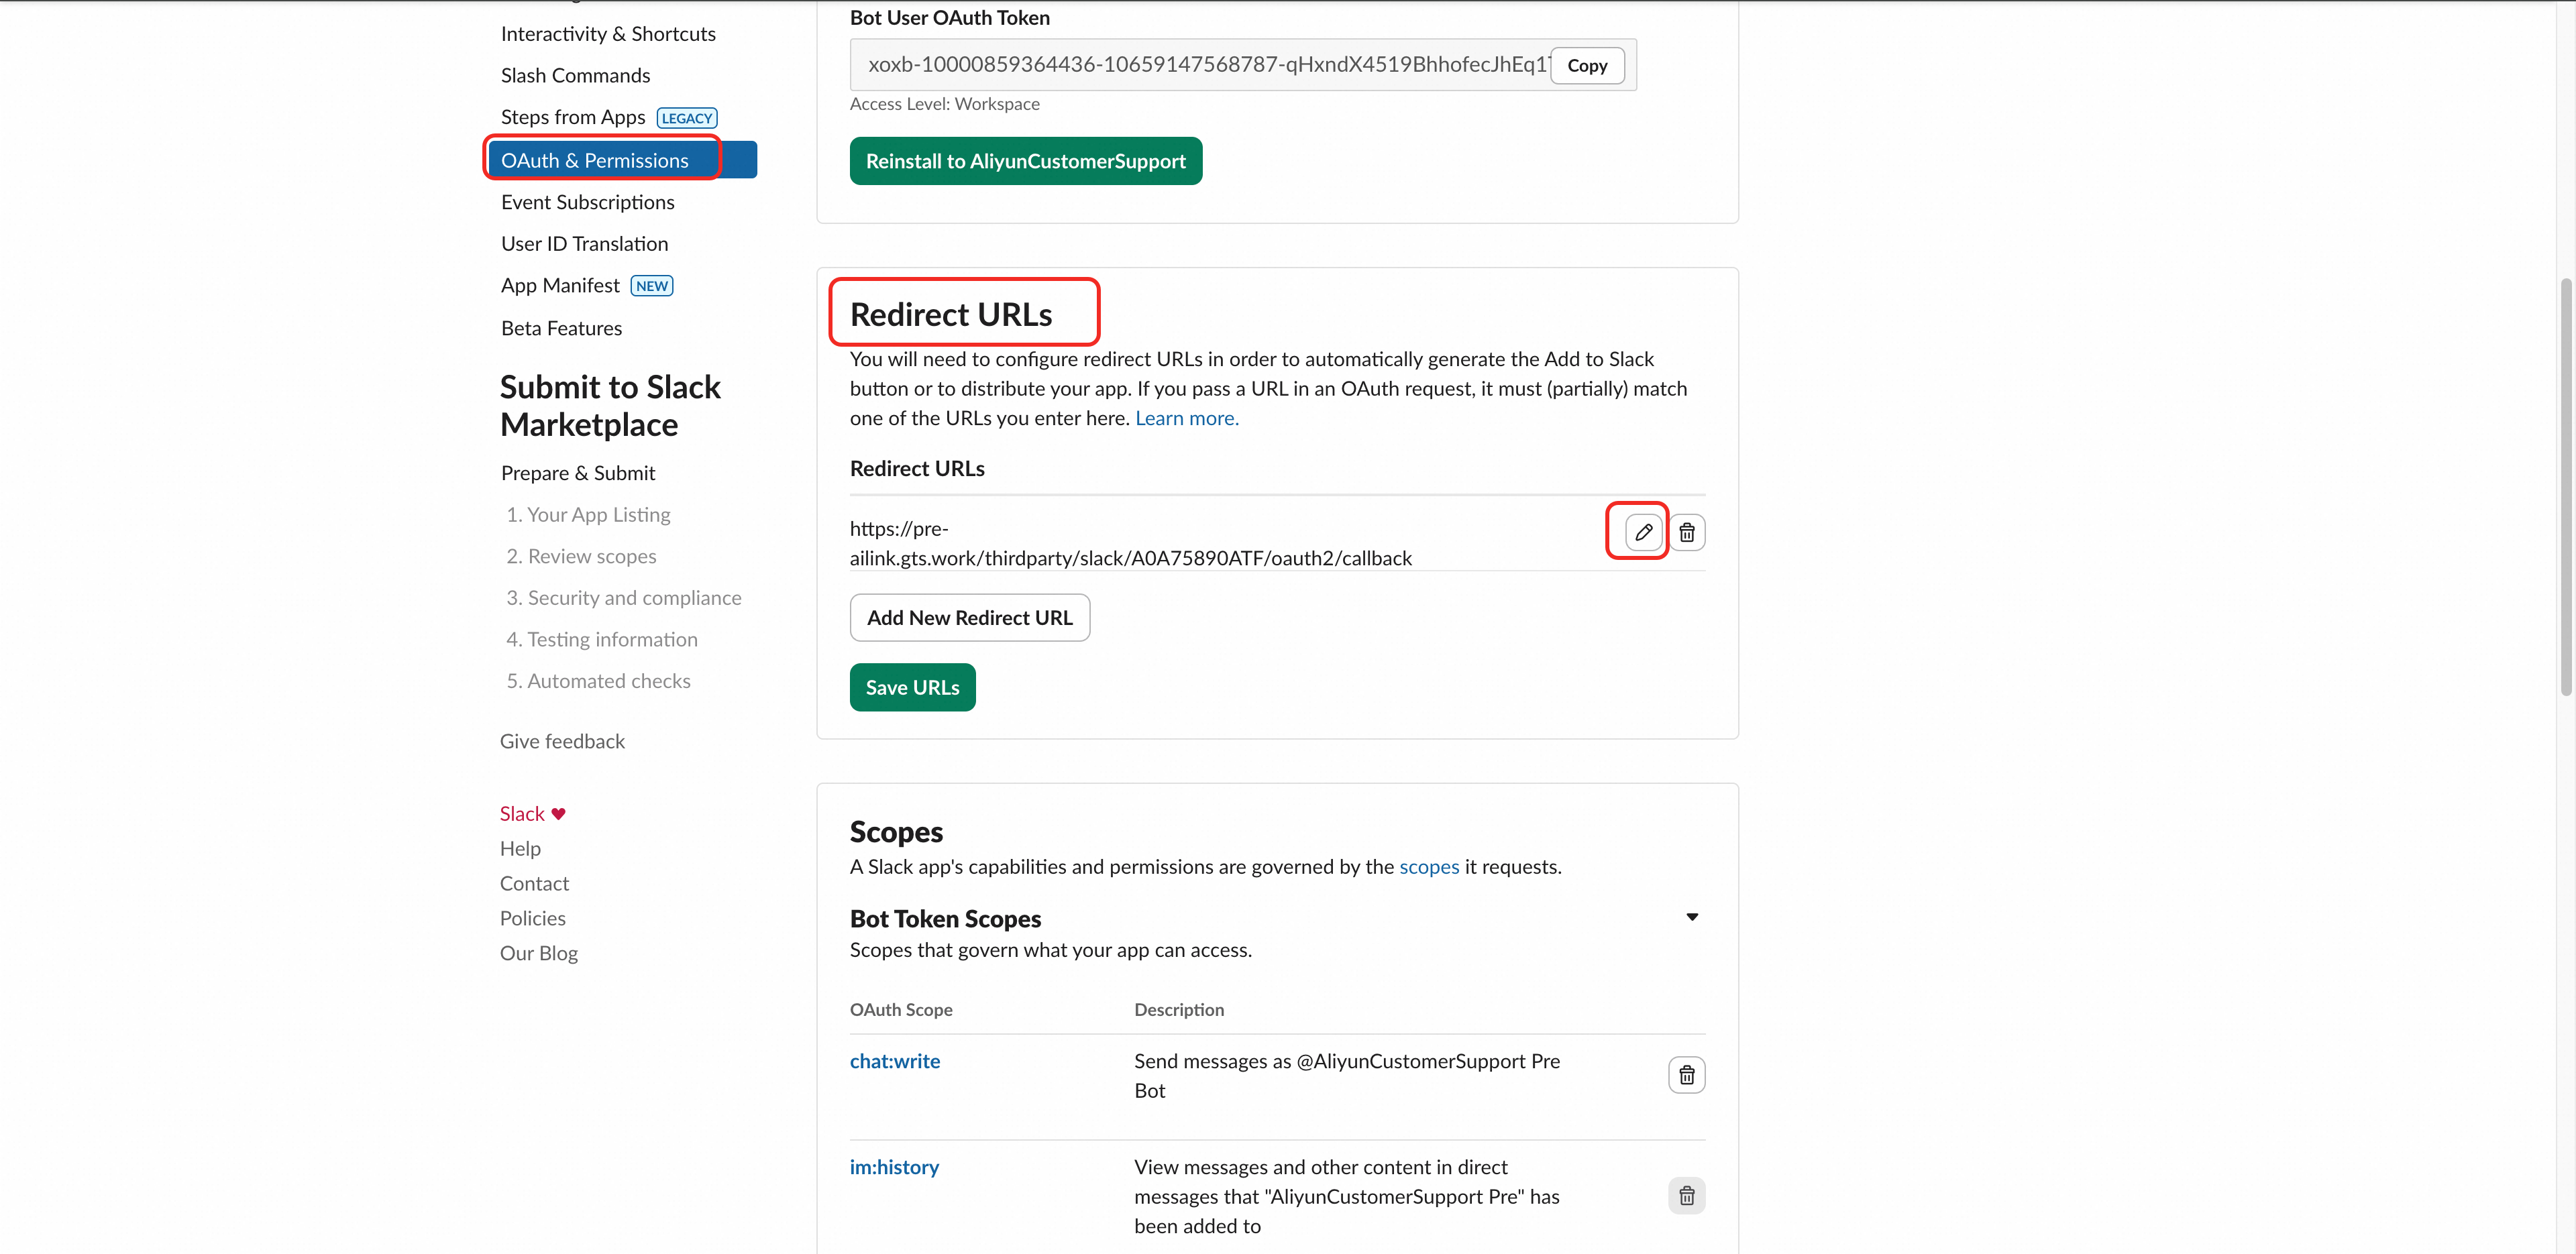
Click "Edit" on the right side of the existing URL
Replace the URL with (please replace {AppId} with your actual App ID):
https://ailink.gts.work/thirdparty/slack/{AppId}/oauth2/callback
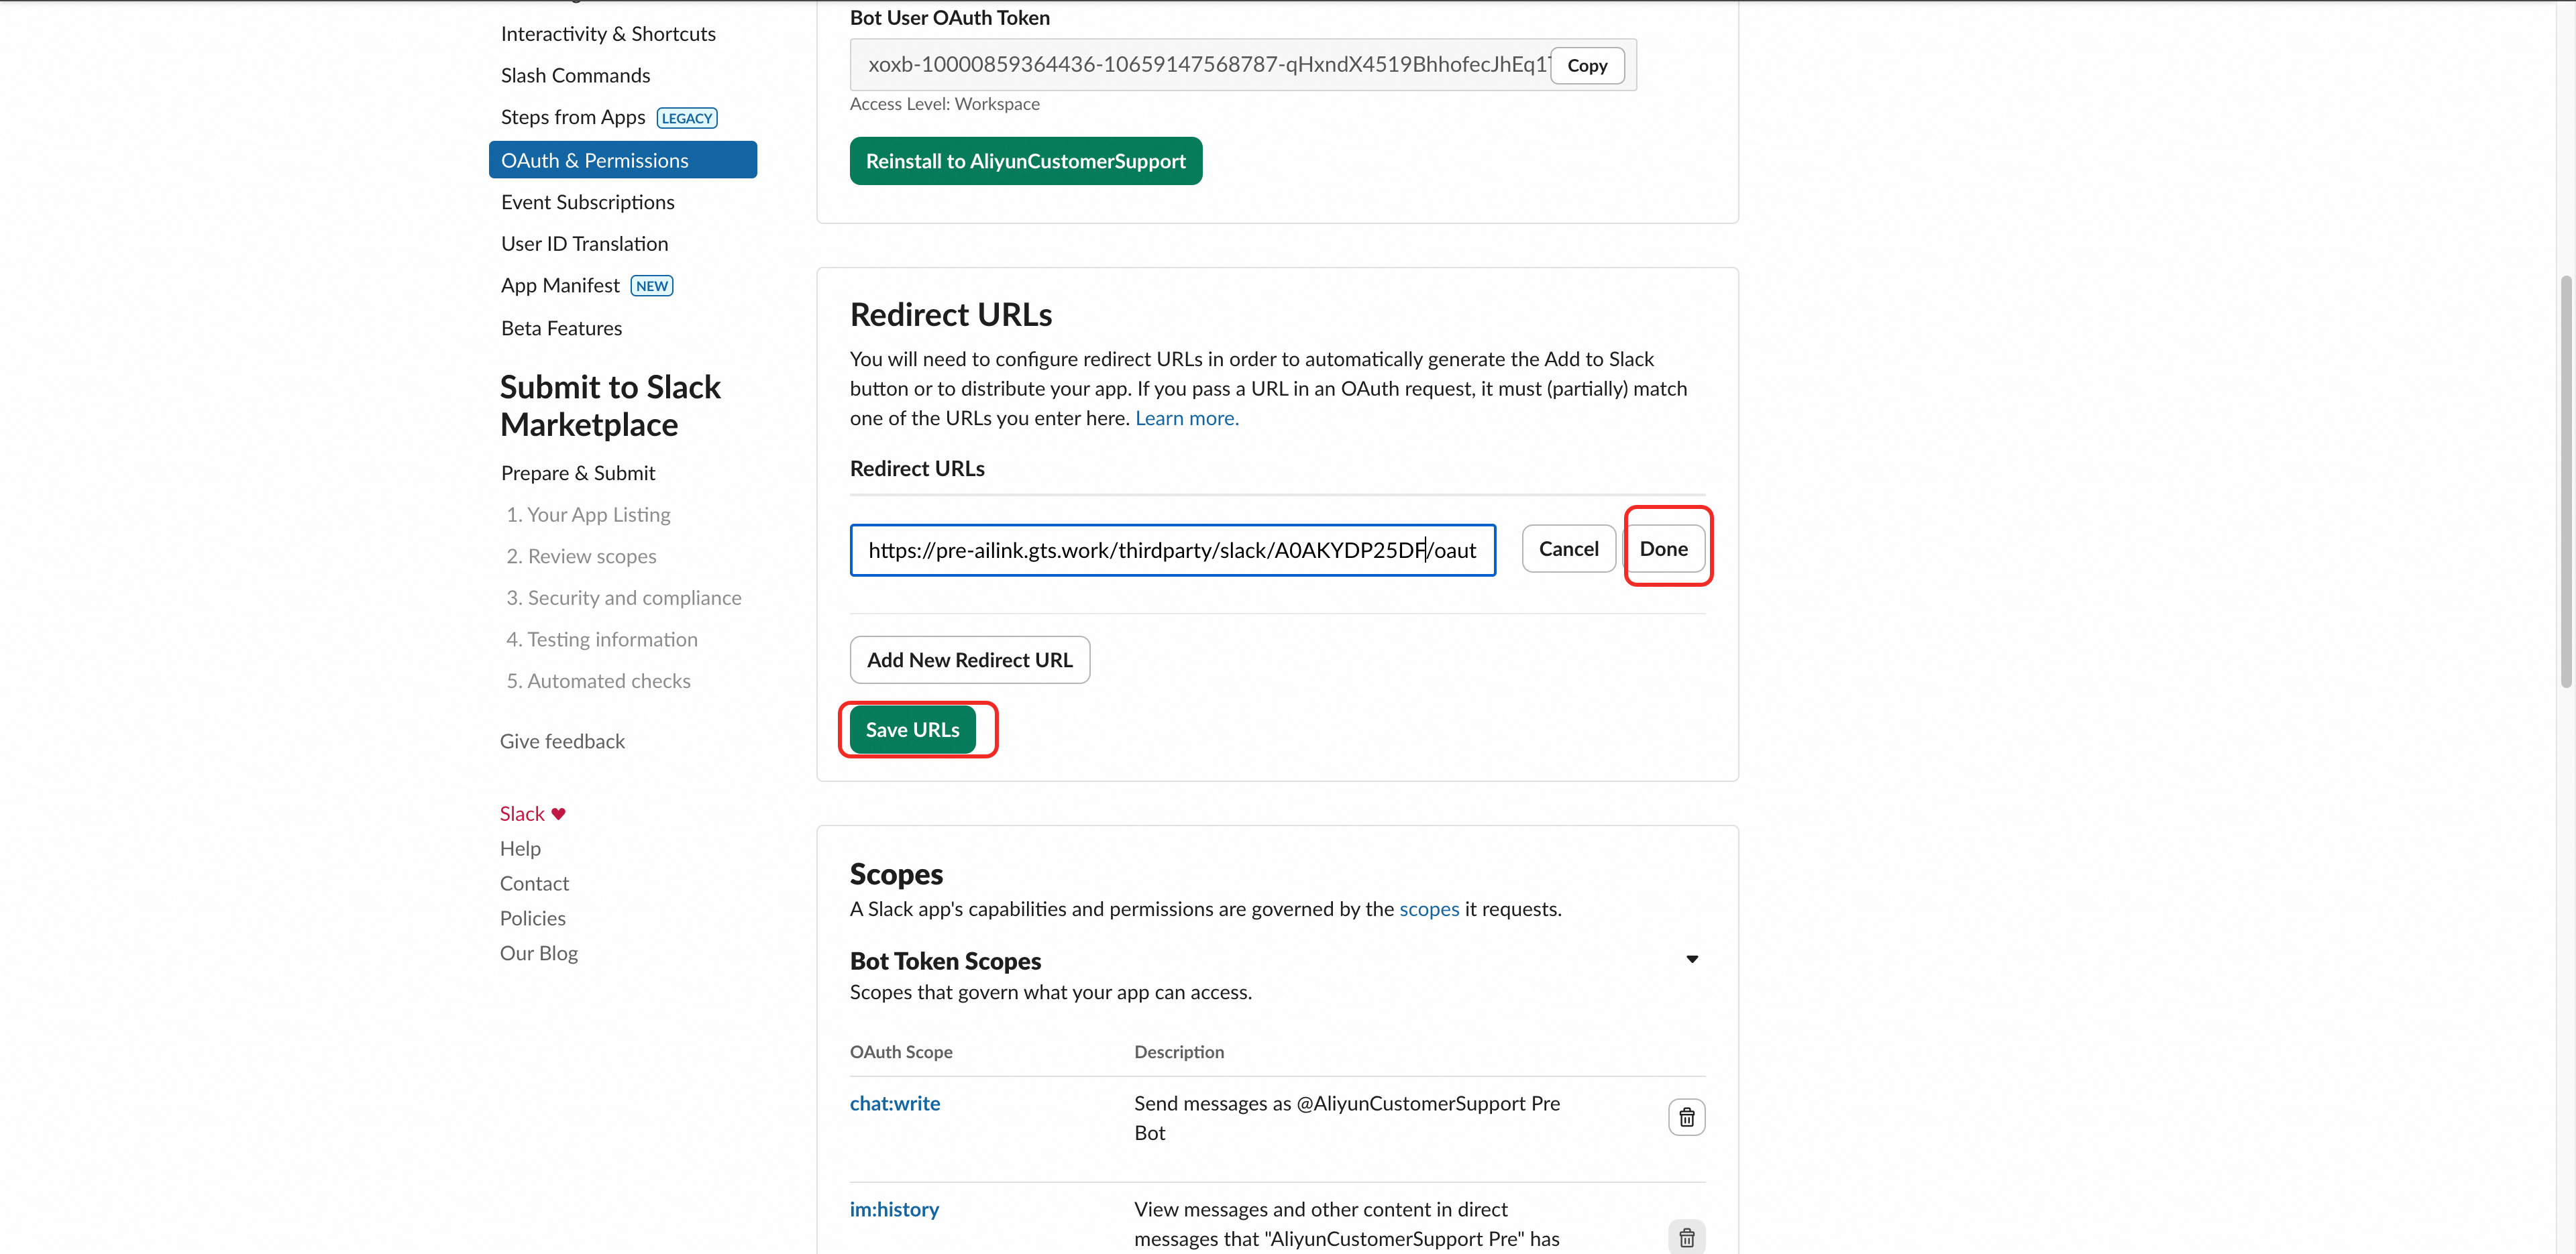
Click "Done" and "Save URLs" to save
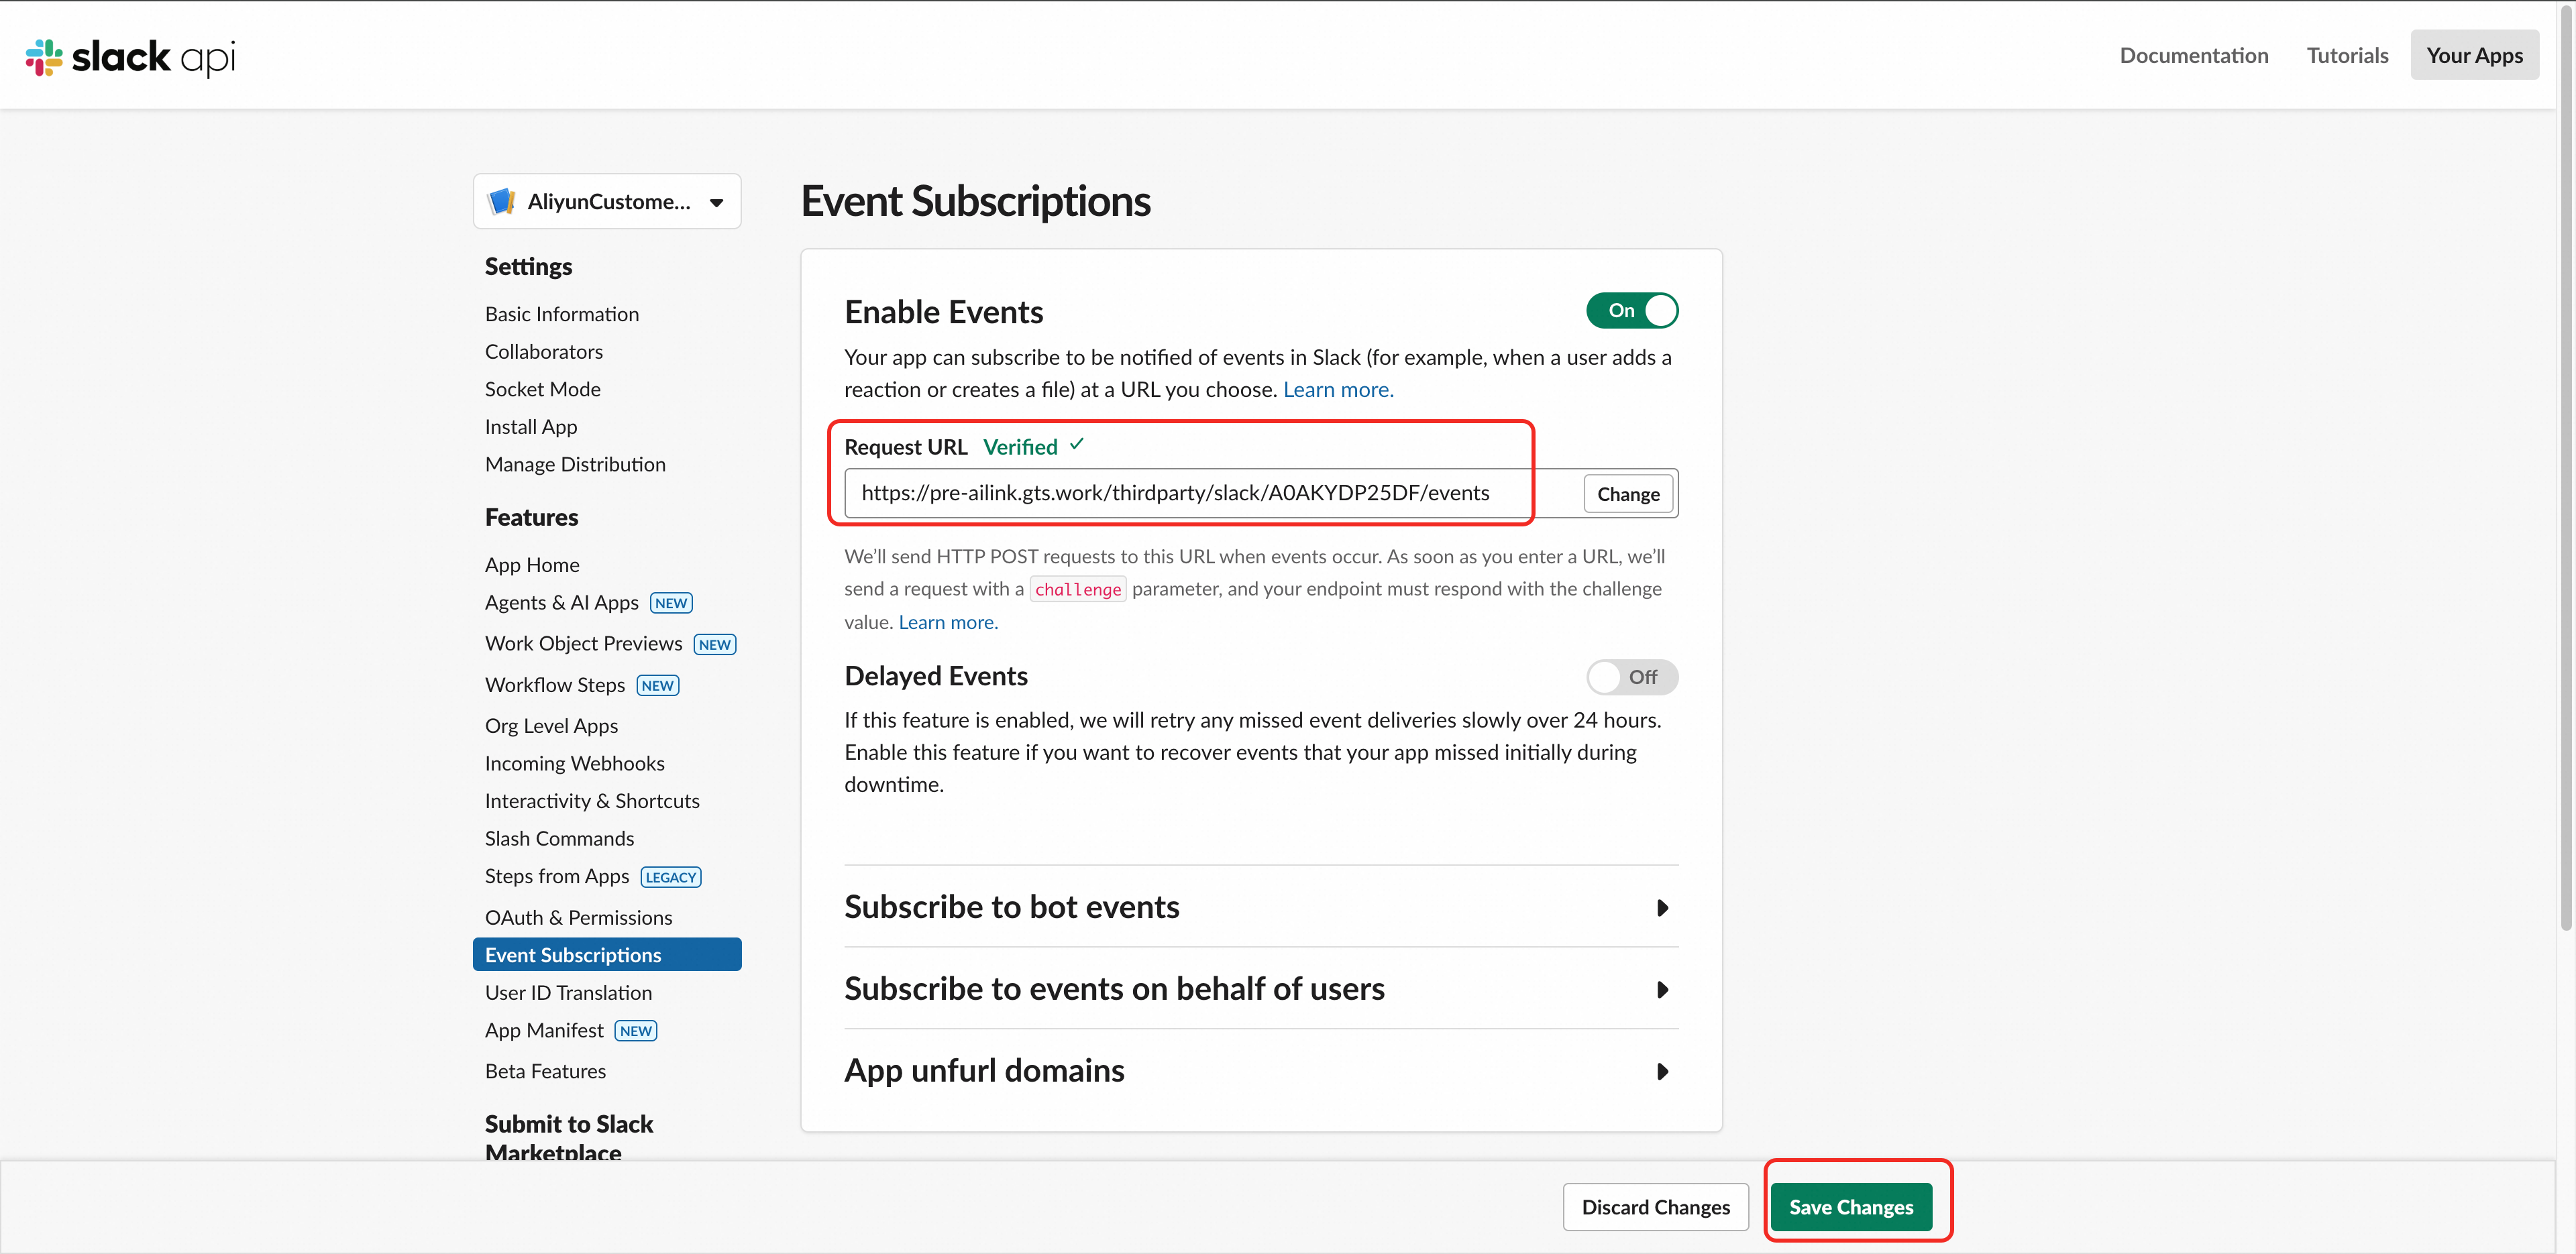
Step 7: Update Event Subscription URL
Click "Event Subscriptions" in the left menu
Find the "Request URL" input box (warning messages may appear at this time, which is normal)
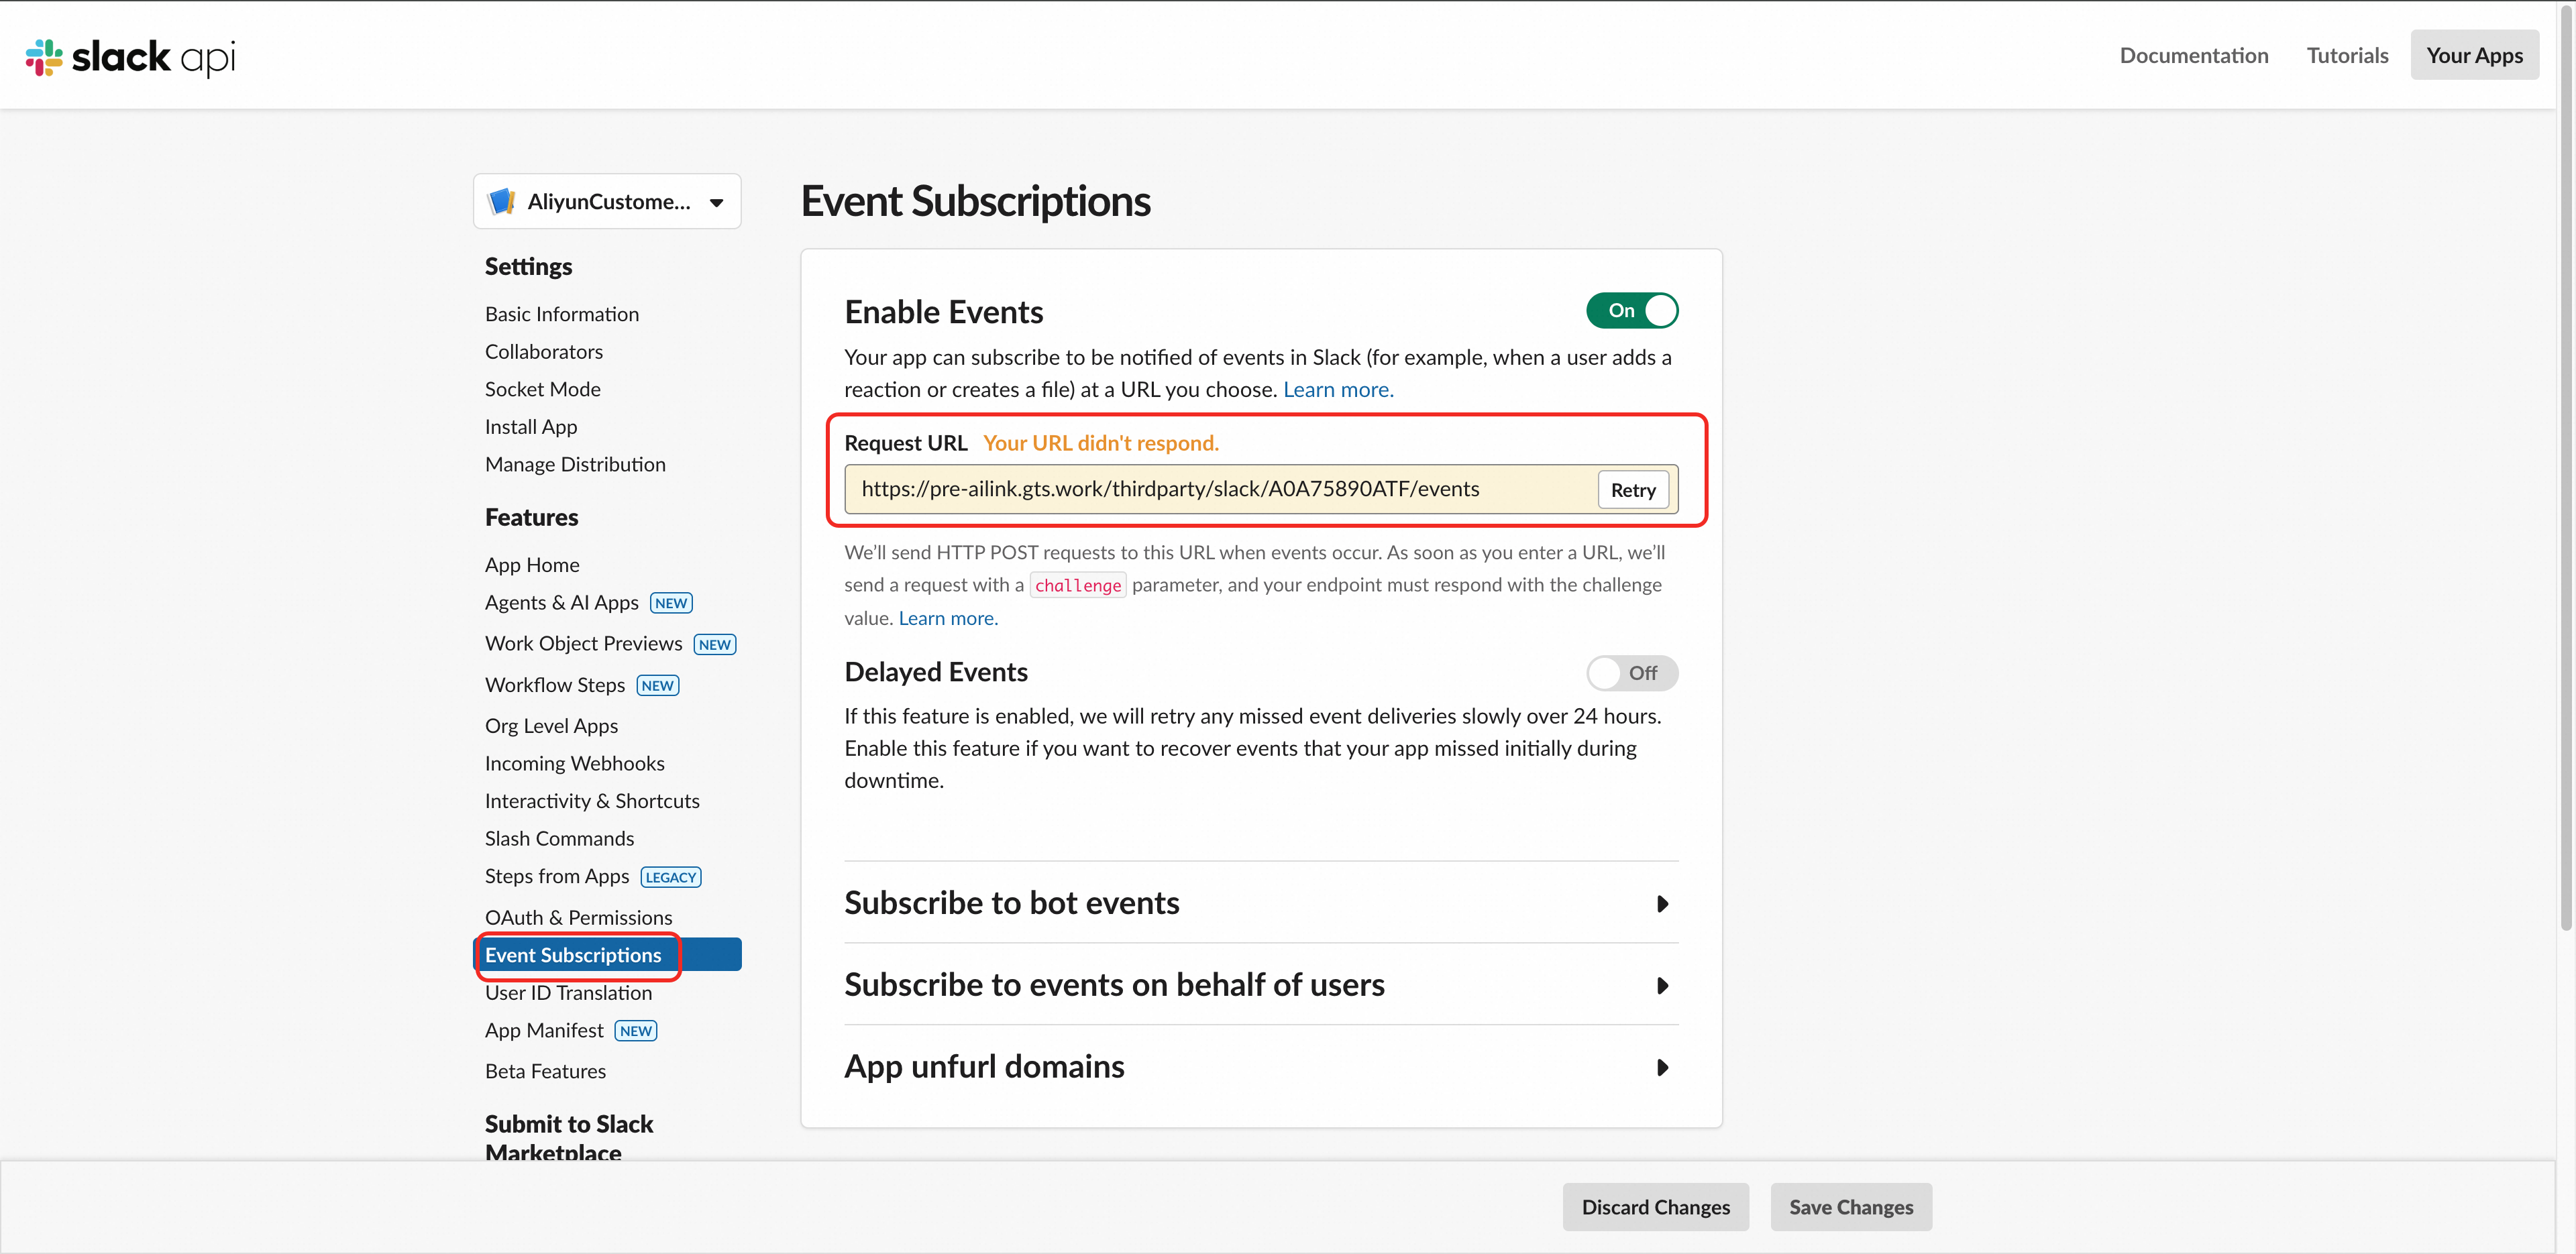
Replace the URL with (please replace {AppId} with your actual App ID):
https://ailink.gts.work/thirdparty/slack/{AppId}/events
The system will automatically verify the address. Displaying "Verified" indicates success. If this fails, check if there are issues with the credentials from Step 5
Click "Save Changes" to save
4. Verify Integration
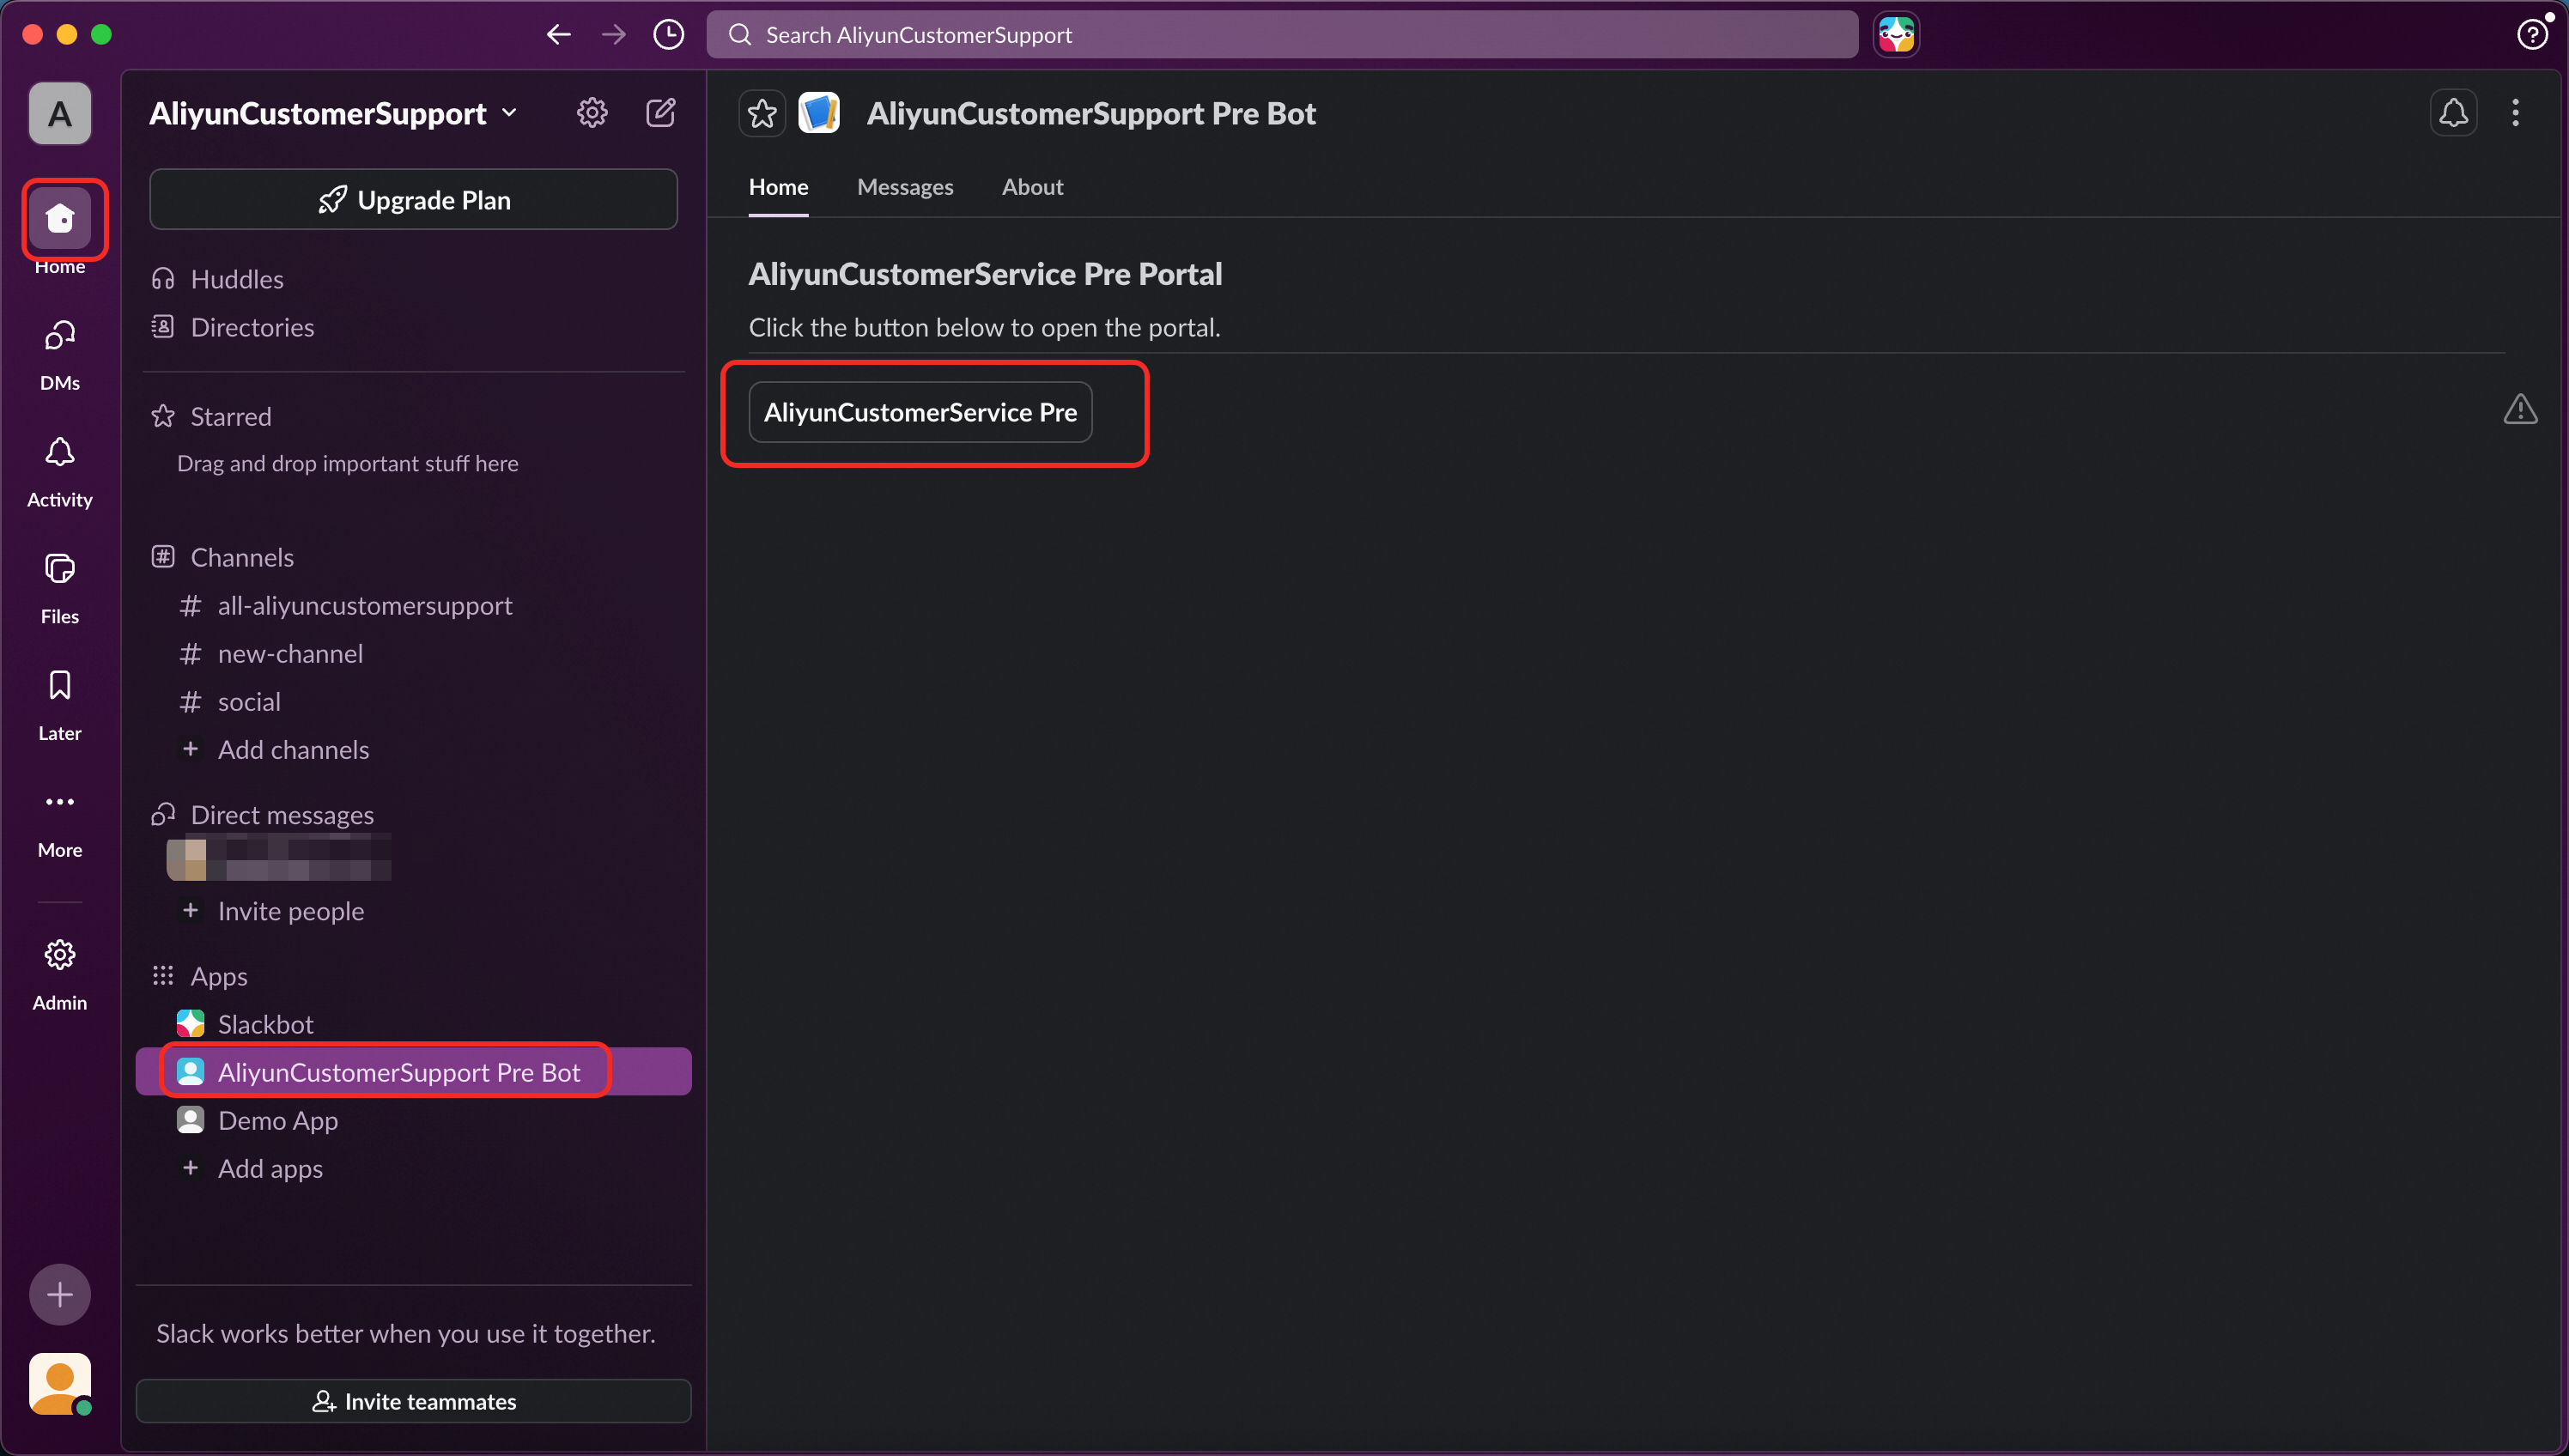
After completing all the above steps, you can use Alibaba Cloud Enterprise Service in Slack:
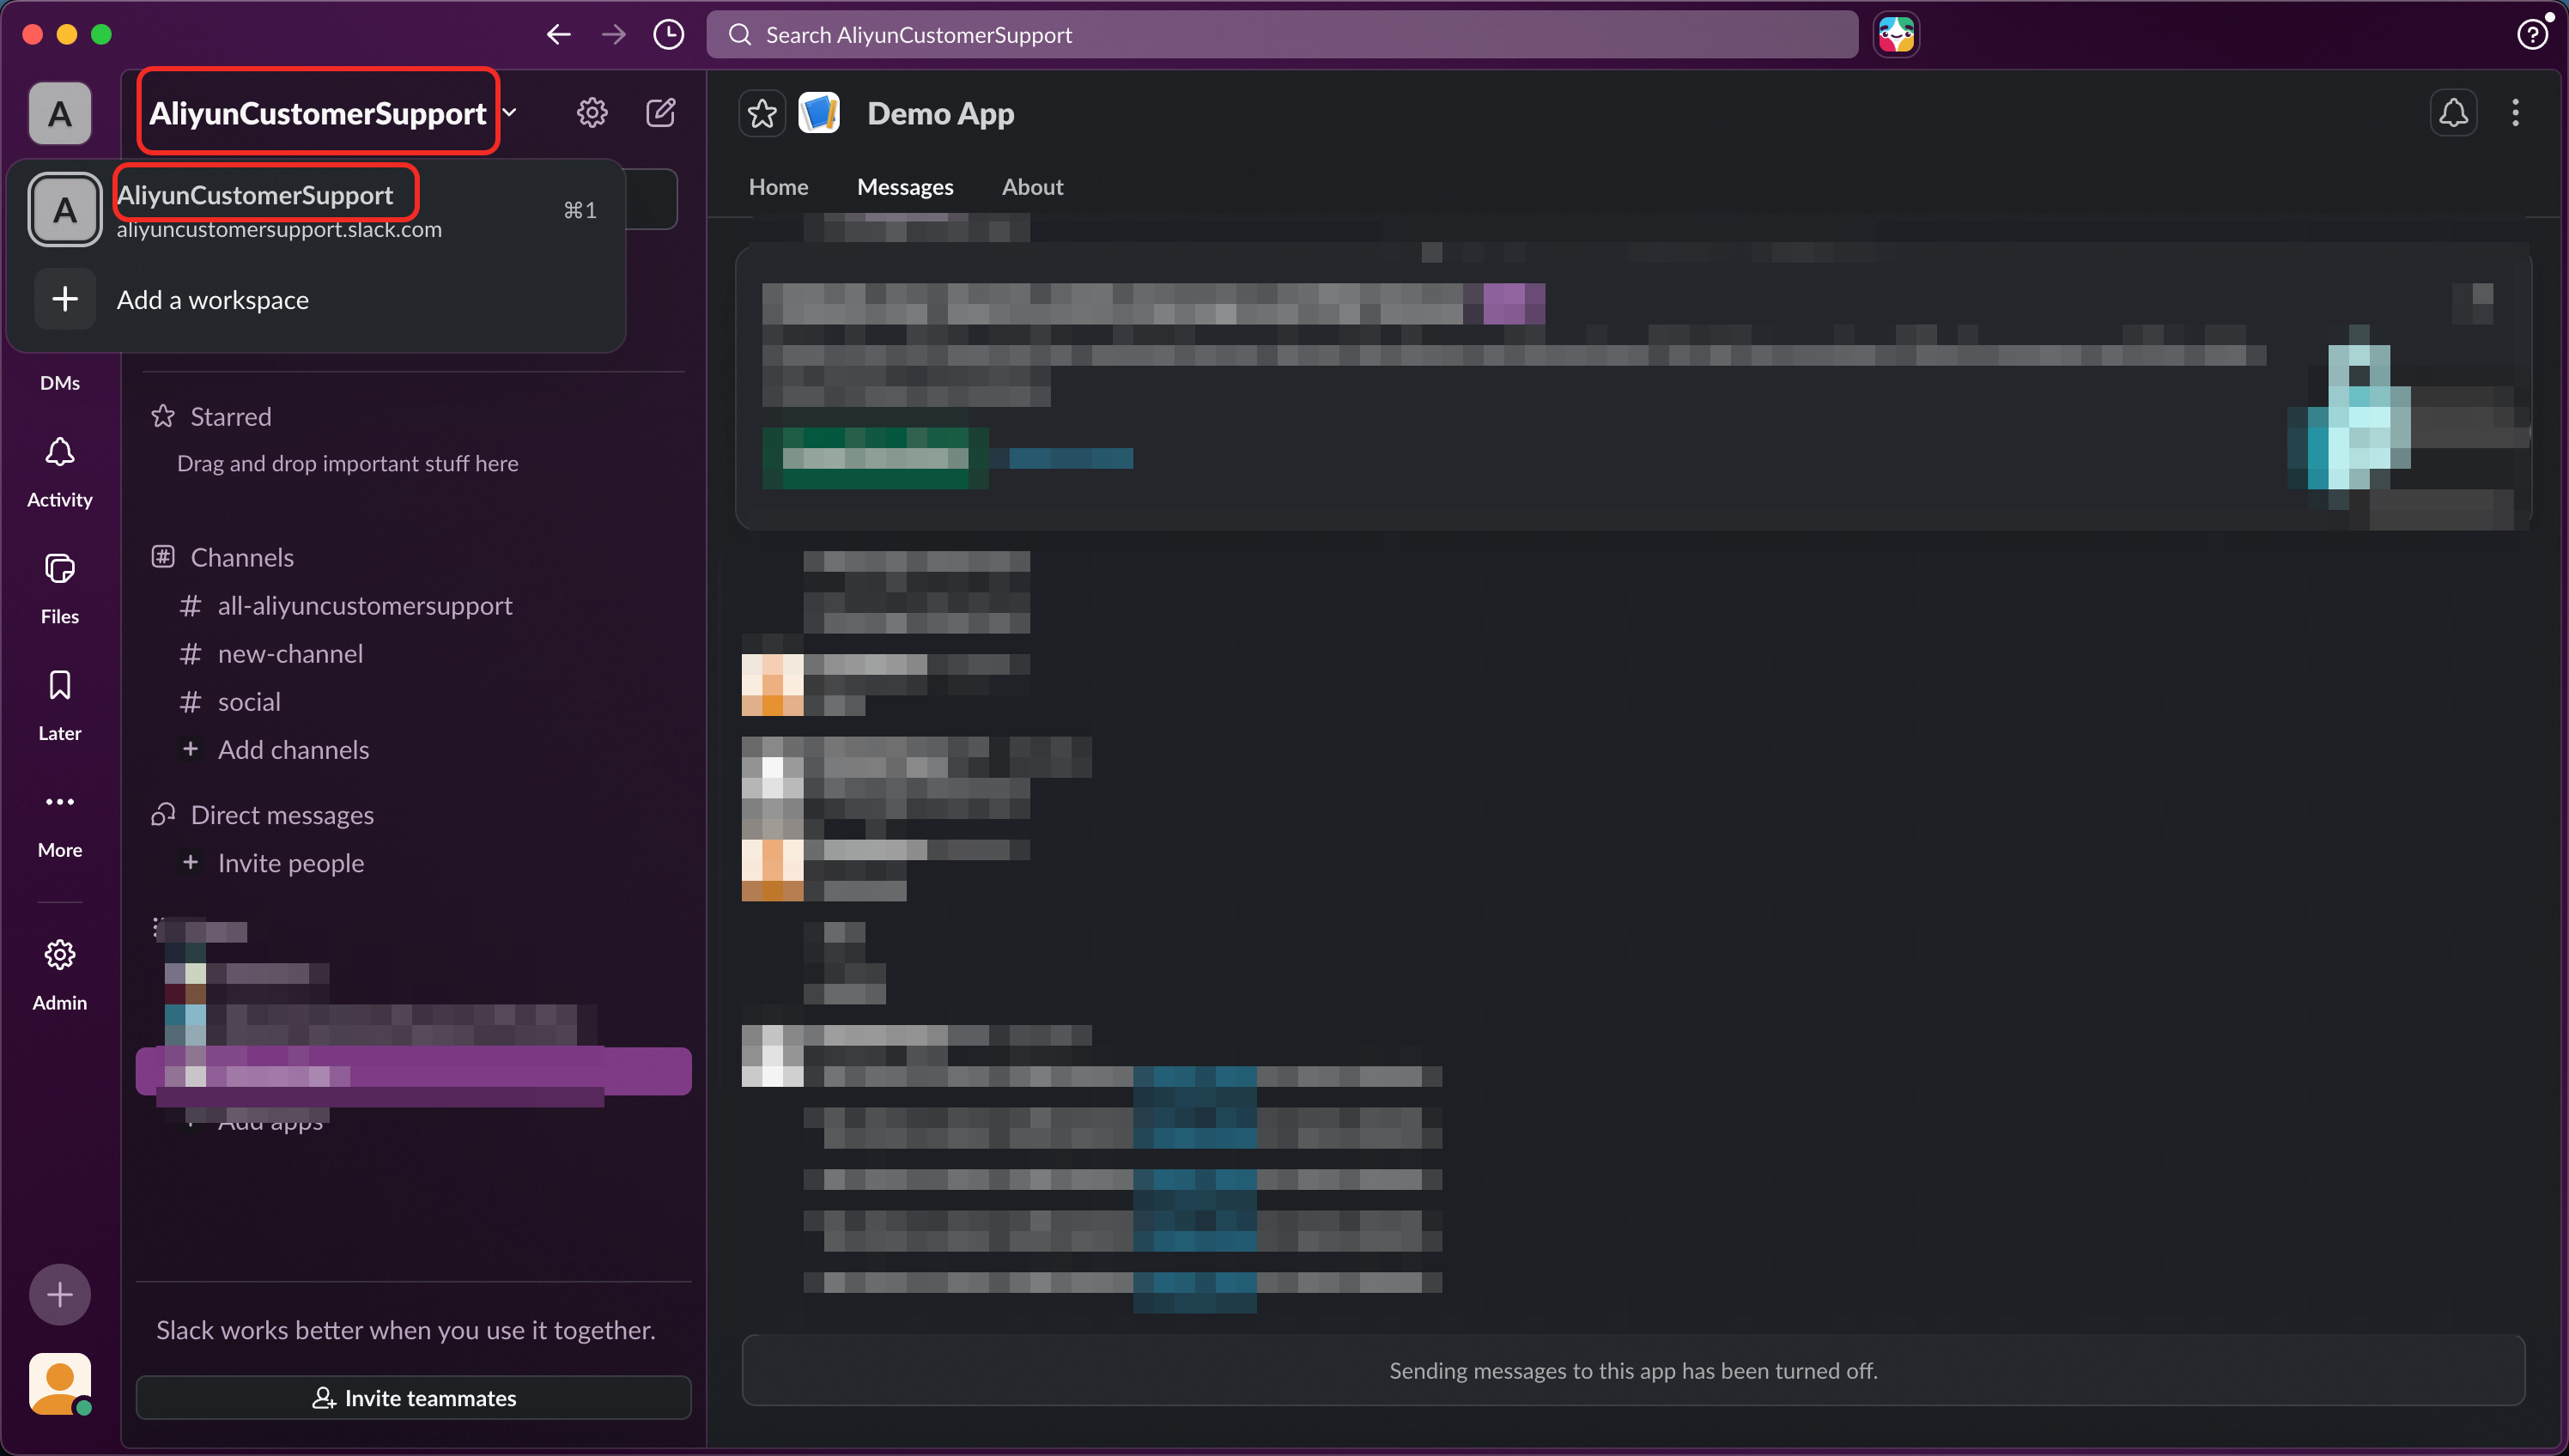
Find the AlibabaCloudEnterpriseSupport app in Slack
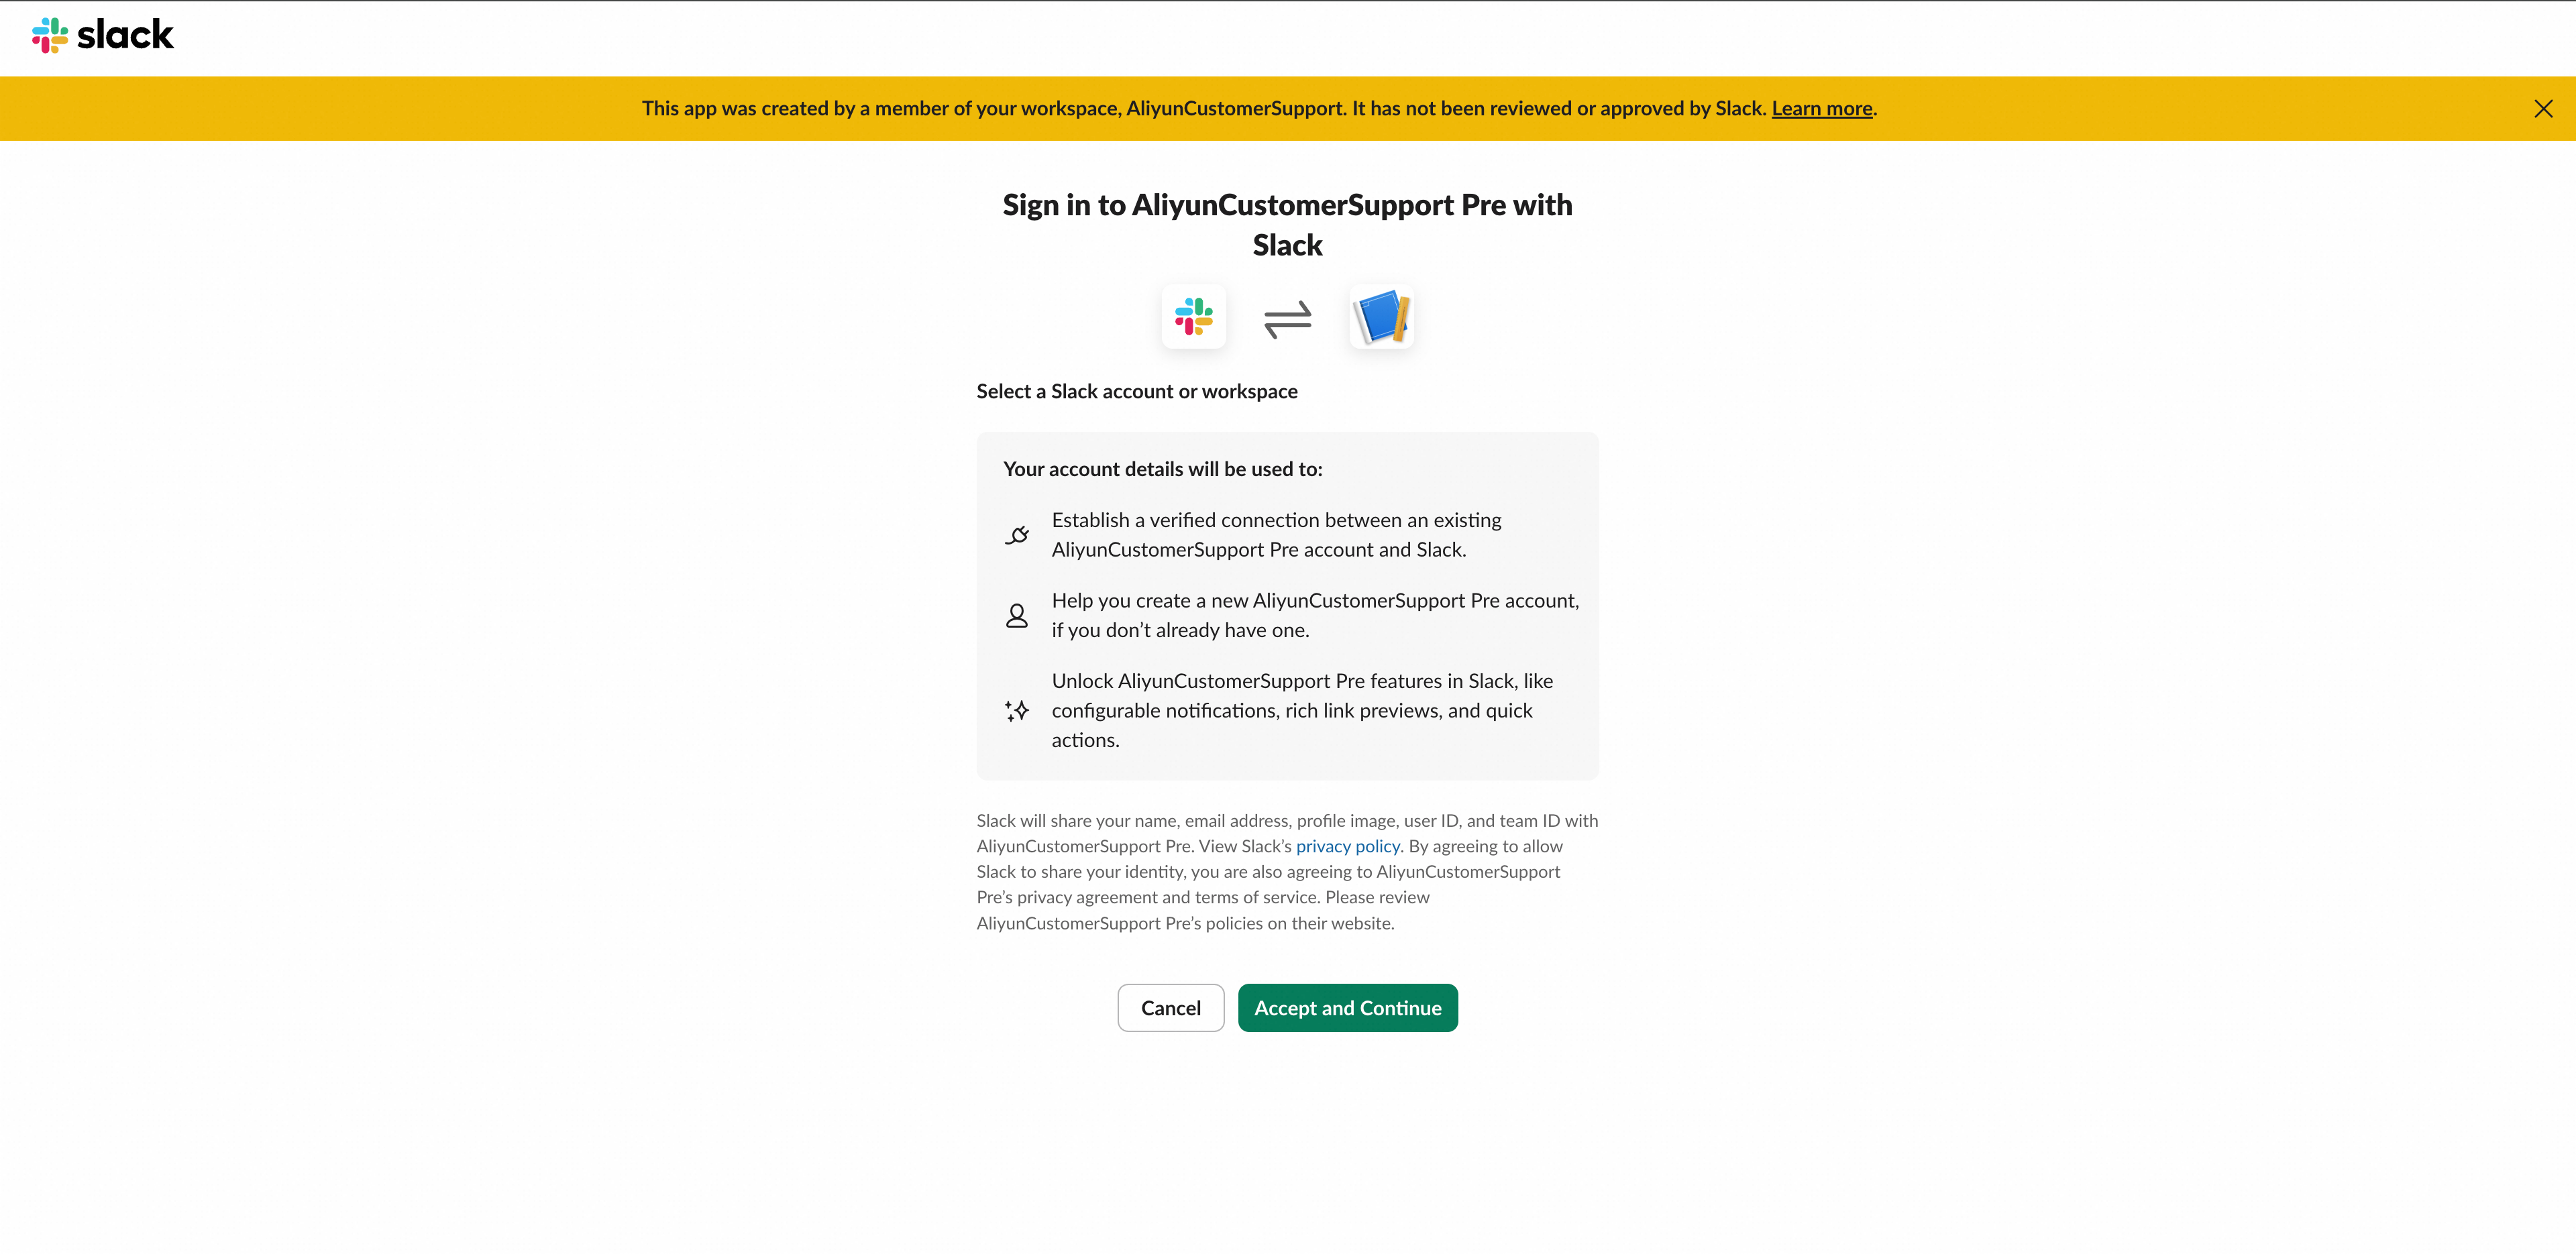
Click the homepage button to jump to the Alibaba Cloud Enterprise Service portal
Log in with your Slack account and start using