This document mainly introduces the detailed operational procedures for JSAPI management capabilities.
1. Background Introduction
To meet the diverse needs of customers at different development stages, the platform has added fine-grained management features for JSAPI (JavaScript API). These features allow customers to flexibly control which business scenarios can use specific JSAPIs and ensure that only approved JSAPIs are integrated into miniapps.
2. Operation Steps
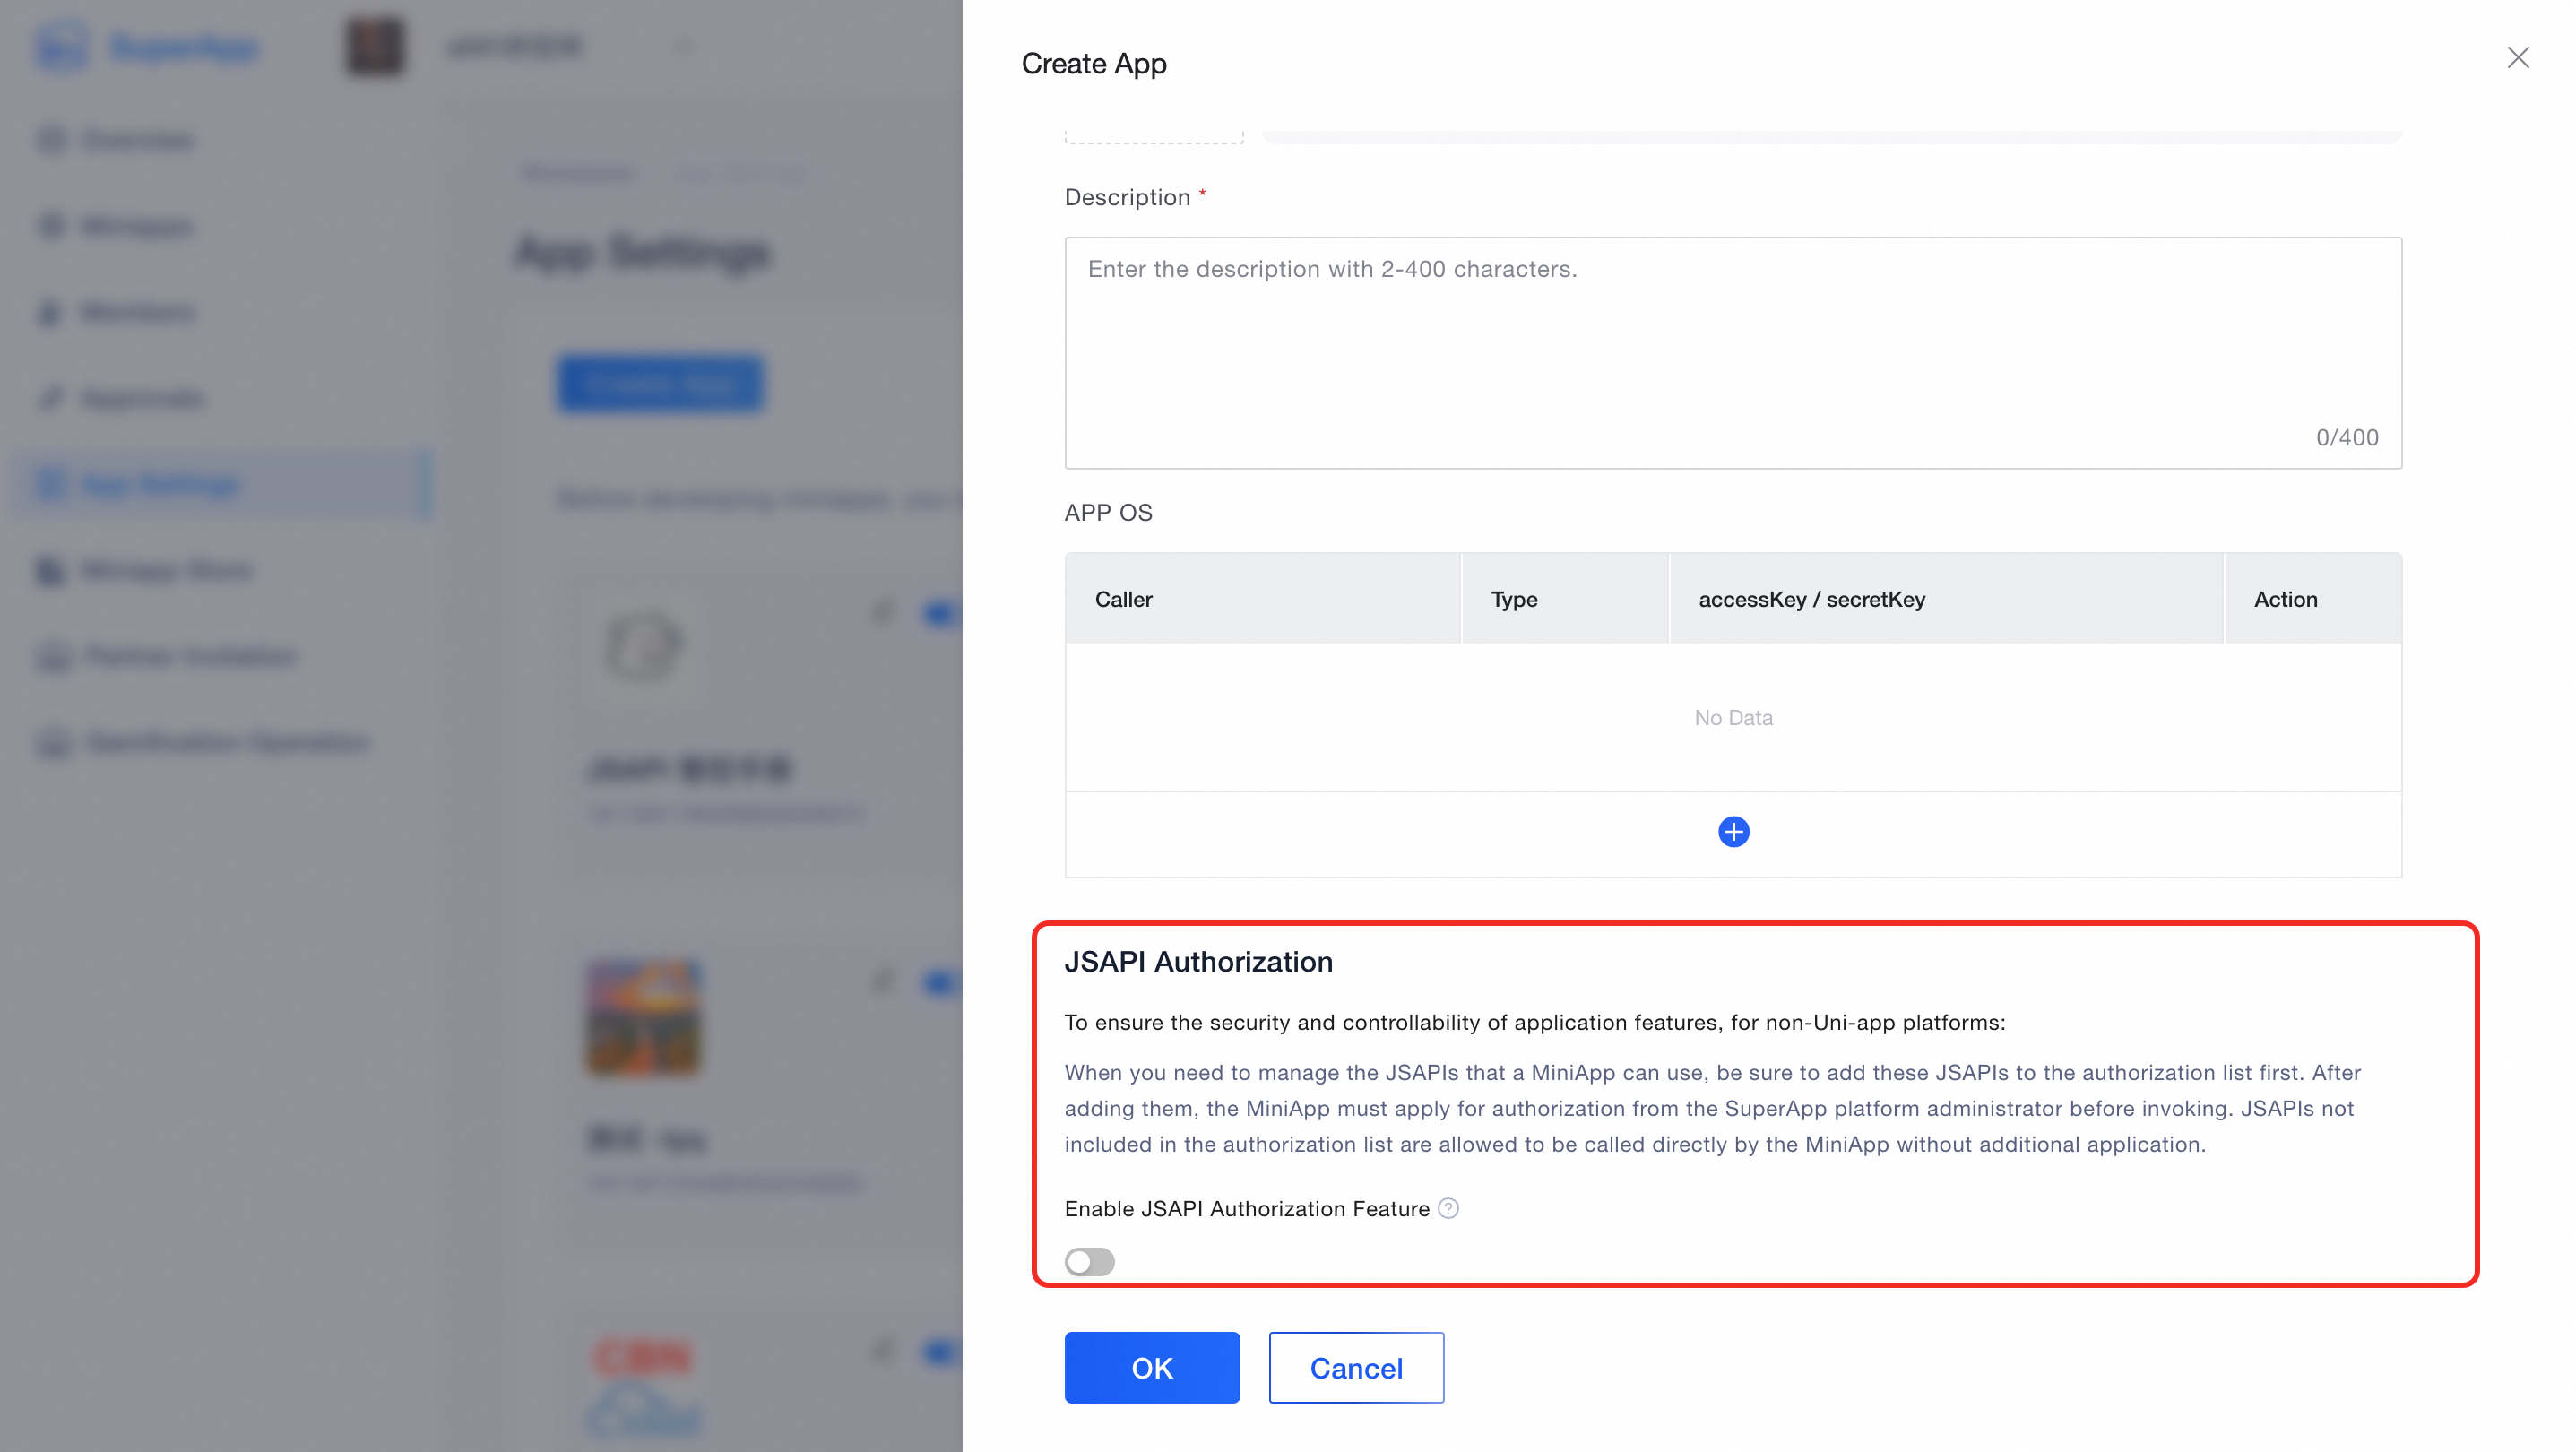
2.1. Enable JSAPI Authorization Function
Steps:
The administrator logs into the platform account.
Navigate to the "App Settings" page.
On the create or edit App page, review the relevant instructions for "JSAPI Authorization".
Based on your needs, choose whether to enable this function.
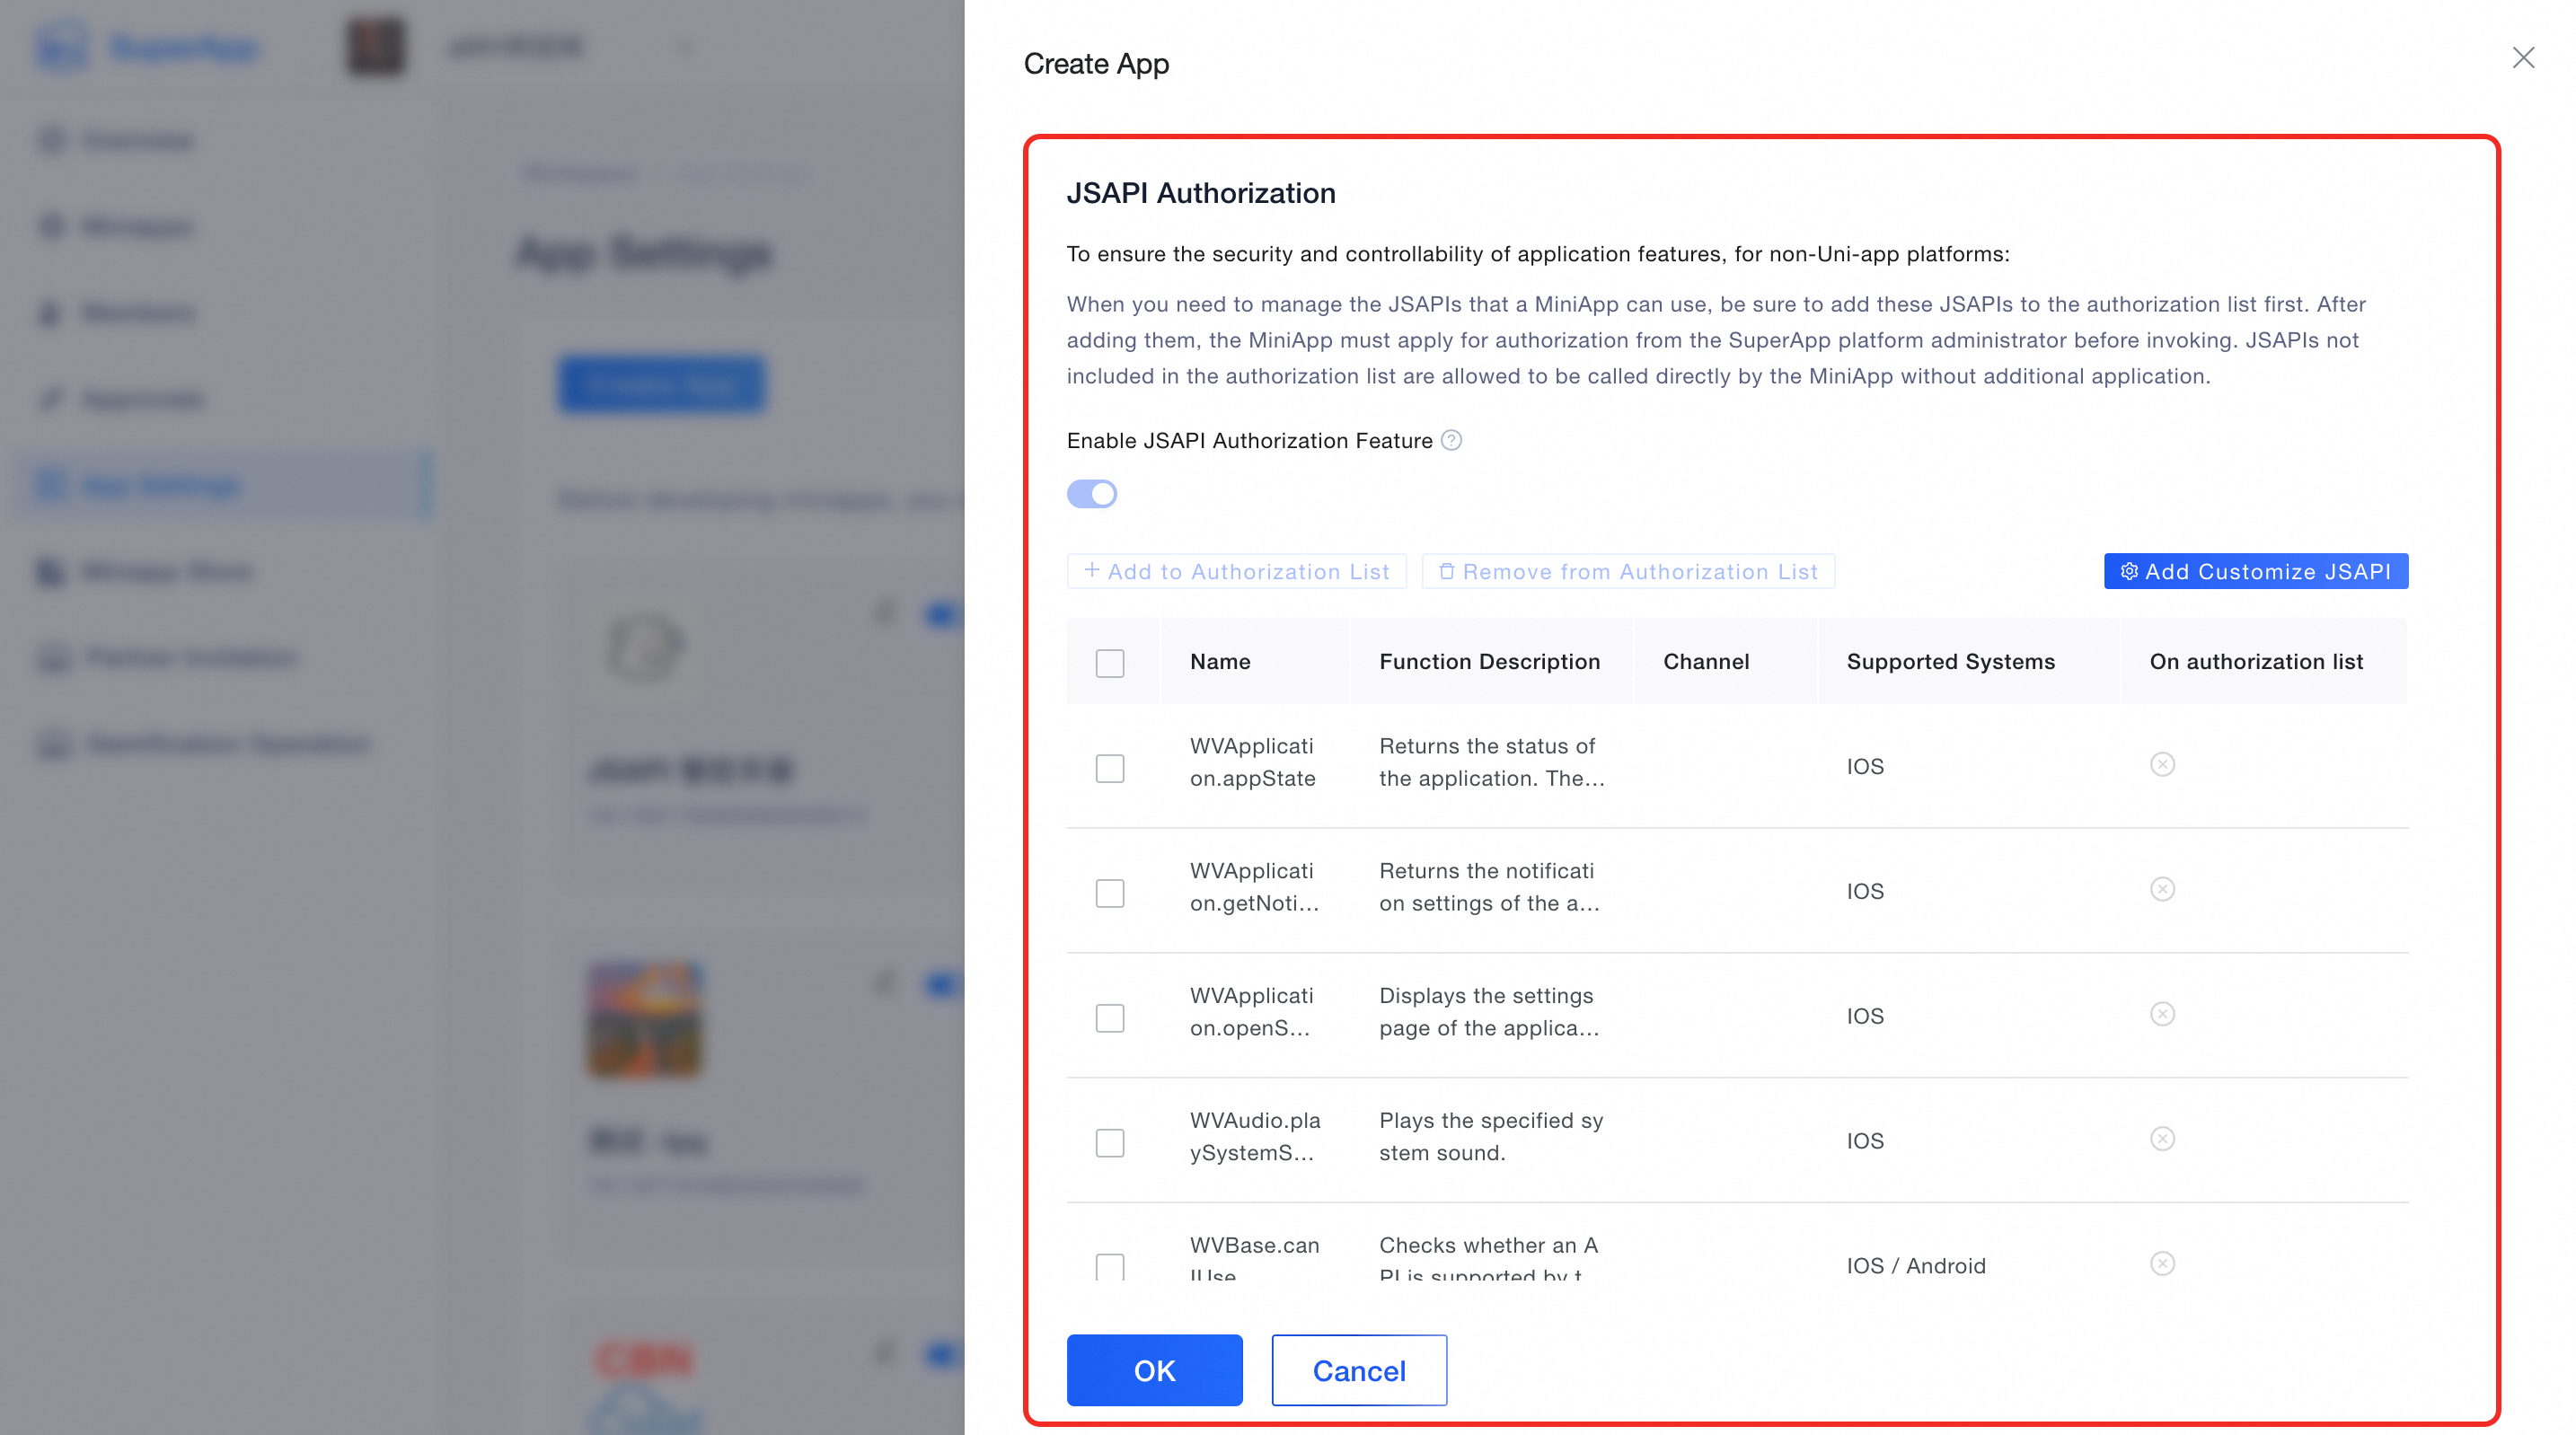
2.2. Set JSAPI Whitelist:
After enabling JSAPI authorization, the administrator role can view the JSAPI list information and select corresponding JSAPIs for management. They can also enter specific JSAPIs for management.
Button Descriptions:
Add to Authorization List:
After selecting the JSAPIs that need to be reviewed, click the "Add to Authorization List" button. This means that the usage scope of these JSAPIs must be applied for in the "Miniapps" page and can only be invoked after approval.
Remove from Authorization List:
After selecting the JSAPIs to be removed, click the "Remove from Authorization List" button. This means that these JSAPIs will be removed from the JSAPI feature application list in the "Miniapps".
Add Customize JSAPI:
Supports add customize of JSAPIs, which will be displayed in the JSAPI list and can be chosen for management.
Entry includes: name, description, and supported systems.
After completing the information, click the "OK" button to complete the entry.

2.3. JSAPI Application
If the administrator has enabled JSAPI authorization and set up a list requiring authorization applications, you will need to apply for JSAPI when using managed JSAPIs. Of course, if you forget to apply, there will be a prompt before publishing the miniapp, allowing you to go and apply for authorization.
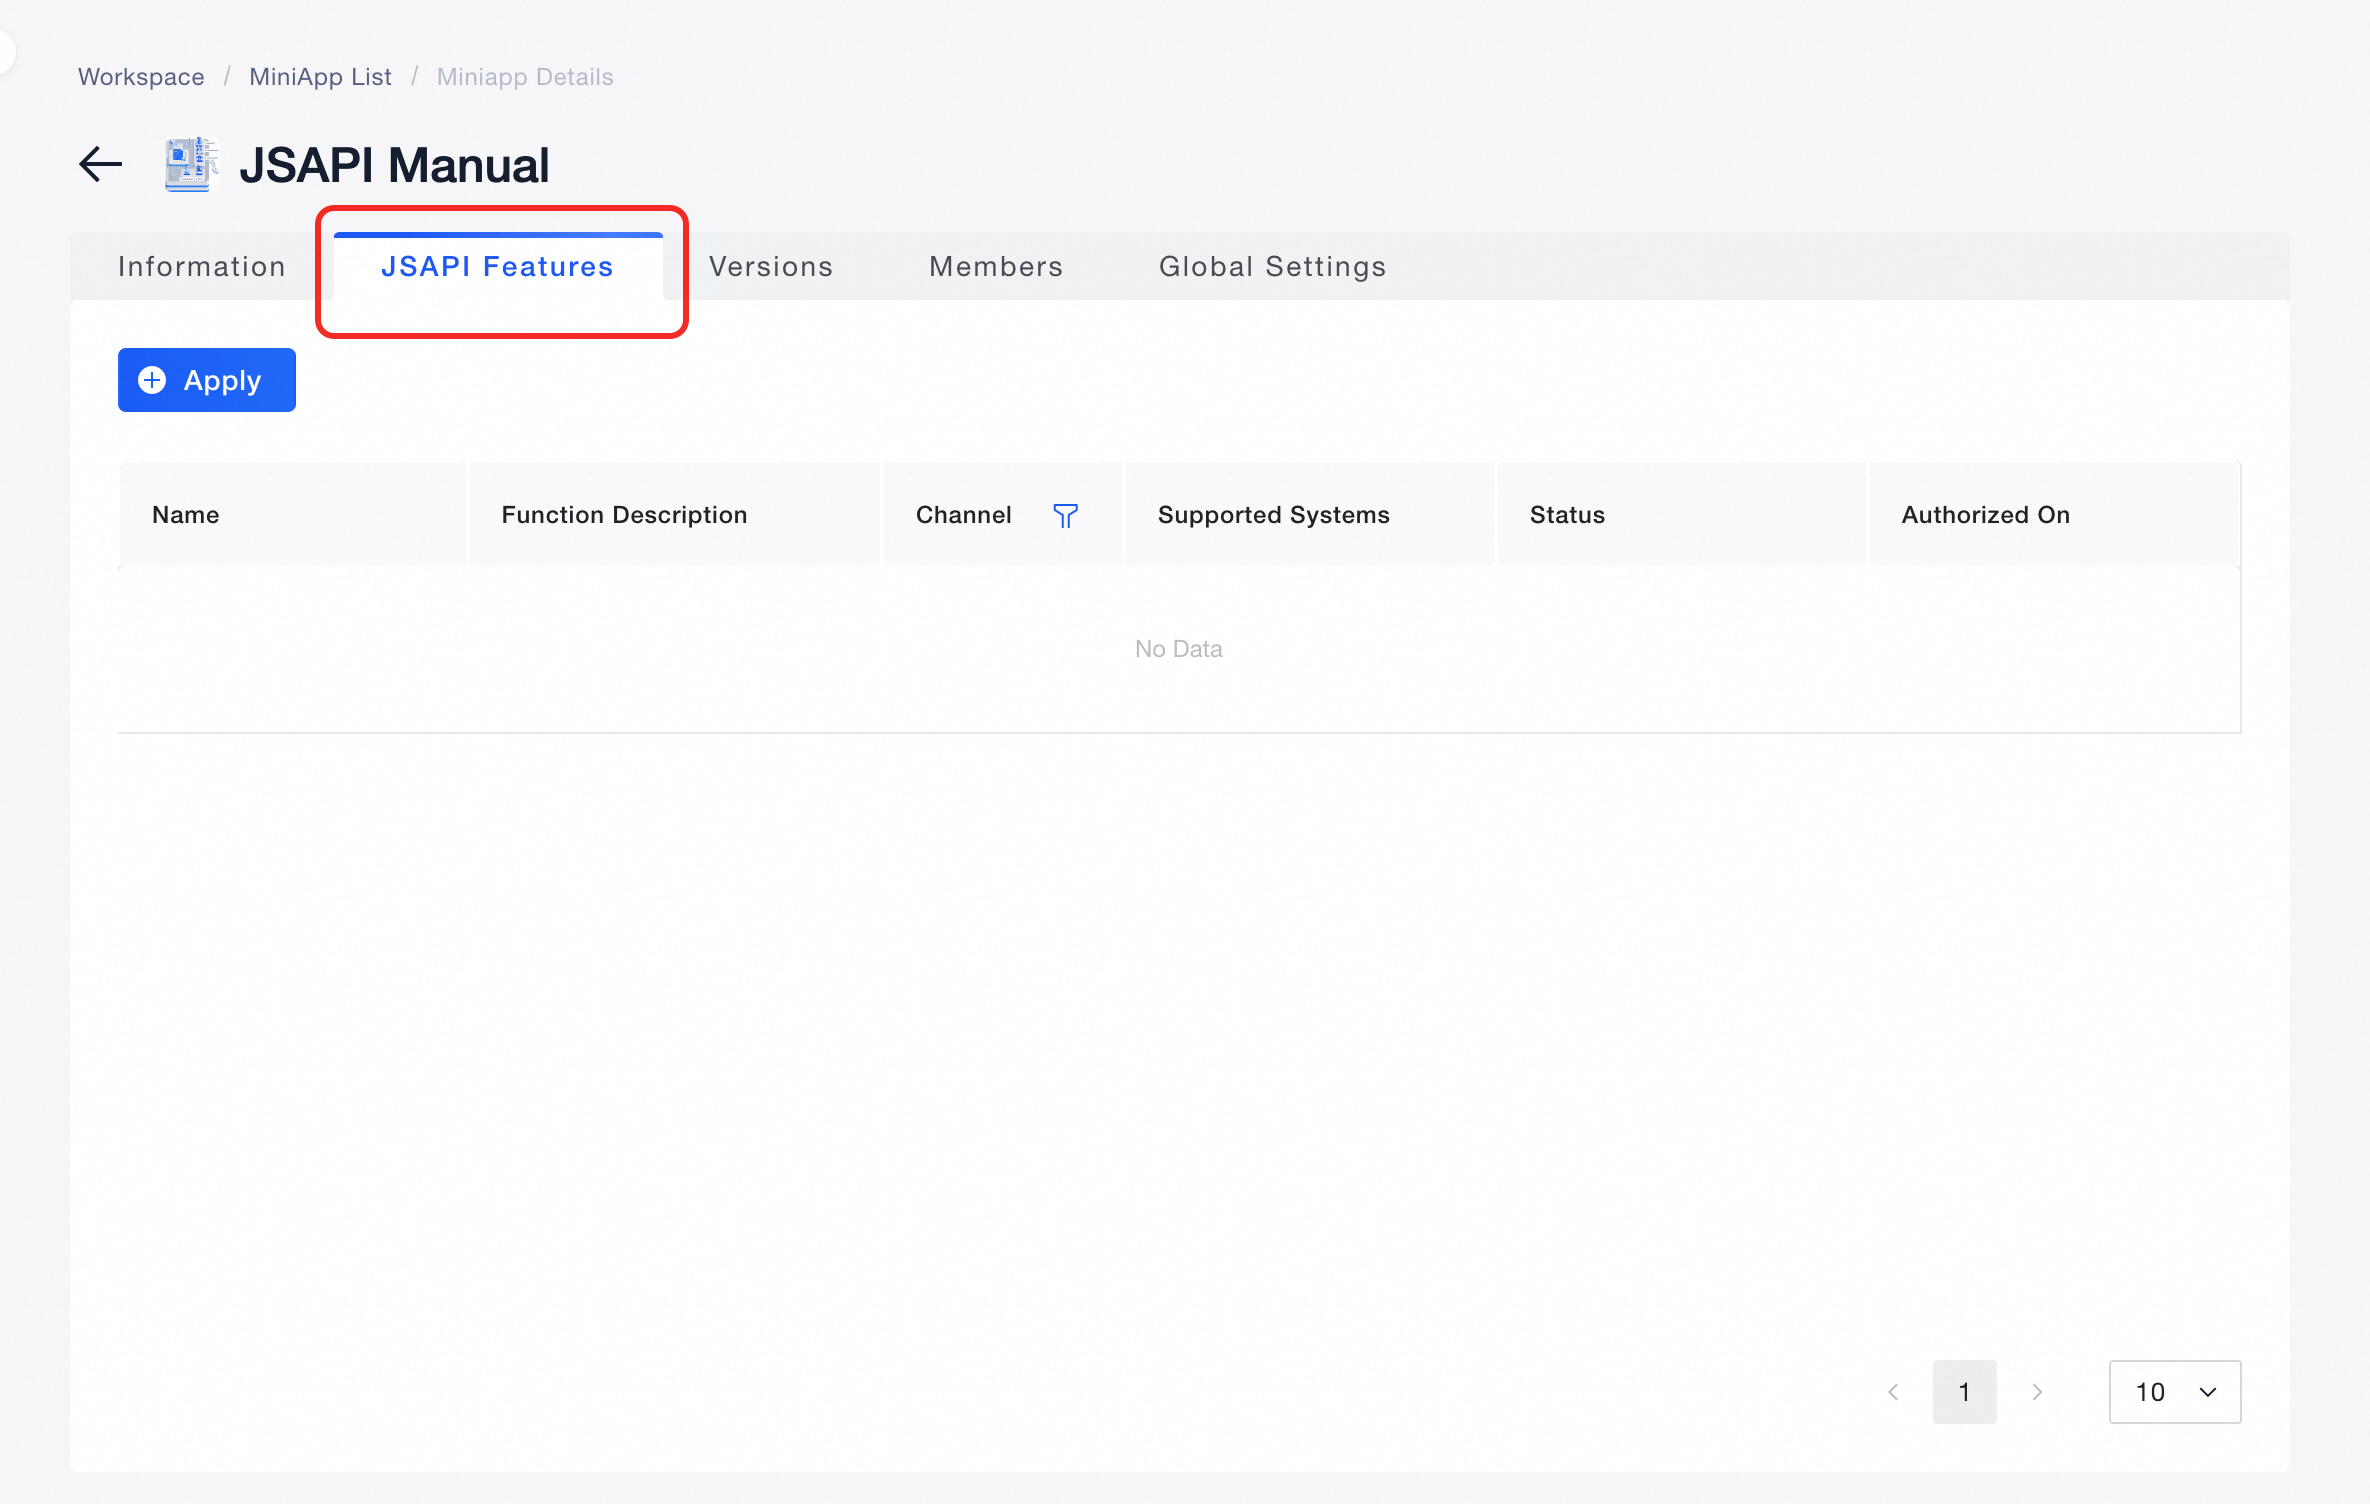
Access JSAPI Feature Module:
In the miniapp details page, find and click the "JSAPI Features" tab. If you have not yet enabled JSAPI authorization, this tab will not be displayed.
View Available JSAPI List:
In the "JSAPI Features" page, click the "Apply" button to display all available JSAPI functions for application.
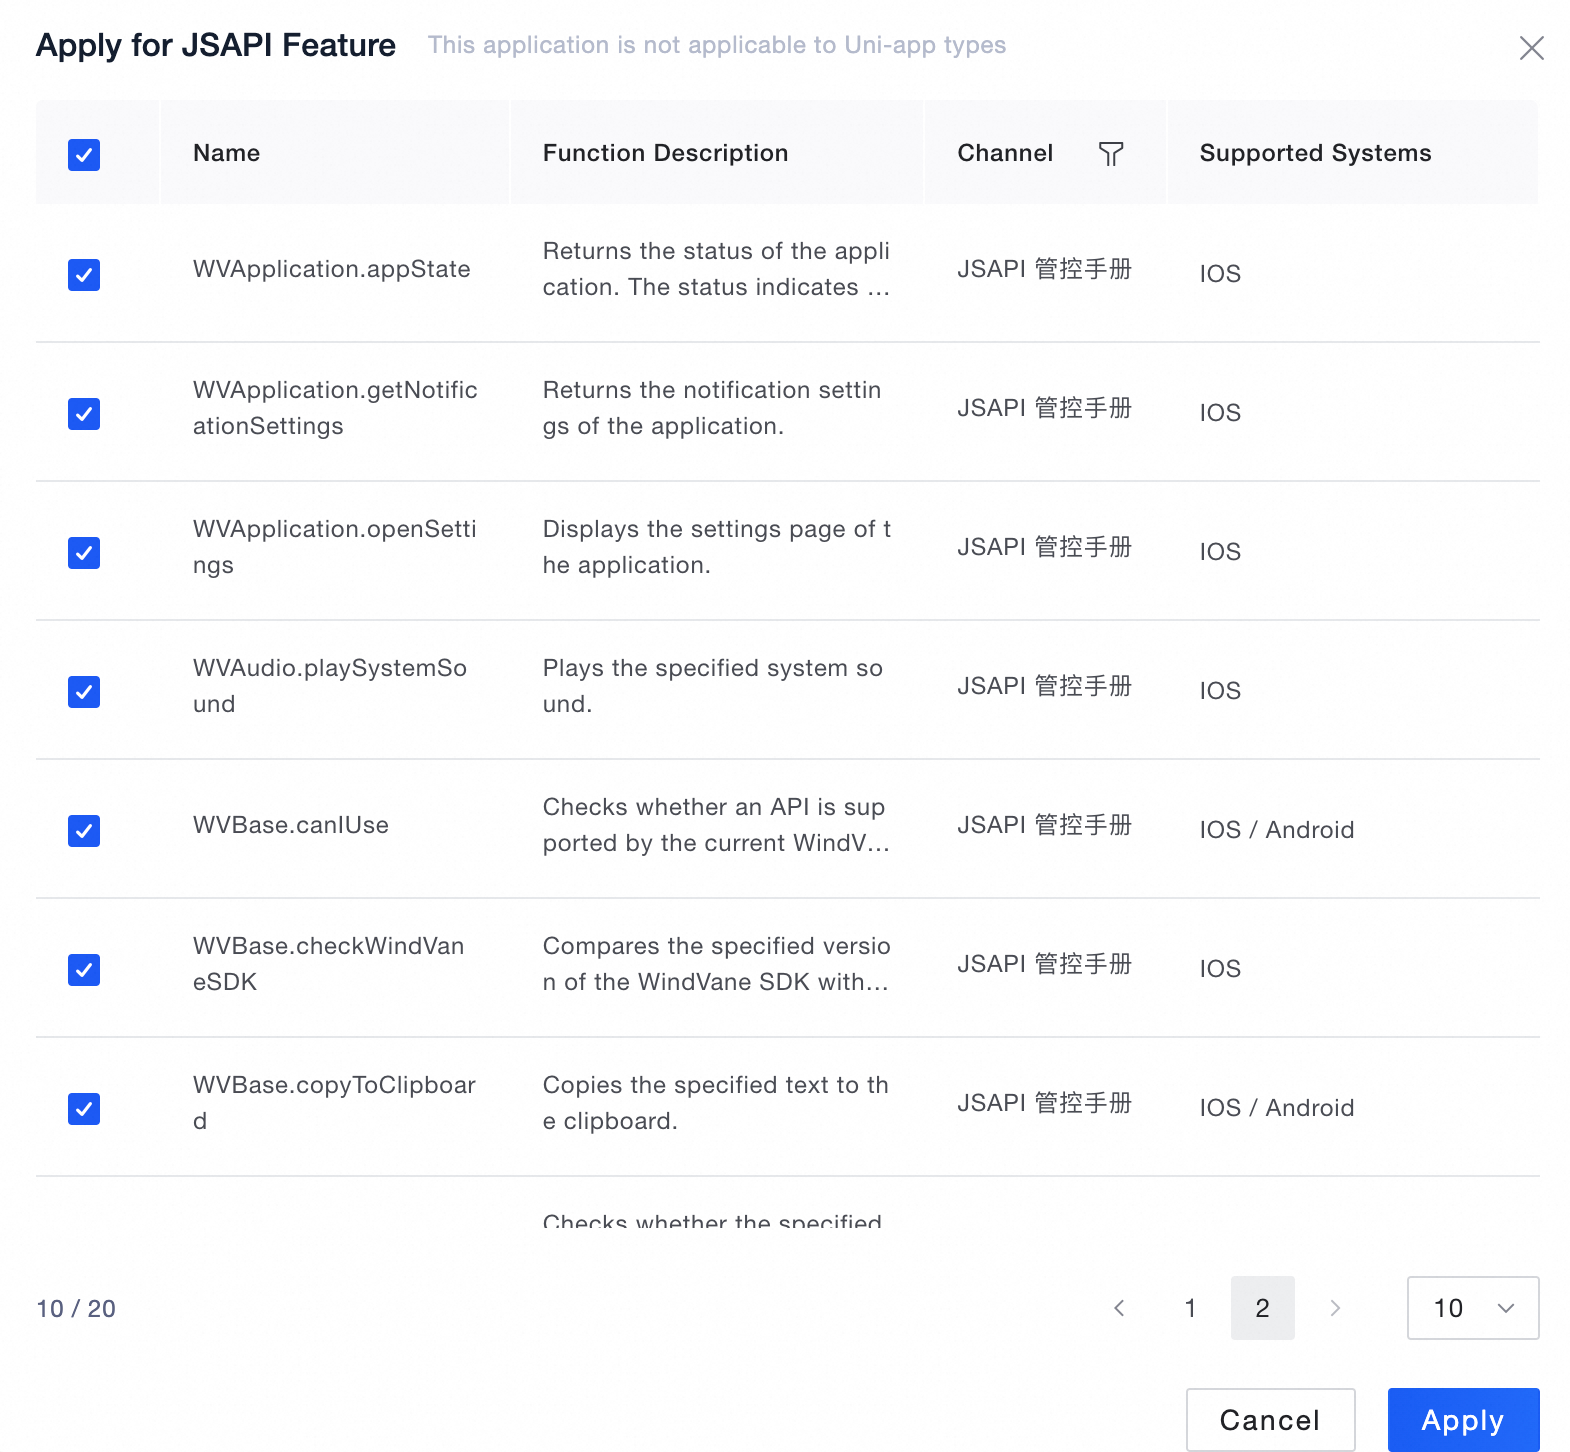
Select JSAPIs to Apply For:
Browse the available JSAPI list and select the JSAPIs you need based on your requirements.
After checking the required JSAPIs, click the "Apply" button to complete the application process.
View Application Status:
After submitting the application, you can see the current application status under the "JSAPI Features" tab.
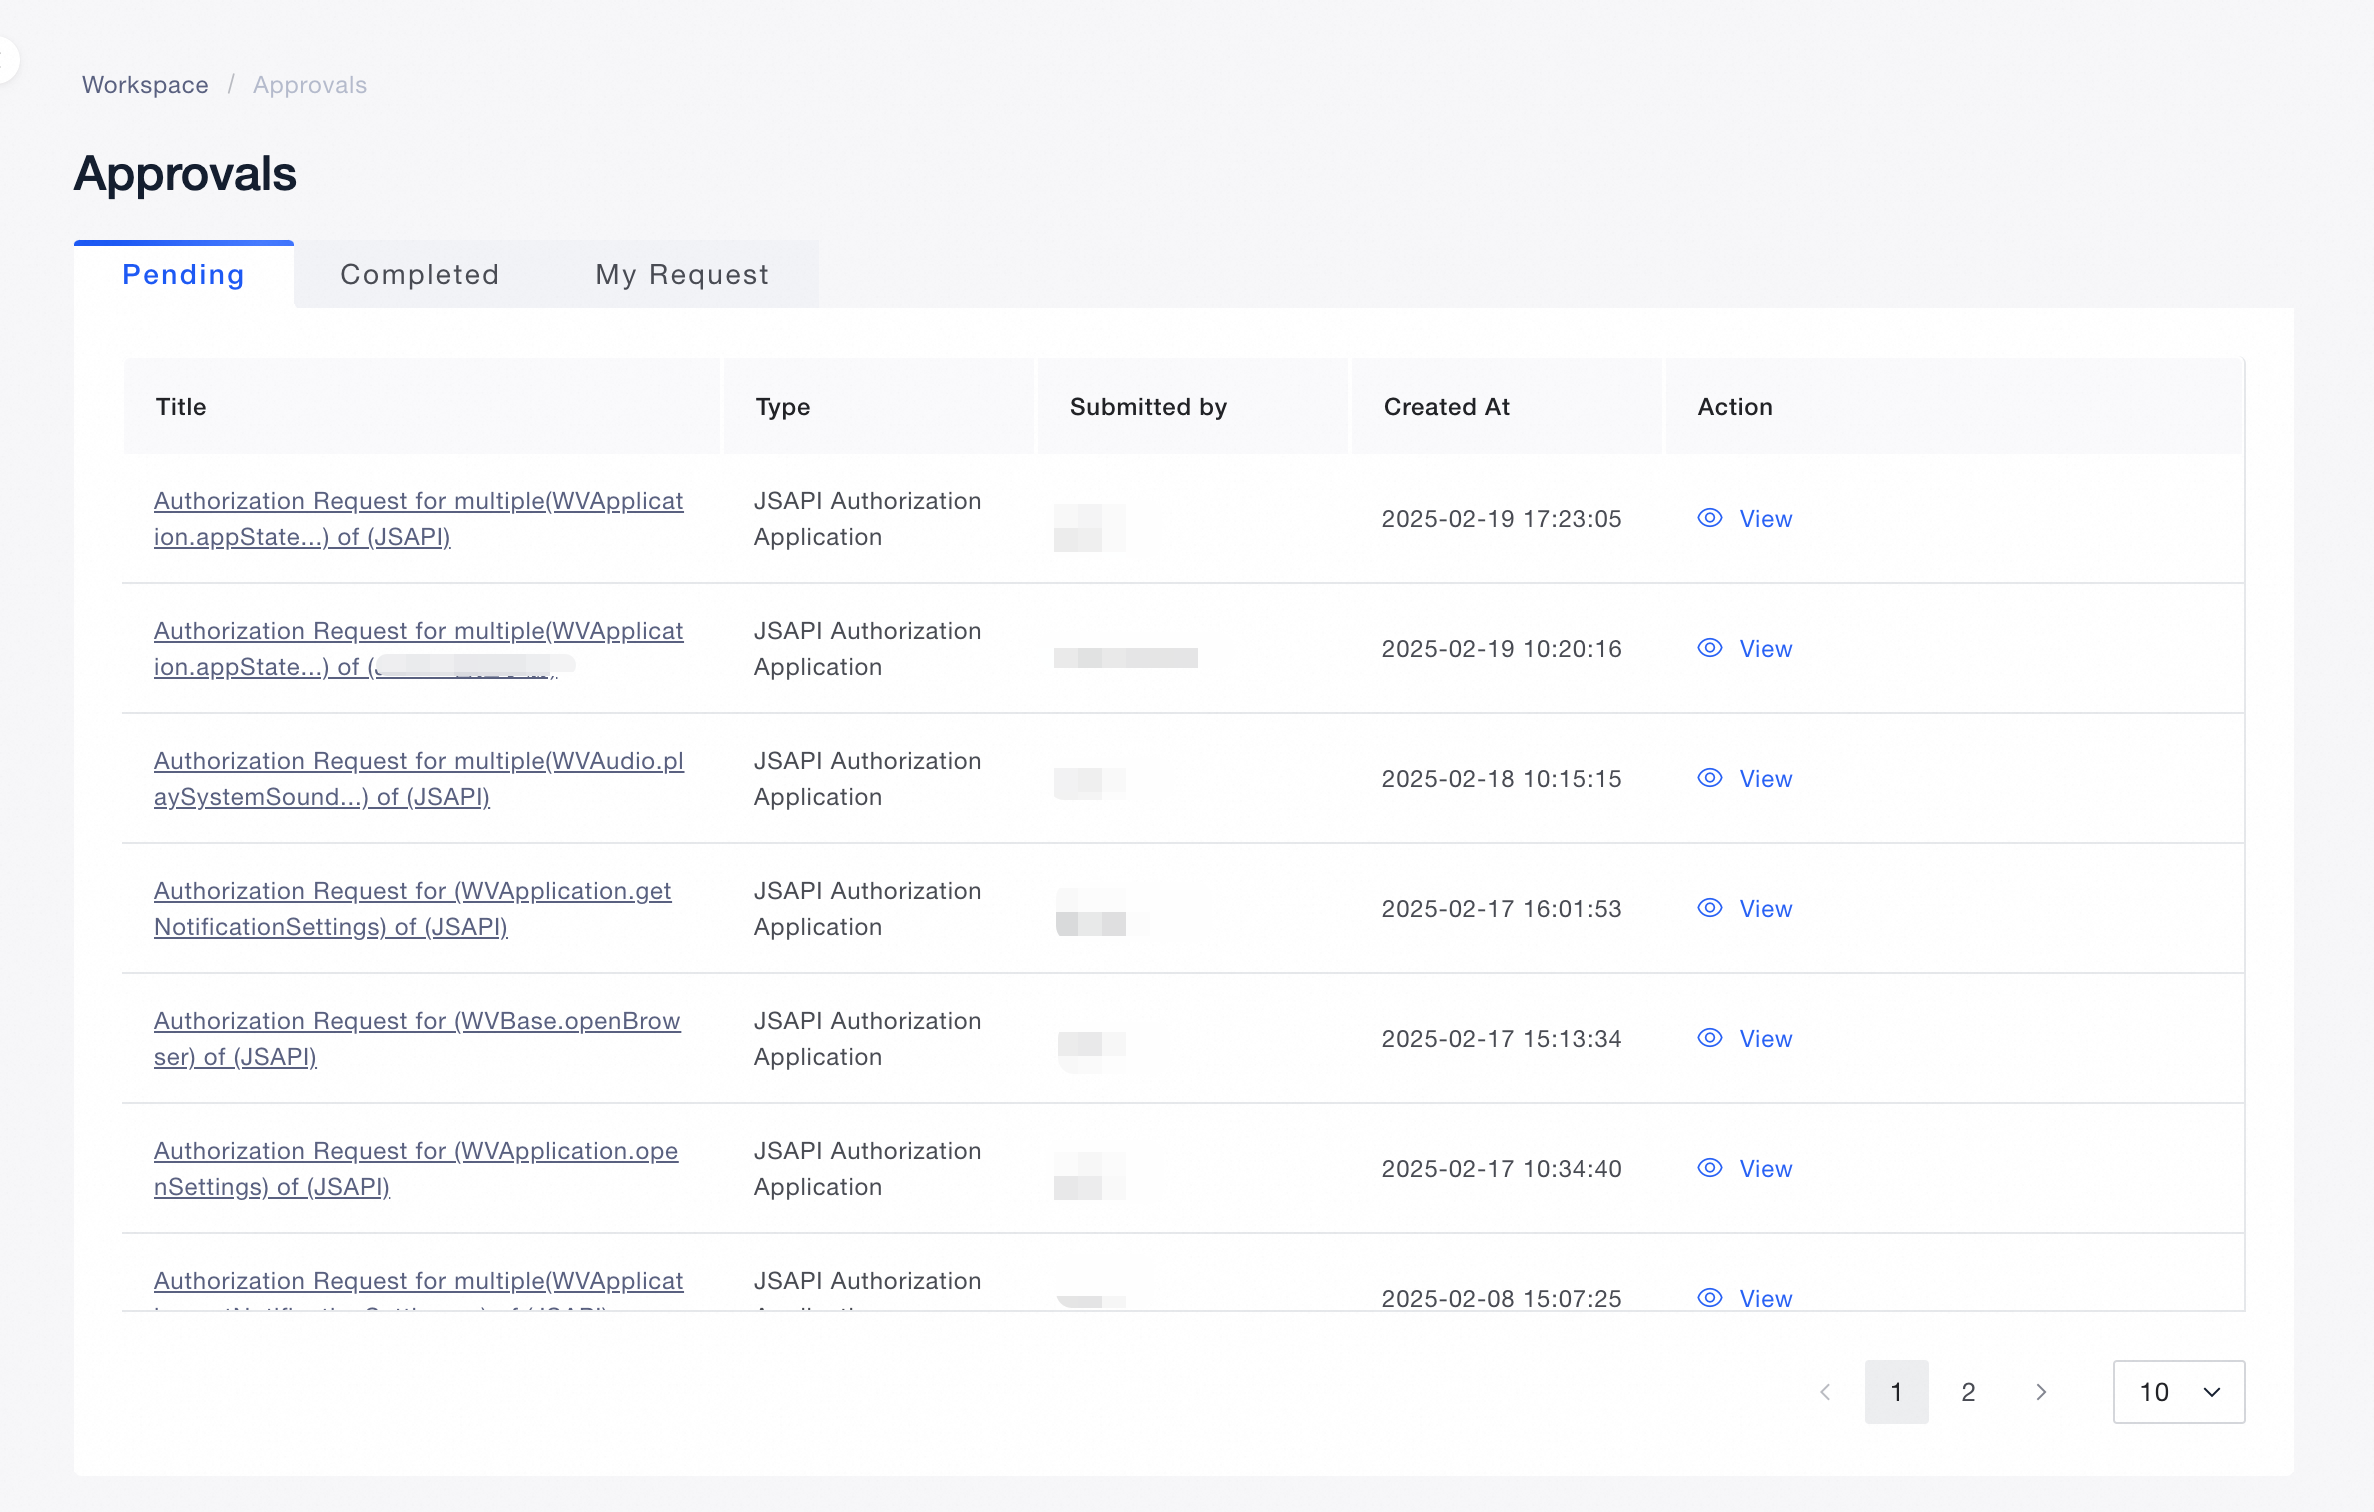
2.4. Approval
Administrators can view submitted approval information in the "Approvals" module.
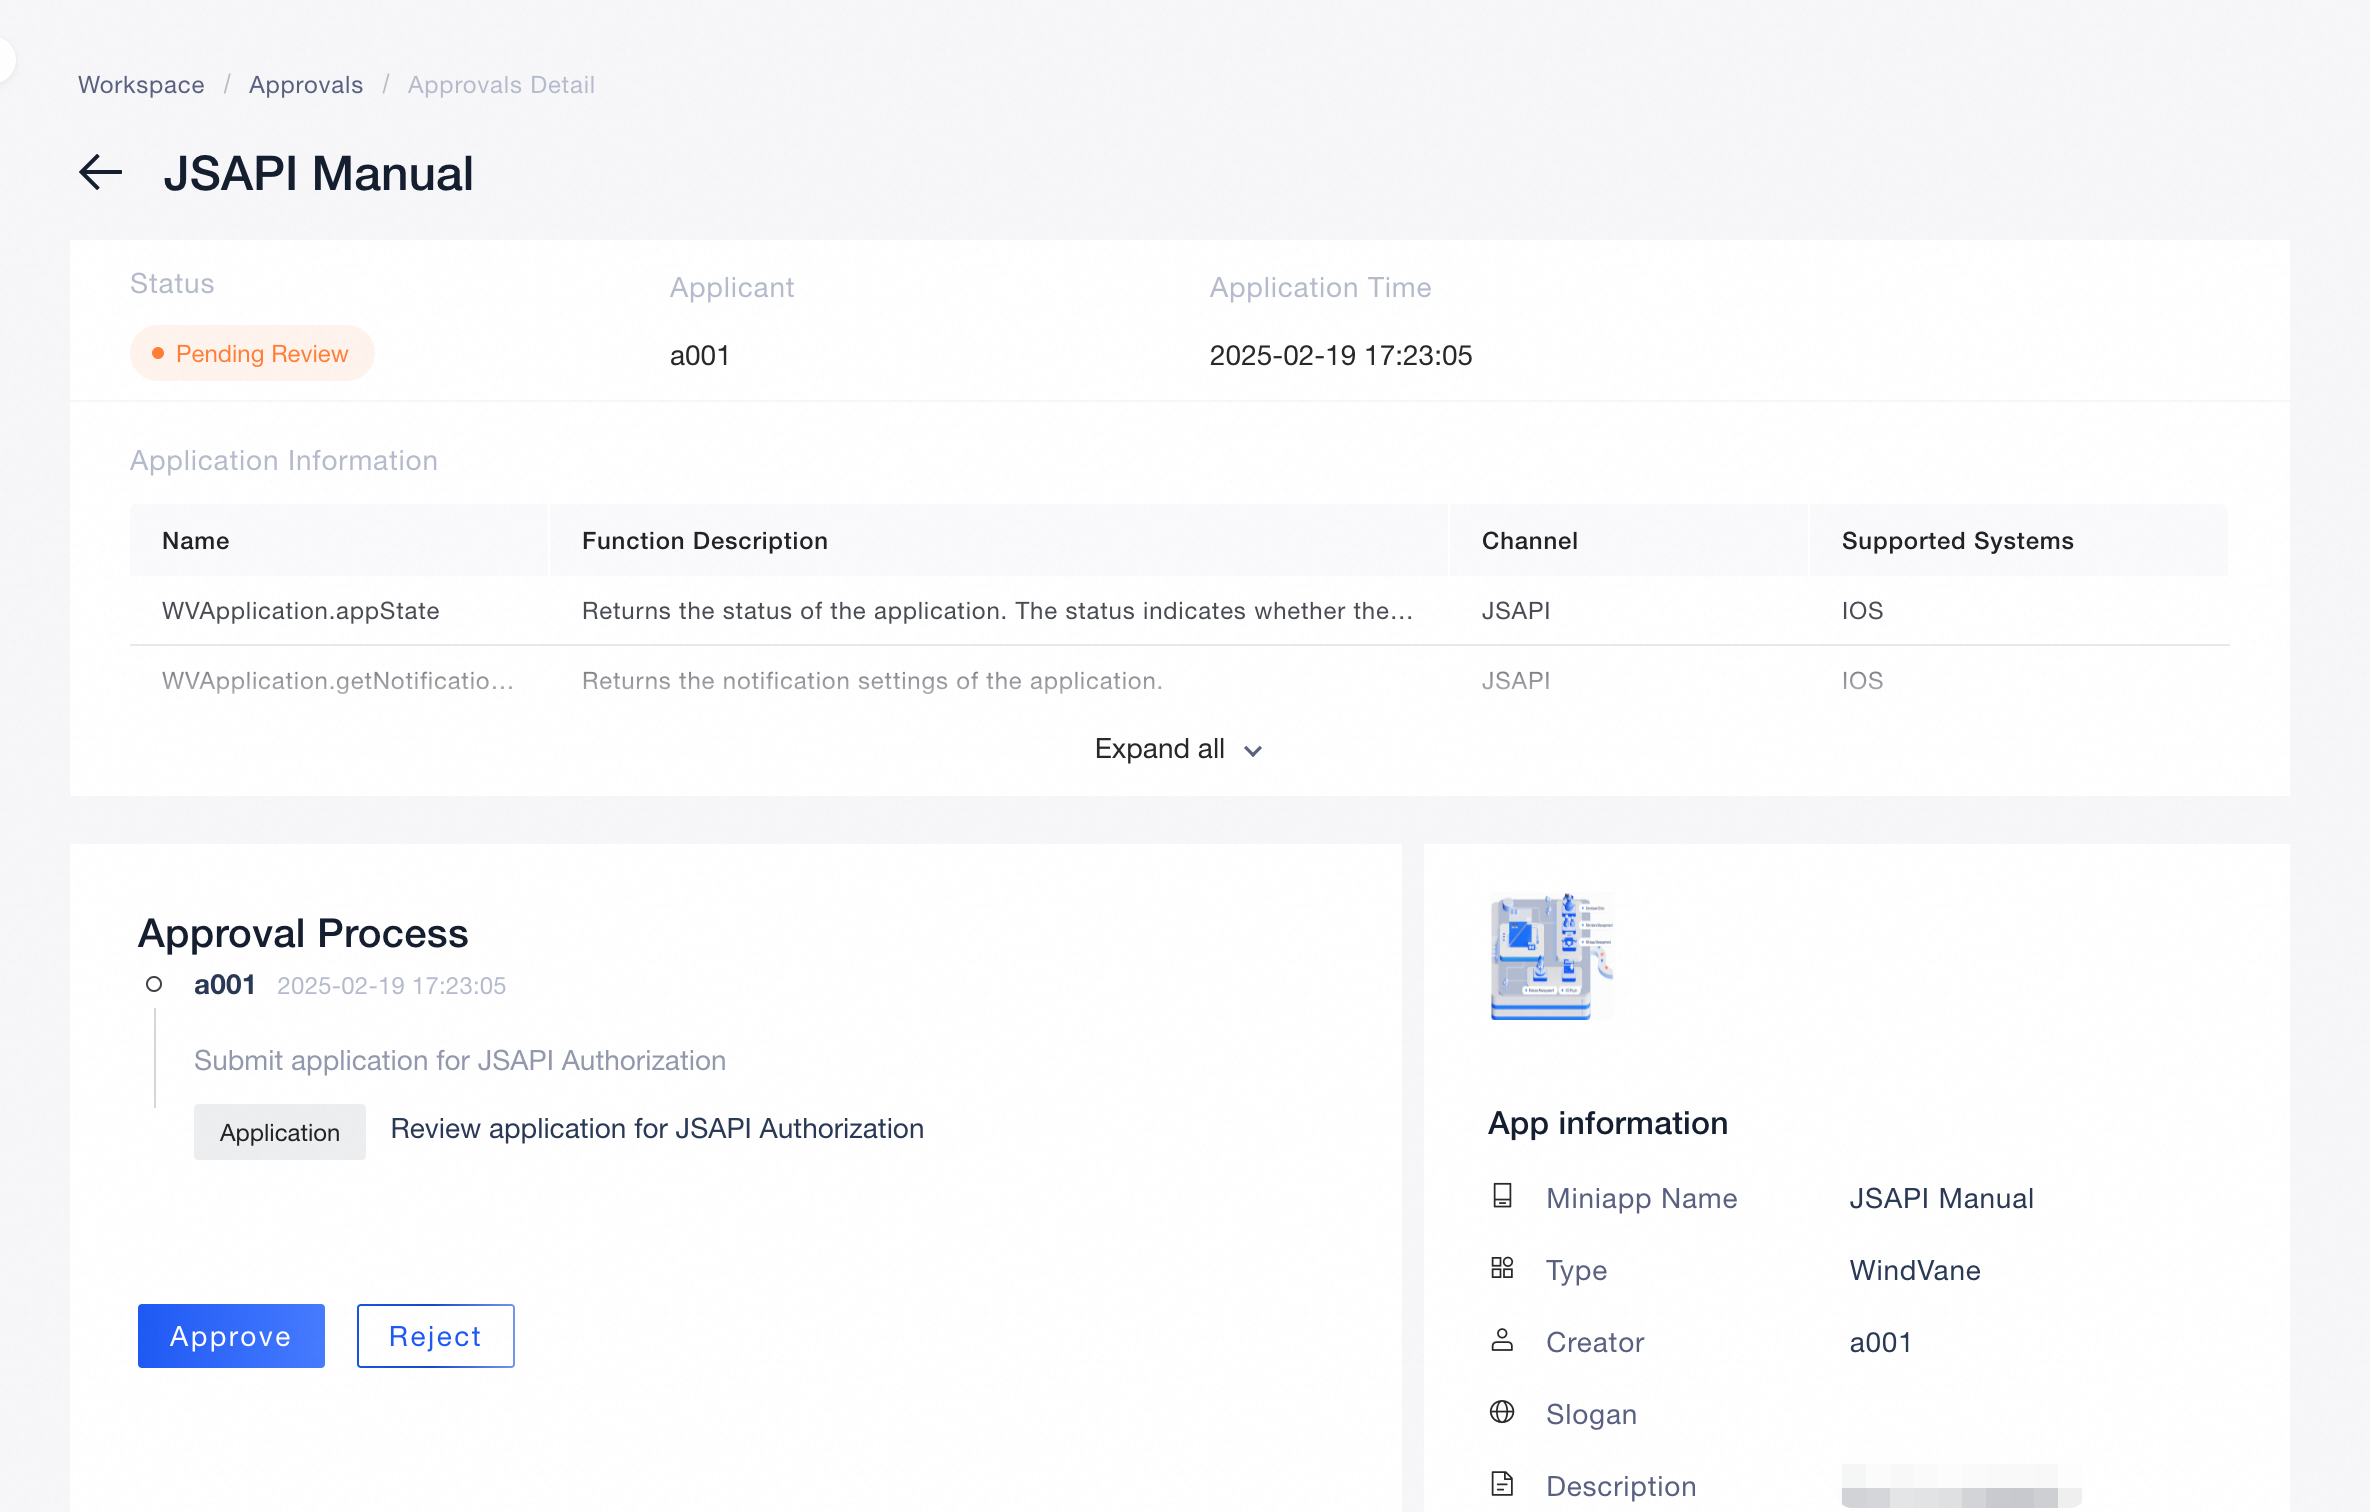
View Application Details:
Click the approval title to view detailed application information.
Process Approval Requests:
Click the "Approve" button to approve the request.
Click the "Reject" button to reject the request.