This guide helps you quickly understand how to use and operate the Media AI.
Prerequisites: Login/Sign up and access credential configuration.
Core Steps:「Create Workflow」 → 「Create Task」 → 「Tasks」
1. Login / Sign up
To use the Media AI, you must first log in. There are three common scenarios:
Log in with your Alibaba Cloud purchasing account
Use the Alibaba Cloud account used to purchase the Media AI. After login, you’ll be redirected to the Media AI console.
First-time user of Media AI
If you are using the Media AI for the first time, please sign up first.
Existing Media AI account
If you already have a Media AI account, please log in using your account and password.
Password complexity:
Your password must meet the following complexity requirements:
Password must contain at least one digit [0-9].
Password must contain at least one lowercase Latin character [a-z].
Password must contain at least one uppercase Latin character [A-Z].
Password must contain at least one special character like
! @ # & ( ).\.Password must contain a length of at least 8 characters and a maximum of 20 characters.
If you forget your password, click 「Forgot Password」 on the logon page to reset the password.
If you have successfully registered or already have a SuperApp account, please enter your account and password to complete the login.
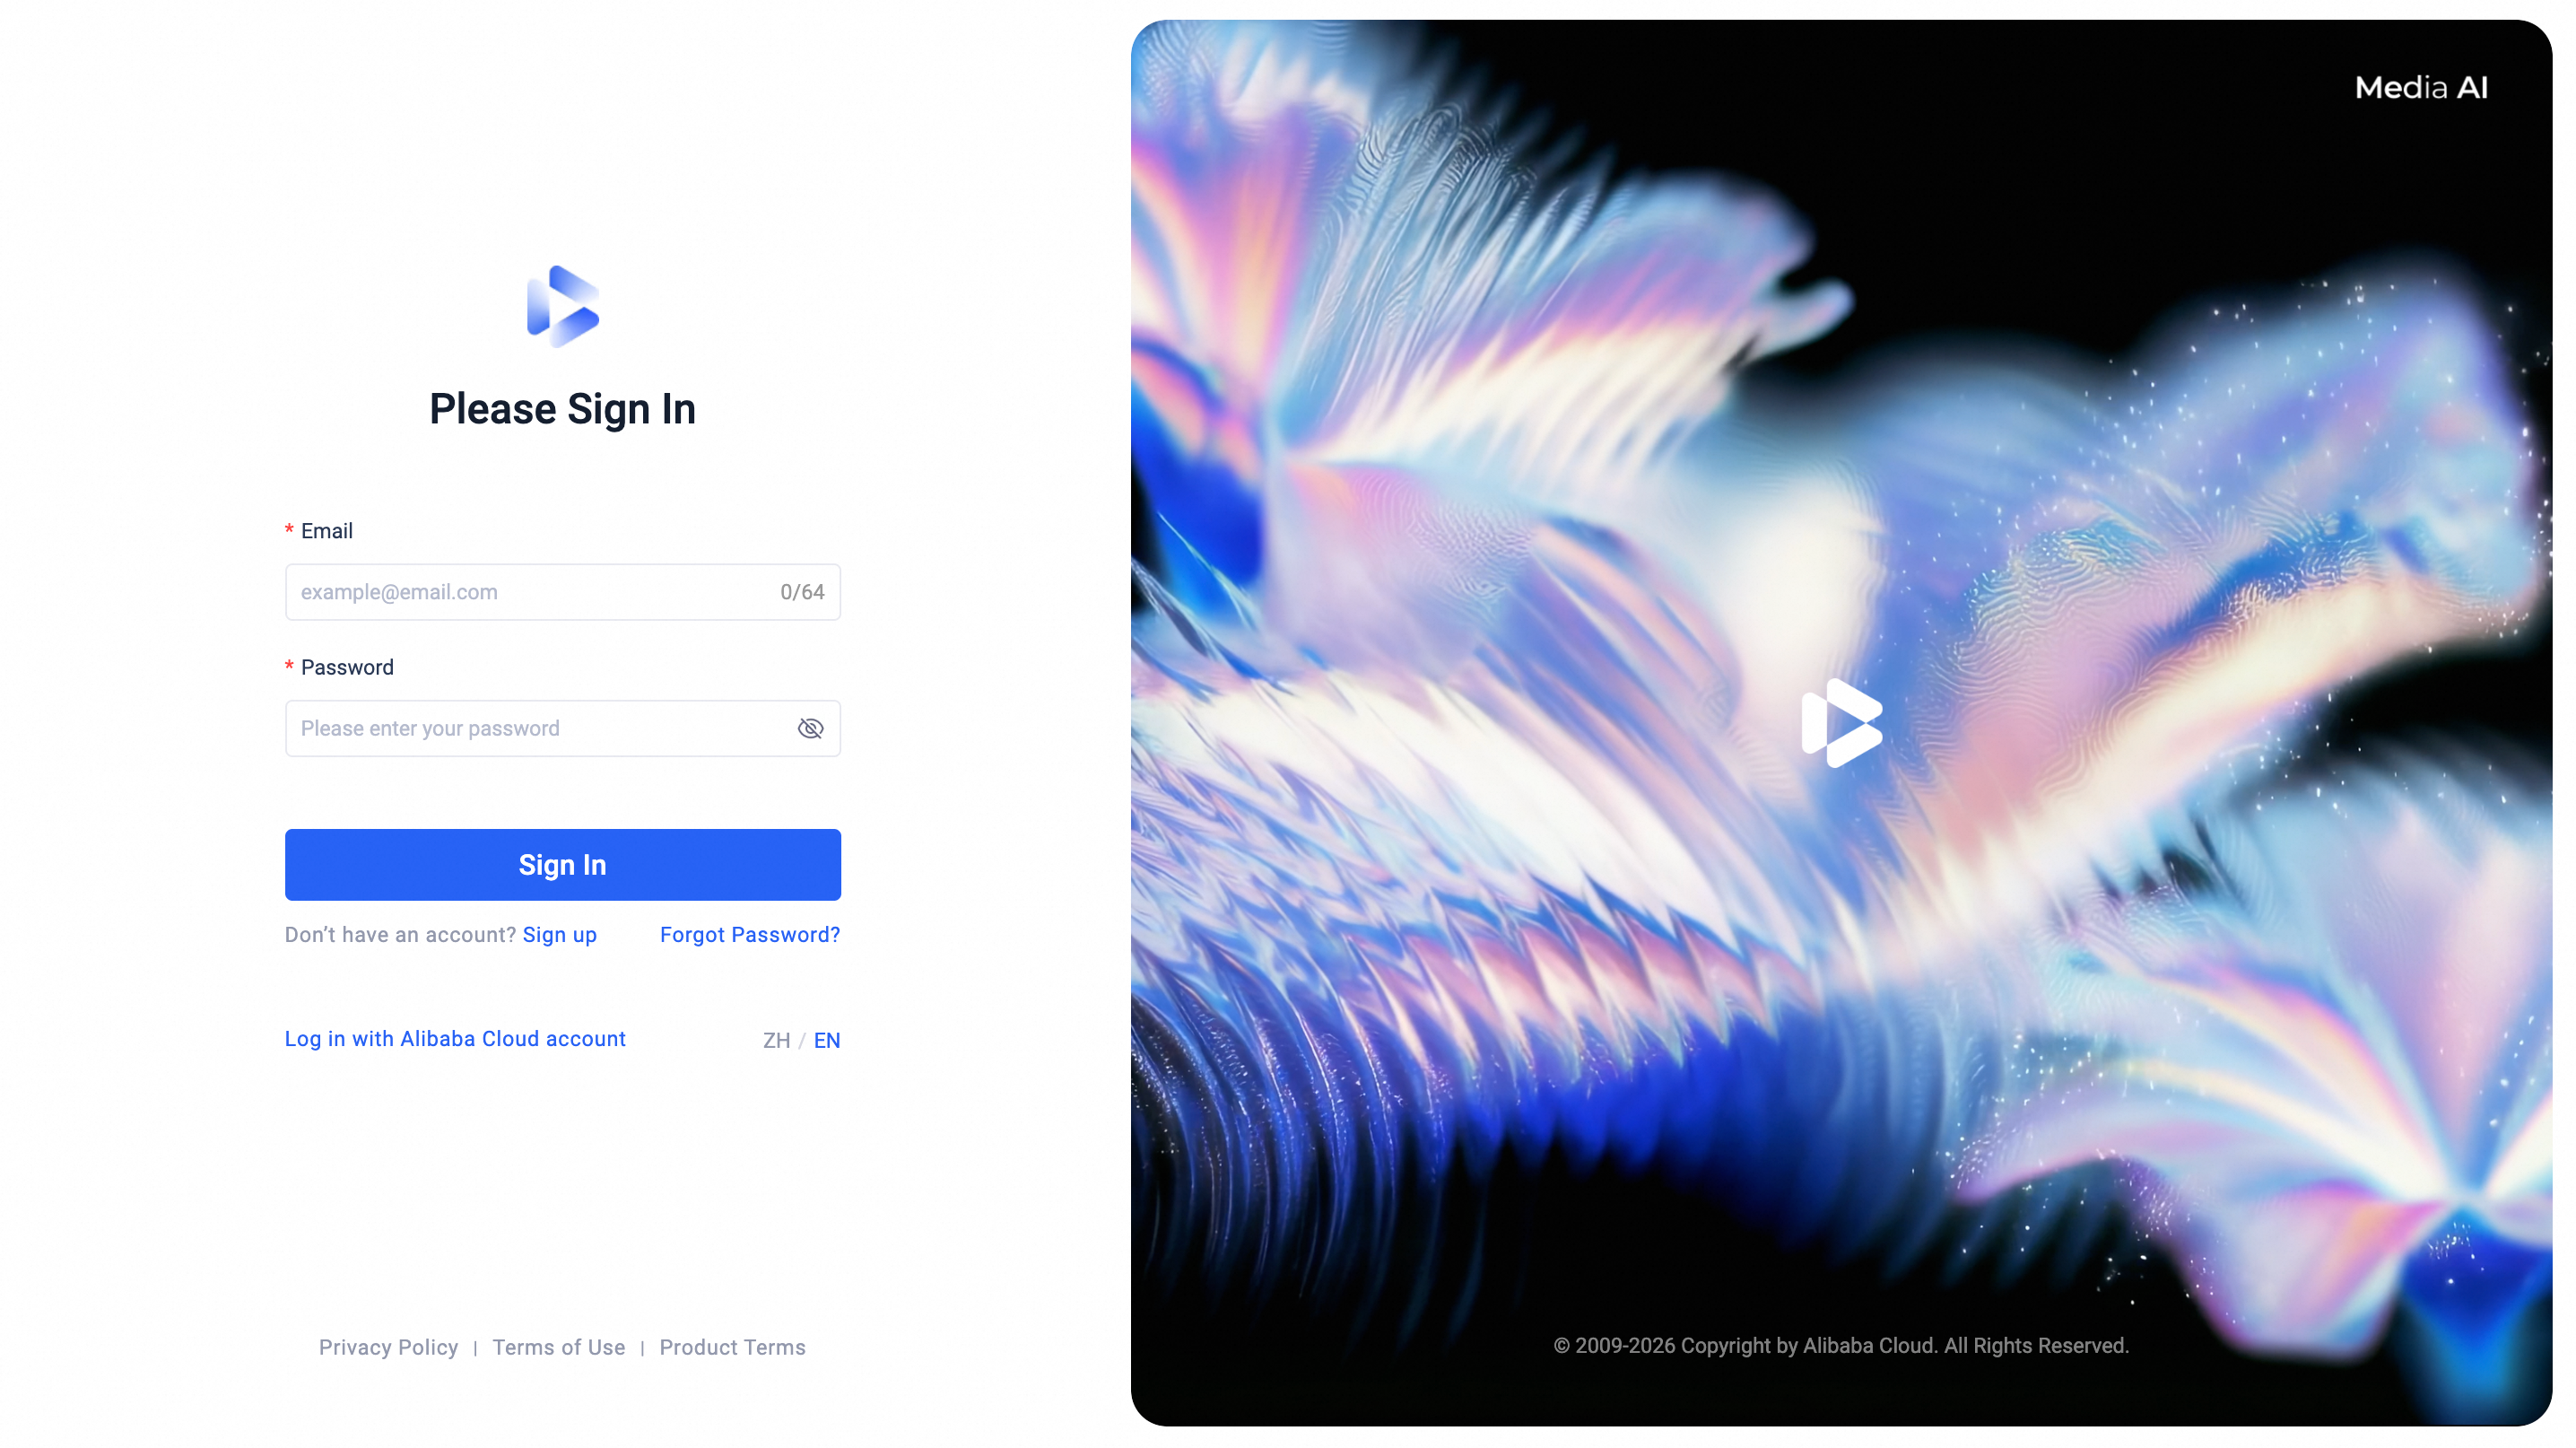
Login Page
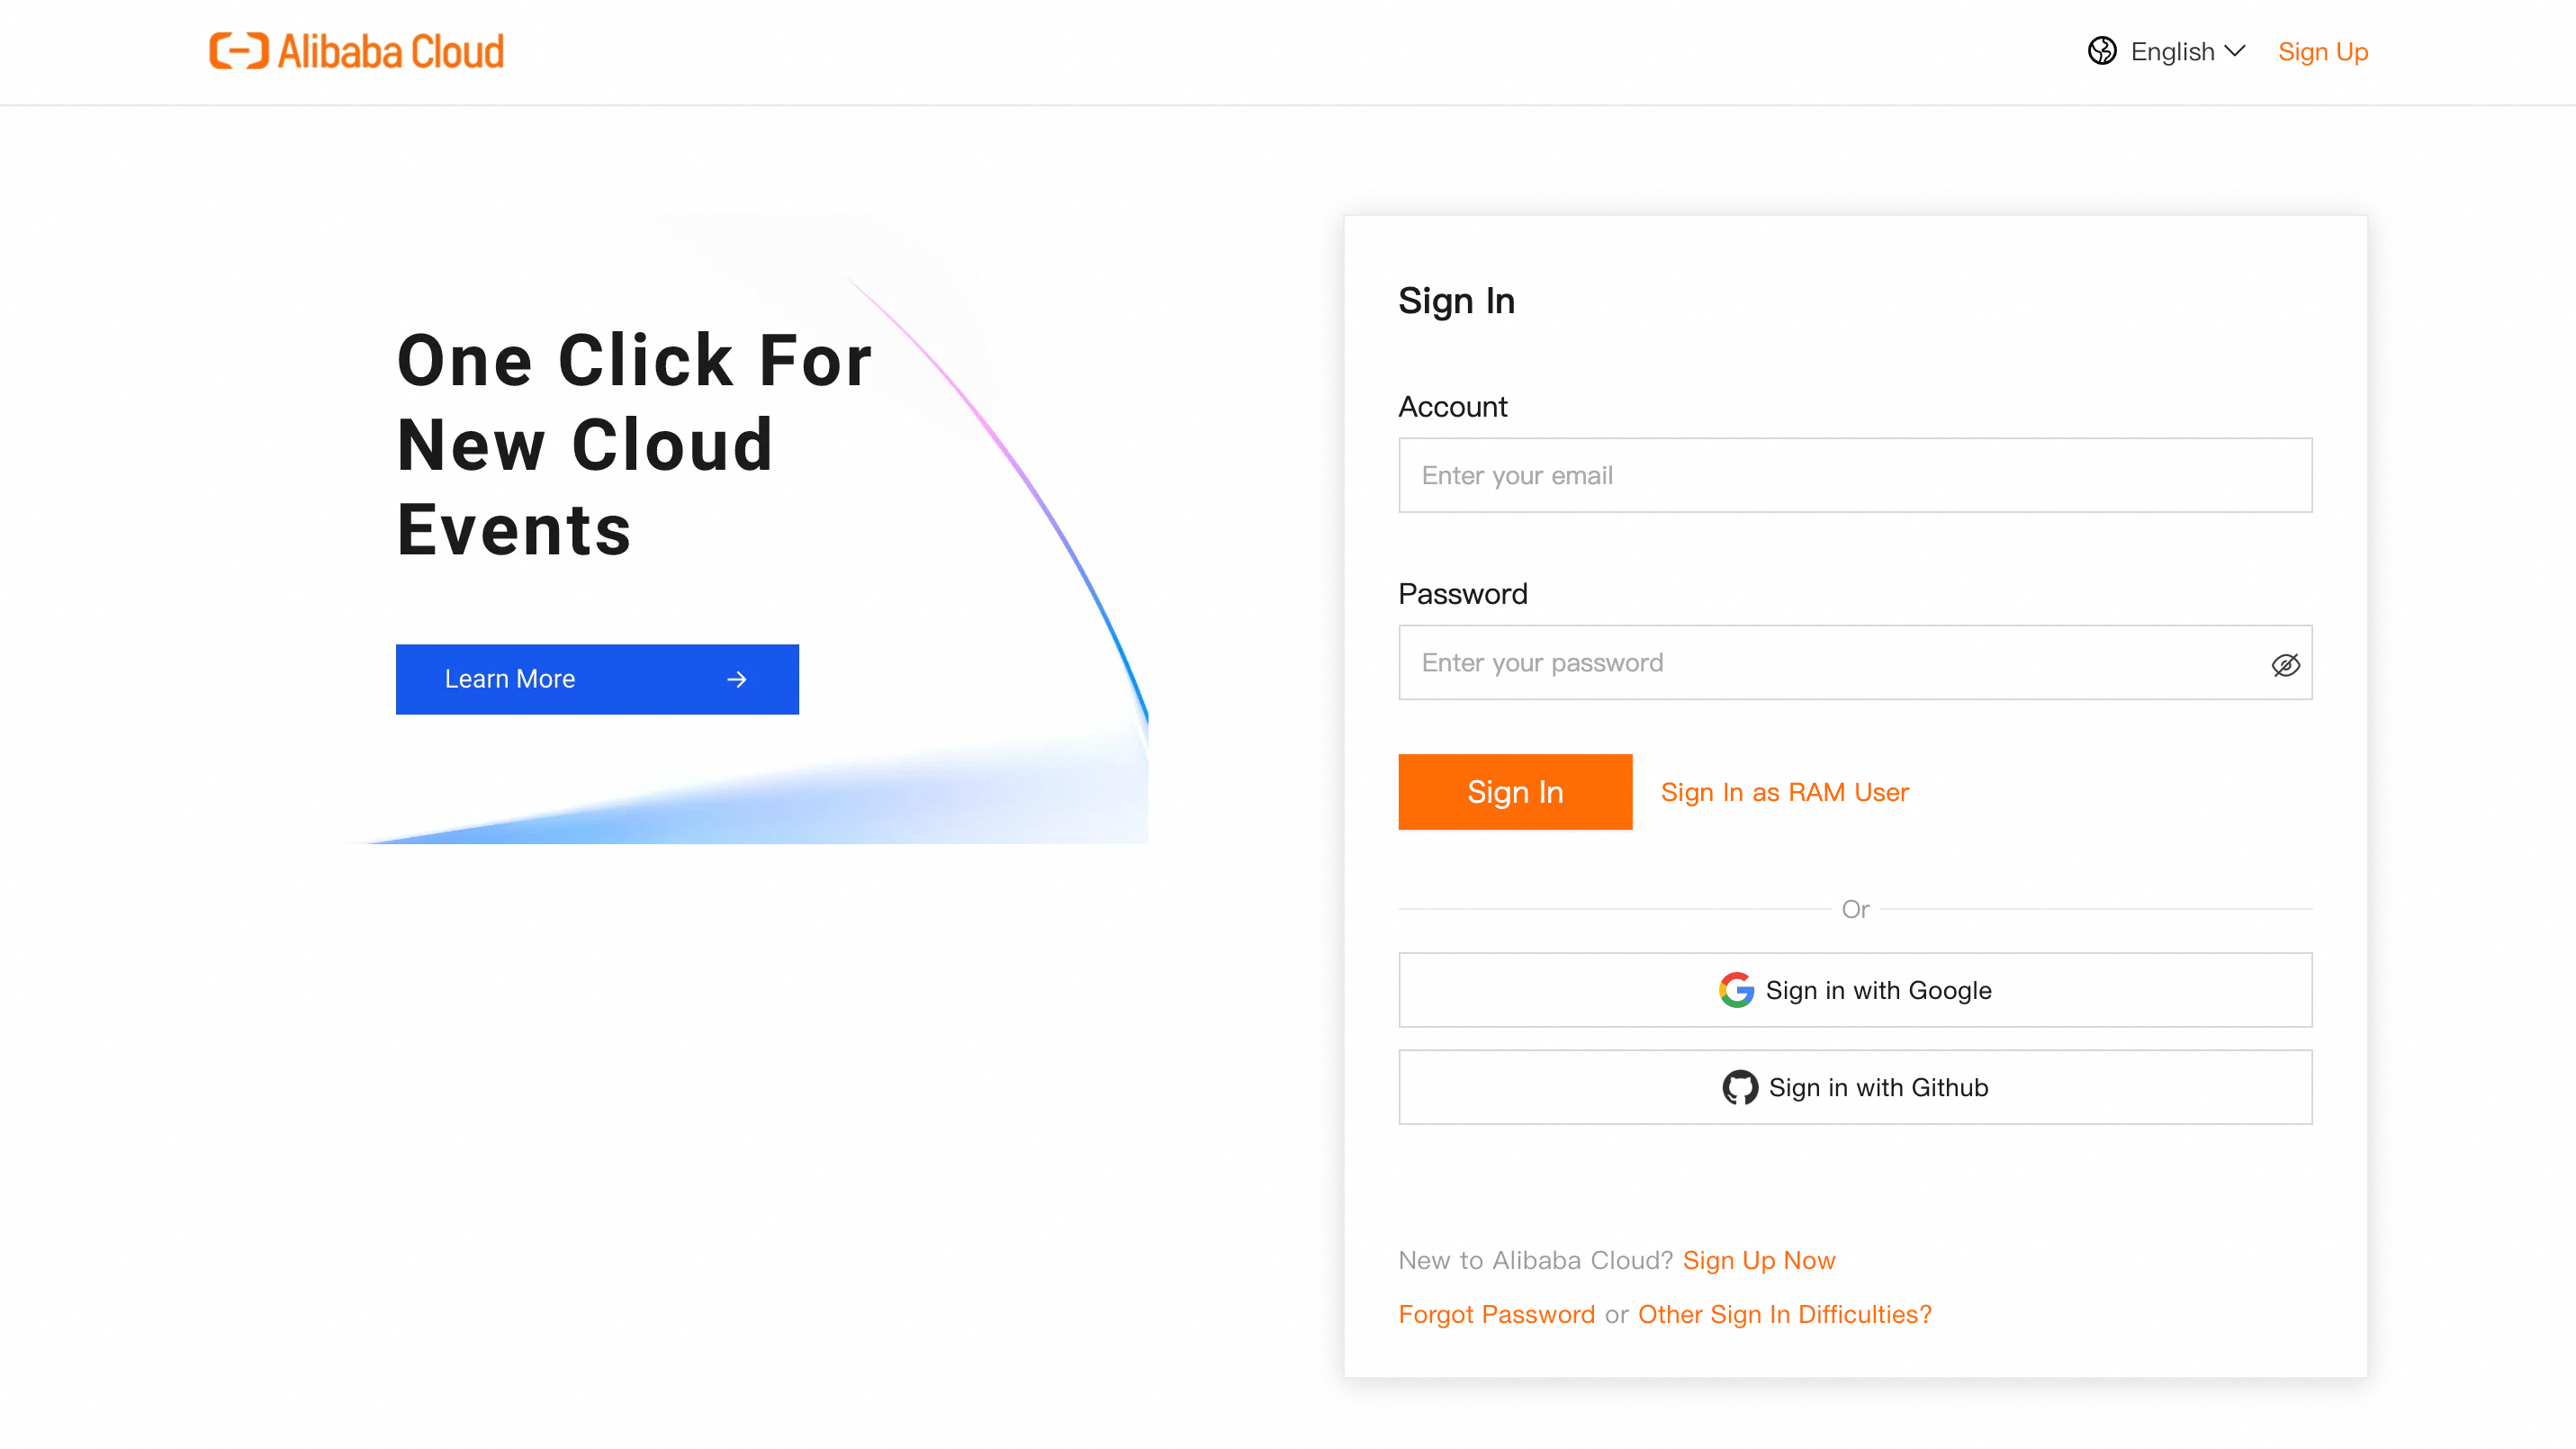
Alibaba Cloud Account Login Page
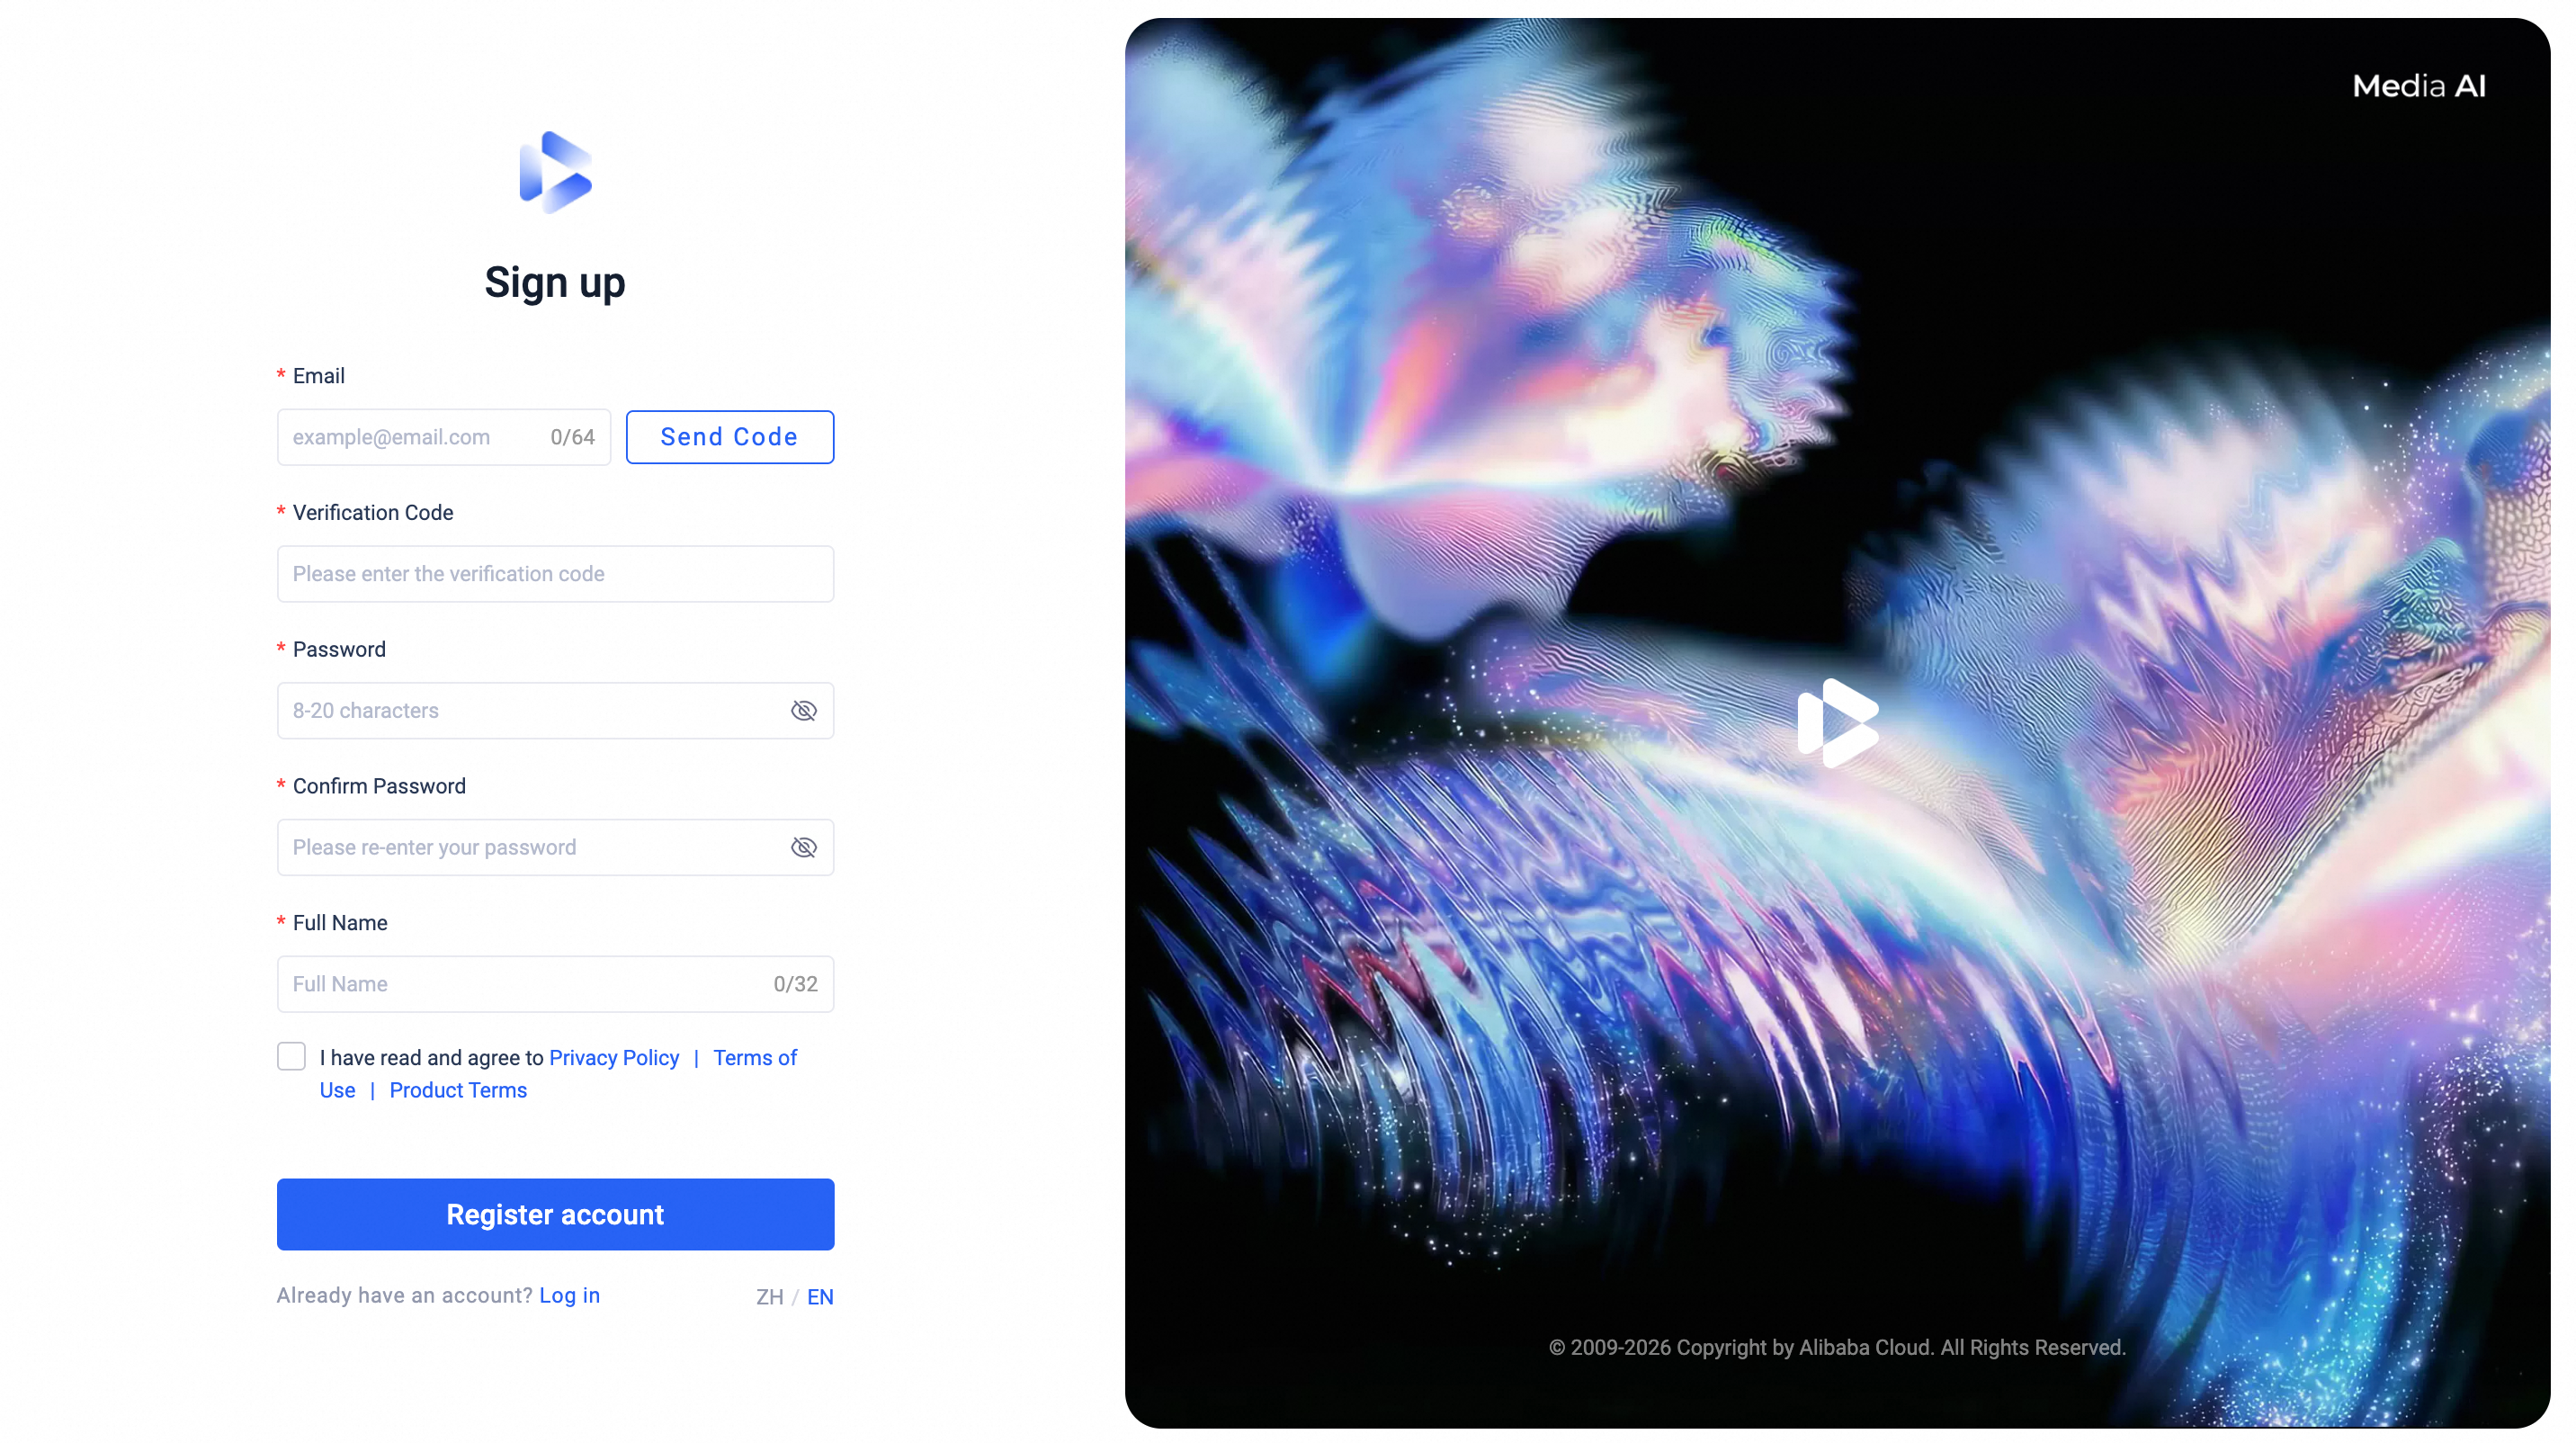
Sign Up Page
2. Access Credentials
Before using the Media AI, configure the following two credentials. Both must be valid; missing or invalid settings will block functionality.
Alibaba Cloud Model Studio
Region: Select your Model Studio service region.
API Key: Enter a valid API Key.
Validation: Click 「Test Connection」 before saving. Auto-validation occurs on save; failed tests prevent saving.
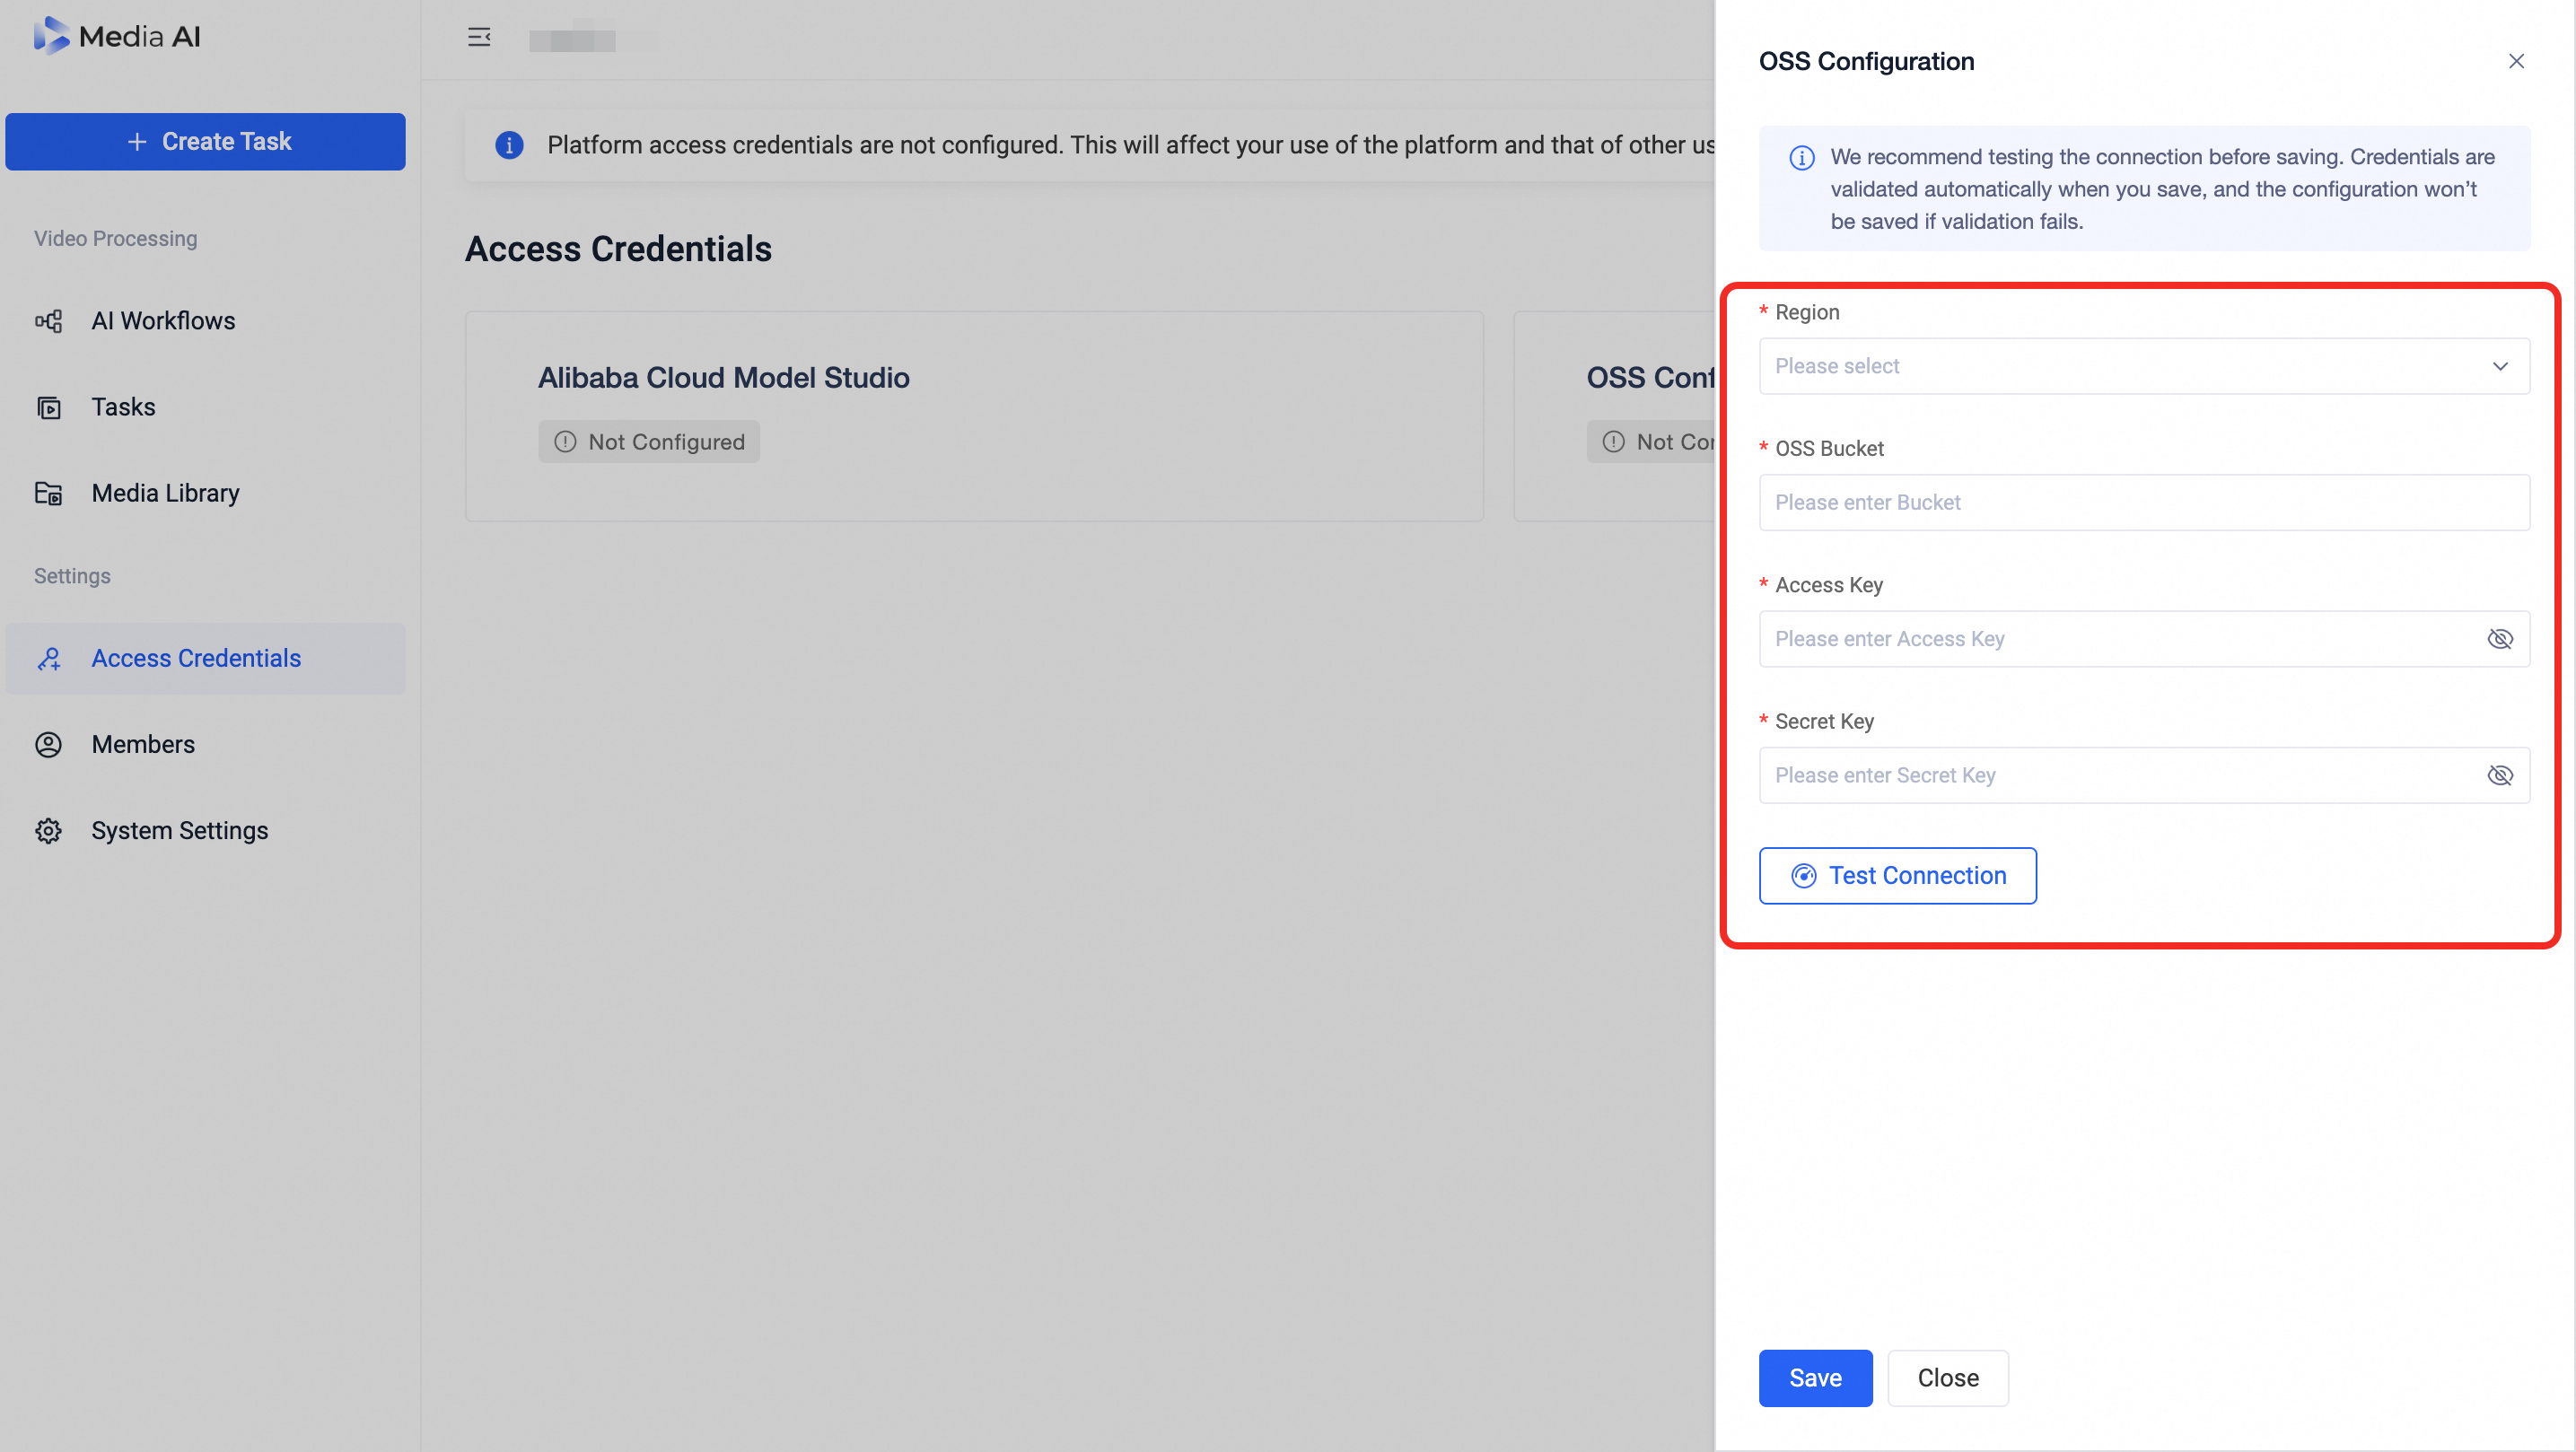
OSS Configuration
Region: Select your OSS bucket region.
OSS Bucket: Enter the target bucket name.
Access Key & Secret Key: Provide credentials with read/write permissions.
Validation: Click 「Test Connection」 before saving. Auto-validation occurs on save; failed tests prevent saving.
After successful configuration, settings appear under 「Access Credentials」. Edit via the pencil icon on the right.
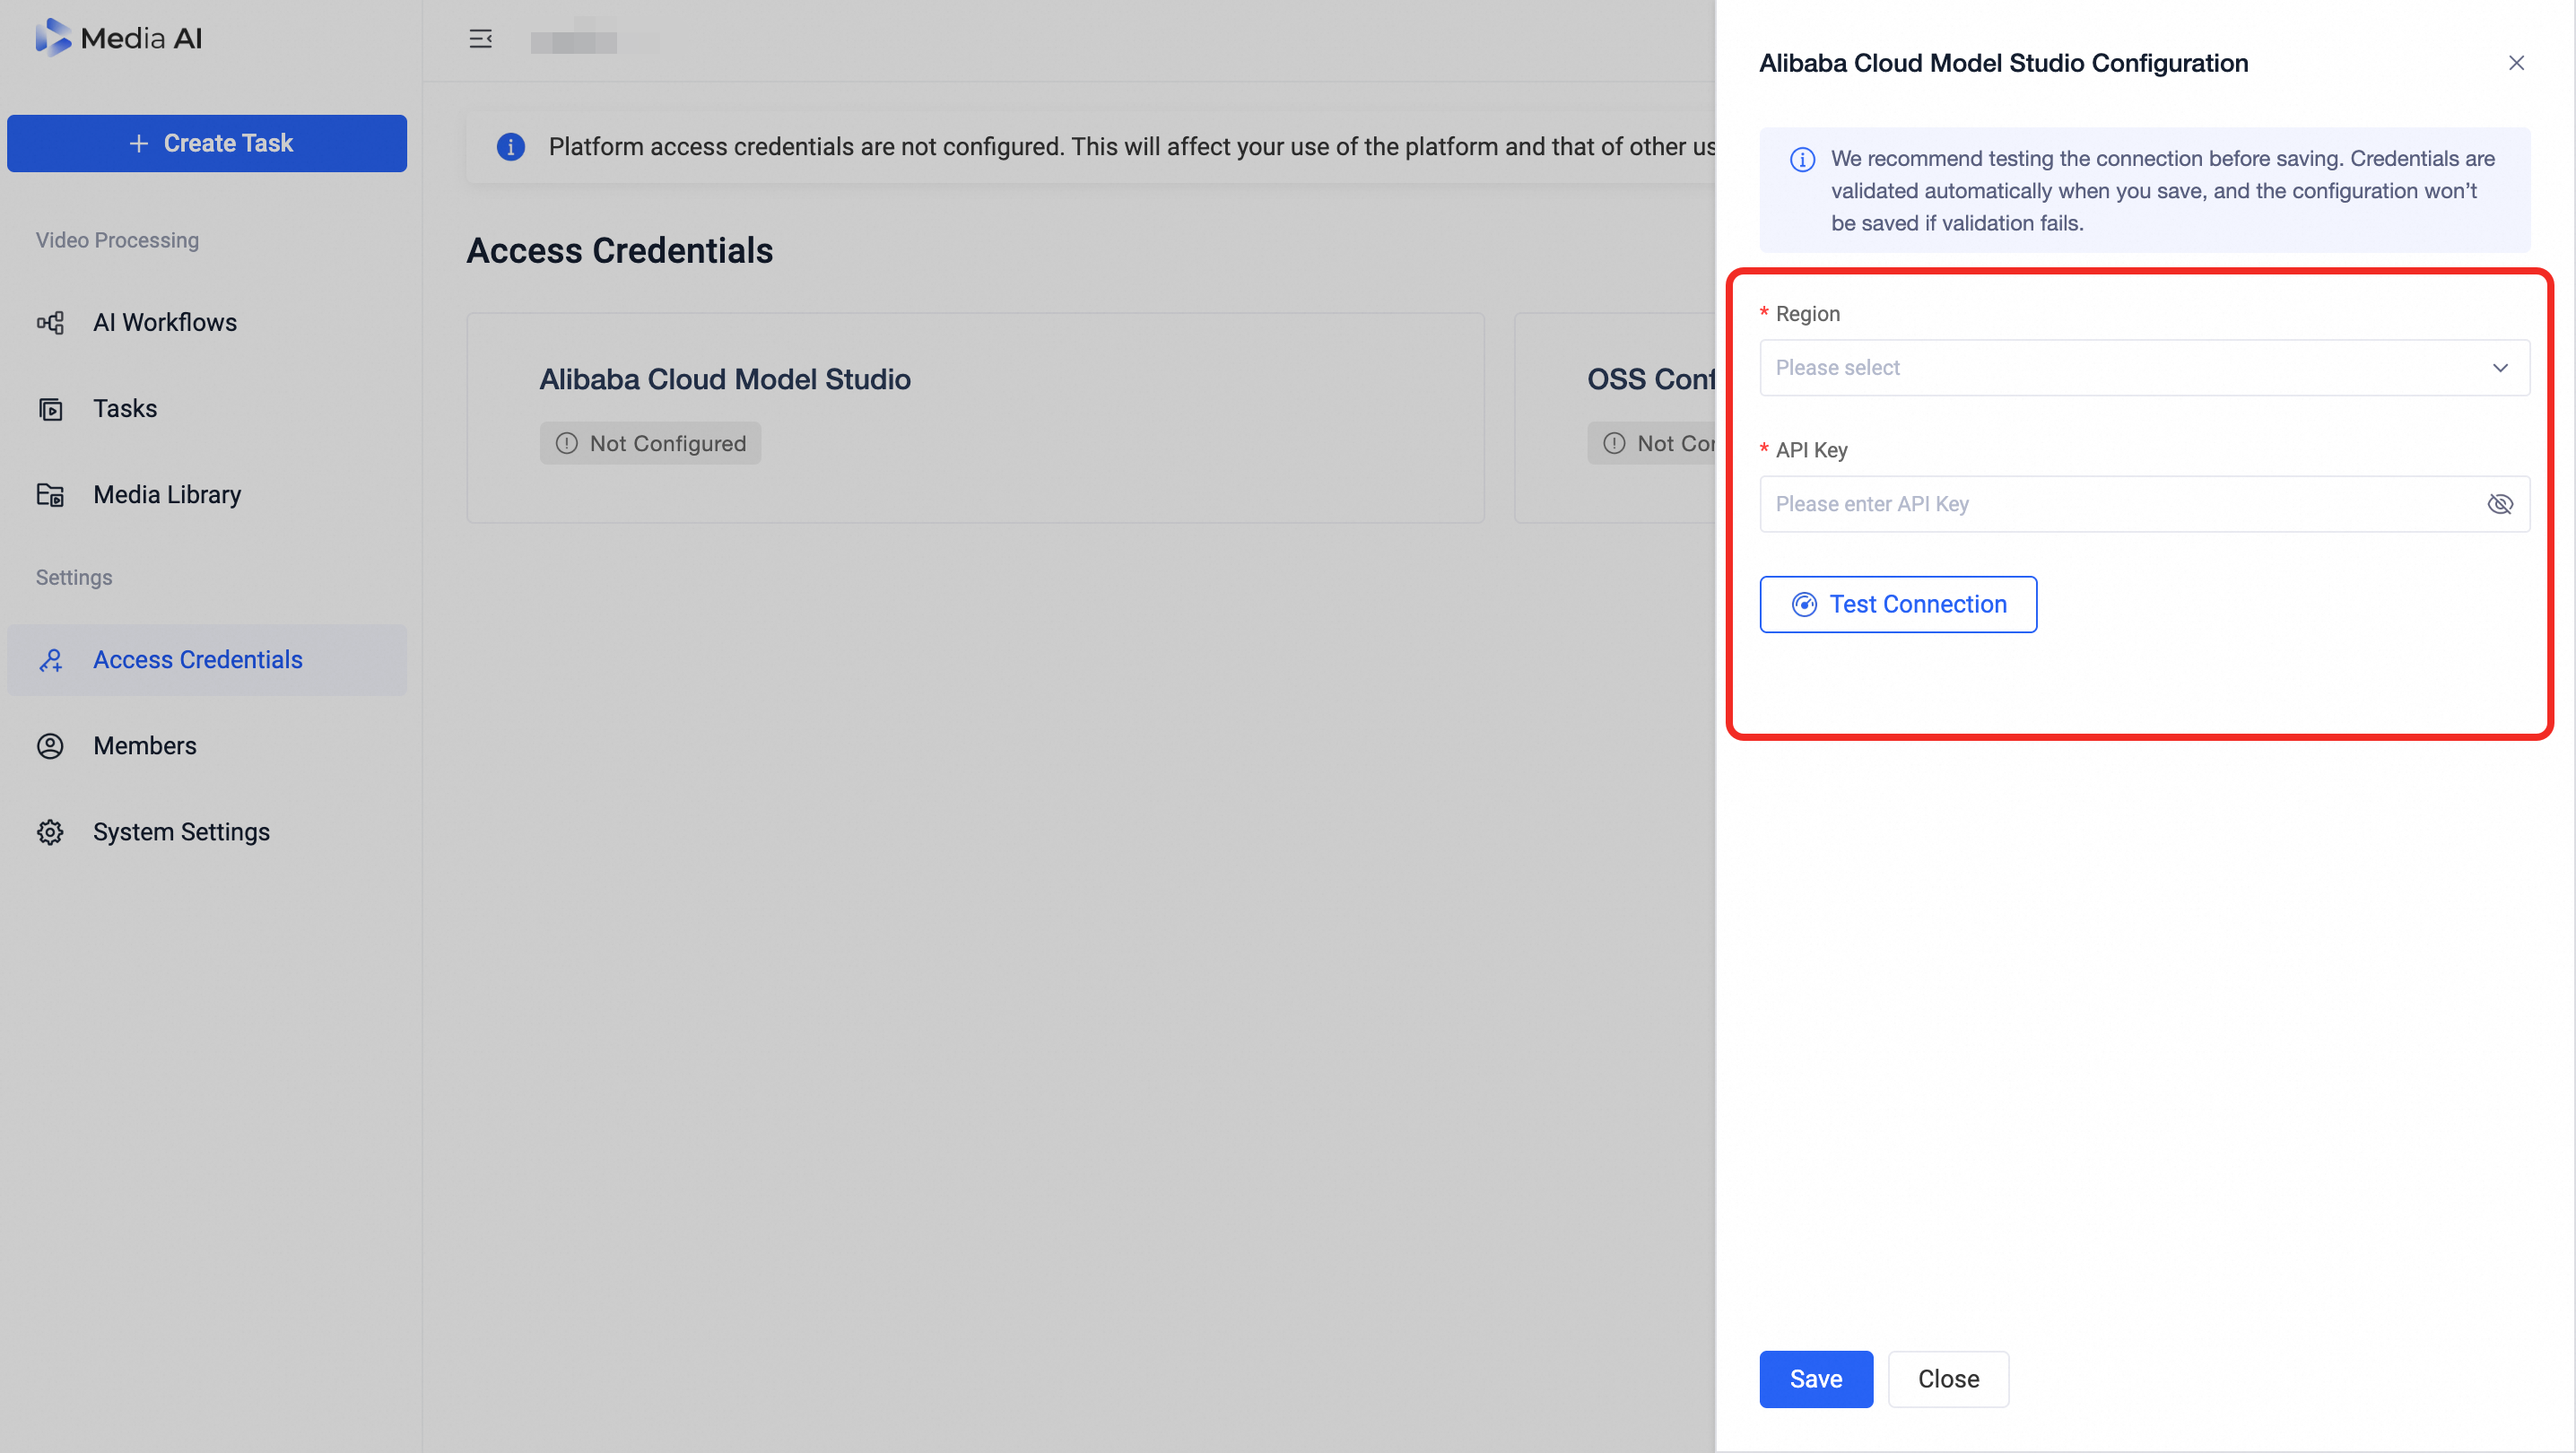
Alibaba Cloud Model Studio page
OSS Config page
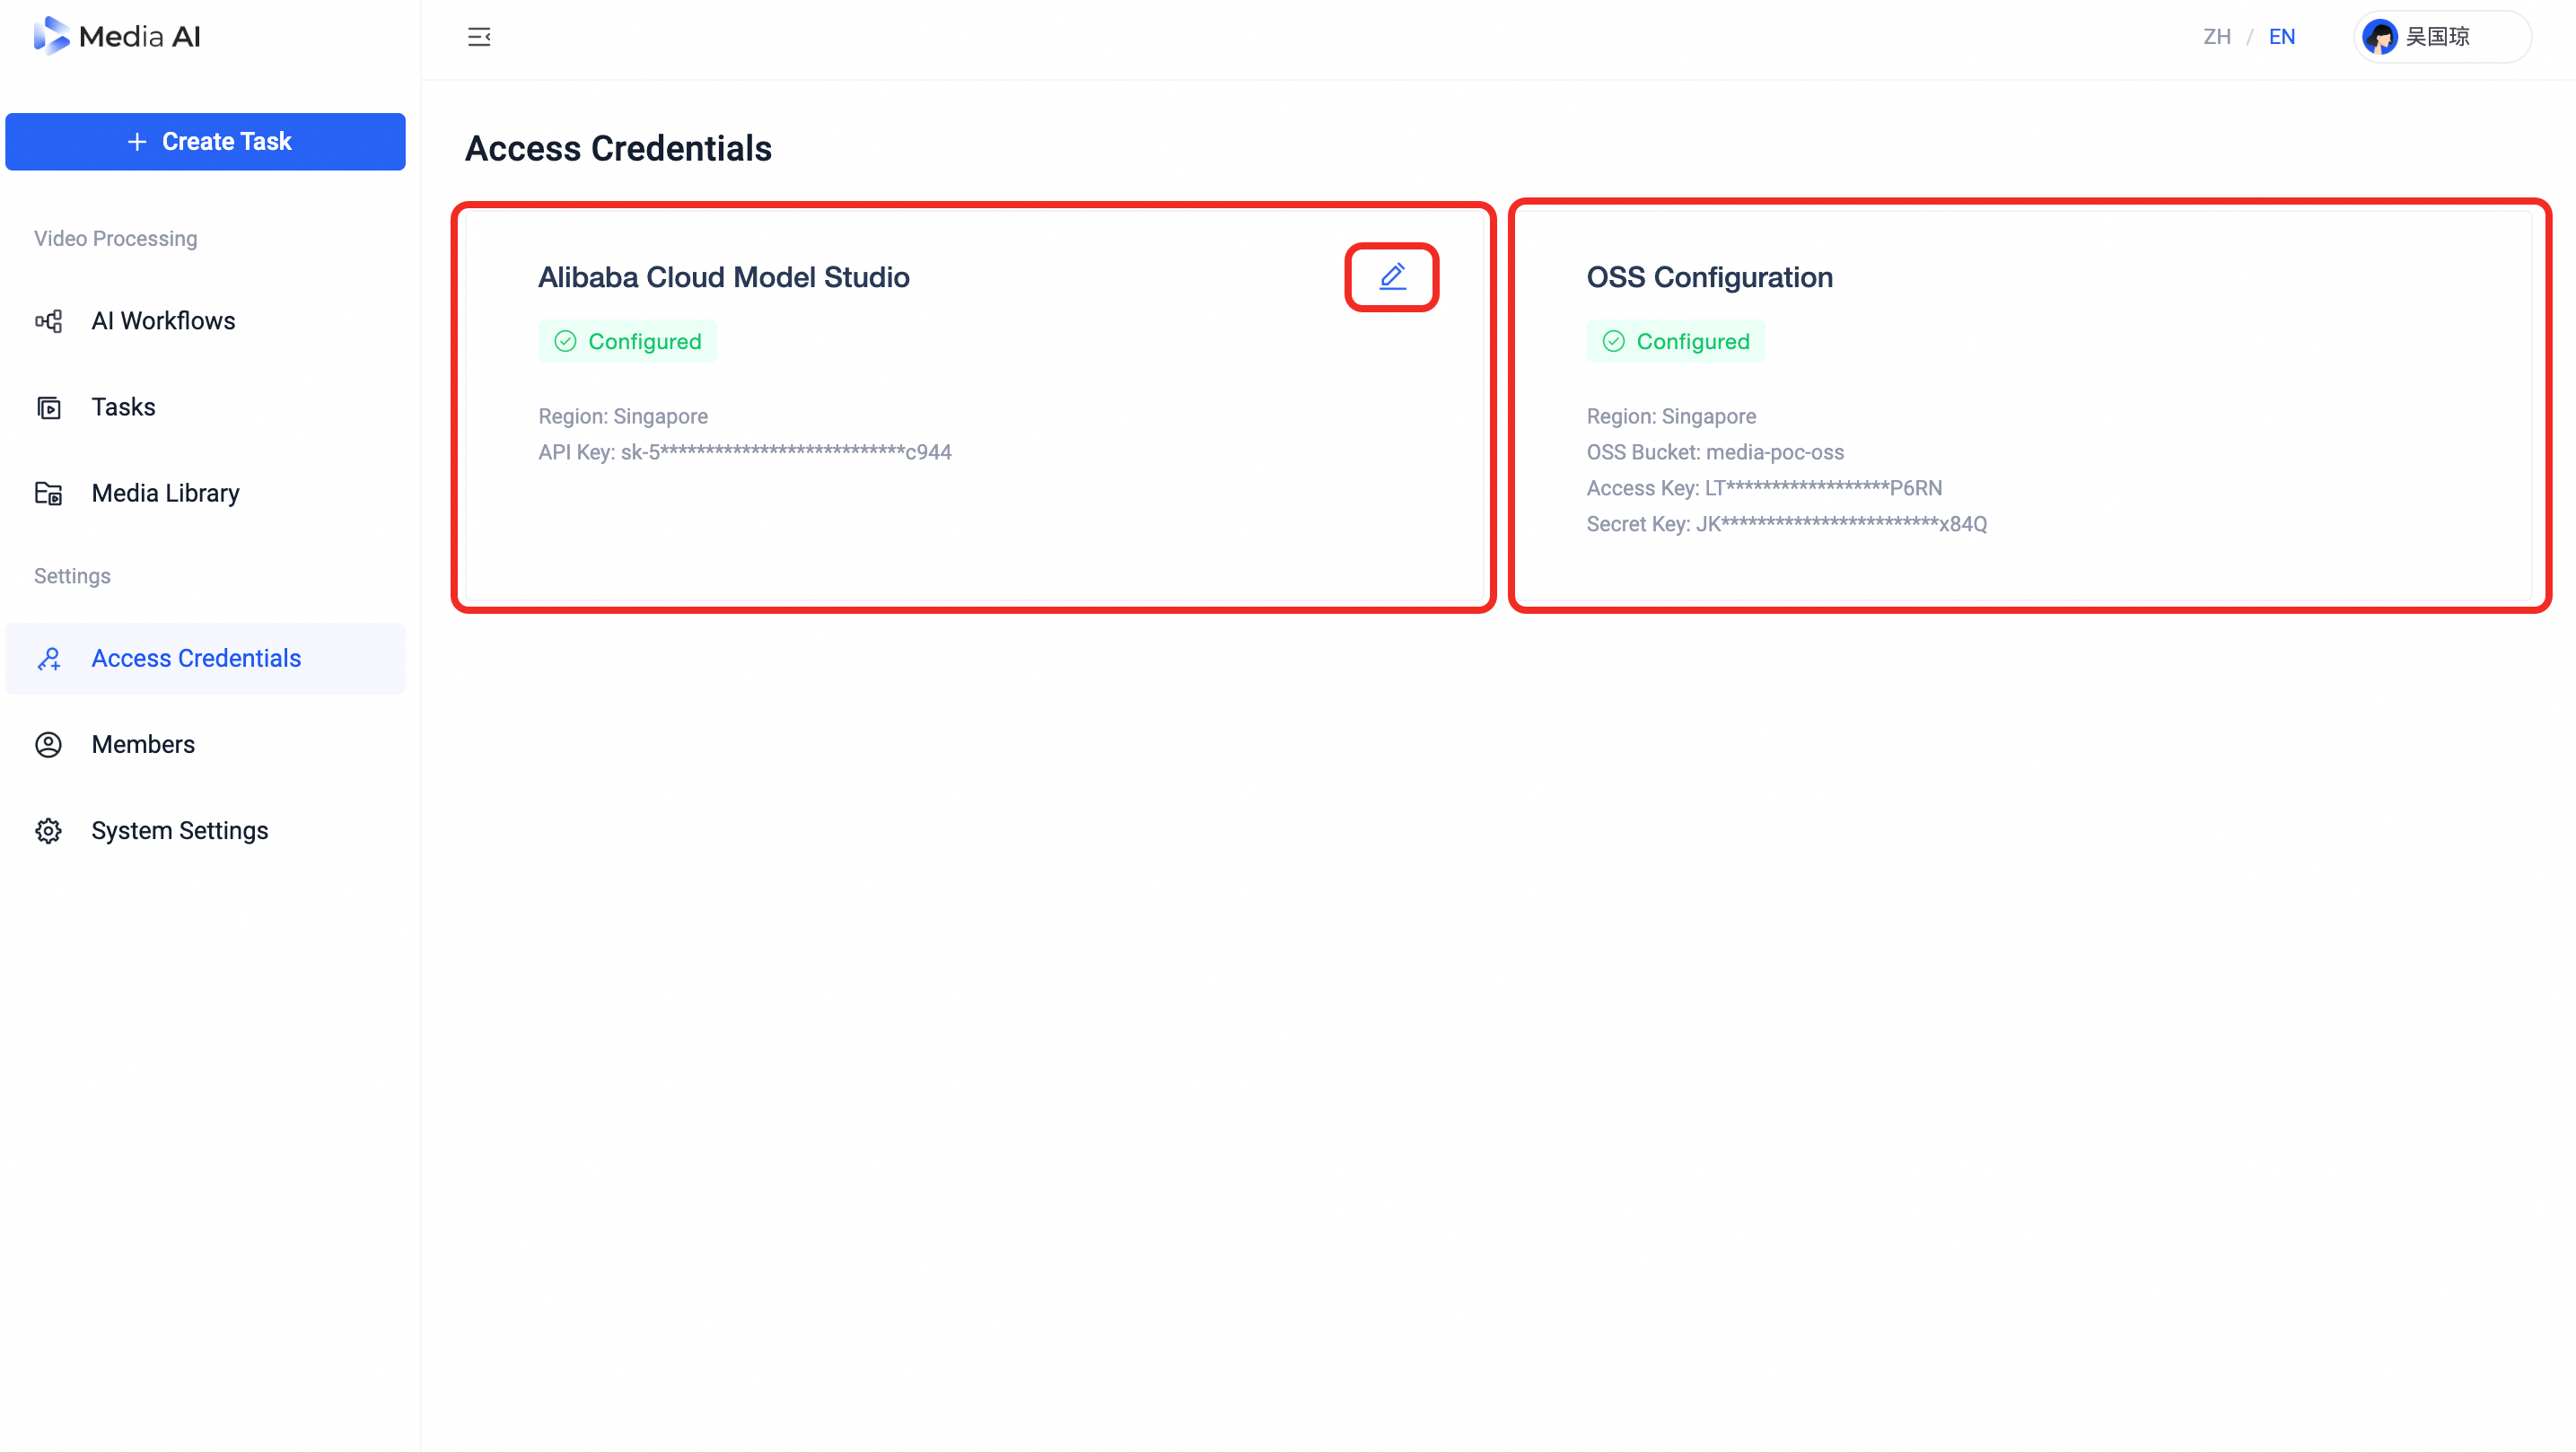
Access Credentials page
3. Members
Purchasers can register and log in to the platform directly. Other members need to be invited to join.
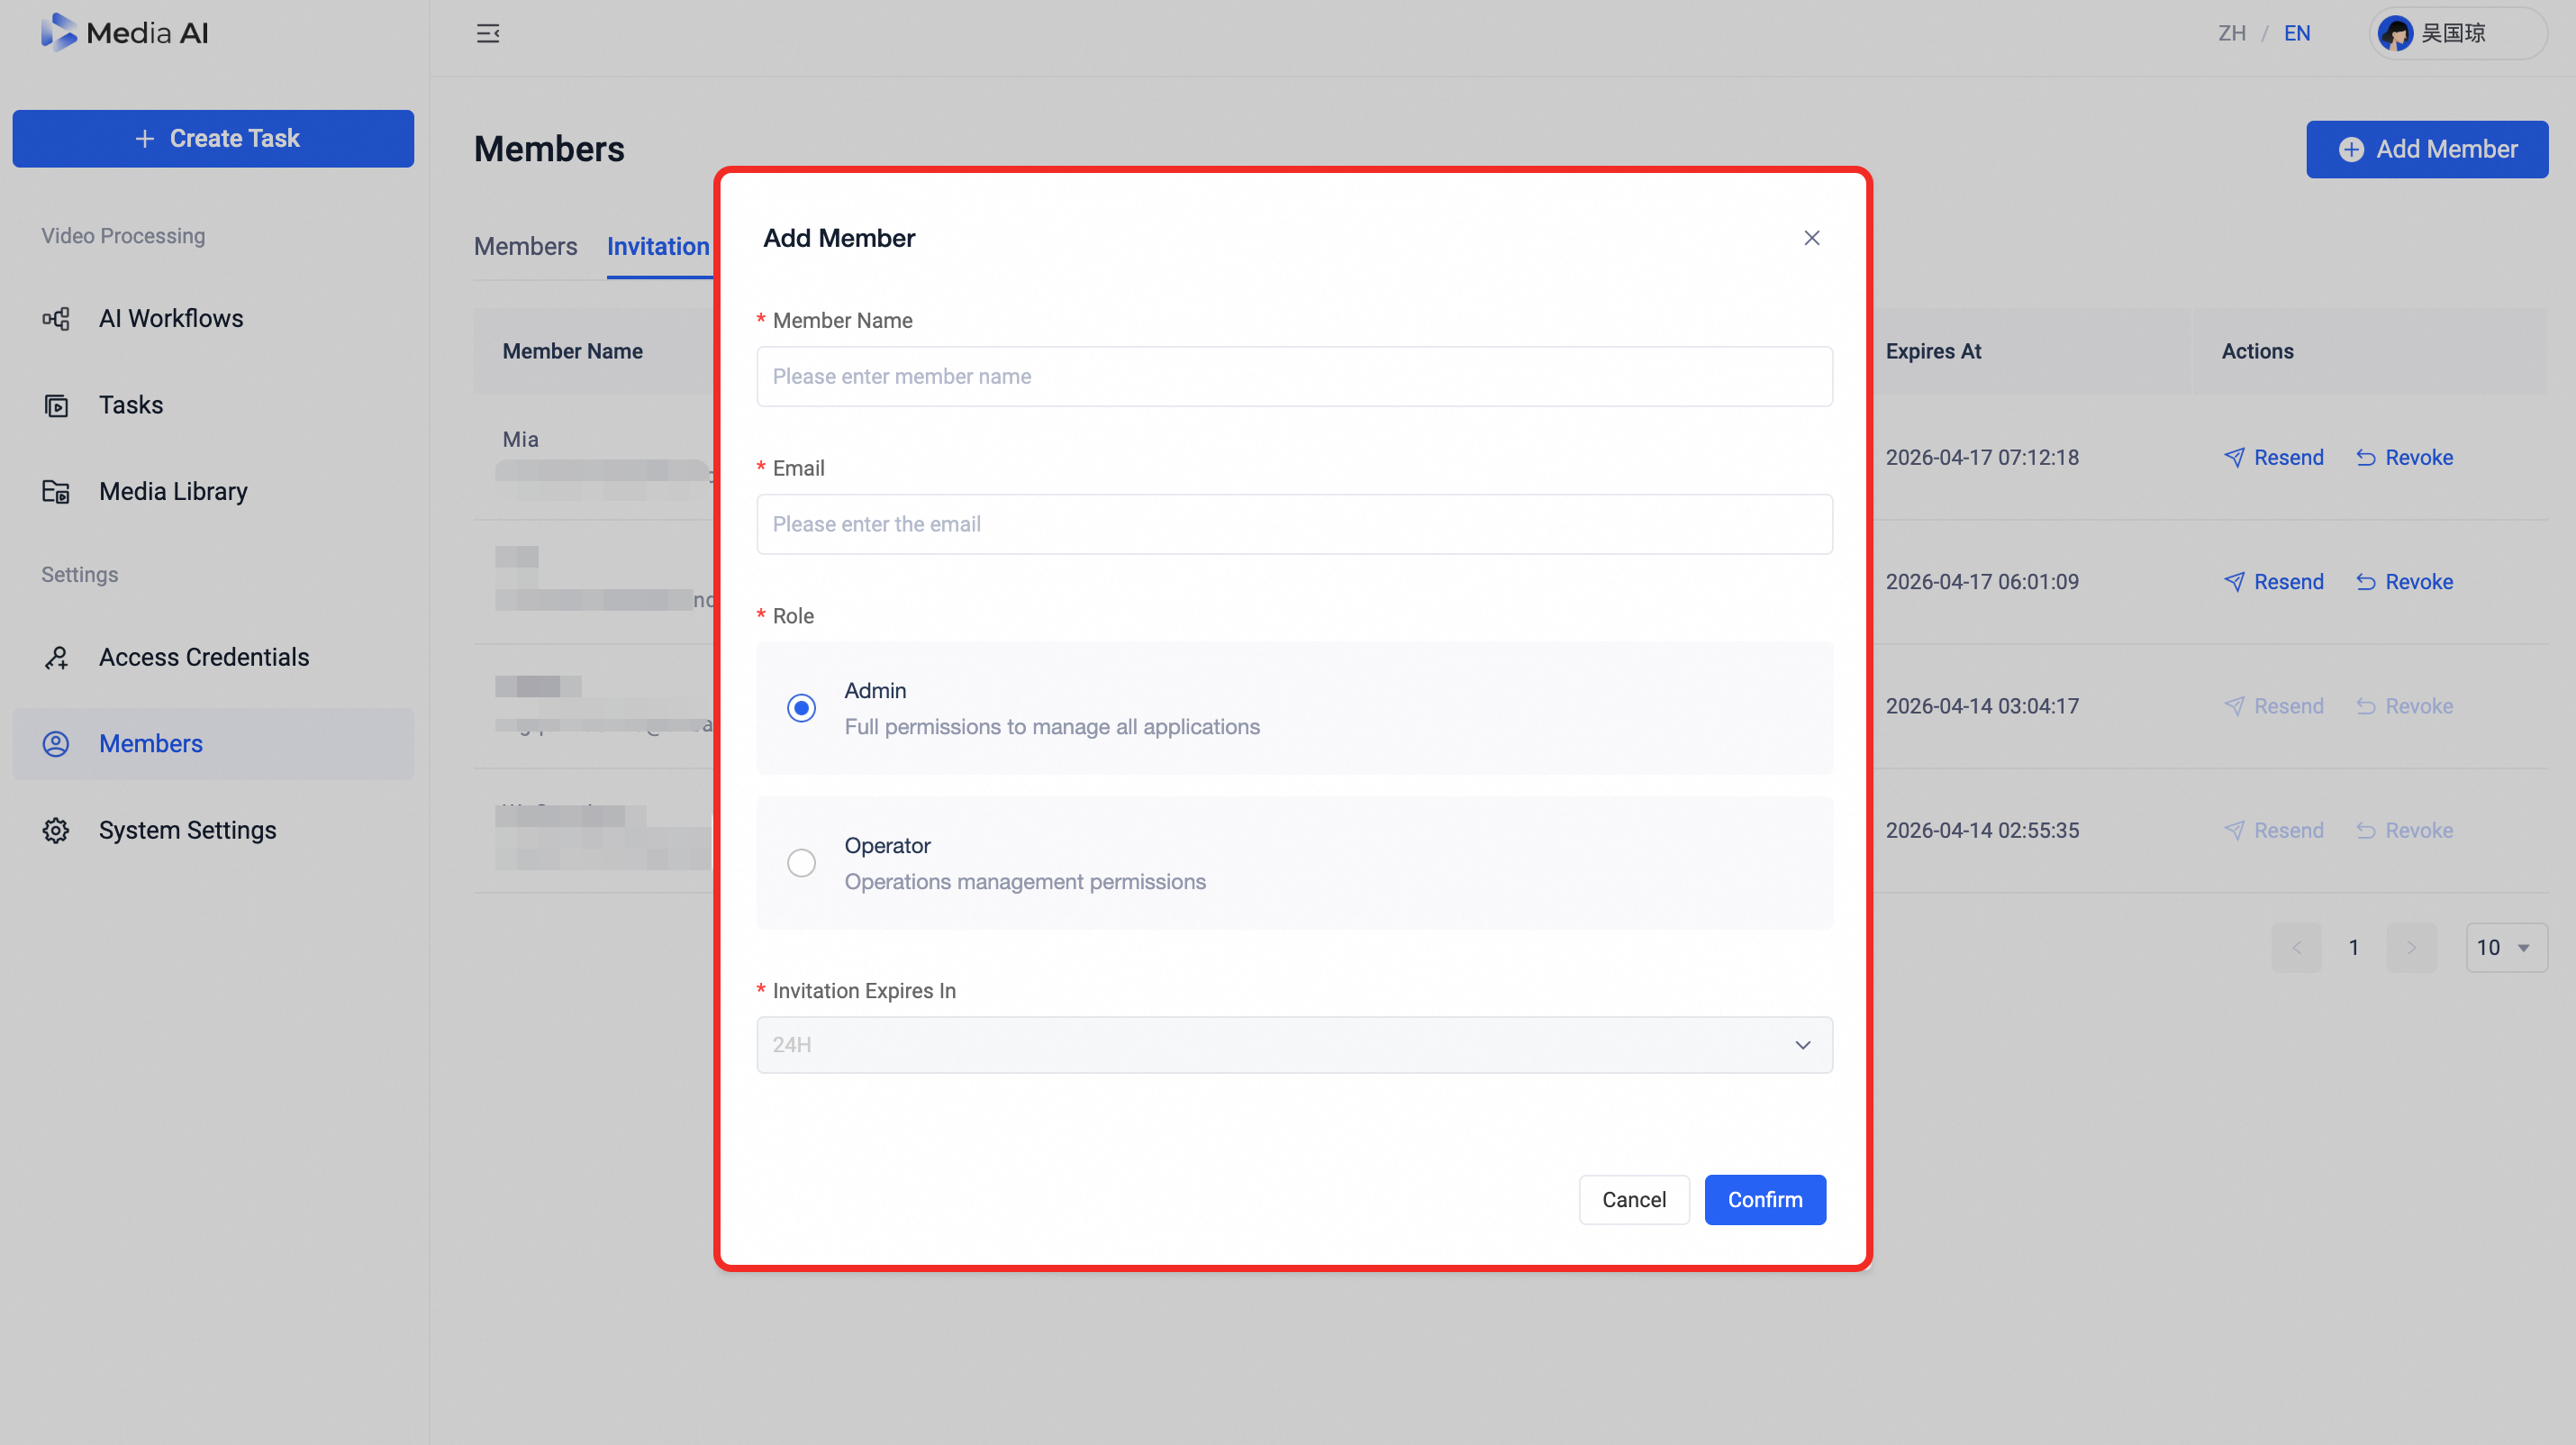
Send an Invitation: The inviter selects 「Add Members」 in the member list, fills in the member's Name, Email, and Role, and then clicks 「OK」.
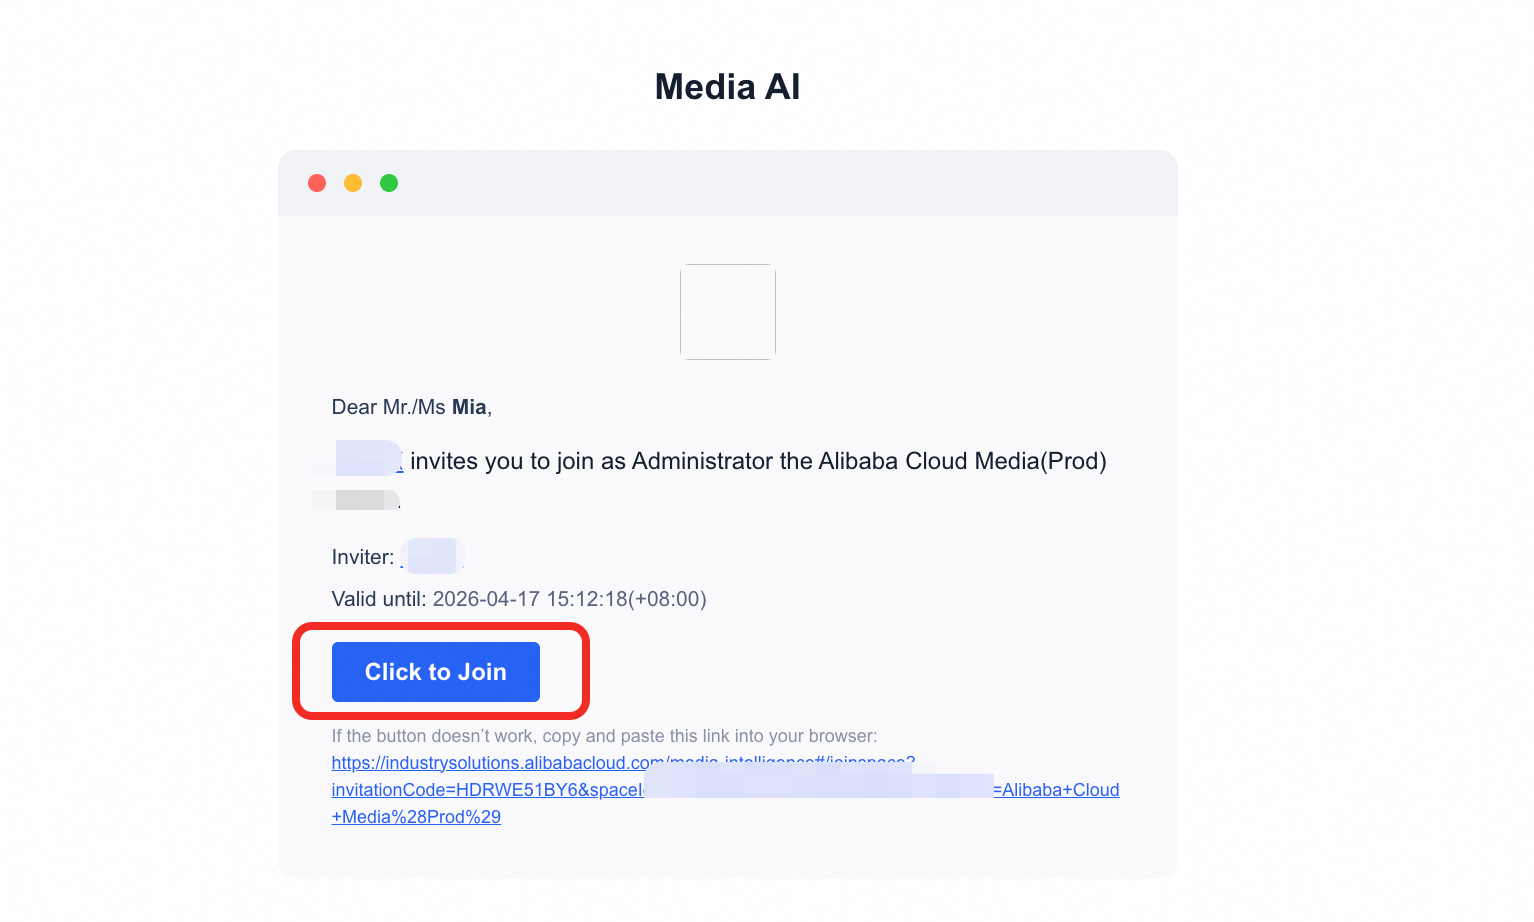
Accept the Invitation: The invitee will receive an email. Click the 「Click to Join」 link in the email, confirm the information, and then click 「Join Now」 to gain access to the Media AI. If the invitee is using the platform for the first time, please complete the registration and login process first.
The purchaser can register and log in directly. Other members must be invited:
Invite: In Members, click 「Add Member」, fill in name, email, role → 「Confirm」.
Accept: Invitee receives an email with a 「Join Now」 link. Click it, confirm details, then 「Join Immediately」. First-time users must register first.
Receiving an invitation does not mean automatic registration. If it's your first time using the platform, you must complete the sign-up process before joining.
The account used for registration and login must match the invited account. Each invitation email link can only be used by one email account.
Add Members Page
Invitation Email Received Page
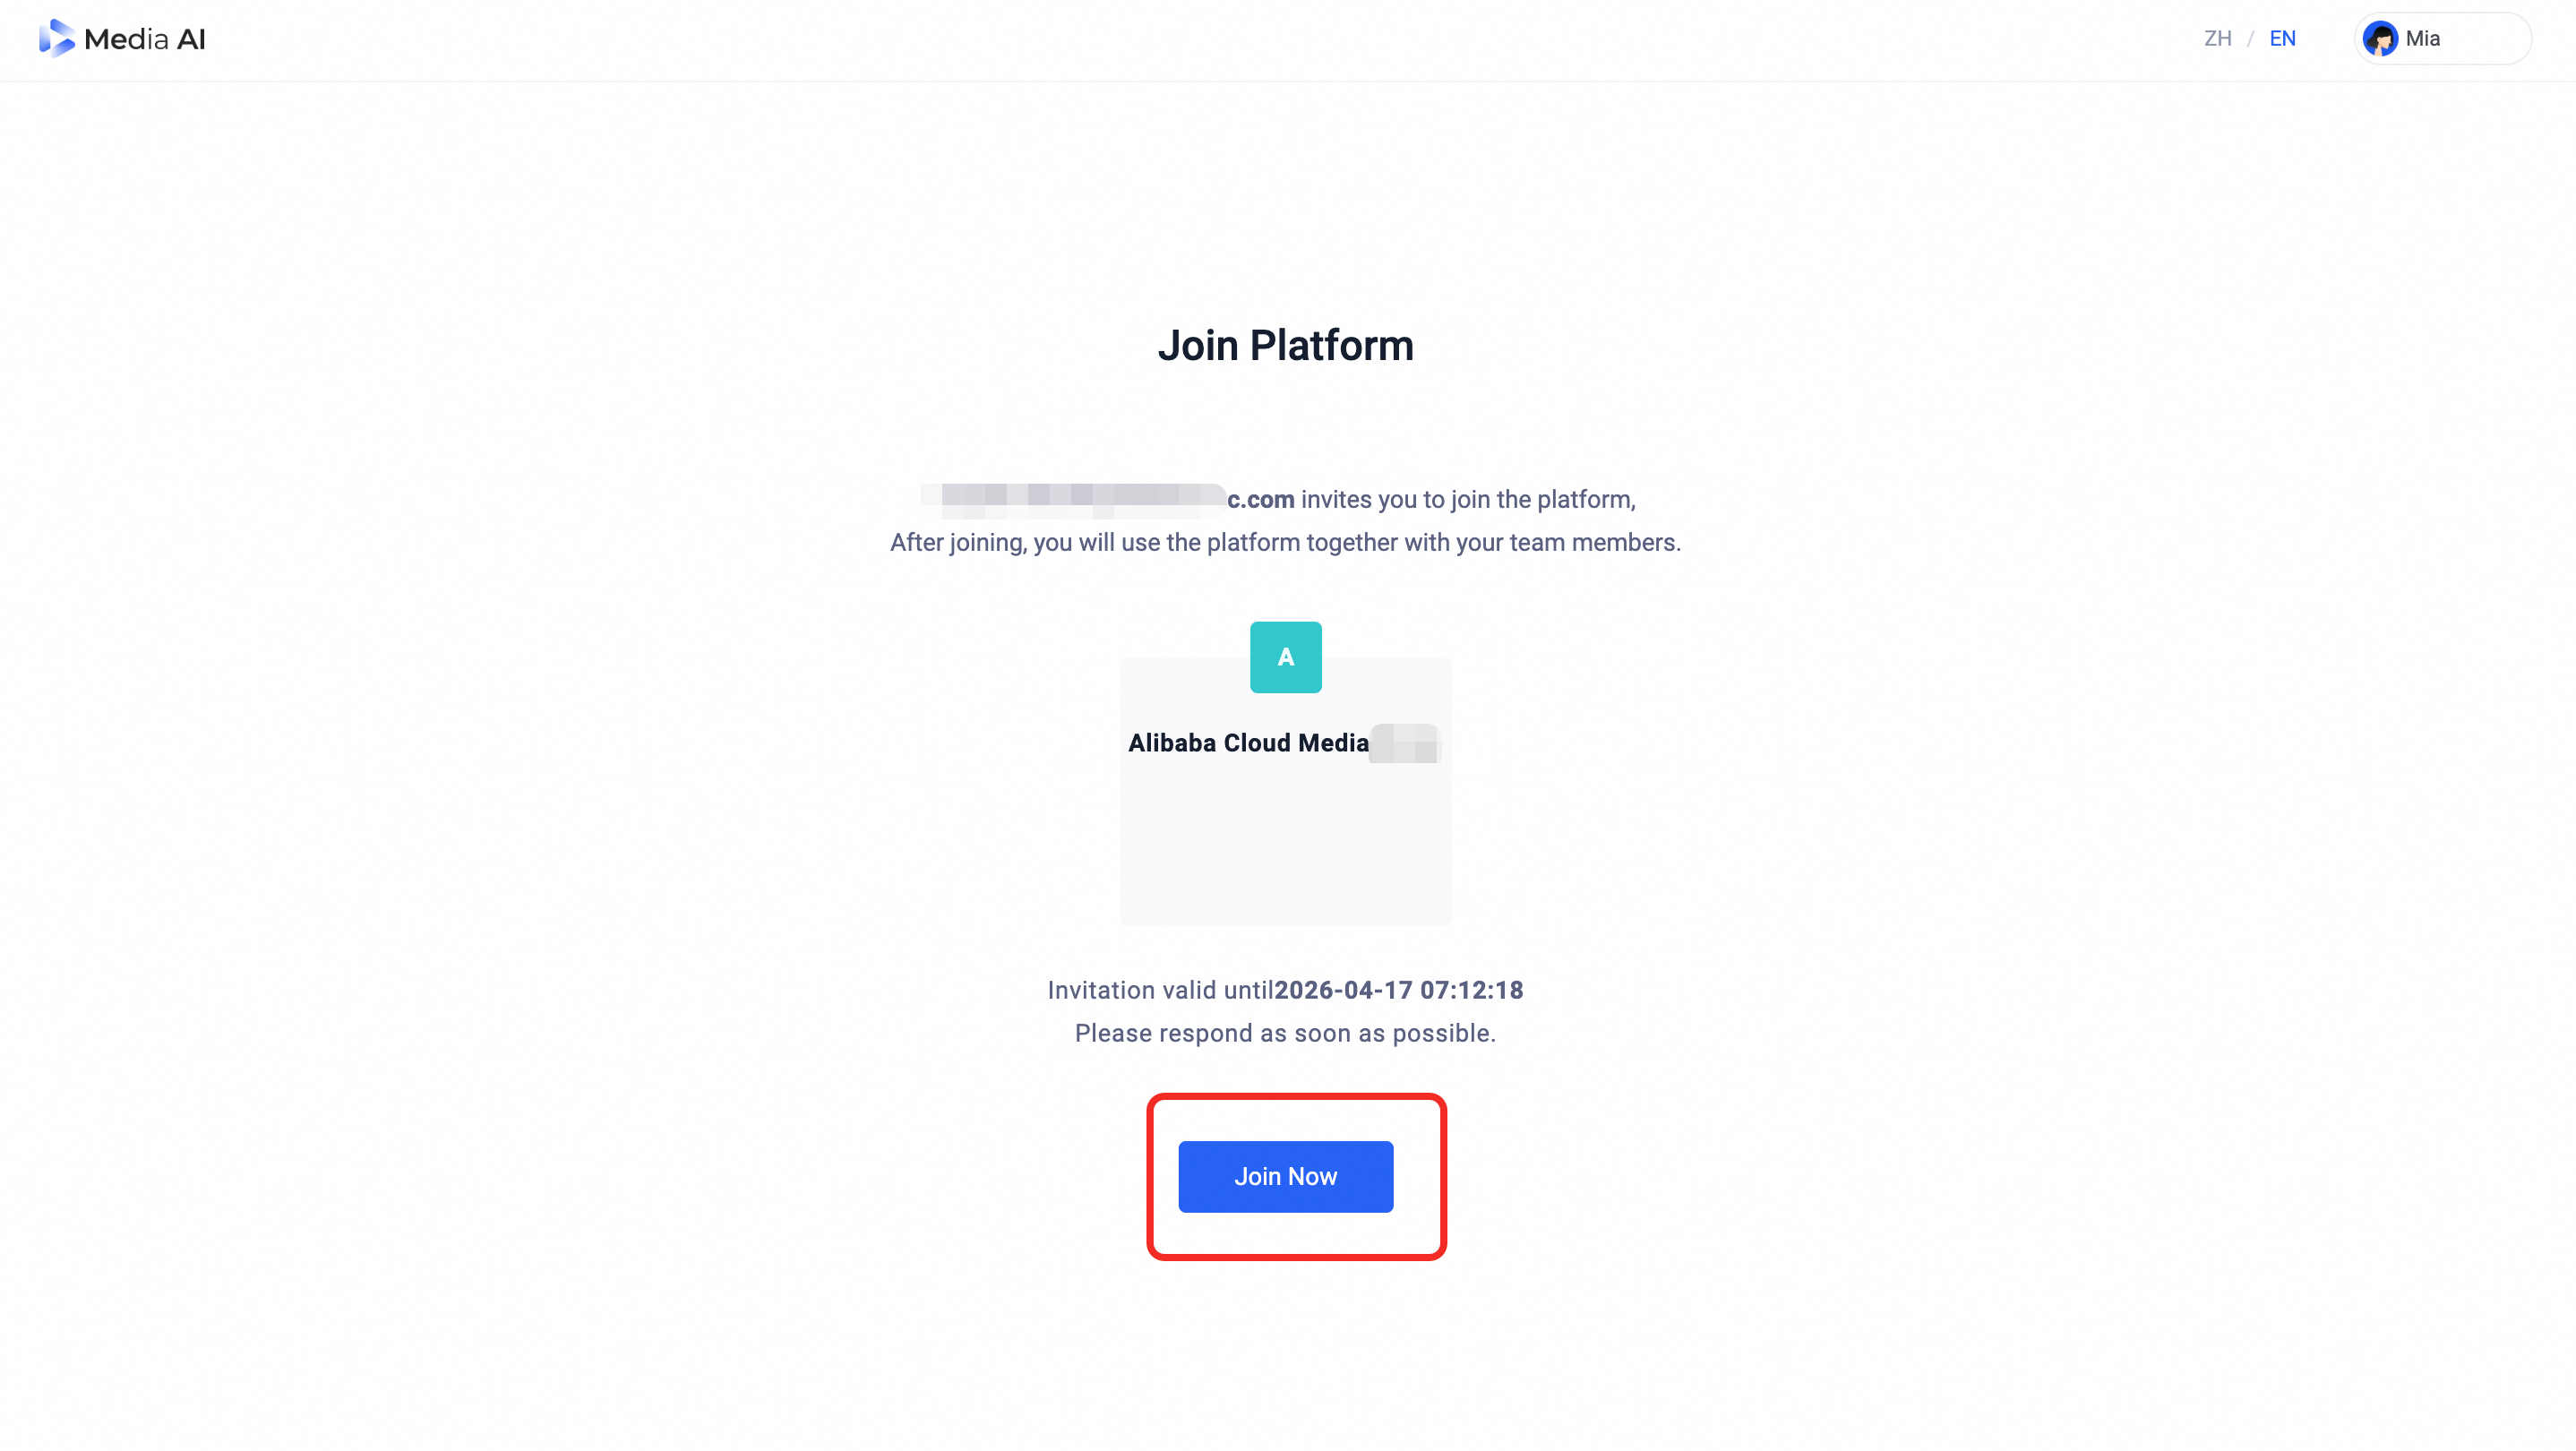
Join Platform Page
4. Create Workflow
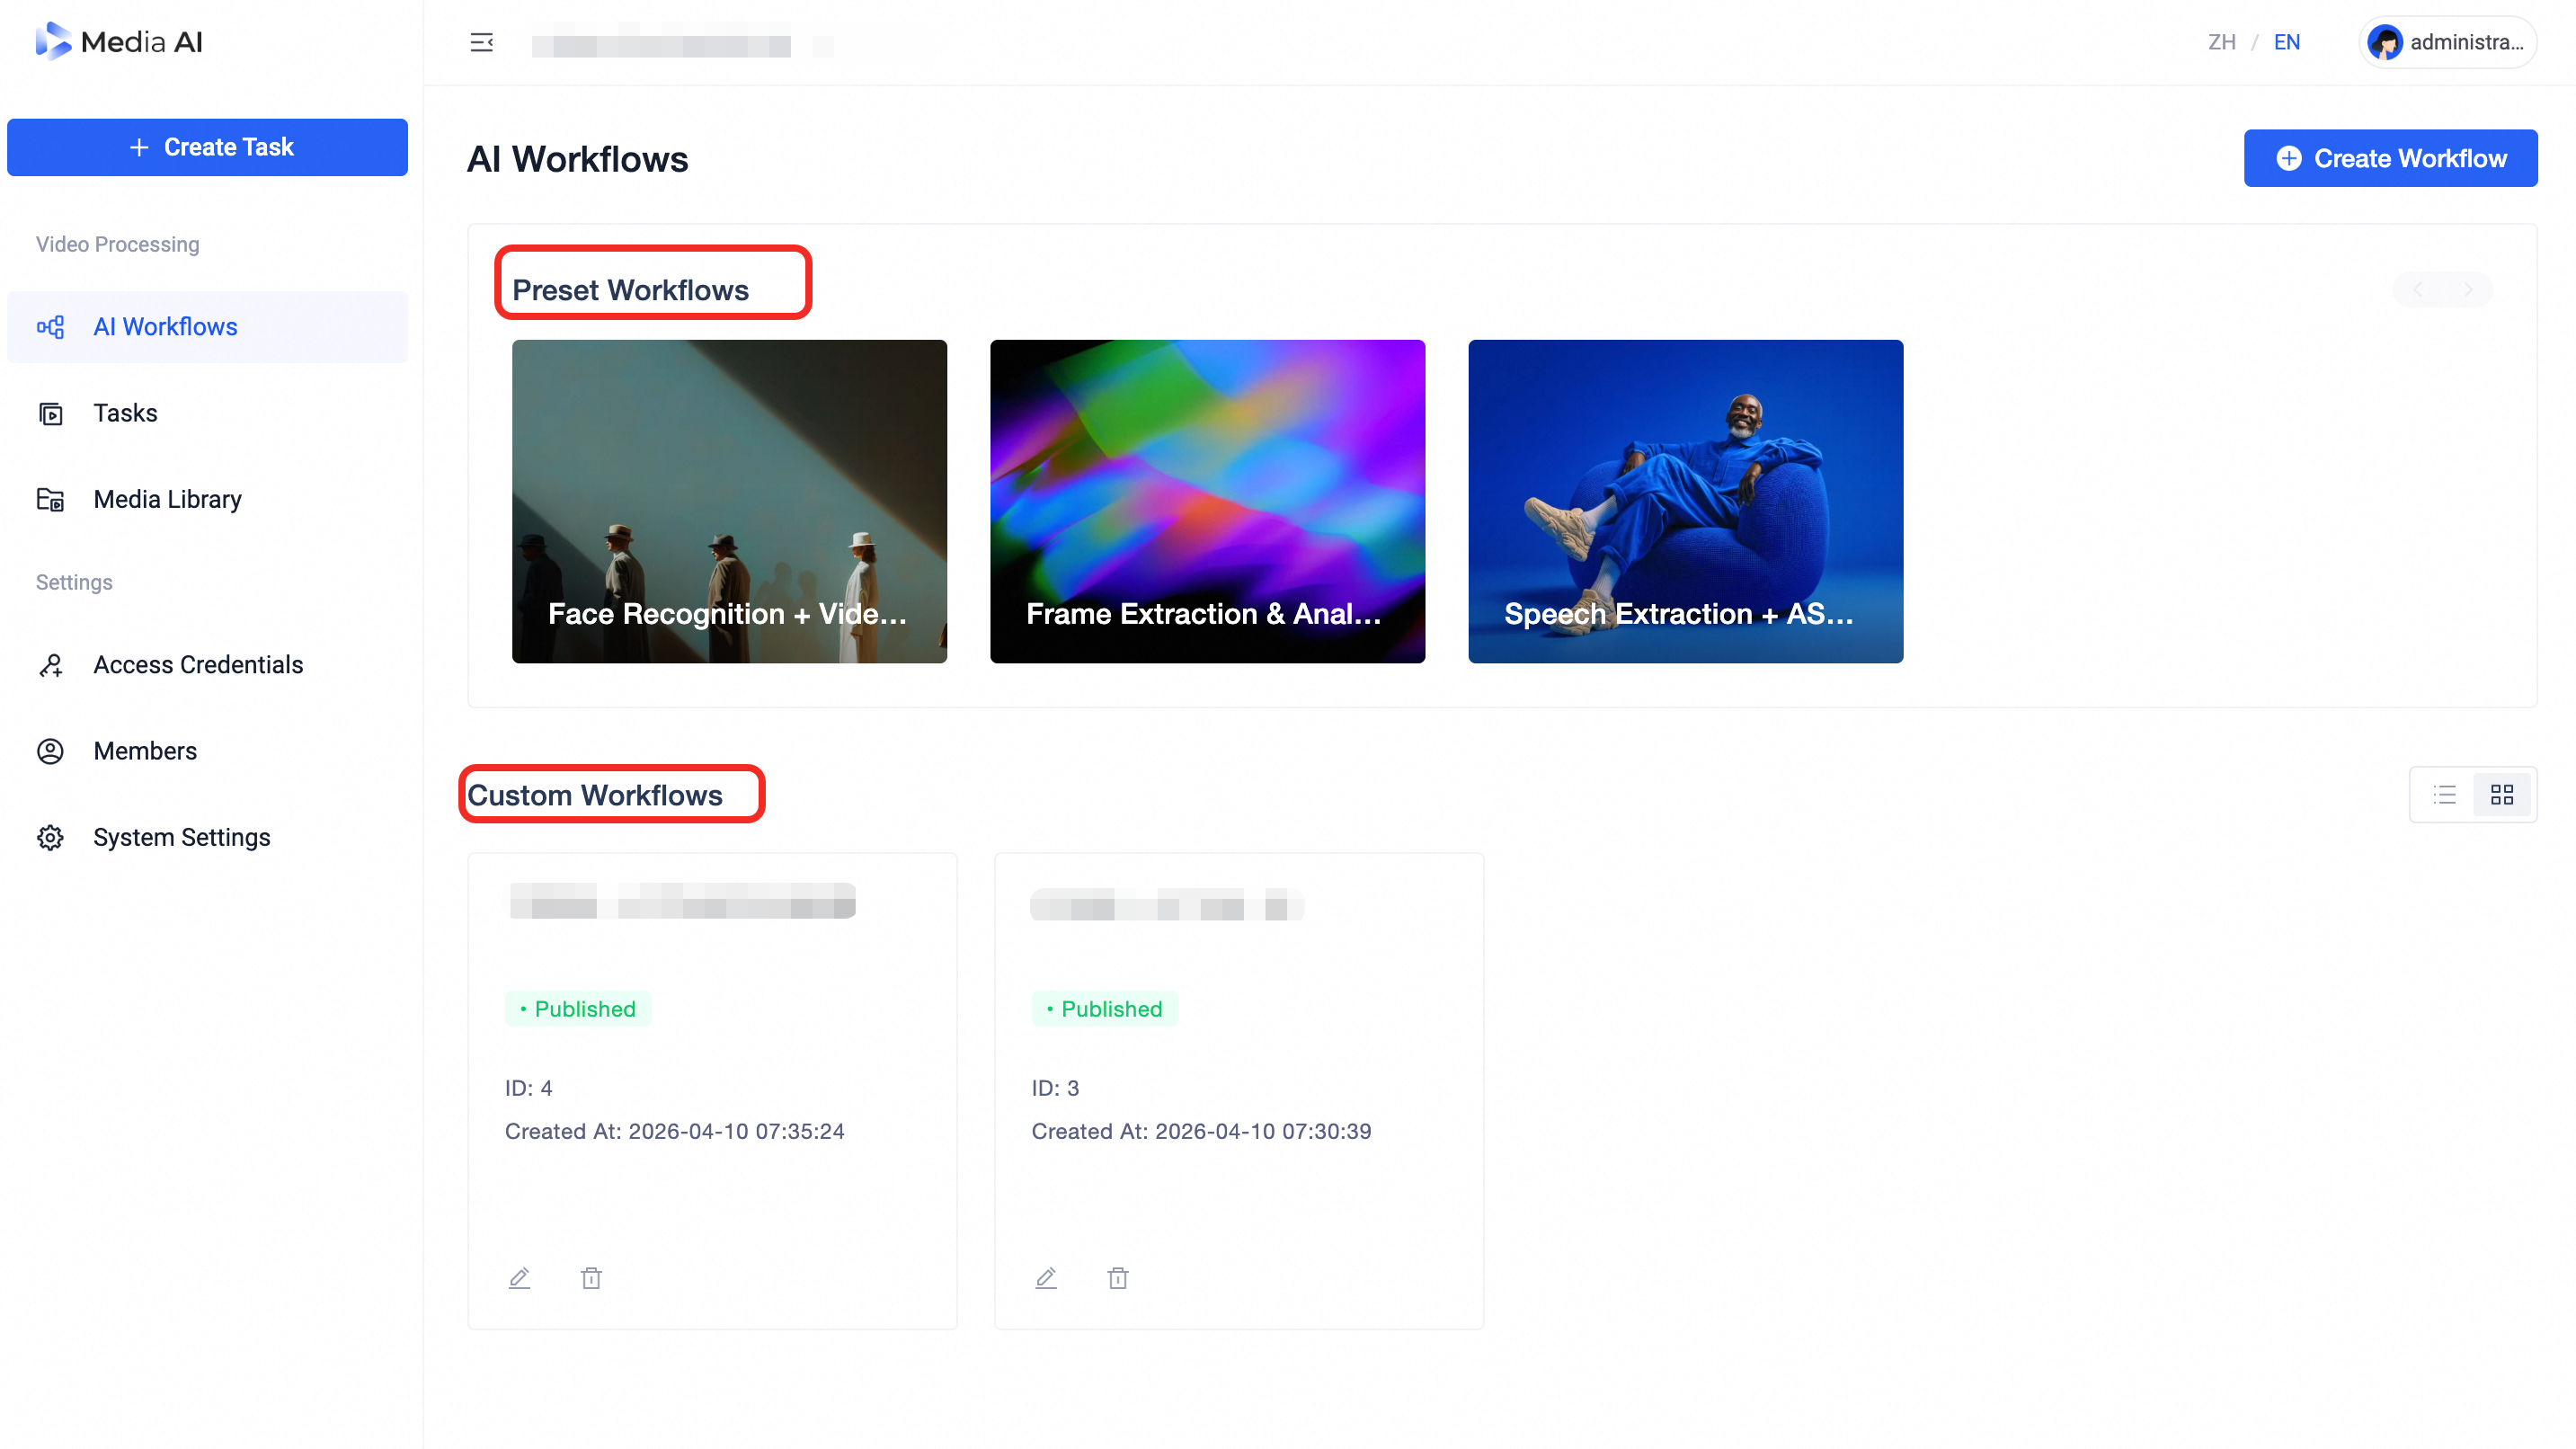
Go to AI Workflows You’ll see:
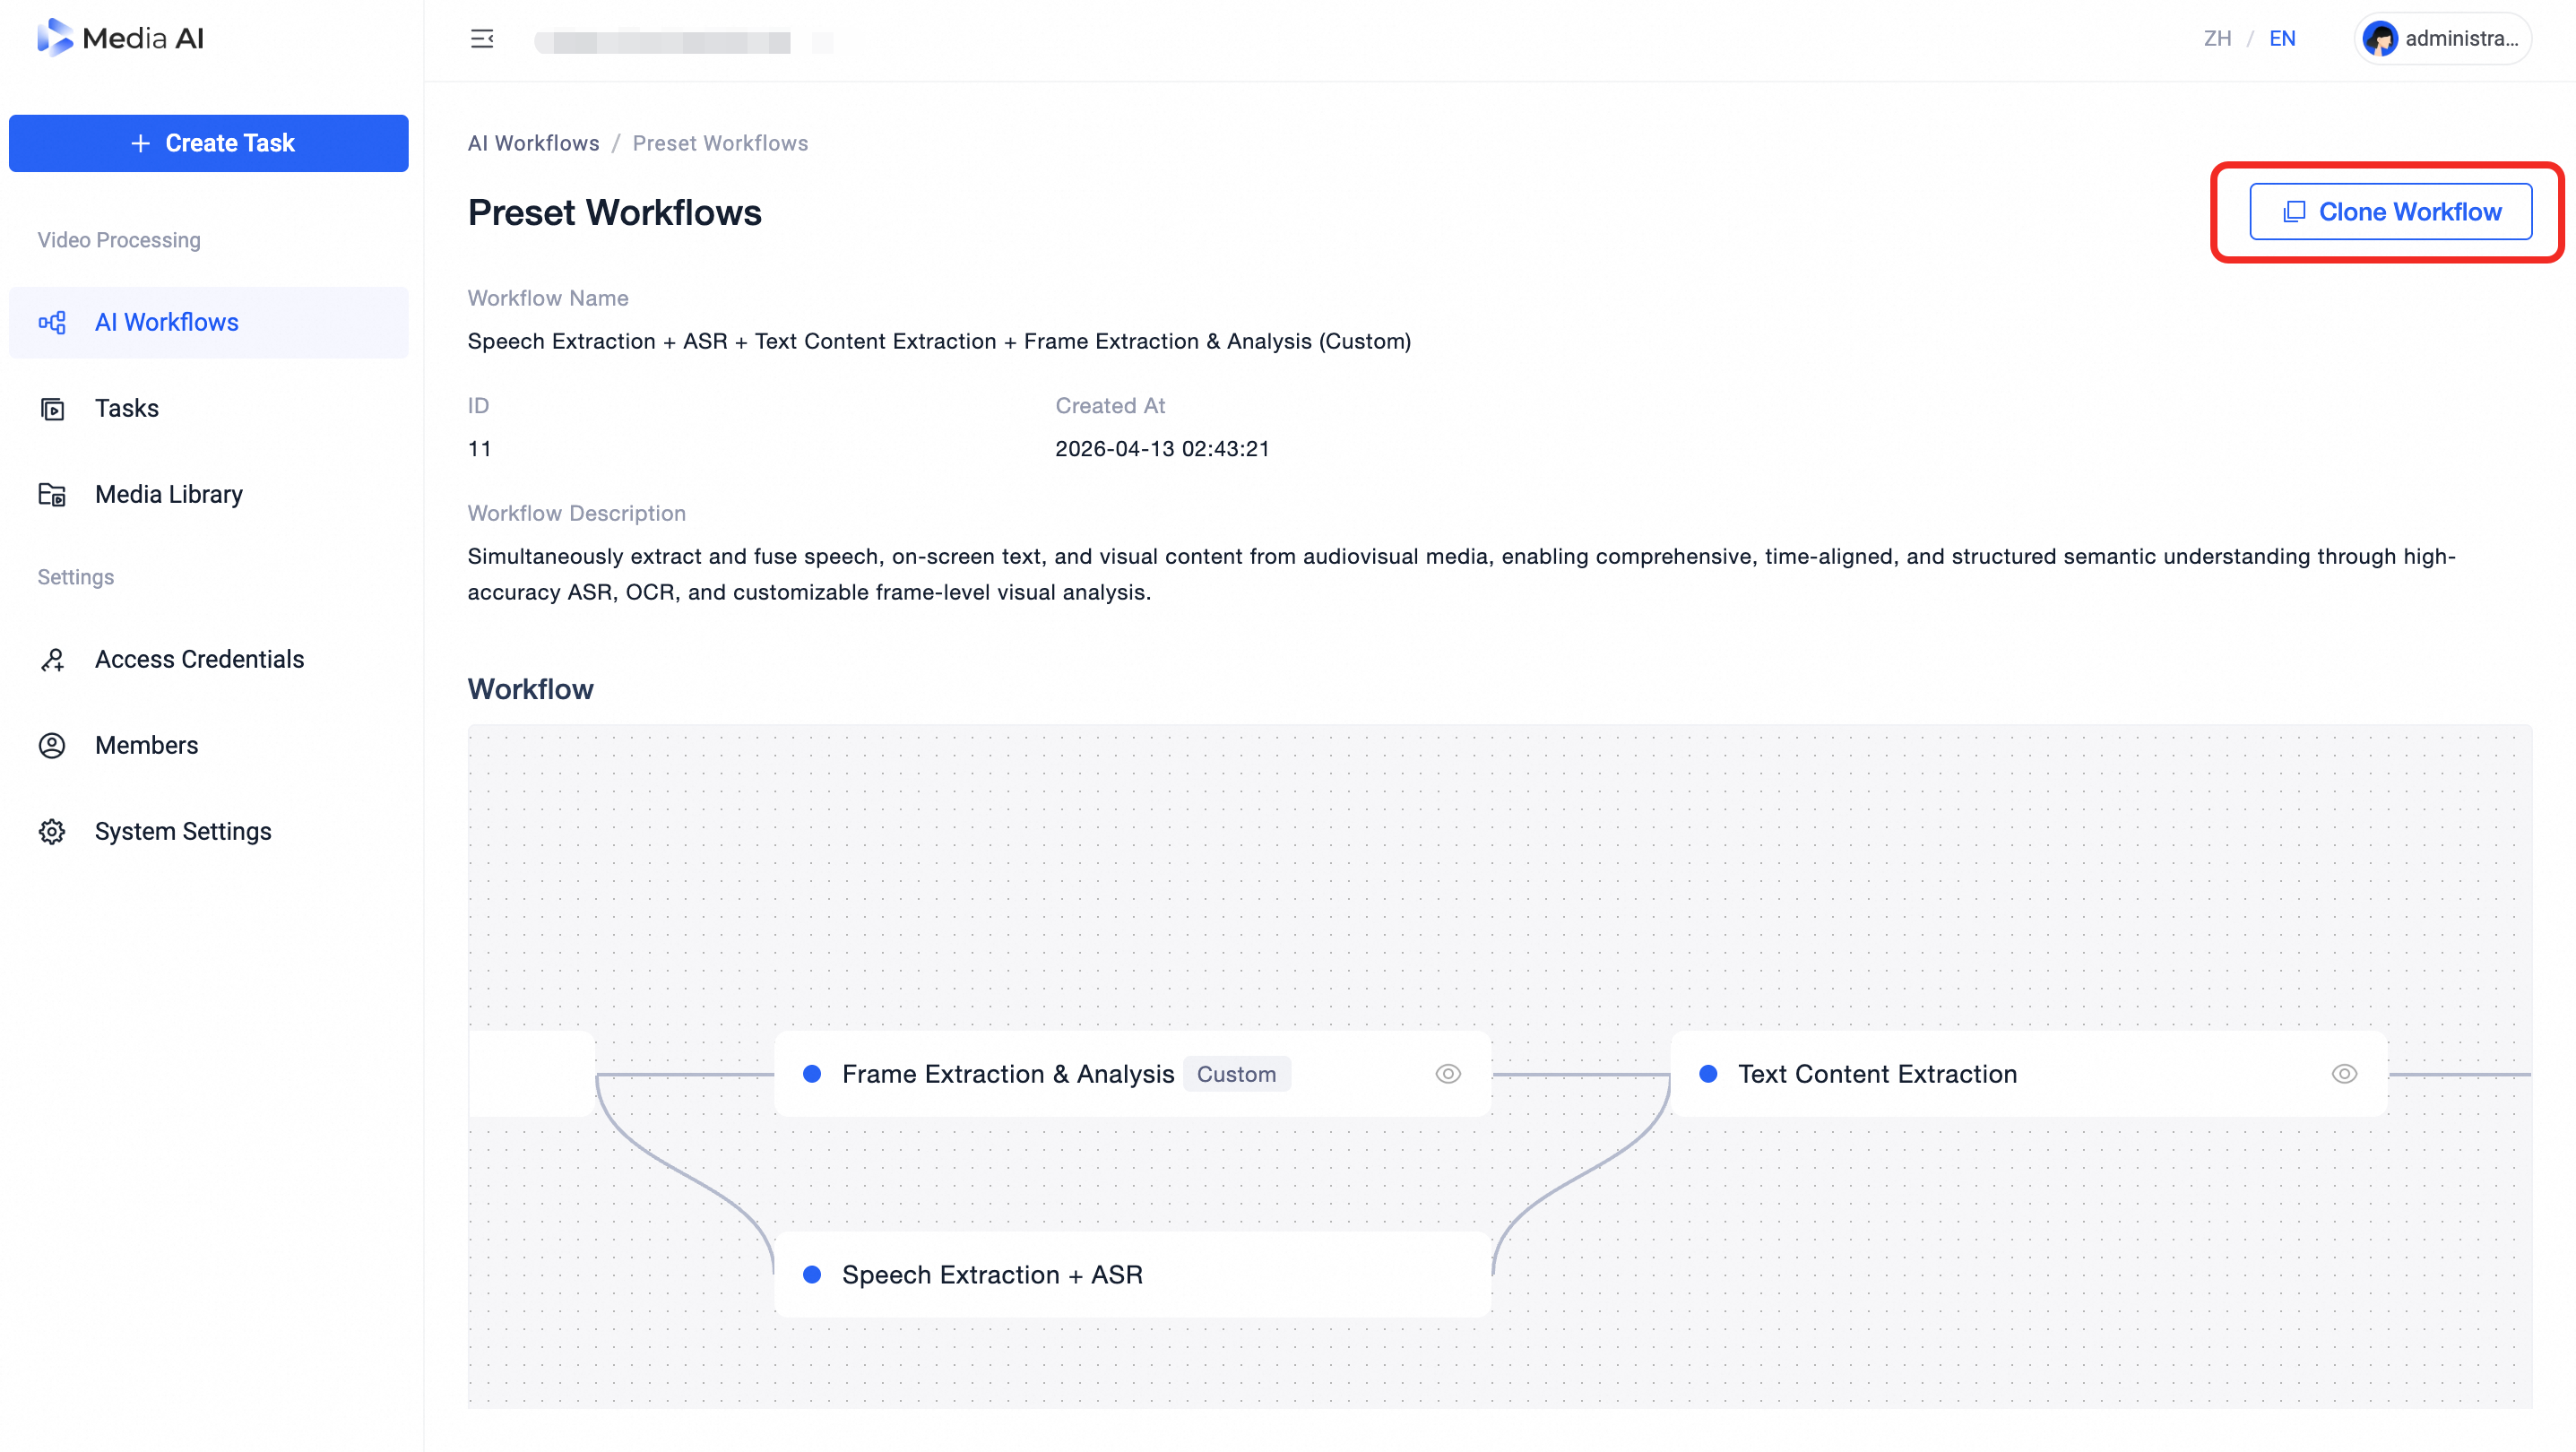
Preset Workflows : View and click 「Clone Workflow」 to reuse.
Custom Workflows: Click 「Create Workflow」 to build from scratch.
Steps:
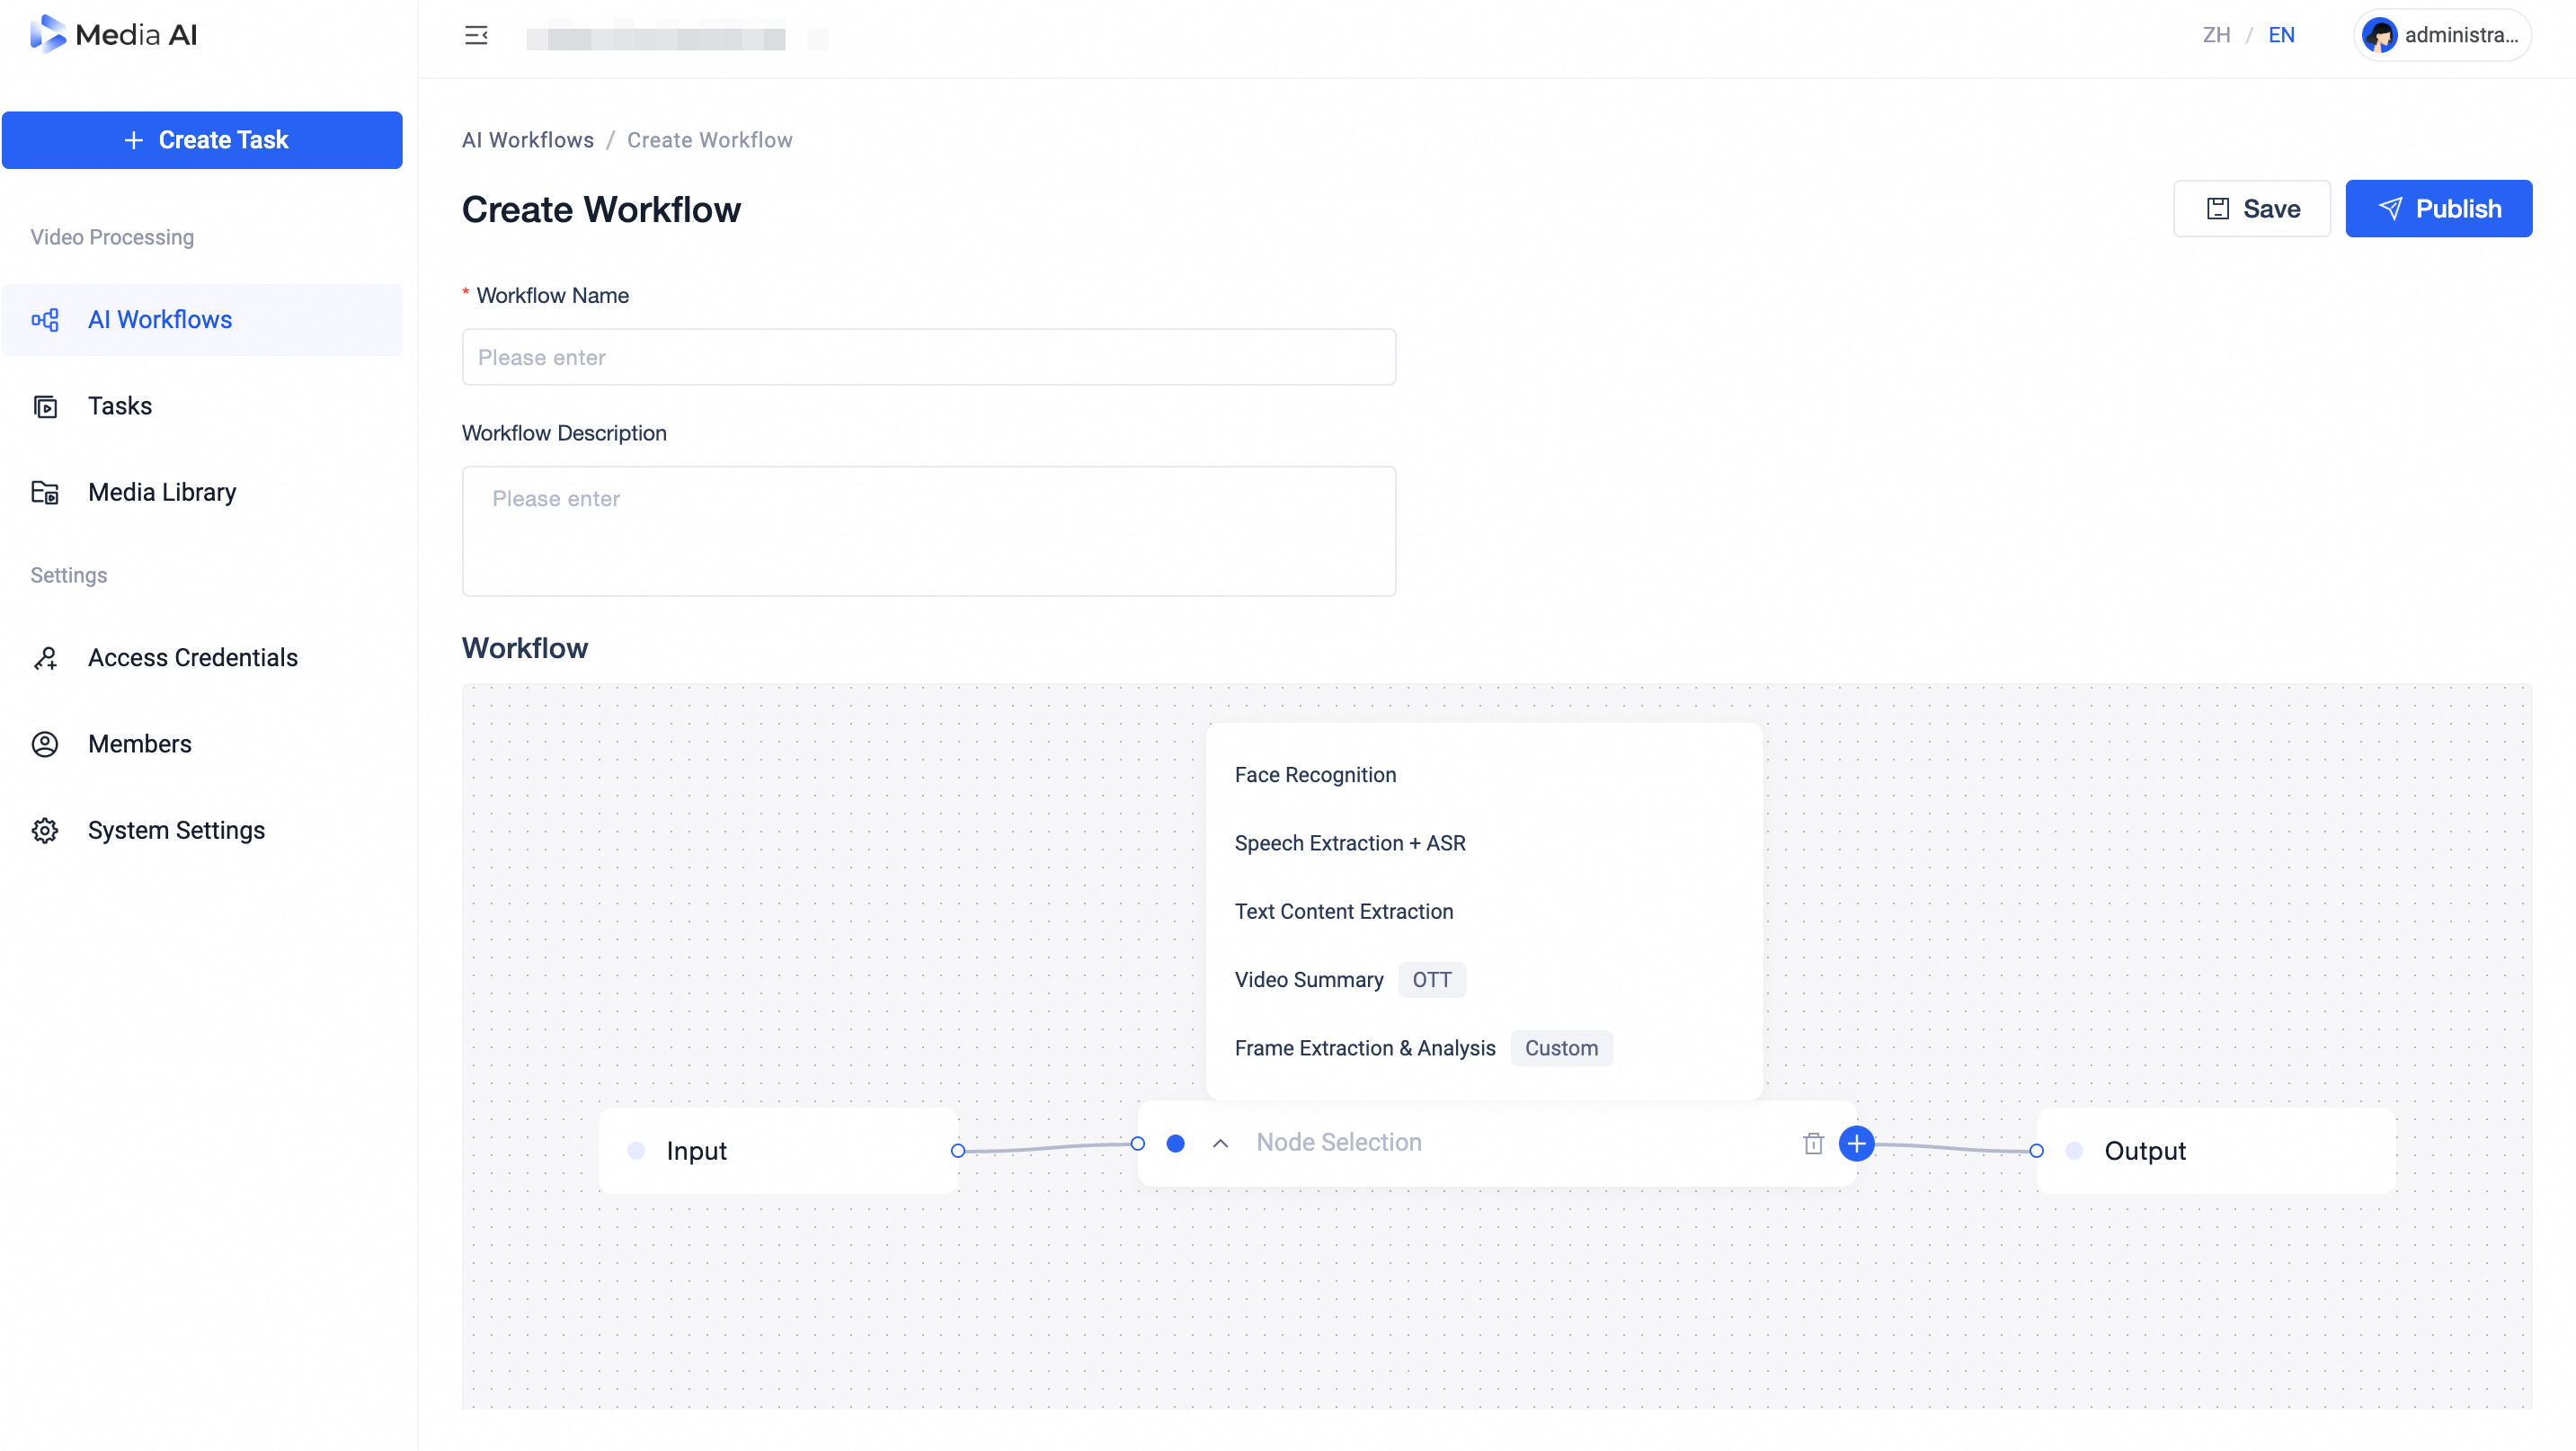
Enter Workflow Name and Description.
On the canvas:
Add nodes by selecting from the node library.
Configure node parameters (e.g., frame interval, similarity threshold, model, prompt).
(See Node Configuration Guide)
Click 「Save」 → workflow appears in Custom Workflows.
Click 「Publish」 → workflow becomes available in 「Create Task」.
 AI Workflows page
Prest Workflows page
Create Workflow page
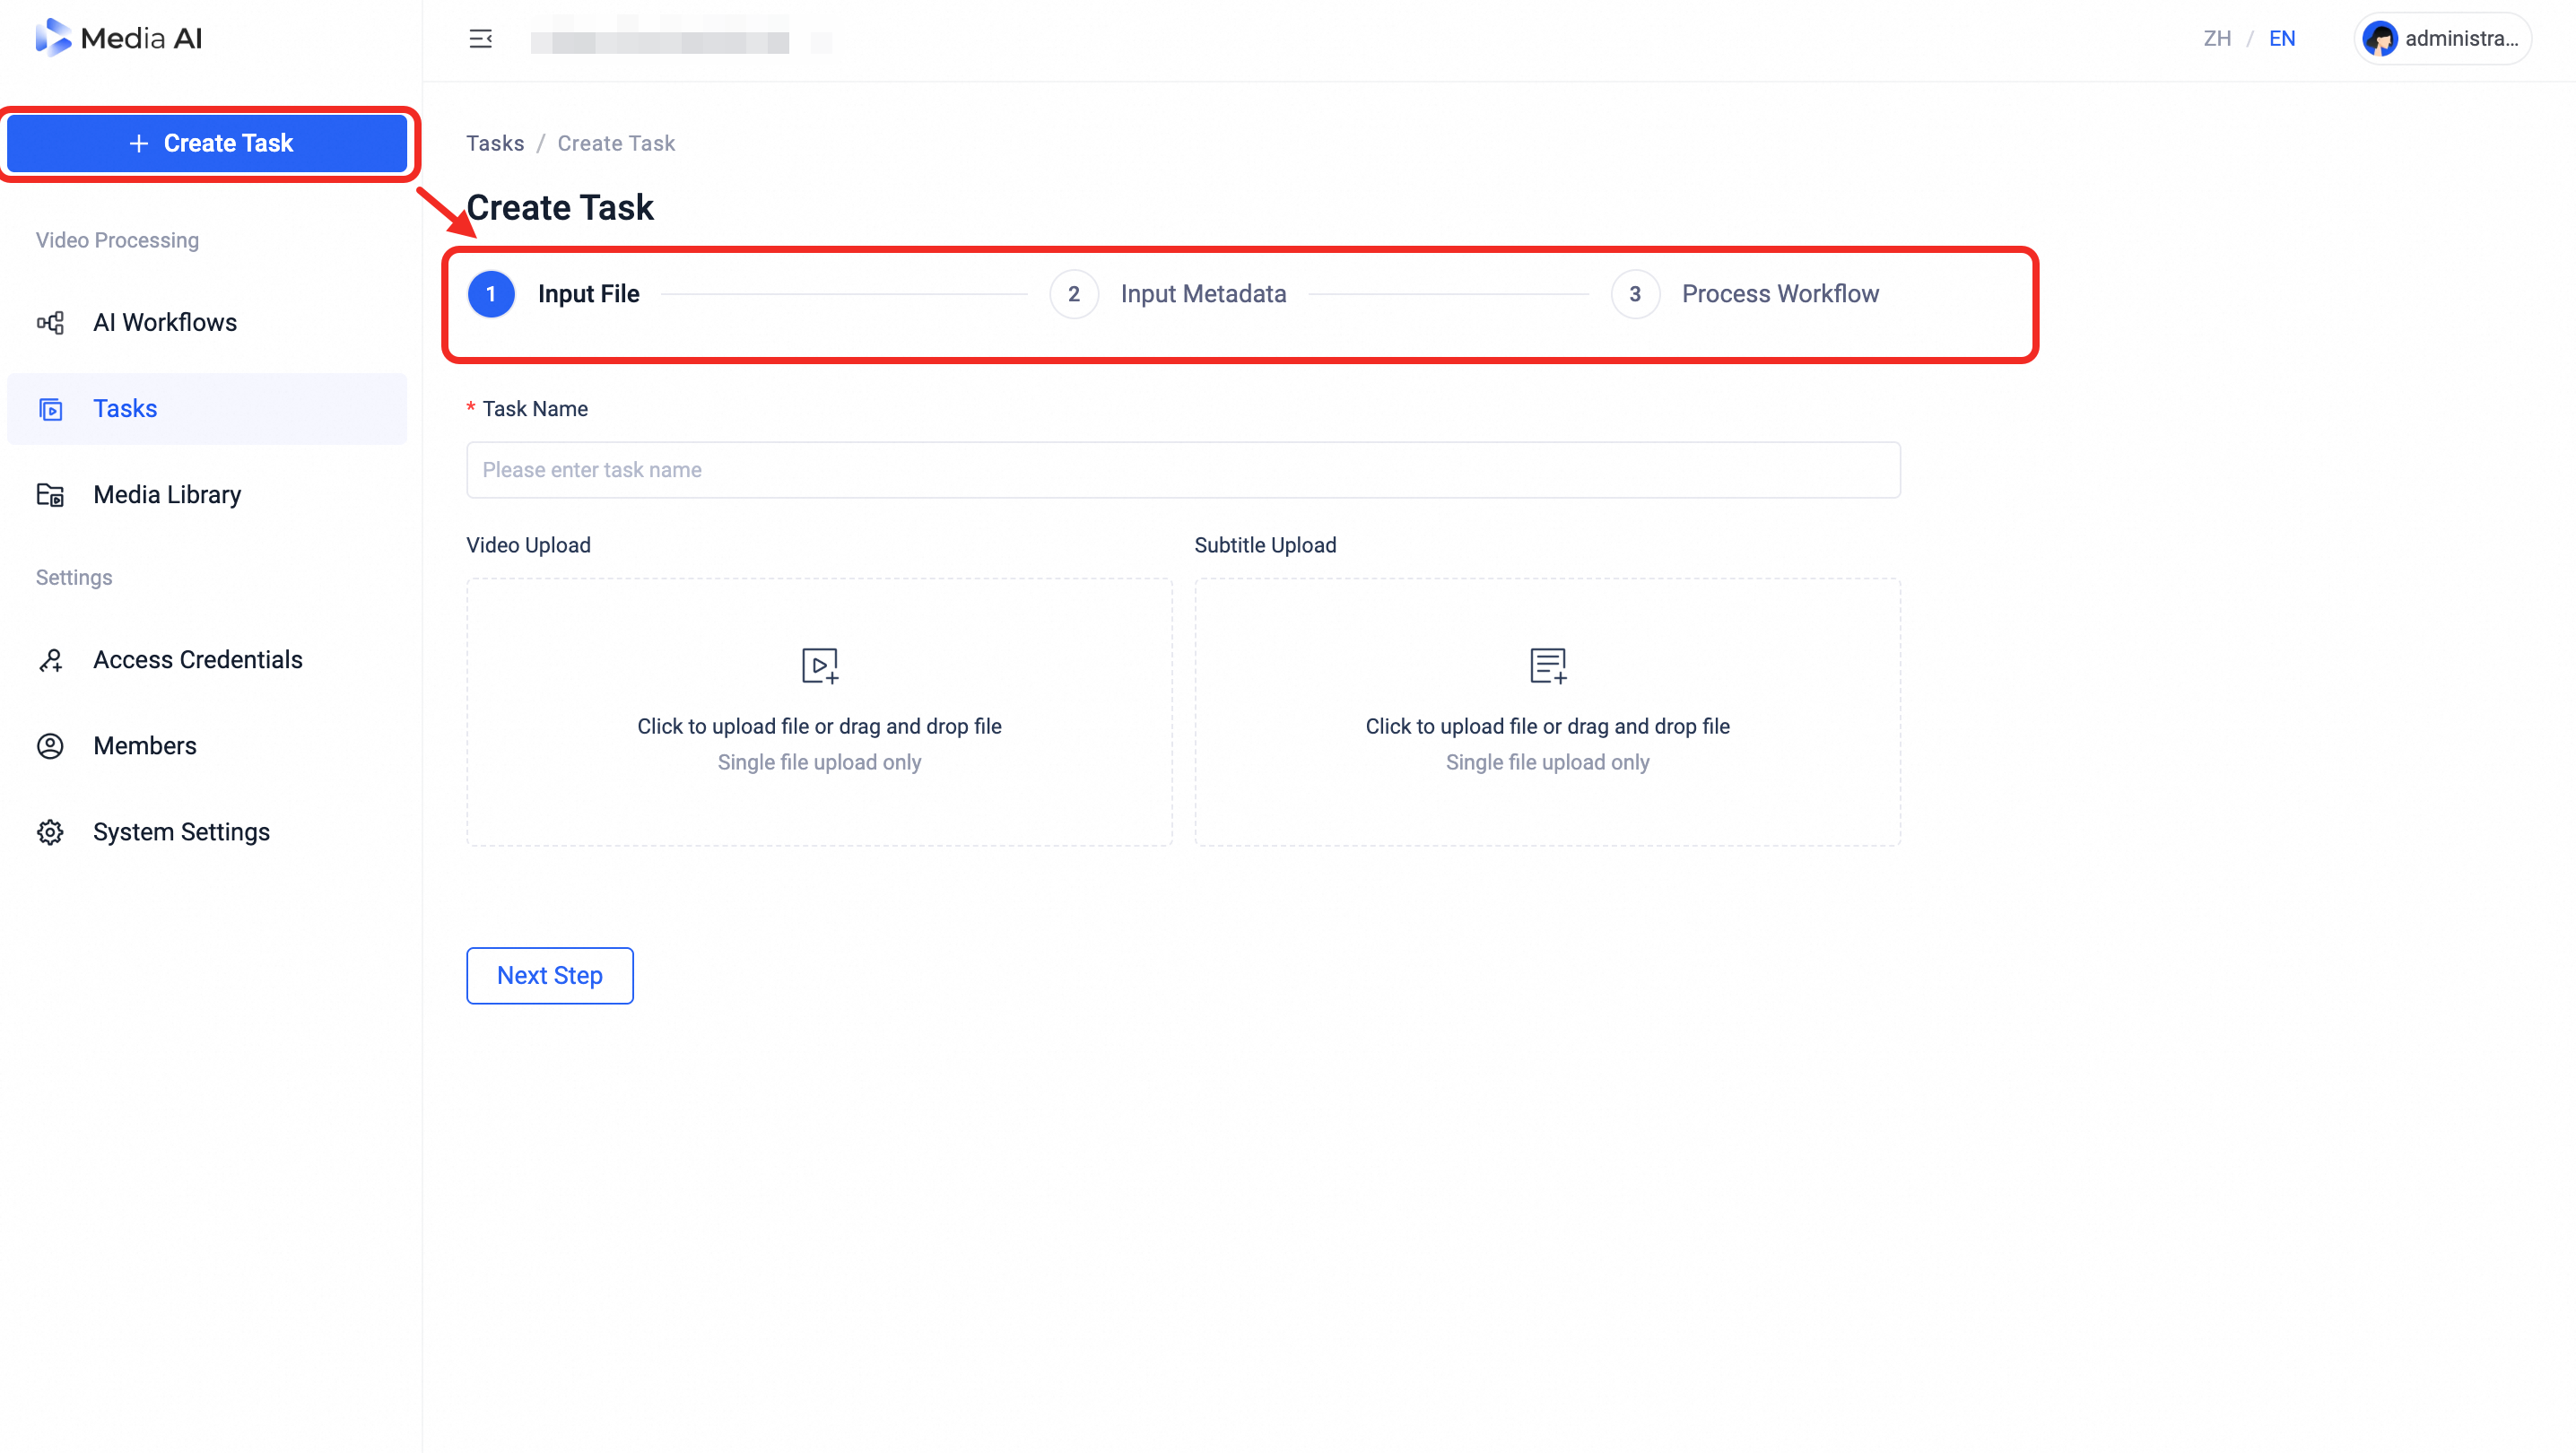
5. Create Task
Go to 「Create Task」 and complete:
1. Input Files
Task Name
Upload:
Video:
.mp4,.avi,.movSubtitles (optional):
.srt,.vtt
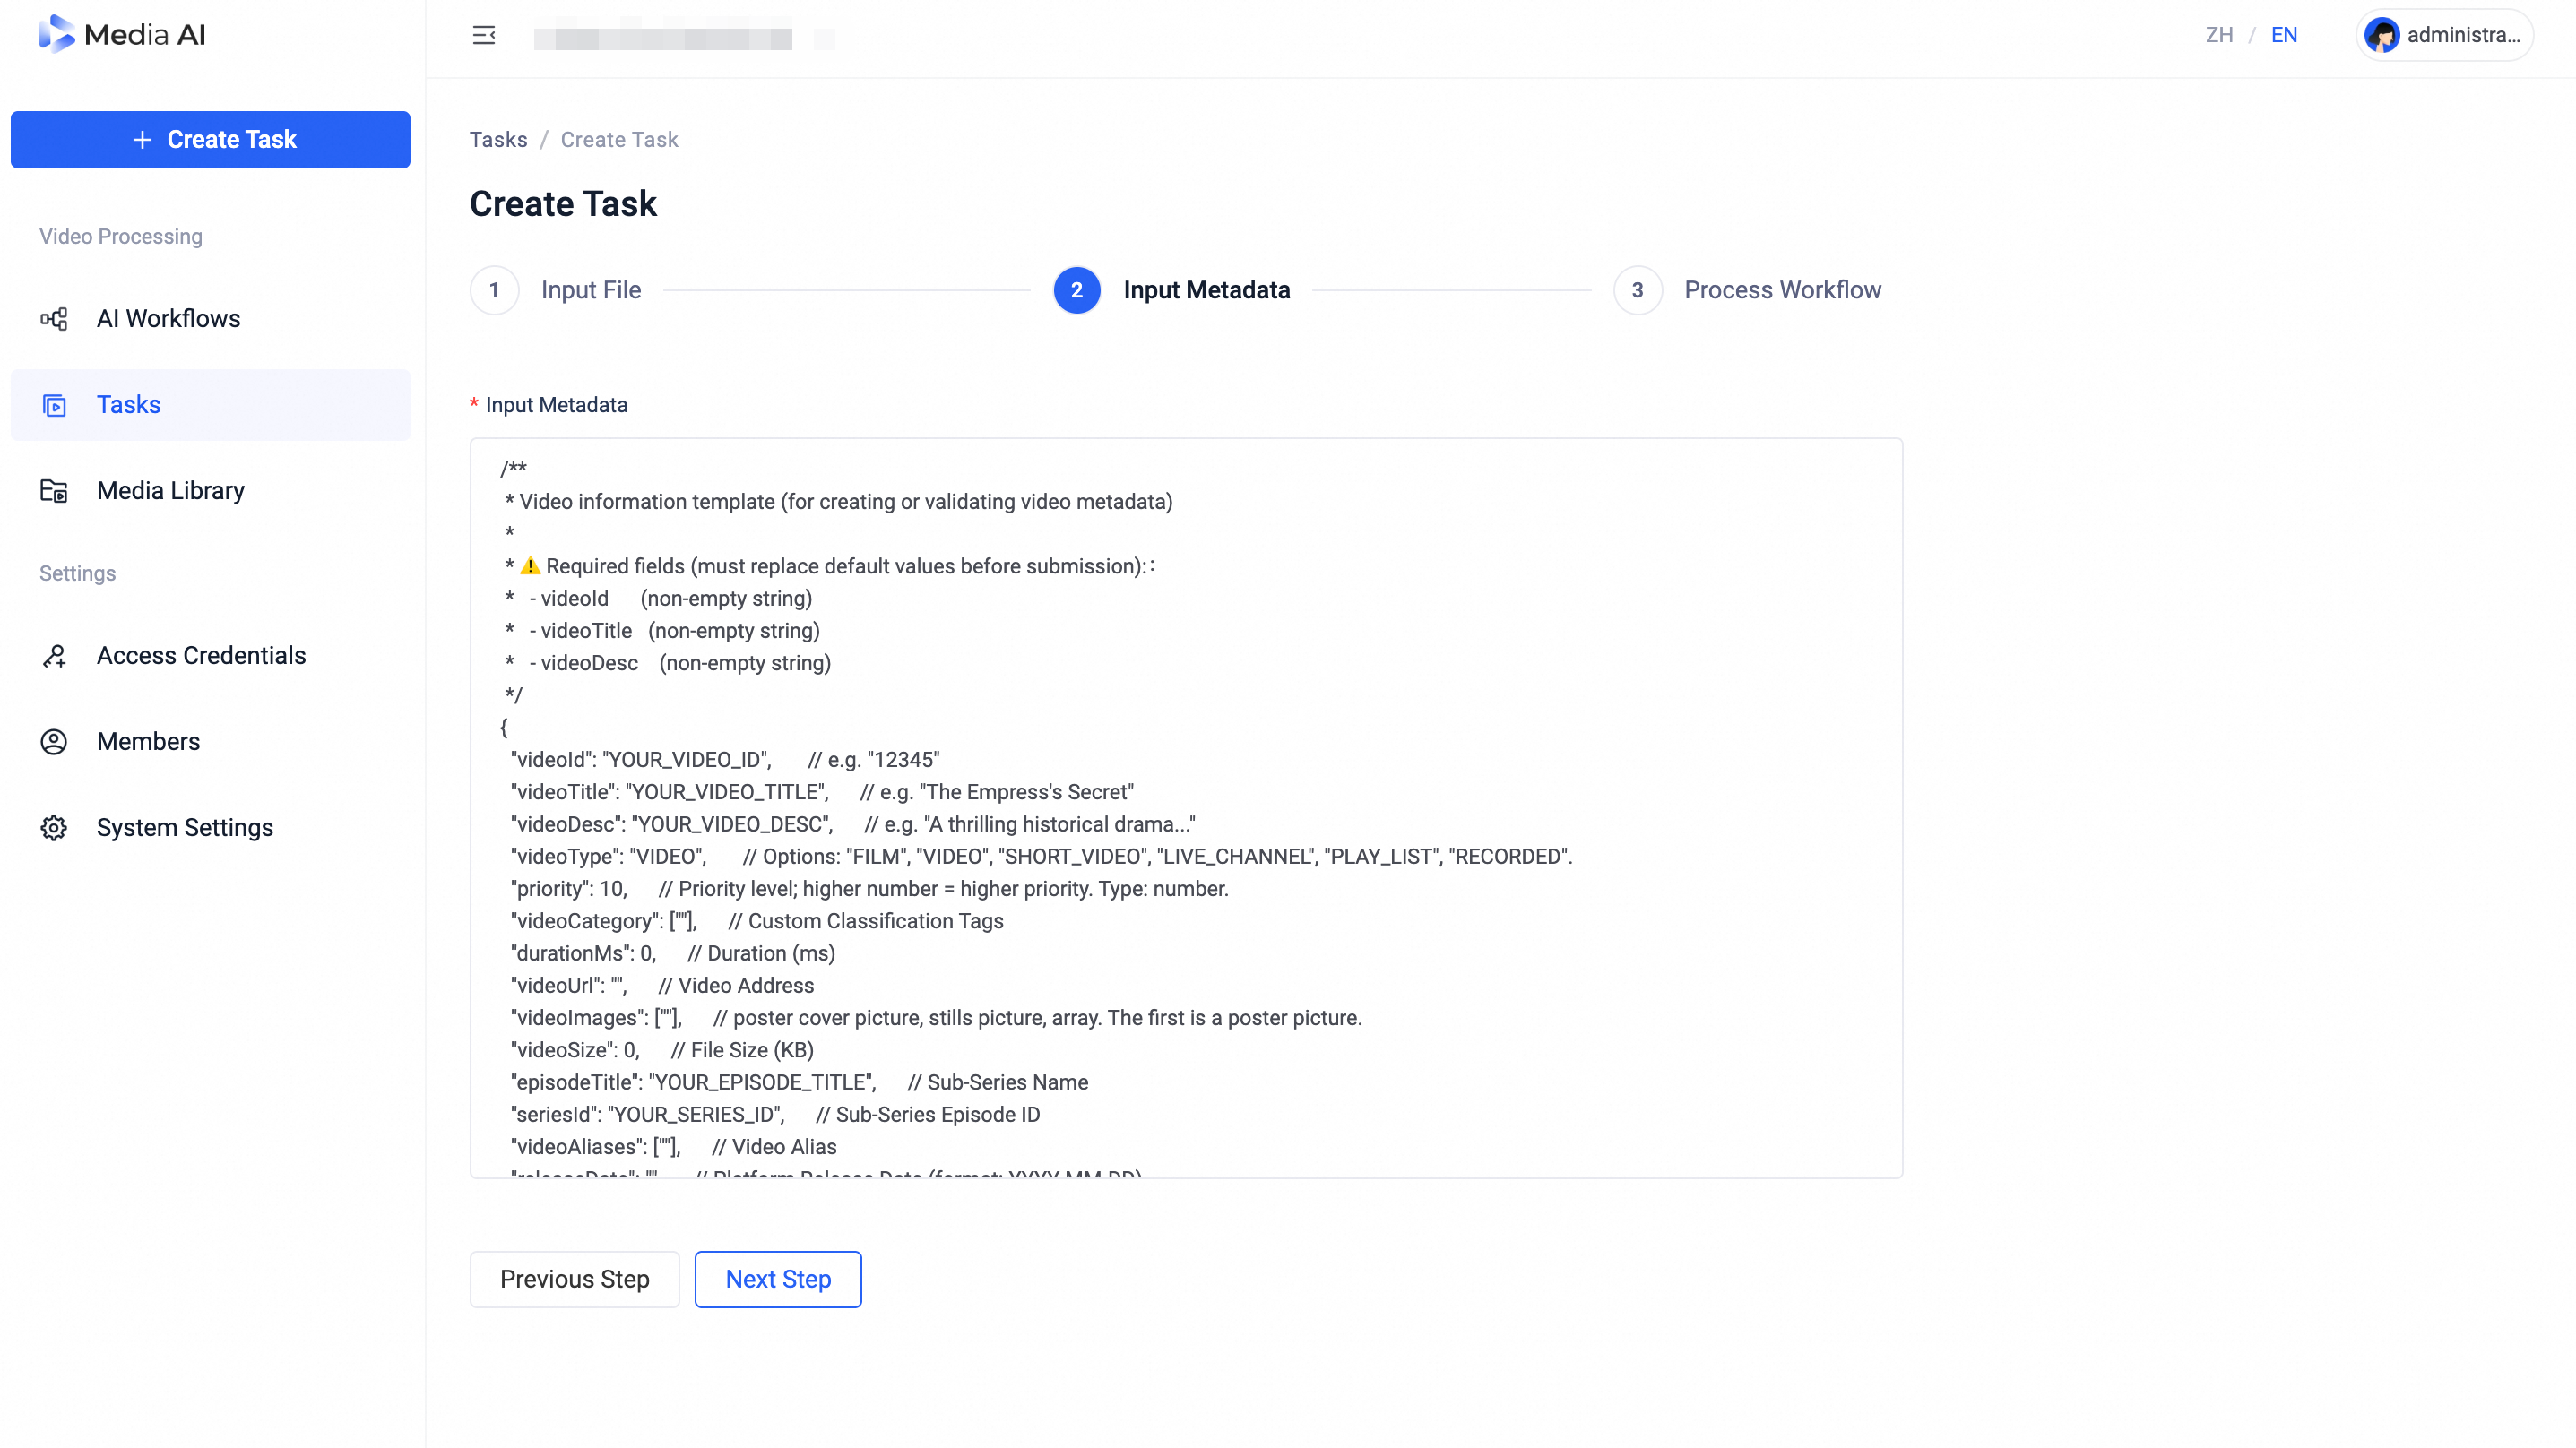
2. Input Metadata
Fill in the basic video information. The following fields are required:
videoId(unique video identifier)videoTitle(video title)videoDesc(video description)
Additional metadata fields can be added as needed for your business requirements.
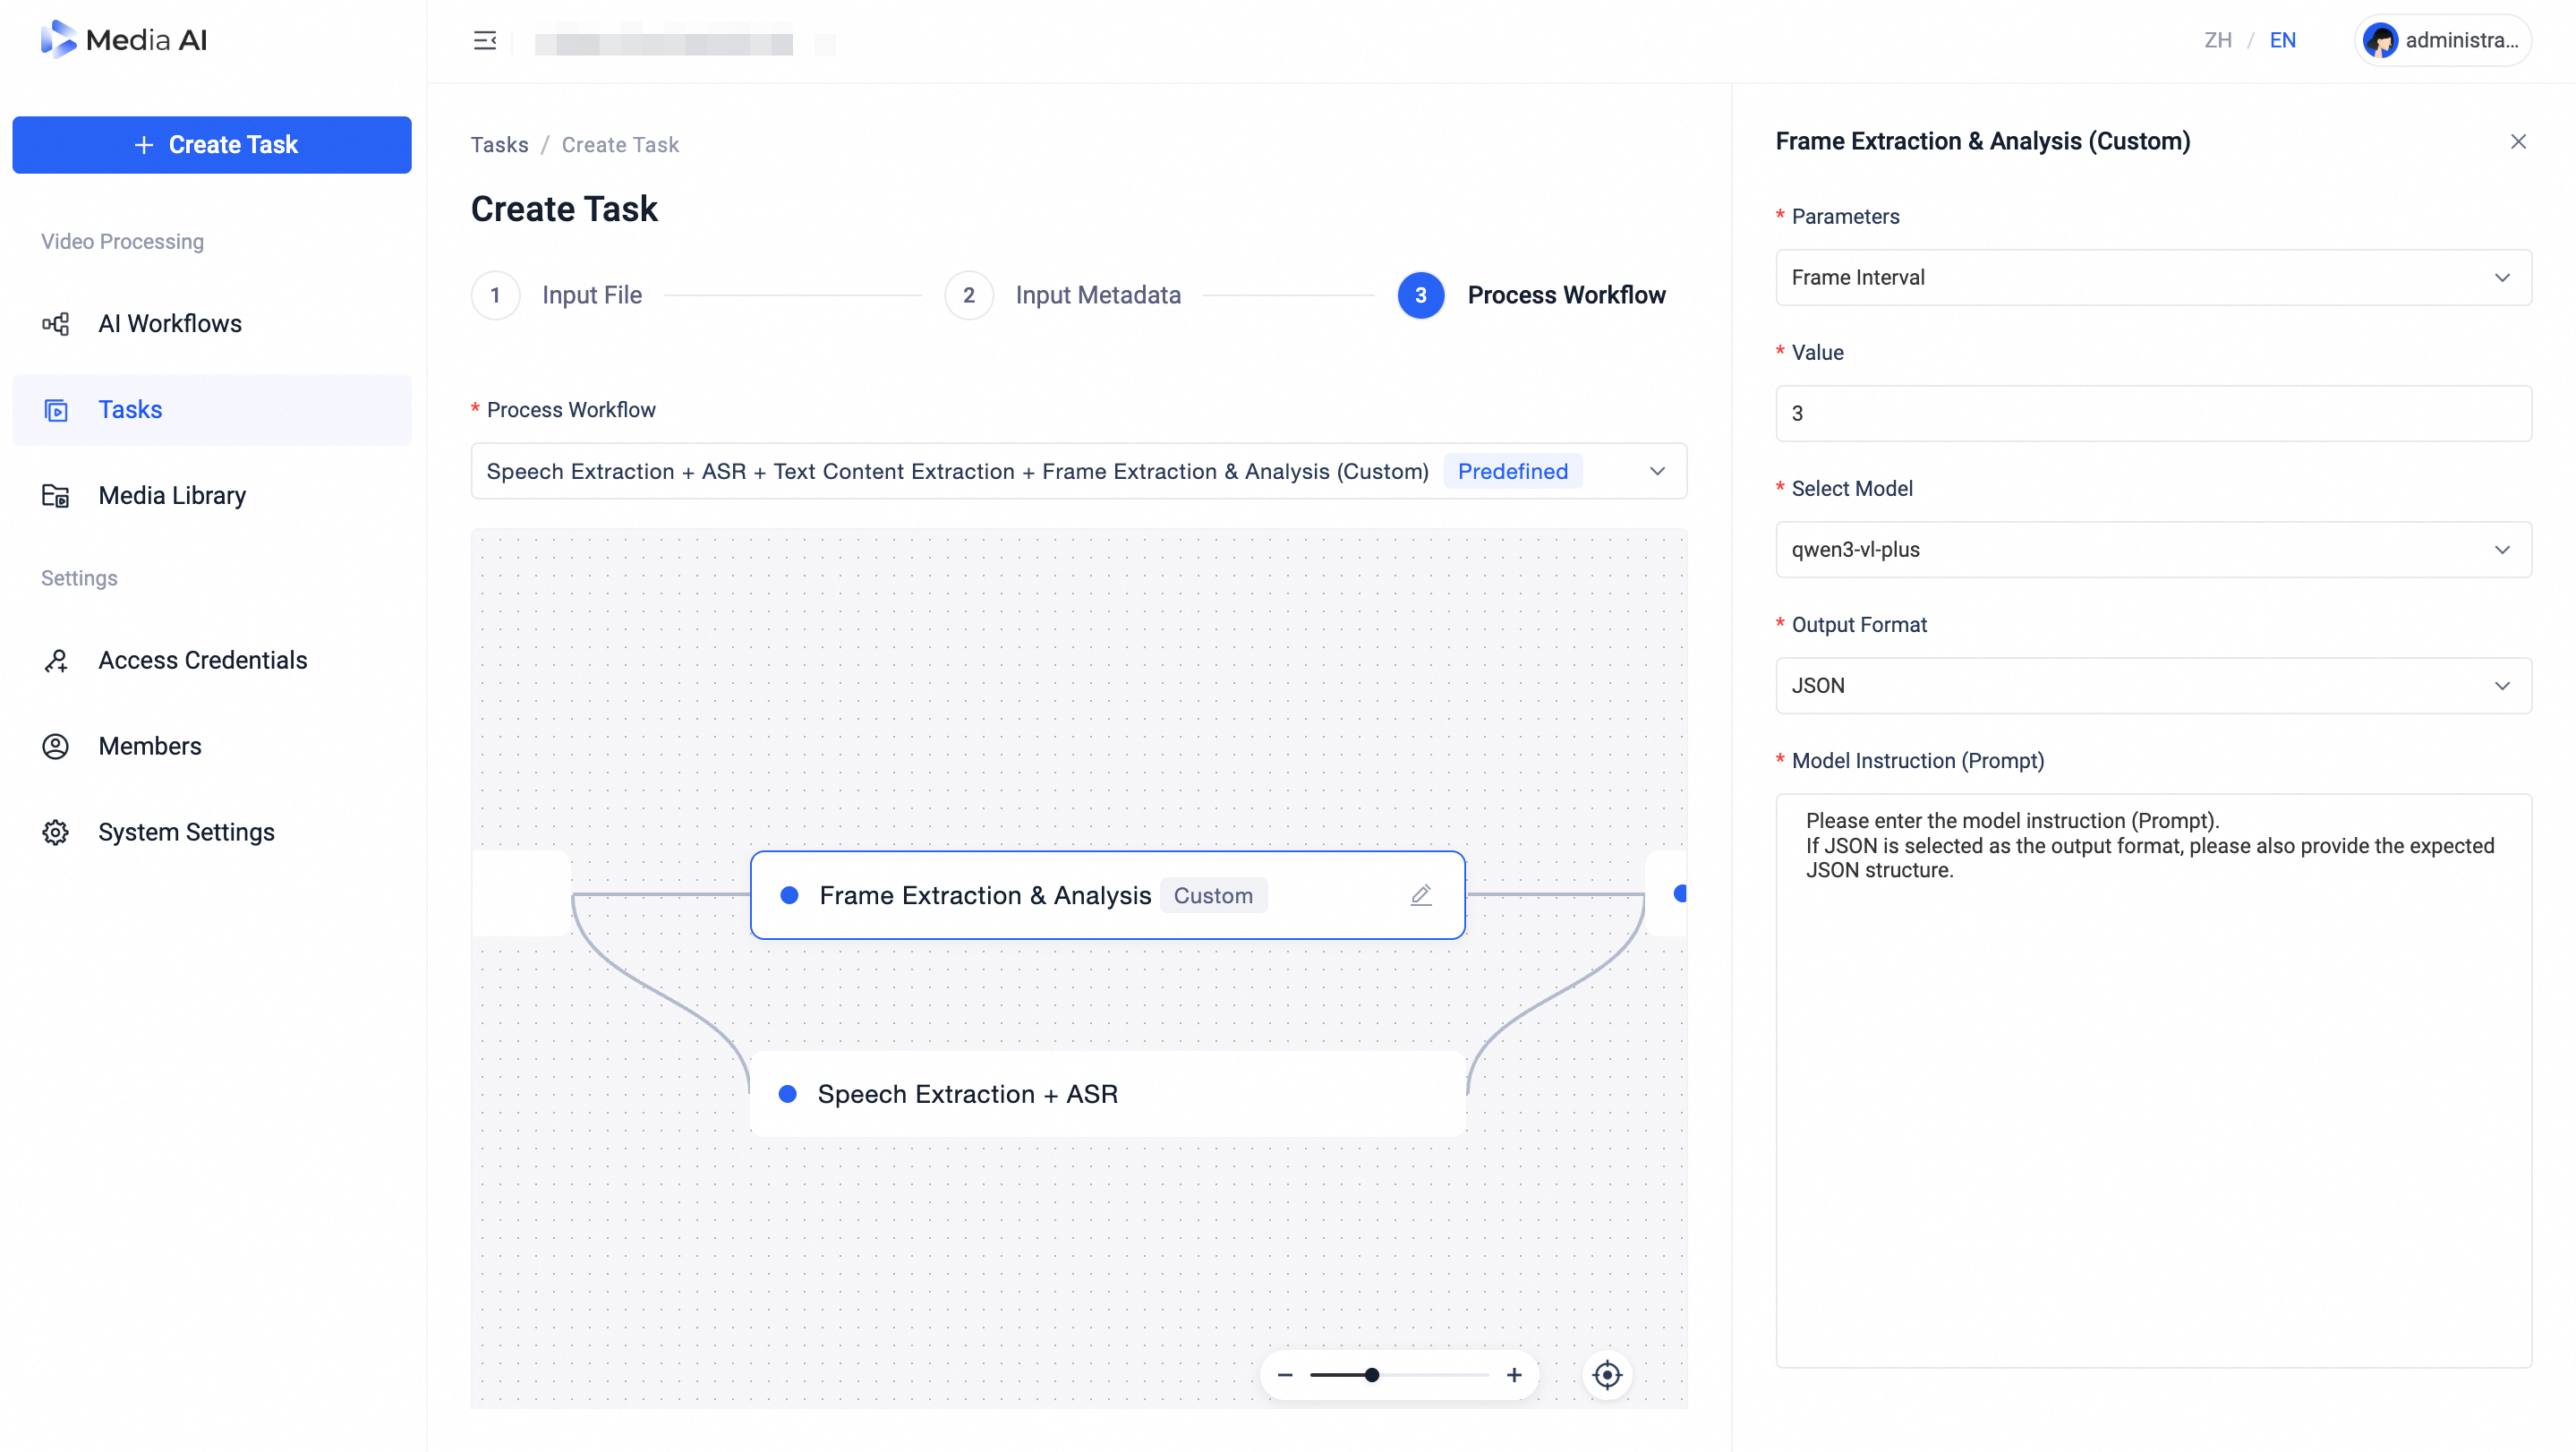
3. Select Workflow
Choose a workflow from the list (only workflows that have been published by an admin or are preset will appear here).
After selection, you can:
Preview the workflow’s node diagram;
Adjust parameters of individual nodes (e.g., frame interval, similarity threshold, model, prompt, etc.).
These adjustments apply only to the current task and do not modify the original workflow.
Once configured, click 「Create Task」 at the bottom to start processing. You can track the task status and results in the 「Tasks」 page.
Create Task page
Input metadata page
workflow selection page
Tasks page
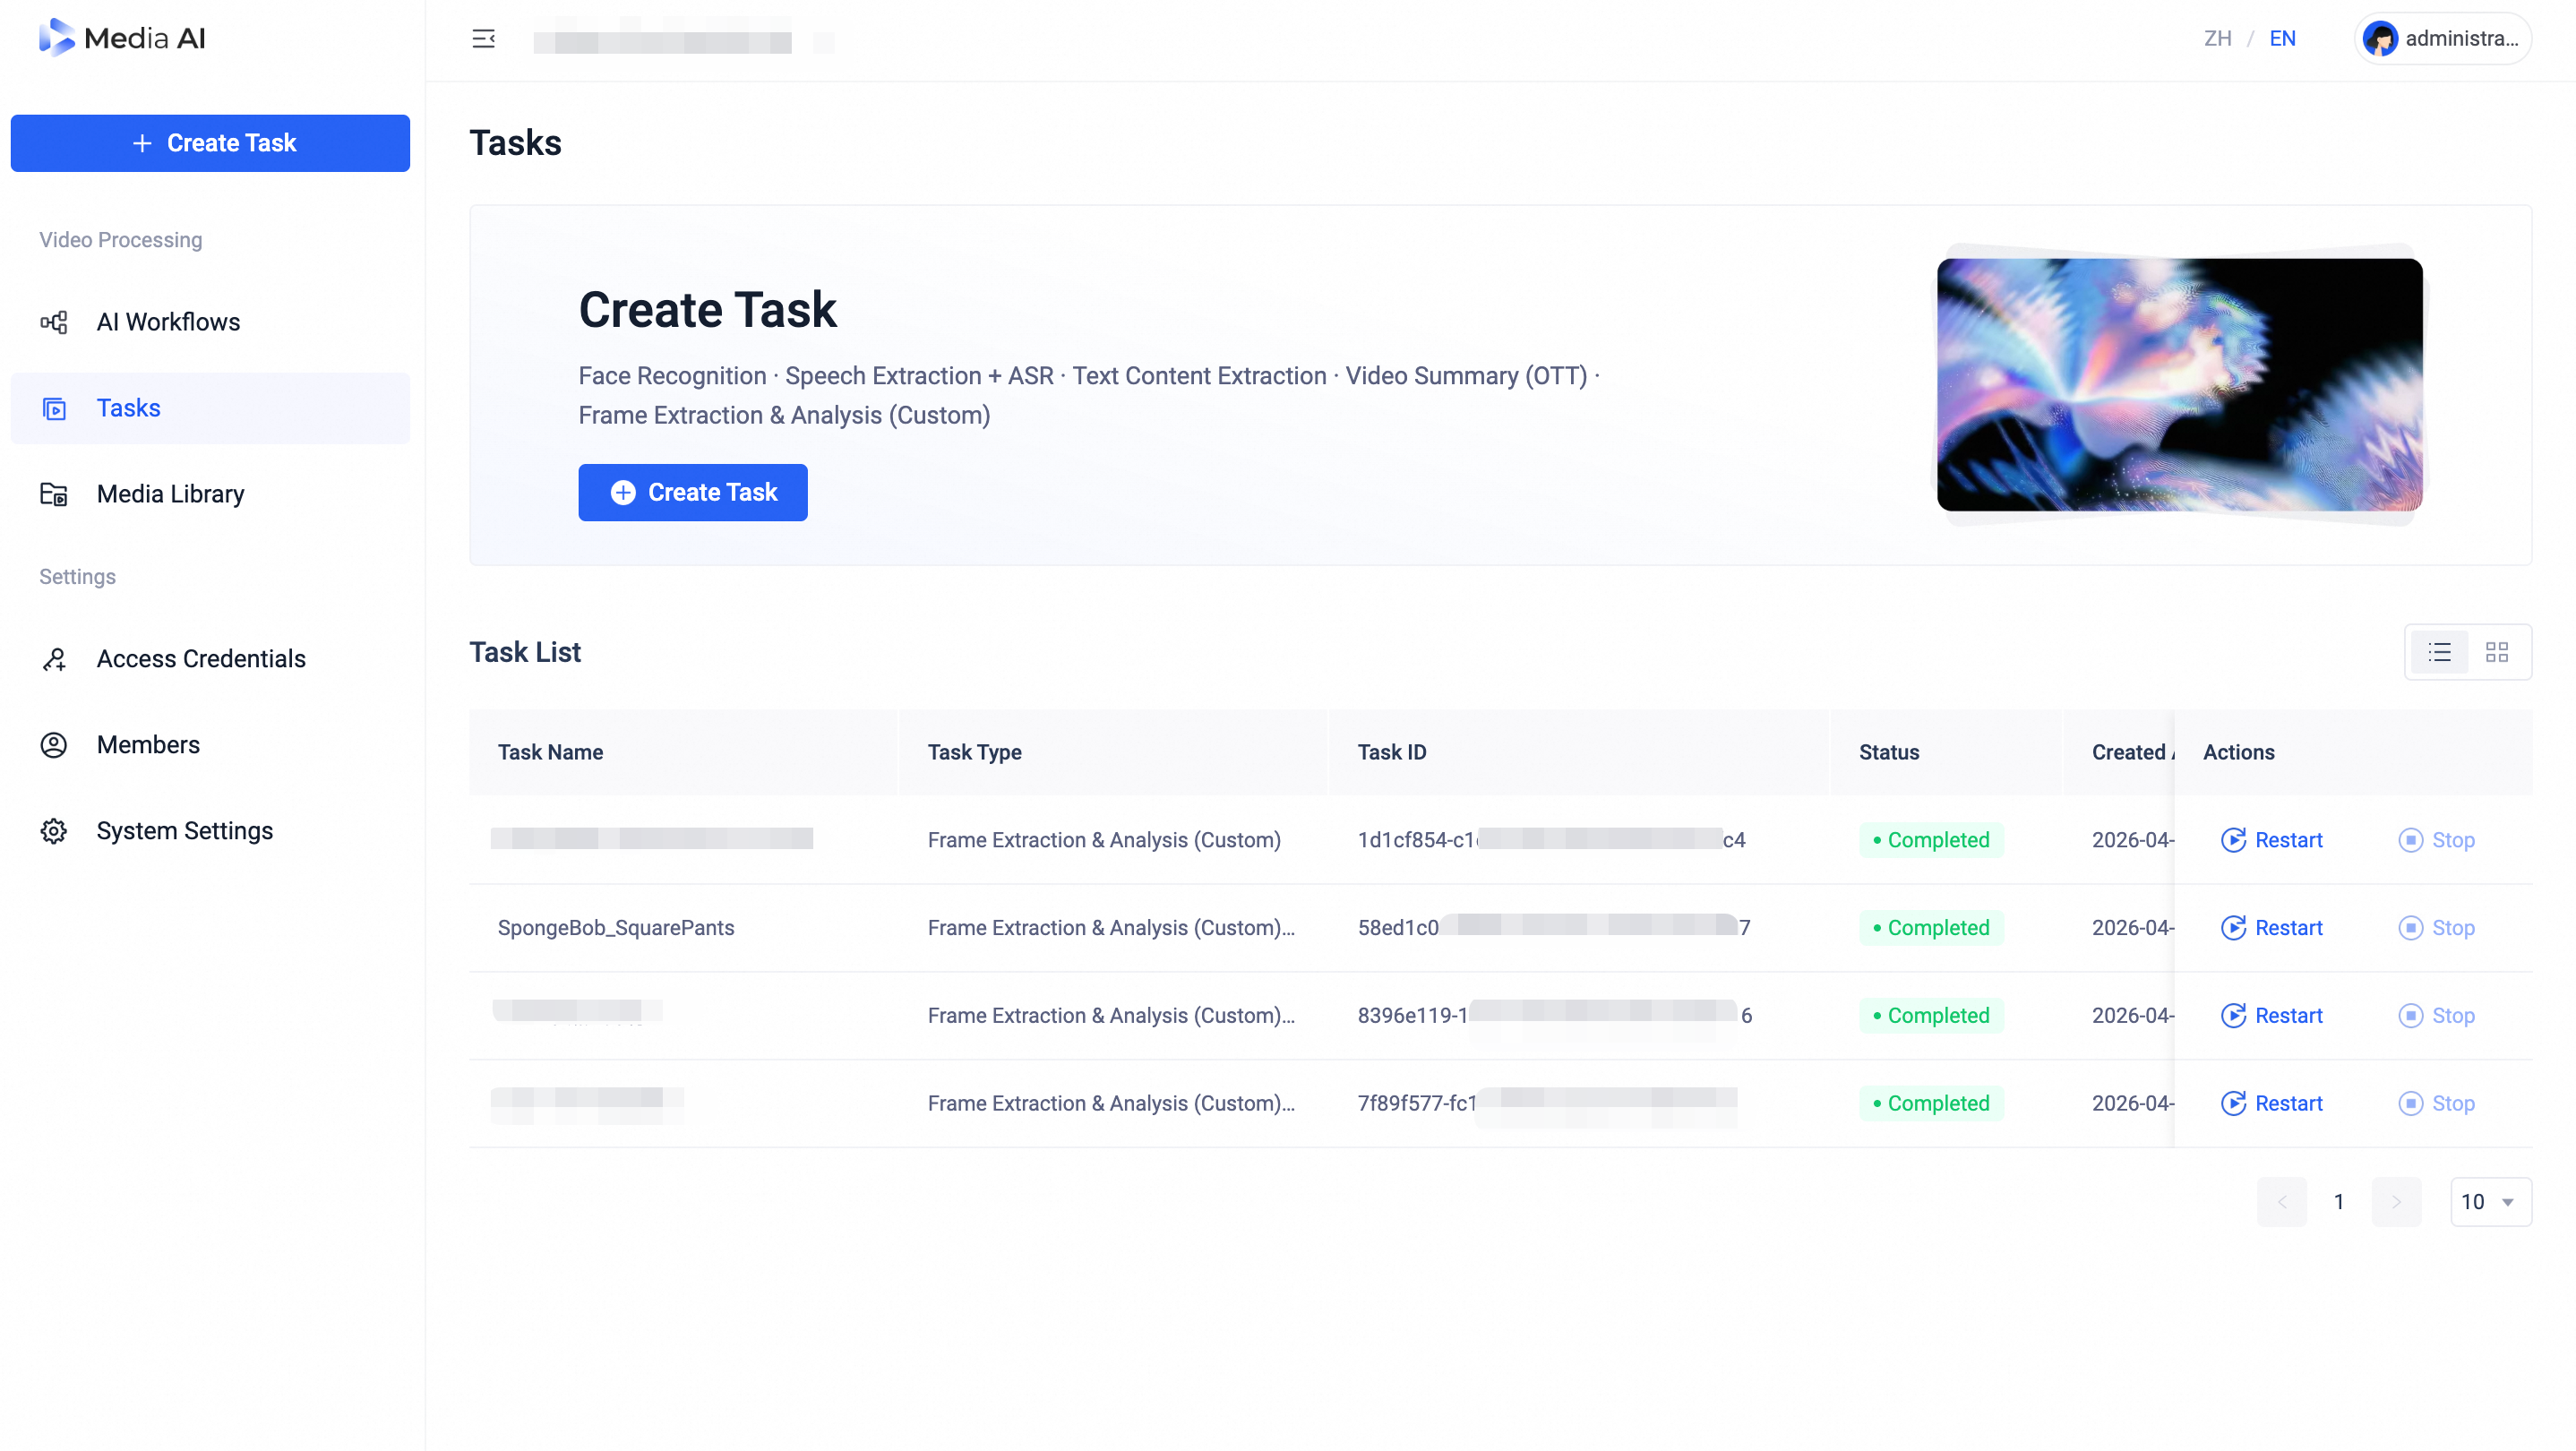
6. Tasks
After a task is created, you’ll be directed to the 「Tasks」 page, where you can view detailed information about each task.
For tasks with status Completed, Failed, or Terminated, click 「Restart」 to re-execute the task.
For tasks In Progress, click 「Stop」 to terminate the current execution.
For Completed tasks, click the task name to enter the detail page and review the full analysis results.
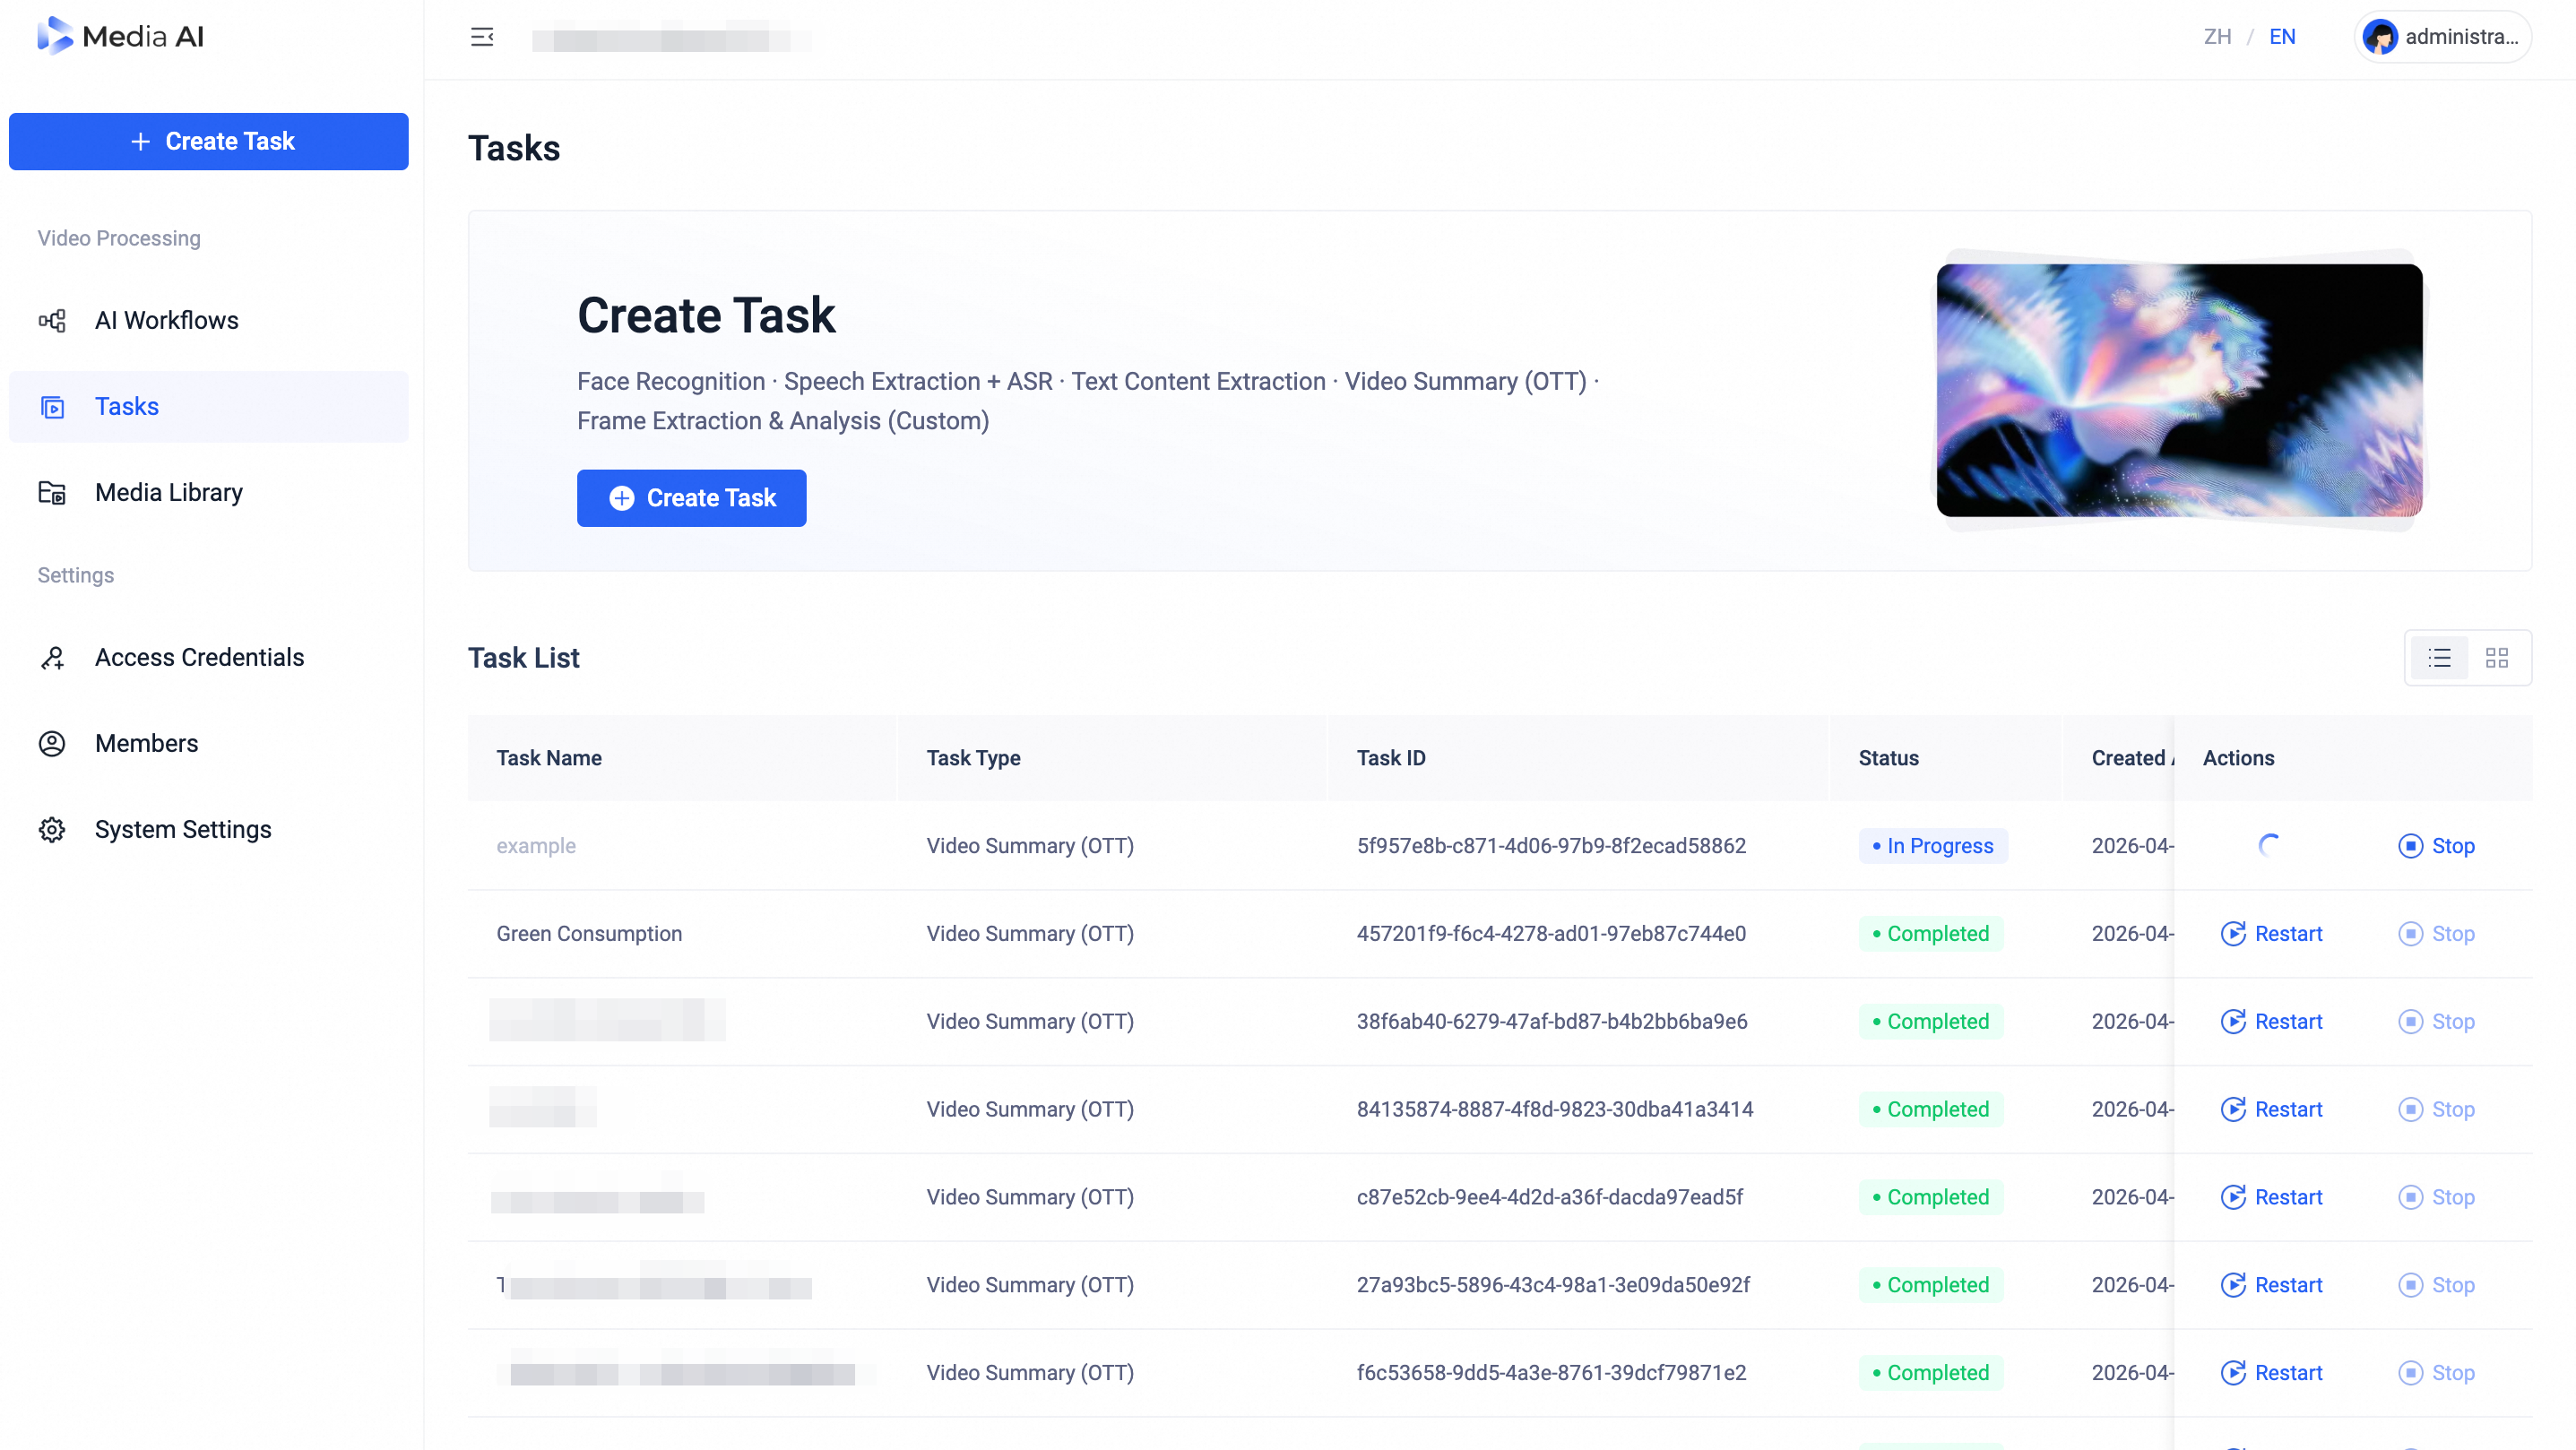
Tasks page
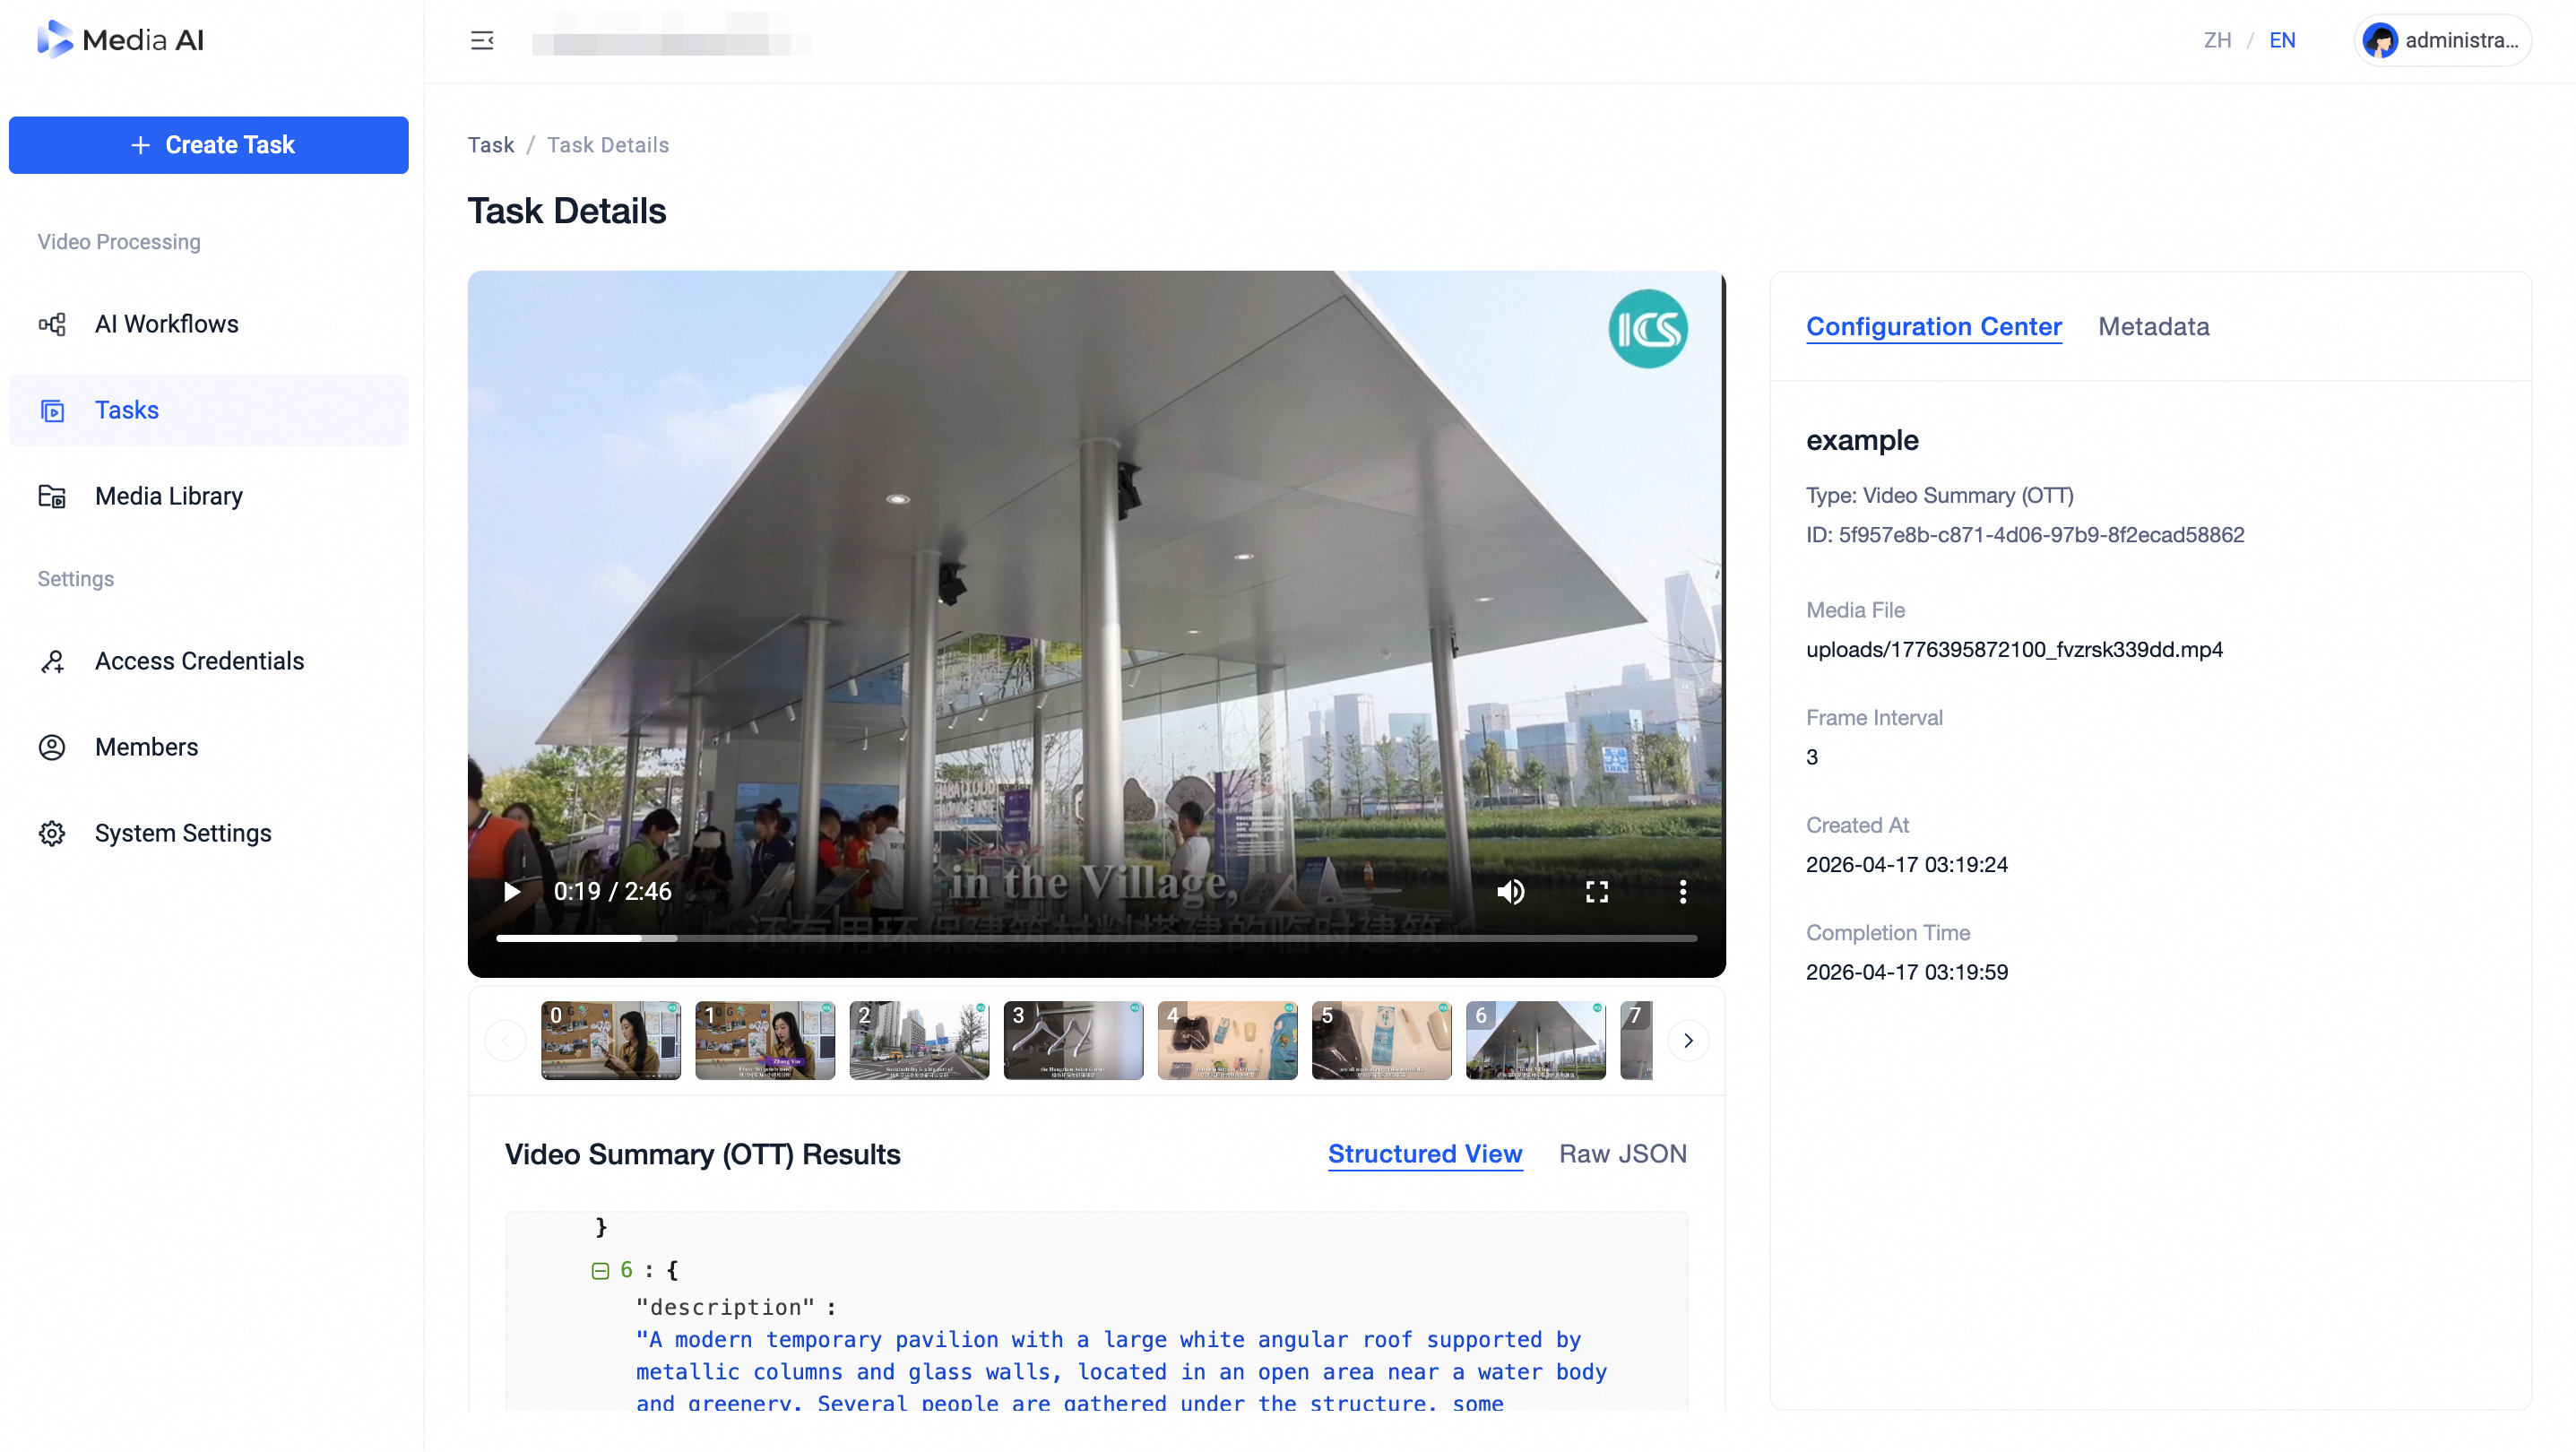
Task Details page
7. System Settings
On the System Settings page, you can customize the following two options:
Output Language: Default is English. Once set, the selected language will be used in task detail pages and in analysis results returned by the API.
Custom Timezone: Default is server time. Once set, system notifications (e.g., email alerts), log timestamps, and other time-related displays will follow your specified Custom Timezone.
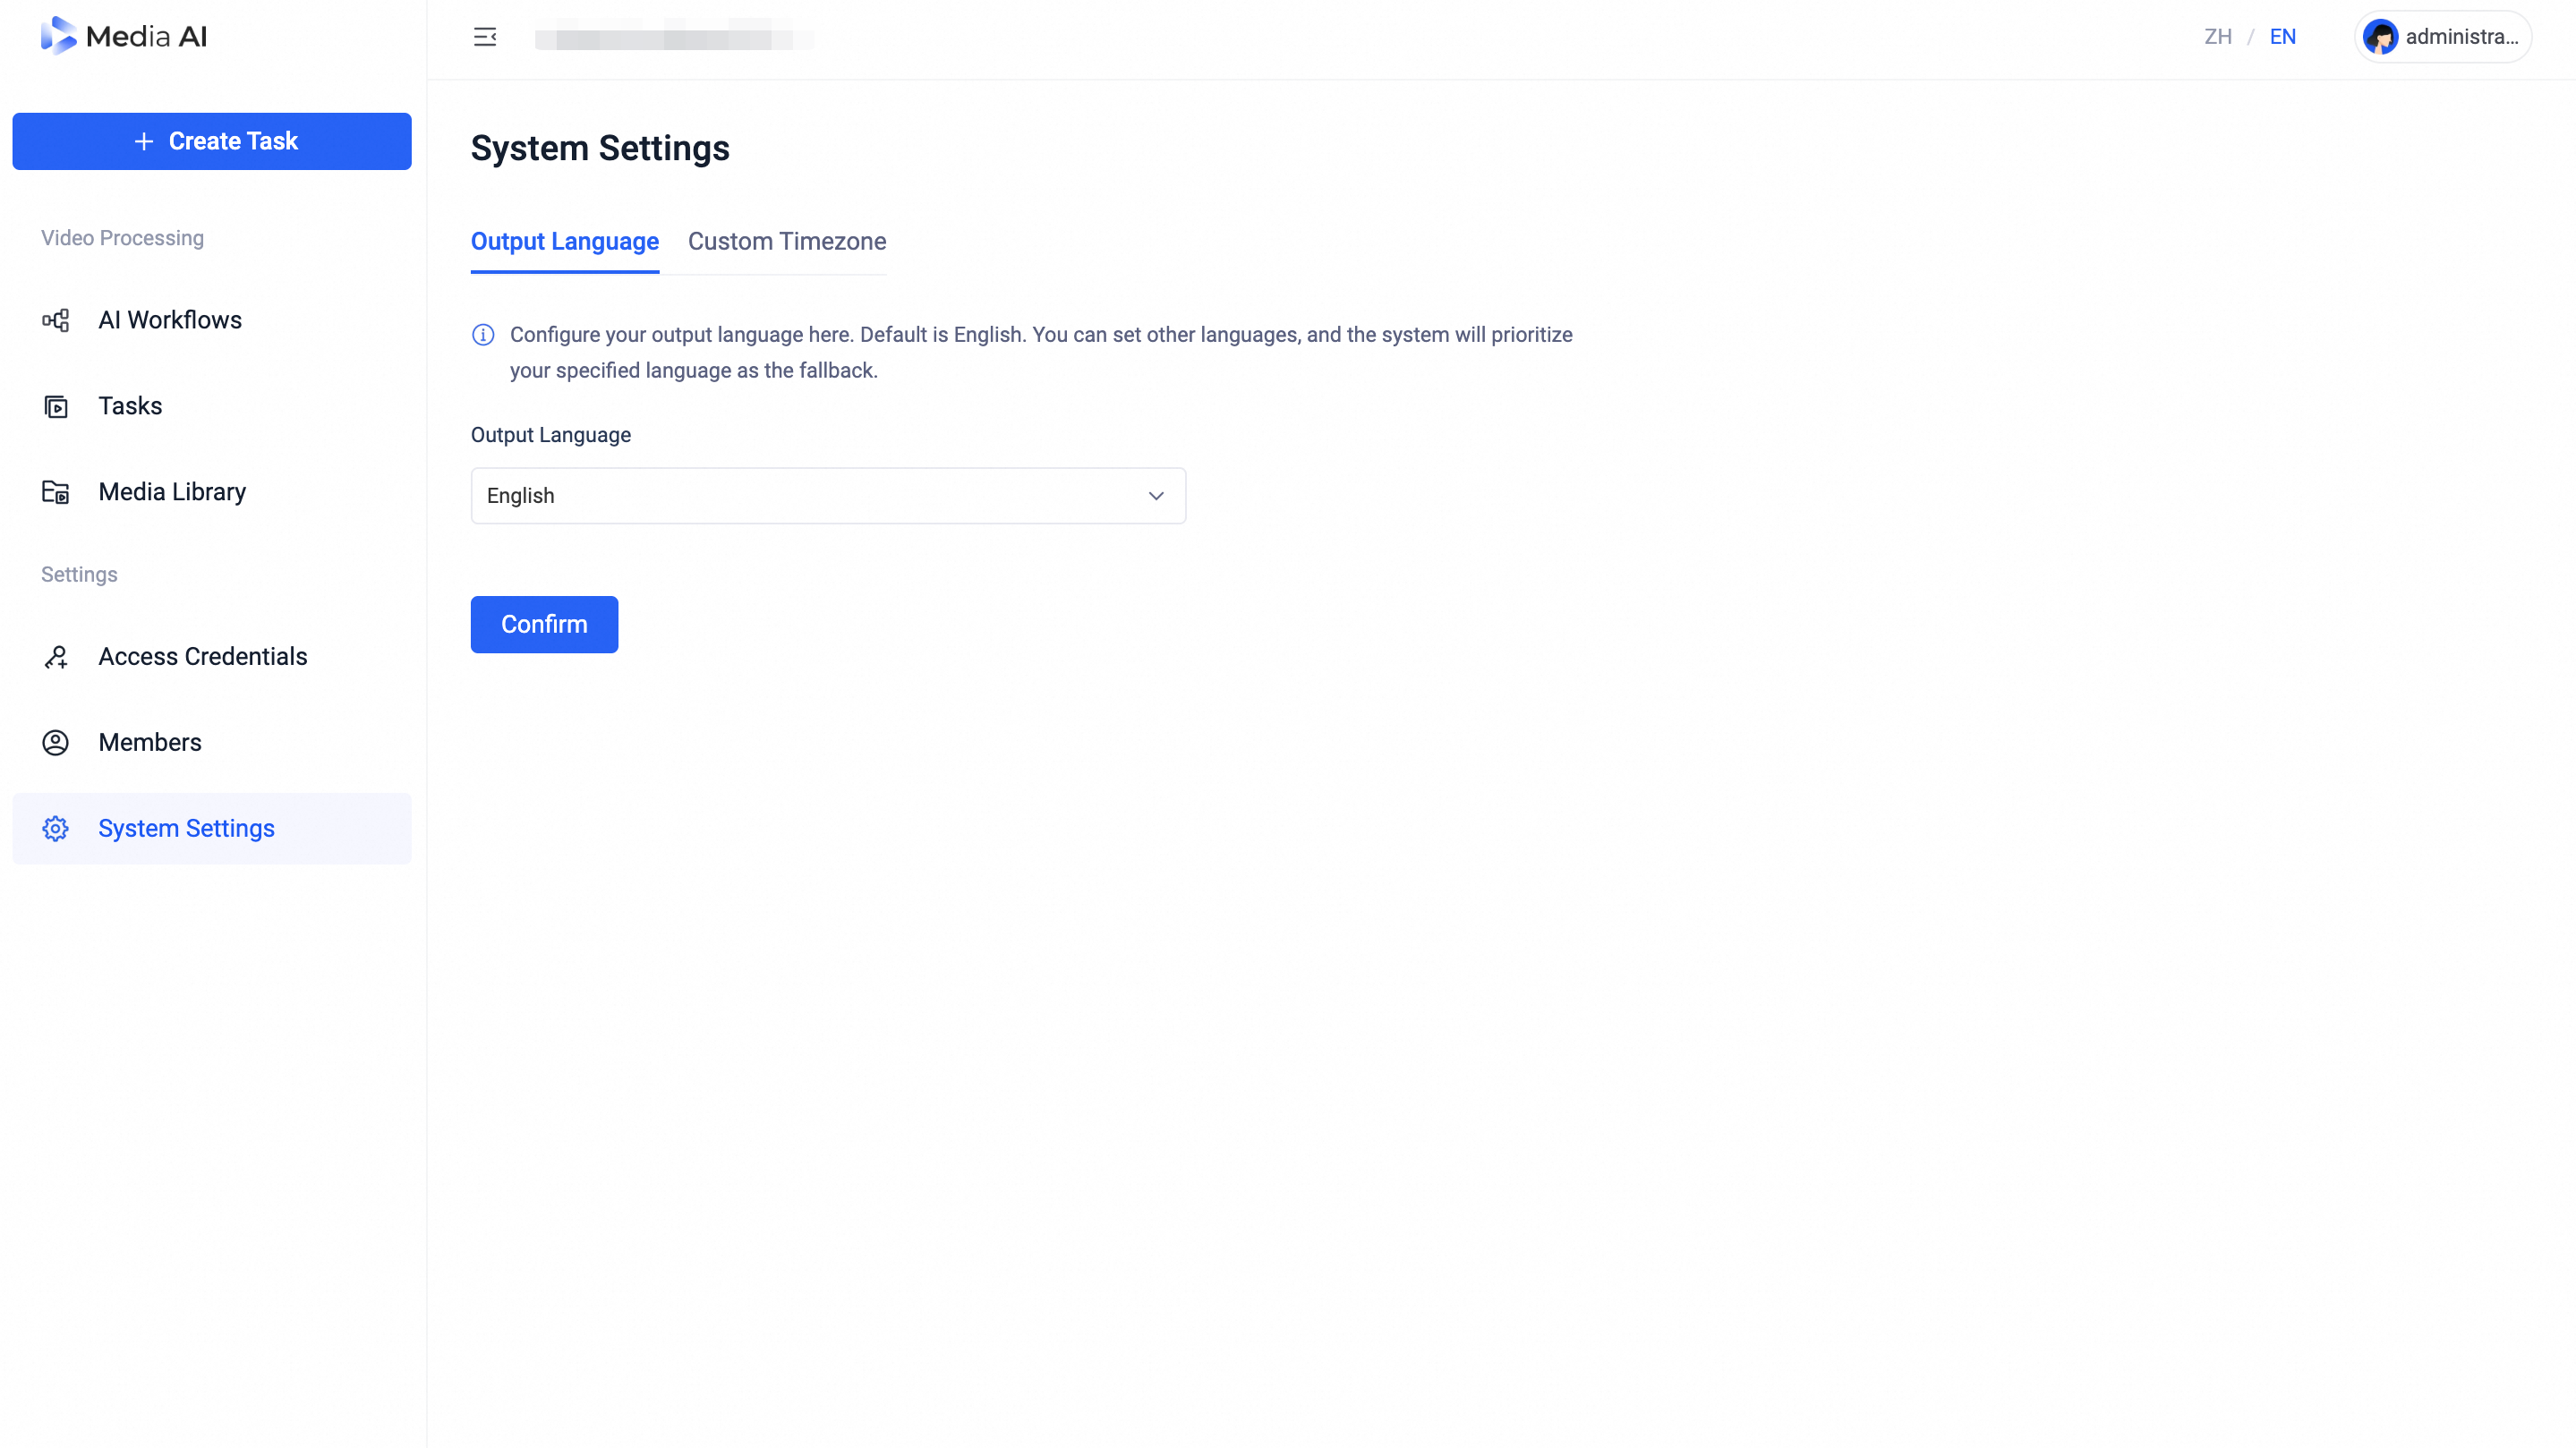
Output Language page
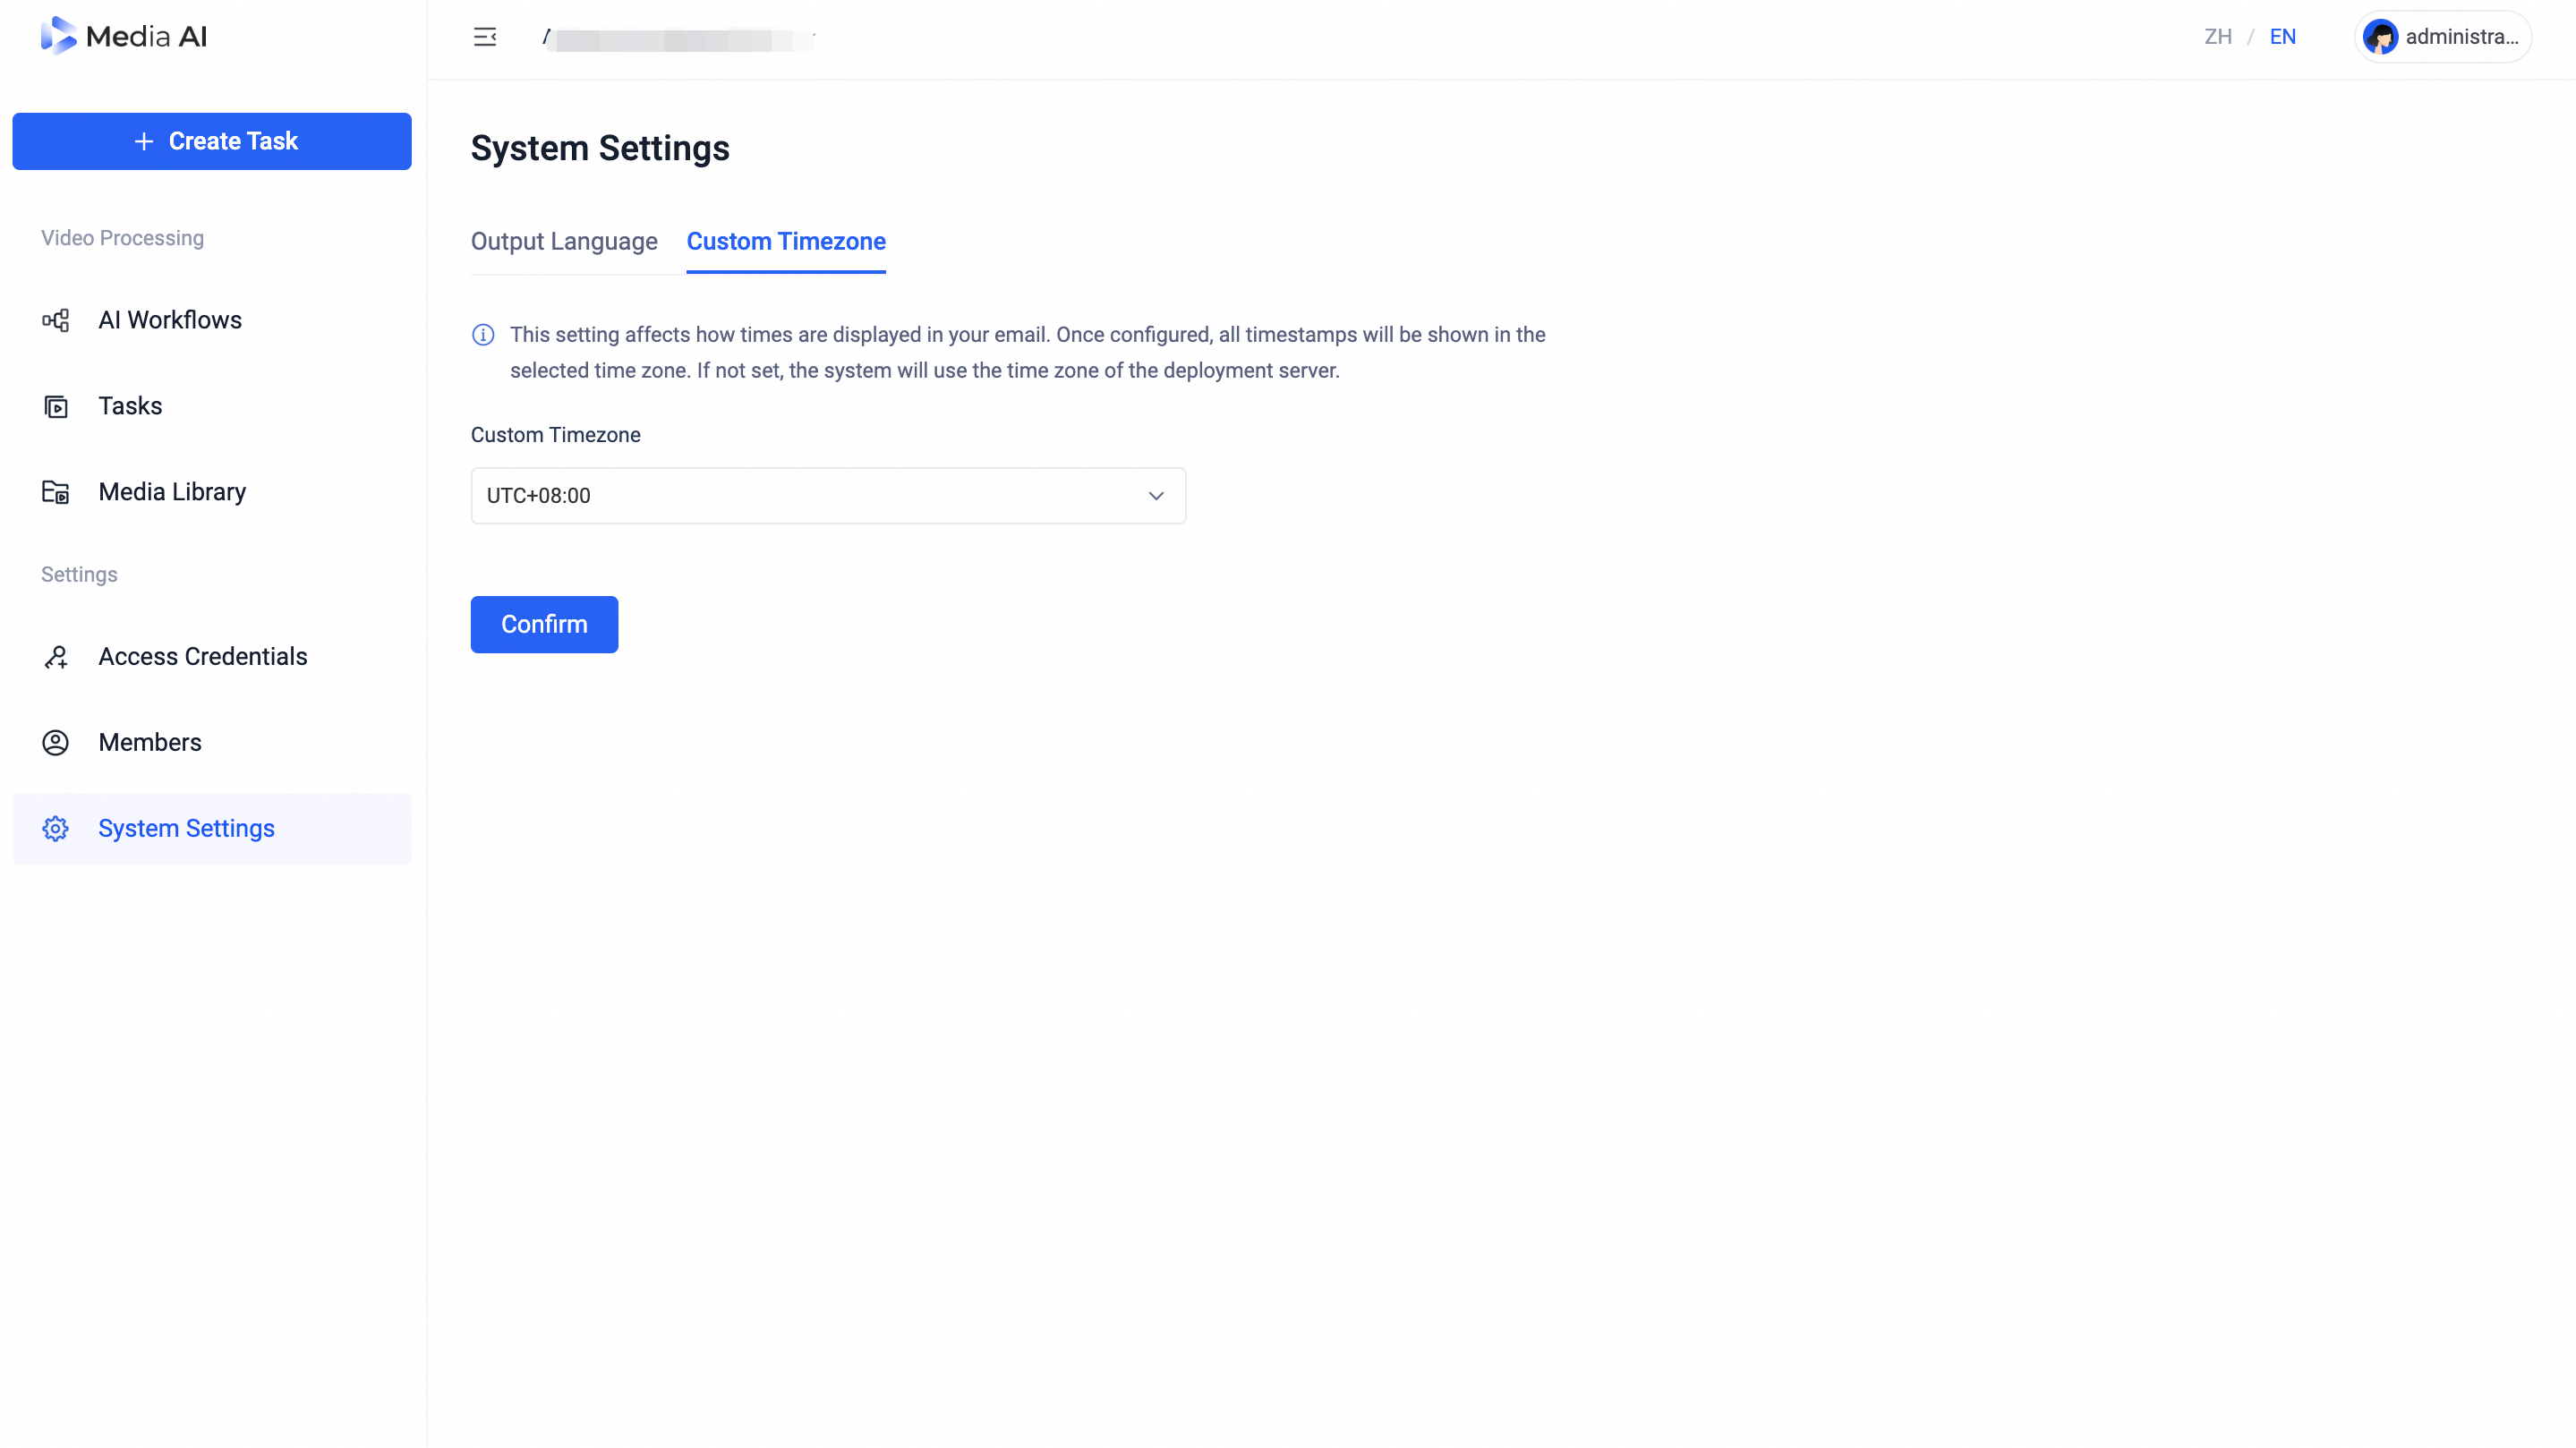
Timezone page