Import data from a self-managed MySQL database or a MySQL database on an ApsaraDB RDS for MySQL instance to Simple Log Service (SLS). Then you can query, analyze, and transform the data in SLS. This topic describes how to use the MySQL - Data Import feature to import data from a MySQL database to SLS.
The MySQL - Data Import feature will stop updating and maintaining. The timeline for the cessation of maintenance and related migration details will be provided later. We recommend that you use DataWorks for data synchronization. For more information, see MySQL data source.
Limits
Data import from a MySQL database is available in the following regions: China (Hangzhou), China (Shanghai), China (Qingdao), China (Beijing), China (Zhangjiakou), China (Hohhot), China (Ulanqab), China (Chengdu), China (Shenzhen), China (Heyuan), China (Guangzhou), China (Hong Kong), Singapore, Malaysia (Kuala Lumpur), Indonesia (Jakarta), Philippines (Manila), Thailand (Bangkok), Japan (Tokyo), South Korea (Seoul), UK (London), Germany (Frankfurt), US (Virginia), and US (Silicon Valley).
If the data source for import is AnalyticDB for MySQL, JSON fields need to be converted to VARCHAR type before importing. For example, if the
detailfield is of JSON type, convert it usingcast(detail as VARCHAR) as detail. For more information about the CAST function, see CAST functions.
Prerequisites
A MySQL database is created. A database account is created and is granted minimum read permissions.
An IP address whitelist is configured for the MySQL database.
You must configure an IP address whitelist based on the region of the project to which the data import job belongs and the network of the database. For more information about the IP addresses that you can add to a whitelist, see IP address whitelists. For more information about how to add a whitelist to a MySQL database, see Configure an IP address whitelist.
A project and a Logstore are created. For more information, see Manage projects and Create a basic logstore.
Import data
Log on to the Simple Log Service console.
In the Projects section, click the one you want.

On the tab, click > to the left of the Logstore, move the pointer over , and then click +.
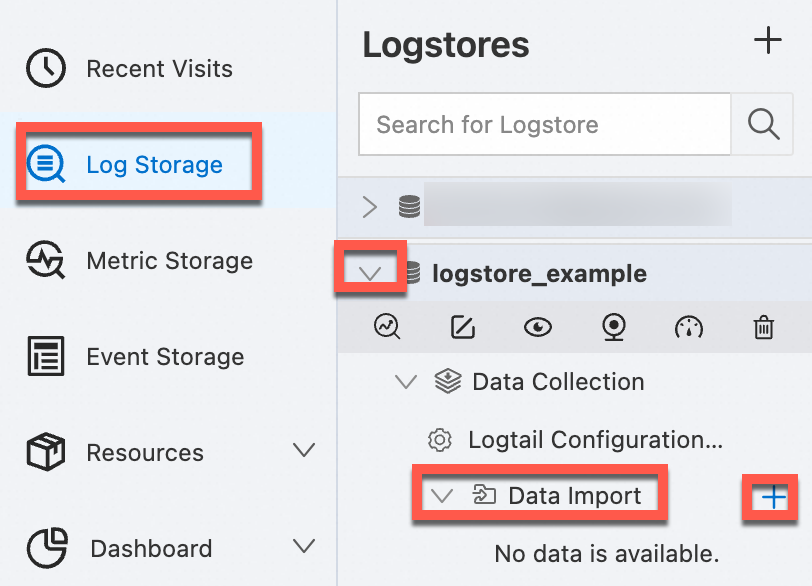
In the Quick Data Import dialog box, search for and click MySQL - Data Import.
In the Import Configuration step, create a data import configuration.
On the Configure Data Source tab, configure the following parameters.
Advanced parameters
Click Preview to preview the import result. Confirm the result and click Next Configuration.
On the Specify Scheduling Interval tab, configure the following parameters.
Parameter
Description
Import Interval
The interval at which data is imported from the MySQL database to SLS.
Execute Now
If you turn on Execute Now, the data import job is immediately run.
After the configuration is complete, click Next.
Create indexes and preview data. Then, click Next. By default, full-text indexing is enabled in Simple Log Service. You can also manually create field indexes for the collected logs or click Automatic Index Generation. Then, Simple Log Service generates field indexes. For more information, see Create indexes.
ImportantIf you want to query all fields in logs, we recommend that you use full-text indexes. If you want to query only specific fields, we recommend that you use field indexes. This helps reduce index traffic. If you want to analyze fields, you must create field indexes. You must include a SELECT statement in your query statement for analysis.
You must wait approximately 1 minute for the indexes to take effect. Then, you can view the collected logs on the Raw Logs tab. For more information about how to query and analyze logs, see Guide to log query and analysis.
View the data import configuration and reports
After you create a data import configuration, view the configuration and related reports in the SLS console.
In the Projects section, click the project to which the data import configuration belongs.
Find and click the Logstore to which the data import configuration belongs, choose , and then click the data import configuration.
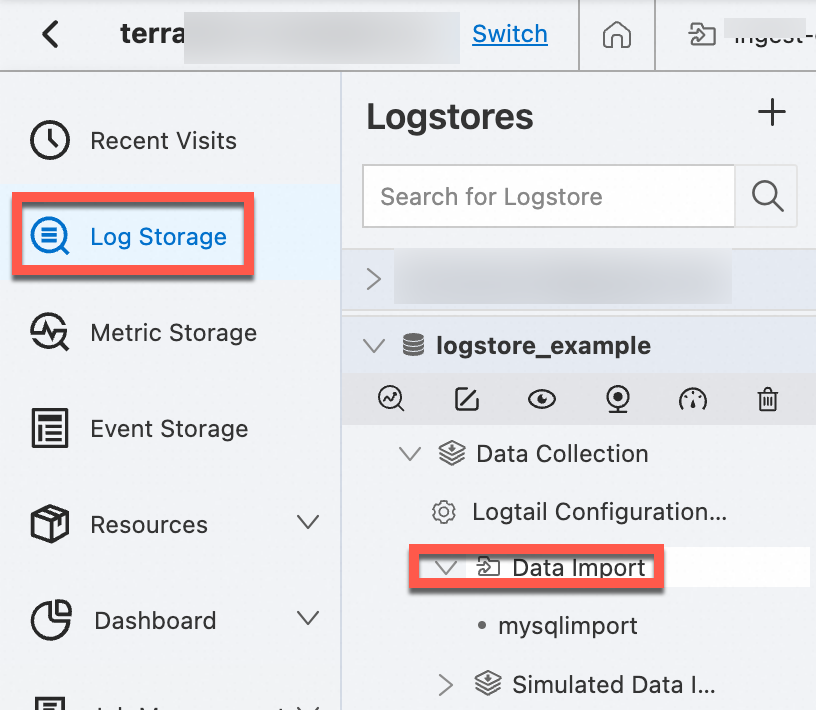
On the Import Configuration Overview page, view the basic information about the data import configuration and the related reports.
What to do next
On the Import Configuration Overview page, you can perform the following operations:
Modify the data import configuration
To modify the data import configuration, click Modify Settings. For more information, see Import data.
Delete the data import configuration
To delete the data import configuration, click Delete Configuration.
WarningAfter a data import configuration is deleted, it cannot be restored. Proceed with caution.