Simple Log Service allows you to use the default role AliyunLogETLRole or a custom Resource Access Management (RAM) role to create Scheduled SQL jobs. This topic describes how to grant a custom RAM role the permissions to analyze logs in a source Logstore and the permissions to write data to a destination Logstore.
Grant a custom RAM role the permissions to analyze logs in a source Logstore
Log on to the RAM console by using your Alibaba Cloud account or as a RAM user that has administrative permissions.
Create a RAM role named
QueryLogstoreRole. For more information, see Step 1: Create a RAM role.ImportantWhen you create a RAM role, you must set the Select Trusted Entity parameter to Alibaba Cloud Service and the Select Trusted Service parameter to Log Service.
Check the trust policy of the RAM role. Make sure that the
Serviceelement contains at least"log.aliyuncs.com".{ "Statement": [ { "Action": "sts:AssumeRole", "Effect": "Allow", "Principal": { "Service": [ "log.aliyuncs.com" ] } } ], "Version": "1" }
Create a custom policy named
QueryLogstorePolicy. The policy grants the permissions to analyze logs in a source Logstore. For more information, see Create a custom policy on the JSON tab.On the JSON tab of the Create Policy page, you can use the policy document that uses exact match or fuzzy match for authorization to replace the existing script in the code editor.
Exact match for authorization
Replace
{project-name}and{logstore-name}in the script based on your business requirements.ImportantWhen you create a policy, you can specify either a Logstore or Metricstore after the Logstore keyword. If you want to manage Metricstores, you can also refer to the following policy document to create a policy.
{
    "Version":"1",
    "Statement":[
        {
            "Action":[
                "log:PostProjectQuery"
            ],
            "Resource":[
                "acs:log:*:*:project/{project-name}/logstore/{logstore-name}"
            ],
            "Effect":"Allow"
        },
        {
            "Action":[
                "log:GetProjectQuery",
                "log:PutProjectQuery",
                "log:DeleteProjectQuery"
            ],
            "Resource":[
                "acs:log:*:*:project/{project-name}"
            ],
            "Effect":"Allow"
        }
    ]
}
Fuzzy match for authorization
If you want to grant the permissions on multiple projects and Logstores, you can use fuzzy match for authorization. In this example, the names of the source projects are log-project-dev-a, log-project-dev-b, and log-project-dev-c. The names of the source Logstores are website_a_log, website_b_log, and website_c_log. You can replace the project and Logstore names based on your business requirements.
{
    "Version":"1",
    "Statement":[
        {
            "Action":[
                "log:PostProjectQuery"
            ],
            "Resource":[
                "acs:log:*:*:project/log-project-dev-*/logstore/website_*_log"
            ],
            "Effect":"Allow"
        },
        {
            "Action":[
                "log:GetProjectQuery",
                "log:PutProjectQuery",
                "log:DeleteProjectQuery"
            ],
            "Resource":[
                "acs:log:*:*:project/log-project-dev-*"
            ],
            "Effect":"Allow"
        }
    ]
}
Attach the
QueryLogstorePolicypolicy to theQueryLogstoreRolerole. For more information, see Grant permissions to a RAM role.
What to do next
Obtain the Alibaba Cloud Resource Name (ARN) of the RAM role. For more information, see View the information about a RAM role.
When you create a Scheduled SQL job, set the SQL Execution Authorization parameter to Custom Role and enter the Alibaba Cloud Resource Name (ARN) of the
QueryLogstoreRoleRAM role. For more information, see Create a scheduled SQL job.
Grant the RAM role the permissions to write data to a destination Logstore
Log on to the RAM console by using your Alibaba Cloud account or as a RAM user that has administrative permissions.
Create a RAM role named
WriteLogstoreRole. For more information, see Step 1: Create a RAM role.ImportantWhen you create a RAM role, you must set the Select Trusted Entity parameter to Alibaba Cloud Service and the Select Trusted Service parameter to Log Service.
Check the trust policy of the RAM role. Make sure that the
Serviceelement contains at least"log.aliyuncs.com".{ "Statement": [ { "Action": "sts:AssumeRole", "Effect": "Allow", "Principal": { "Service": [ "log.aliyuncs.com" ] } } ], "Version": "1" }
Create a custom policy named
WriteLogstorePolicy. The policy grants the permissions to write logs to a destination Logstore. For more information, see Create a custom policy on the JSON tab.On the JSON tab of the Create Policy page, you can use the policy document that uses exact match or fuzzy match for authorization to replace the existing script in the code editor.
Exact match for authorization
Replace
{project-name}and{logstore-name}in the script based on your business requirements.ImportantWhen you create a policy, you can specify either a Logstore or Metricstore after the Logstore keyword. If you want to manage Metricstores, you can also refer to the following policy document to create a policy.
{
  "Version": "1",
  "Statement": [
    {
      "Action": [
        "log:PostLogStoreLogs",
        "log:PostProjectQuery",
        "log:BatchPostLogStoreLogs"
      ],
       "Resource": "acs:log:*:*:project/{project-name}/logstore/{logstore-name}",
      "Effect": "Allow"
    }
  ]
}
Fuzzy match for authorization
If you want to grant the permissions on multiple projects and Logstores, you can use fuzzy match for authorization. In this example, the names of the destination projects are log-project-dev-a, log-project-dev-b, and log-project-dev-c. The names of the destination Logstores are website_a_log_output, website_b_log_output, and website_c_log_output. You can replace the project and Logstore names based on your business requirements.
{
  "Version": "1",
  "Statement": [
    {
      "Action": [
        "log:Post*",
        "log:BatchPost*"
      ],
       "Resource": "acs:log:*:*:project/log-project-dev-*/logstore/website_*_log_output",
      "Effect": "Allow"
    }
  ]
}
Attach the
WriteLogstorePolicypolicy to theWriteLogstoreRoleRAM role. For more information, see Grant permissions to a RAM role.Optional. If the source and destination Logstores are not within the same Alibaba Cloud account, you must modify the trust policy of the
WriteLogstoreRoleRAM role.On the Roles page, click the
WriteLogstoreRoleRAM role.On the Trust Policy tab, click Edit Trust Policy and replace the existing script in the code editor with the following policy document.
ImportantReplace
ID of Alibaba Cloud Account A to which the source Logstore belongswith the ID of your Alibaba Cloud account. You can view the ID of your Alibaba Cloud account in the Account Center console.{ "Statement": [ { "Action": "sts:AssumeRole", "Effect": "Allow", "Principal": { "Service": [ "log.aliyuncs.com", "ID of Alibaba Cloud Account A to which the source Logstore belongs@log.aliyuncs.com" ] } } ], "Version": "1" }
What to do next
Obtain the Alibaba Cloud Resource Name (ARN) of the RAM role. For more information, see View the information about a RAM role.
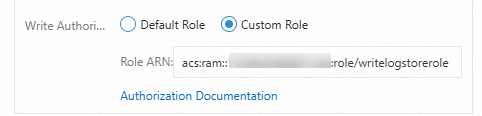
When you create a scheduled SQL job, set the Write Authorization parameter to Custom Role and enter the ARN of the
WriteLogstoreRoleRAM role. For more information, see Create a scheduled SQL job.