Use Logtail to collect logs across regions from servers under the same Alibaba Cloud account. This topic uses a Linux server as an example.
How it works
Suppose your web application is deployed in Region A and the Simple Log Service project is in Region B. To send log data from an ECS instance in Region A to the Simple Log Service project in Region B, follow these steps:
-
Step 2: Configure a custom identifier on the ECS instance in region A
-
Step 3: Create a machine group that uses custom identifiers in the SLS project in region B
-
Step 4: Create a Logtail configuration in the SLS project in region B
The following figure shows the process.

Prerequisites
A project and a logstore must already exist. For more information, see Manage projects and Create a logstore.
Step 1: Install Logtail in region A
Network transmission
|
Transmission mode |
Use case |
|
Internet |
|
|
transfer acceleration |
If your servers are in on-premises data centers or hosted by cloud providers outside China, Internet transmission may cause high latency and unstable connections. Use transfer acceleration instead. For more information, see Manage transfer acceleration. |
Log on to the ECS instance in region A. Based on your network environment, select a Logtail installation script as described in Network transmission. For a list of Linux operating systems that Logtail supports, see Limits.
Internet
Obtain the value of the Simple Log Service parameter for the region in which the Simple Log Service project resides. Replace the ${region_id} parameter with the obtained value and run the installation command.
For more information about the value of the ${region_id} parameter for each region, see Supported regions. For example, the value of the ${region_id} parameter for the Singapore region is ap-southeast-1.
wget http://logtail-release-${region_id}.oss-${region_id}.aliyuncs.com/linux64/logtail.sh -O logtail.sh; chmod +x logtail.sh; ./logtail.sh install ${region_id}-internetTransfer acceleration
Obtain the value of the Simple Log Service parameter for the region in which the Simple Log Service project resides. Replace the ${region_id} parameter with the obtained value and run the installation command.
For more information about the value of the
${region_id}parameter for each region, see Supported regions. For example, the value of the${region_id}parameter for the China (Hangzhou) region iscn-hangzhou.After installing Logtial using transfer acceleration, you need to enable the transfer acceleration feature for it to take effect. For more information, see Enable the transfer acceleration feature for a project.
wget http://logtail-release-${region_id}.oss-${region_id}.aliyuncs.com/linux64/logtail.sh -O logtail.sh; chmod +x logtail.sh; ./logtail.sh install ${region_id}-accelerationStep 2: Configure a custom identifier
-
Create the custom identifier file
user_defined_idin the specified directory and configure the custom identifier.Important-
A Machine Groups cannot contain both Linux and Windows servers. Therefore, do not assign the same Custom Identifier to both a Linux and a Windows server.
-
You can configure multiple Custom Identifier for a server. Separate the identifiers with line breaks.
-
Linux
-
Log on to the Linux server where Logtail is installed and run the following command to configure the Custom Identifier.
NoteIf the directory
/etc/ilogtail/does not exist, create it manually.echo "user-defined-1" > /etc/ilogtail/user_defined_id -
(Optional) Run the following command to check whether the Custom Identifier was successfully written. If
user-defined-1is returned, the write operation was successful.cat /etc/ilogtail/user_defined_id -
Changes to the
user_defined_idfile take effect within 1 minute by default. To apply the changes immediately, run the following command to restart Logtail./etc/init.d/ilogtaild stop /etc/init.d/ilogtaild start
Windows
-
Log on to the Windows server where Logtail is installed, create a file named
user_defined_idin theC:\LogtailDatadirectory, writeuser-defined-1to it, and then save it.NoteIf the directory
C:\LogtailDatadoes not exist, manually create the directory. -
By default, changes to the
user_defined_idfile take effect within one minute. To apply the changes immediately, restart Logtail:-
Choose .
-
In the Service dialog box, select the appropriate service.
-
For Logtail V0.x.x.x, select the LogtailWorker service.
-
For Logtail V1.0.0.0 or later, select the LogtailDaemon service.
-
Right-click the service and select Restart.
-
Container environments
The custom identifier is set in the ALIYUN_LOGTAIL_USER_DEFINED_ID environment variable of the Logtail container. Run the docker inspect ${logtail_container_name} | grep ALIYUN_LOGTAIL_USER_DEFINED_ID command to verify the configuration.
Step 3: Create a custom-ID machine group
Log on to the Simple Log Service console. In the Projects section, click the one you want.
In the navigation pane on the left, choose . In the Machine Groups list, choose
 > Create Machine Group.
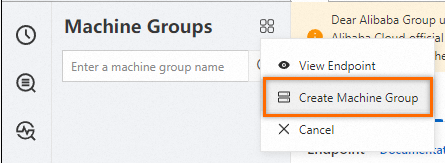
In the Create Machine Group panel, configure parameters and click OK. The following table describes the parameters.
Parameter
Description
Name
The name of the machine group must meet the following requirements:
Contains only lowercase letters, digits, hyphens (-), and underscores (_).
Starts and ends with a lowercase letter or a digit.
Is 2 to 128 characters in length.
ImportantAfter you create a machine group, you cannot change its name. Proceed with caution.
Machine Group Identifier
The identifier type of the machine group. Select IP Address.
Machine Group Topic
Optional. The topic is used to identify the logs generated by different servers.
IP Address
The IP address. Enter the IP address that is automatically obtained by Logtail.
ImportantIf you want to add multiple servers to a machine group, we recommend that you manually enter the IP addresses of the servers and separate the IP addresses with line feeds.
A machine group cannot include both Linux and Windows servers. Do not add the IP addresses of Linux and Windows servers to the same machine group.
-
In the Machine Groups list, click the target machine group. On the Machine Group Configurations page, check the machine group configuration and the server heartbeat status.
Step 4: Create a Logtail configuration
-
The host on which Logtail is installed must allow outbound traffic on port 80 (HTTP) and port 443 (HTTPS). On an ECS instance, security group rules control port access. For more information about how to add a security group rule, see Add a security group rule.
-
Logtail collects only incremental logs, so the log file must be continuously updated. Logtail does not collect data from a file that is no longer updated after the configuration is applied. For more information, see Read log data.
-
To collect historical data, see Import historical log files.
References
If the preview page is blank or the query page displays no data when you use Logtail to collect logs, troubleshoot the issue by following the instructions provided in Troubleshoot Logtail collection errors If you use Logtail to collect logs, errors may occur. For example, regular expressions may fail to be parsed, invalid file paths may exist, and traffic may exceed the processing capabilities of shards. View Logtail collection errors by following the instructions provided in How do I view Logtail collection errors? For more information about the common errors in data collection, see Common collection errors.
By default, you can use only one Logtail configuration to collect logs from a log file. If you want to collect multiple copies of logs in a file, follow the instructions provided in Collect logs from a file multiple times
For more information about how to collect logs from servers in a corporate intranet to Simple Log Service, see Collect logs from on-premises servers.