You can view health check logs for the last three days on the Log Management page. To retain logs for a longer period, store them in Object Storage Service (OSS) and download them as needed.
Store health check logs
You can use the log management feature of Classic Load Balancer (CLB) to view health check logs for the backend ECS instances of your CLB instance. By default, CLB stores health check logs for only three days. To retain logs for a longer period, you can activate OSS and store them in a bucket.
You can enable or disable the log storage feature at any time. After you enable log storage, CLB creates a folder named AliyunSLBHealthCheckLogs in the selected bucket to store health check log files. CLB generates health check logs hourly. The system automatically creates a subfolder named after the date, such as 20220907, to store the logs for that day.
Each hourly log file is named after the start of its time range. For example, the log file for the period from 00:00:00 to 01:00:00 is named 00.txt, and the log file for the period from 01:00:00 to 02:00:00 is named 01.txt.
Health check logs are generated hourly, but only if an abnormality is detected on a backend ECS instance. If no abnormalities occur within an hour, no log file is created for that period.
Prerequisites
You have created a CLB instance and configured a listener for it. For more information, see the following topics:
OSS is activated. For more information, see Activate OSS.
Configuration
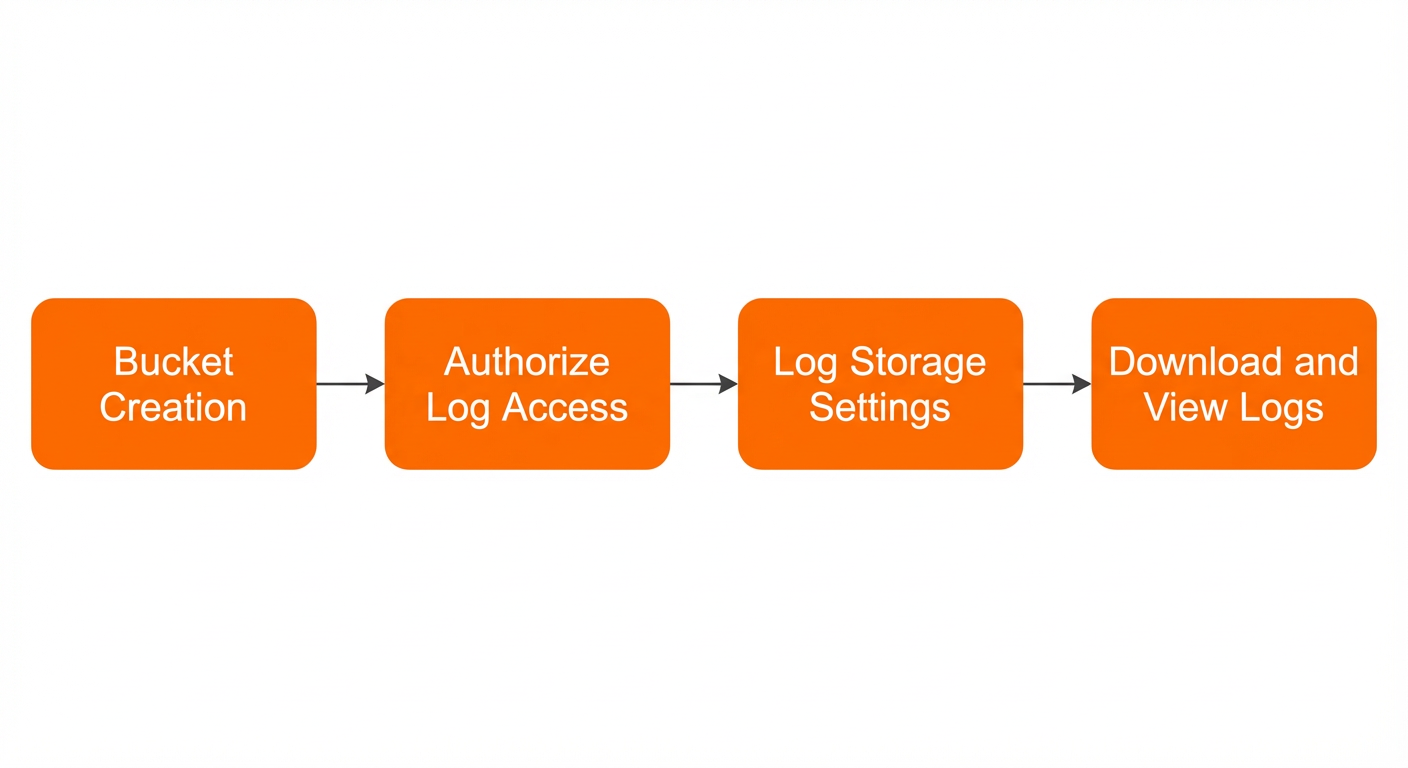
Step 1: Create a bucket
The bucket must be in the same region as the CLB instance.
Log on to the OSS console.
In the left-side navigation pane, click Buckets. On the Buckets page, click Create Bucket.
In the Create Bucket panel, configure the parameters and click Create.
For more information, see Create a bucket.
Parameter
Description
Bucket Name
The name of the bucket. The name cannot be changed after the bucket is created.
The name must meet the following requirements:
The bucket name must be globally unique.
It can contain only lowercase letters, digits, and hyphens (-).
It must start and end with a lowercase letter or a digit.
It must be 3 to 63 characters long.
NoteAvoid including sensitive information, such as your account ID, in the bucket name. The bucket name appears in the URLs of objects stored in the bucket.
Region
The data center where the bucket is located. The region cannot be changed after the bucket is created.
To access the bucket from an ECS instance over the internal network, select the same region as your ECS instance. For more information, see OSS domain name usage rules.
ImportantIf you want to create a bucket in a region in the Chinese mainland, you must complete real-name verification on the Real-name Registration page.
Redundancy Type
The data redundancy type of the bucket.
Locally redundant storage (LRS)
LRS stores data copies on multiple devices within a single zone. This ensures data durability and availability against hardware failures.
ZRS (recommended)
ZRS stores data copies across multiple zones in the same region. This keeps your data accessible even if one zone becomes unavailable.
ImportantThe following regions support ZRS: China (Shenzhen), China (Beijing), China (Hangzhou), China (Shanghai), China (Hong Kong), Singapore, and Indonesia (Jakarta). ZRS incurs higher storage costs and cannot be disabled after it is enabled. Use this feature with caution.
For more information about zone-redundant storage, see Create a zone-redundant storage bucket.
Step 2: Grant log access permissions
After you create the bucket, you must grant the CLB log role (SLBLogDefaultRole) permissions to access your OSS resources.
You need to grant these permissions only the first time you configure log storage.
-
Log on to the CLB console.
In the left-side navigation pane, choose CLB > Logs > Health Check Log.
On the Health Check Log page, click the Log Storage tab.
On the Log Storage tab, click 1. Activate OSS..
After OSS is activated, click Activate Now in the Step 2: Grant permissions to the RAM user section.
On the Cloud Resource Access Authorization page, review the authorization content and click Agree to Authorization.
Log on to the Resource Access Management (RAM) console.
In the left-side navigation pane, choose Identities > Roles. Find the SLBLogDefaultRole role and click Attach Policy in the Actions column.
In the Grant Permission panel, select System Policy in the Policy section, choose the AliyunOSSFullAccess policy, and then click OK.
Click Close.
Step 3: Configure log storage
Log on to the CLB console.
In the left-side navigation pane, choose CLB > Logs > Health Check Log.
On the Health Check Log page, click the Log Storage tab.
On the Log Storage tab, find the target region and click Configure OSS in the Actions column.
In the Configure OSS panel, configure the following parameters and click OK.
Parameter
Description
Select Bucket
Select the bucket to use for log storage.
Log Type
Select Health Check Log.
On the Log Storage tab, turn on the switch in the Status column to enable log storage.
View health check logs
You can view health check logs for the last three days in the CLB console.
Log on to the CLB console.
In the left-side navigation pane, choose Logs > Health Check Log.
On the Health Check Log page, click the Logs tab.
NoteHealth check logs are generated hourly, but only if an abnormality is detected on a backend ECS instance. If no abnormalities occur within an hour, no log file is created for that period.
A health check log message of
SLB_instance_IP:port to Added_ECS_instance_IP:port abnormal; cause:XXXindicates that the health check for the backend ECS instance is abnormal. You can troubleshoot the issue based on the reported cause.When the message in the health check log is
SLB_instance_IP:port to Added_ECS_instance_IP:port normal, it indicates that the backend ECS instance has returned to a normal state.
Download health check logs
You can download all stored health check logs from the OSS console.
-
Log on to the OSS console.
In the left-side navigation pane, click Buckets. On the Buckets page, click the name of your target bucket.
In the left-side navigation pane, choose Object Management > Objects, and then click the AliyunSLBHealthCheckLogs/ folder.
Click the target log record, and in the log details panel, click Download to the right of FileURL to download the log to your local computer.