If one-way authentication is configured, an HTTPS connection can be established after the server is authenticated. If mutual authentication is configured, an HTTPS connection can be established only after both the client and the server are authenticated. Mutual authentication provides higher security. You can configure mutual authentication to improve the security of your business-critical services. This topic describes how to configure mutual authentication on an HTTPS listener of a Classic Load Balancer (CLB) instance.
Procedure
In this example, a self-signed certificate authority (CA) certificate is used to sign the client certificate. To configure mutual authentication on the HTTPS listener, perform the following steps.

Prerequisites
A CLB instance is created.
Two Elastic Compute Service (ECS) instances that host different application services are created. In this example, the ECS instances are named ECS01 and ECS02.
Step 1: Purchase a server certificate
You can purchase a server certificate in the Certificate Management Service console or from another service provider. A browser authenticates the identity of a server by checking whether the certificate sent by the server is issued by a trusted CA.
In this example, a server certificate is purchased from the Certificate Management Service console. For more information, see Purchase an SSL certificate.
Make sure that you have a valid domain name to associate with the certificate.
Step 2: Generate a CA certificate by using OpenSSL
Log on to a Linux machine on which OpenSSL is installed.
Run the following commands to create a private key for the root CA certificate:
openssl genrsa -out root.key 4096Run the following command to create a certificate signing request (CSR):
openssl req -new -out root.csr -key root.keyConfigure the other parameters. Examples:
NoteMake sure that the common name on the CA certificate is unique. The common name must be different from the common name on the client certificate or other server certificates.
Country Name (2 letter code) [XX]:cn
State or Province Name (full name) []:bj
Locality Name (eg, city) [Default City]:bj
Organization Name (eg, company) [Default Company Ltd]:alibaba
Organizational Unit Name (eg, section) []:test
Common Name (eg, your name or your servers hostname) []:root
Email Address []:a.alibaba.com
A challenge password []:
An optional company name []:
Run the following command to create a root CA certificate:
openssl x509 -req -in root.csr -out root.crt -signkey root.key -CAcreateserial -days 3650The following figure shows the result.

Run the
Iscommand to query theroot.crtroot CA certificate file and theroot.keyprivate key file.
Step 3: Generate a client certificate
Run the following command to generate a private key for the client certificate:
openssl genrsa -out client.key 4096Run the following command to generate a CSR for creating a client certificate. Set the common name to the domain name of your CLB instance.
openssl req -new -out client.csr -key client.keyRun the following commands to view the generated client certificate:
openssl x509 -req -in client.csr -out client.crt -CA root.crt -CAkey root.key -CAcreateserial -days 3650Run the following command to convert the
client.crtclient certificate file to a PKCS12 file that is recognizable by browsers. Enter a password that is used to encrypt the private key of the client certificate.openssl pkcs12 -export -clcerts -in client.crt -inkey client.key -out client.p12Run the
Iscommand to query theclient.key,client.crt, andclient.p12client certificate files.
Step 4: Install the client certificate
Install the generated client certificate on the client.
Windows client
Double-click the client.p12 client certificate file and install the client certificate as prompted.
Linux client
Upload the client.key, client.crt, and root.crt files to a directory on the Linux client.
In this example, the certificate files are uploaded to the /home/ca directory. Run the sudo chmod 700 /home/ca command to change the permissions on the directory.
Step 5: Upload the server certificate and the CA certificate
Log on to the CLB console.
In the left-side navigation pane, choose , click Add Certificate, and then upload the server certificate.
In the Add Certificate panel, select Third-party Certificates, configure the parameters of the certificate, and then click Create.
Parameter
Description
Certificate Name
Enter a name for the certificate.
Certificate Type
In this example, Server Certificate is selected.
Public Key Certificate
Paste the content of the server certificate into the editor.
Private Key
Paste the private key of the server certificate into the editor.
Region
Select the region of the CLB instance.
On the Certificates page, click Add Certificate to upload the CA certificate.
In the Add Certificate panel, click Third-party Certificates, configure the parameters, and then click Create.
Parameter
Description
Certificate Name
Enter a name for the certificate.
Certificate Type
In this example, CA Certificate is selected.
Client CA Certificate
Upload the public key certificate of the client.
Region
Select the region of the CLB instance.
Step 6: Configure mutual authentication on an HTTPS listener
Log on to the CLB console.
Click the ID of the CLB instance that you want to manage.
On the Listener tab, click Add Listener.
In the Protocol & Listener step, configure the parameters and click Next.
Select Listener Protocol: In this example, HTTPS is selected.
Listener Port: In this example, port 443 is selected.
In the Certificate Management Service step, select the server certificate that you uploaded.
Click Modify to the right of Advanced Settings, turn on Mutual Authentication, select the CA certificate that you uploaded, then click Next.
Select Default Server Group and click Add More to add backend servers.
Use the default values for other parameters, click Next, and then click Submit.
Step 7: Test whether mutual authentication works as expected
Windows client
Visit
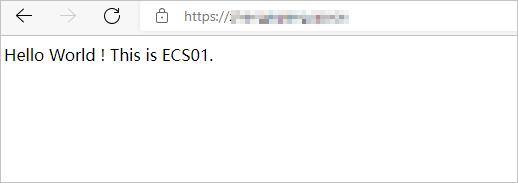
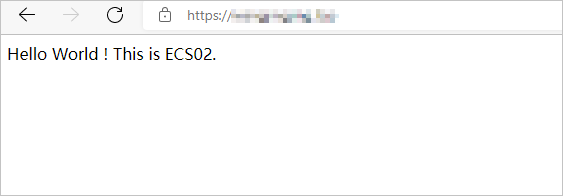
https://ip:portfrom your browser. Replace ip with the public IP address of the CLB instance. In the dialog box that appears, select the client certificate and click OK.If you refresh the page, requests are distributed between ECS01 and ECS02.


Linux client
Log on to the Linux client and run the following command to test whether mutual authentication works as expected:
sudo curl --cert /home/ca/client.crt --key /home/ca/client.key --cacert /home/ca/ca.crt https://<The domain name associated with the server certificate>:<port>The following echo reply packet shows that both the client and the server passed mutual authentication, and requests are distributed between ECS01 and ECS02. 