When the system disk on your simple application server runs low on space, attach a data disk to expand storage capacity. This topic describes how to attach a data disk and make it usable on both Linux and Windows servers.
Limitations
Each simple application server supports only one data disk.
If you attached a data disk when you created the server, you can only scale up that disk — you cannot attach an additional one. For more information, see Scale up a data disk.
The data disk is permanently bound to its server and cannot be detached.
Billing
Data disks use the subscription billing method only. The fee is calculated as:
Data disk fee = Unit price × Capacity (GB) × Subscription duration
Disk prices vary by region. To check prices, go to the Pricing tab on the Elastic Compute Service (ECS) product page and click the Storage tab.
The data disk and the server share the same expiration date and must be renewed together.
Prerequisites
Before you begin, ensure that you have:
A simple application server
No existing data disk attached (or a data disk that needs scaling up instead)
Step 1: Attach a data disk
If you attached a data disk when you created the server, skip this step.
Go to the Servers page in the Simple Application Server console.
Click the server ID of the server you want to expand.
Click the Disk tab.
In the upper-left corner, click Mount a data disk.
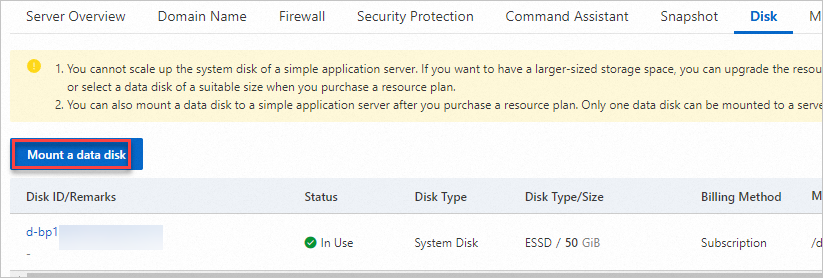
In the Precautions dialog box, read the precautions and click Data Disk Operation.
In the Data Disk section, review the current configuration and expiration date, then select a disk size.
Only one data disk can be attached to a simple application server.
Select I have read and agree to the Simple Application Server service terms and I have read and agree to the image usage terms.
Click Buy Now and complete the payment.
Step 2: Partition and format the data disk
A newly attached data disk has no file system. Format it once to create a file system, then mount it to make it accessible. The steps differ by operating system and how the disk was attached.
| Scenario | Linux | Windows |
|---|---|---|
| Disk attached during server creation | Partition and format required | Automatically done — no action needed |
| Disk attached after server creation | Partition and format required | Partition and format required |
Partition and format the data disk on a Linux server
The following steps use CentOS 7.6 64-bit as an example with the Parted and e2fsprogs utilities. The recommended partition format is GPT (GUID Partition Table).
Choose a file system
| File system | Best for |
|---|---|
| ext4 | General-purpose workloads — stable, widely supported, good default choice |
| XFS | Large files or write-heavy workloads |
1. Connect to the server and install the required tools
a. Connect to your Linux server.
b. Switch to the root user and go to the root directory:
      sudo su root
      cd
c. Install Parted and e2fsprogs:
      yum install -y parted
      yum install -y e2fsprogs
2. View the data disk
Run the following command to confirm the disk is available. The device name is /dev/vdb.
fdisk -l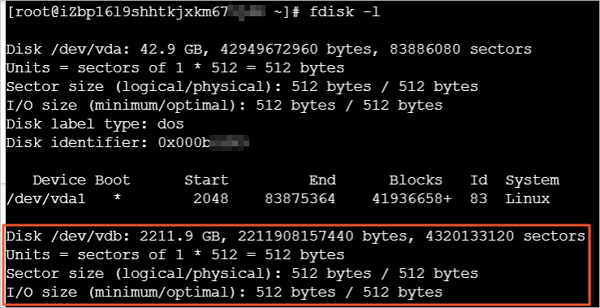
3. Partition the disk with Parted
a. Open the disk in Parted:
parted /dev/vdbb. Set the partition format to GPT:
mklabel gpt When prompted about data loss, enter `Yes`. This is a new, empty disk.c. Create a primary partition using the full disk:
mkpart primary 1 100%d. Verify partition alignment:
align-check optimal 1 The output confirms alignment. e. View the partition table:
print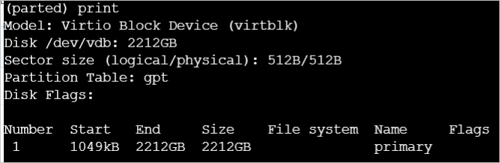
f. Exit Parted:
quit4. Re-read the partition table
partprobe5. Create a file system
Run one of the following commands based on your chosen file system:
ext4:
mkfs -t ext4 /dev/vdb1XFS:
mkfs -t xfs /dev/vdb1
This example uses ext4.
6. Configure persistent mounting
Configure the disk to mount automatically on server startup.
a. Create a mount point:
mkdir /test b. Back up /etc/fstab:
cp /etc/fstab /etc/fstab.bak c. Write the partition entry to /etc/fstab:
echo `blkid /dev/vdb1 | awk '{print $2}' | sed 's/\"//g'` /test ext4 defaults 0 0 >> /etc/fstab This command appends a line to `/etc/fstab` with the following fields:
| Field | Value in this example | Description |
|-------|-----------------------|-------------|
| Device | UUID from `blkid` | Identifies the partition by UUID — more reliable than device name |
| Mount point | `/test` | Directory where the disk is accessible |
| File system | `ext4` | Must match the file system you created in step 5 |
| Options | `defaults` | Standard mount options |
| Dump | `0` | Disables dump backup for this partition |
| Pass | `0` | Disables filesystem check (`fsck`) on boot for this partition |
Adjust the partition device name, mount point, and file system based on your setup. d. Verify the /etc/fstab entry:
cat /etc/fstab Confirm the new partition entry appears in the output. 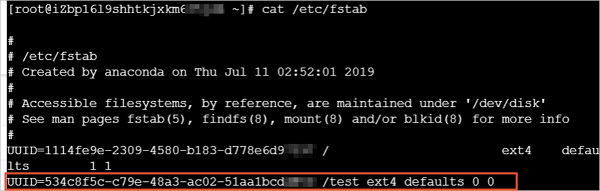e. Apply the fstab entries:
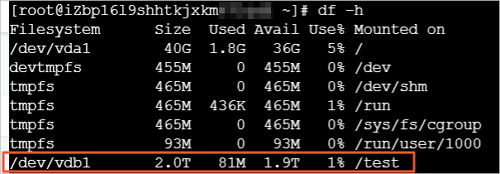
mount -a7. Verify the mount
df -hIf the new file system appears in the output, the disk is mounted and ready to use.
Partition and format the data disk on a Windows server
The following steps use Windows Server 2012 R2 64-bit as an example. The interface may vary slightly depending on your Windows version.
Right-click the
 icon at the bottom of the desktop and select Disk Management.
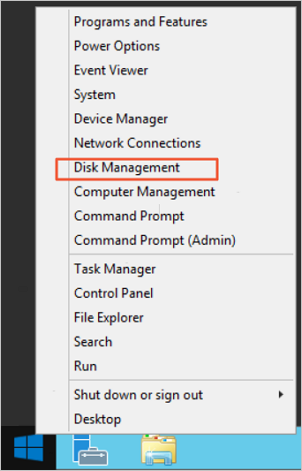
In Disk Management, locate the data disk to partition and format. In this example, Disk 1 is in the Not Initialized state.
Right-click the blank area next to Disk 1 and select Initialize Disk.
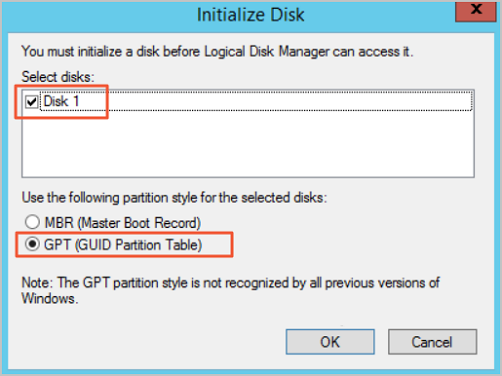
In the Initialize Disk dialog box, select Disk 1, select GPT (GUID Partition Table), and click OK. GPT and MBR (Master Boot Record) are two common partition formats:
GPT: Supports up to 128 primary partitions per disk on Windows. Cannot be recognized by early Windows versions.
MBR: Supports data disks up to 2 TiB in size and a maximum of four primary partitions per disk. Use an extended partition with logical partitions if you need more than four partitions.
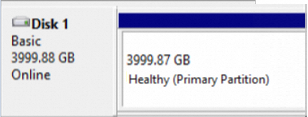
In Disk Management, right-click the Unallocated space of Disk 1 and select New Simple Volume.

Follow the New Simple Volume wizard: Wait for formatting to complete. When Disk 1 shows Healthy in Disk Management, the disk is ready to use.
Click Next.
Specify the volume size. To use the full disk as one partition, keep the default value. Click Next.
Assign a drive letter. This example uses G. Click Next.
Configure formatting settings — file system, allocation unit size, and volume label. Optionally select Perform a quick format and Enable file and folder compression. This example uses the default settings. Click Next.
Click Finish.
What's next
View disk details: After attaching the data disk, check its mount point, capacity, and usage in the console. See View data disk.
Scale up the disk: If disk space becomes insufficient, scale up the data disk. See Scale up a data disk.
Create snapshots: Back up disk data regularly to protect against accidental deletion or ransomware. See the Create a snapshot section of "Manage snapshots".
Roll back from a snapshot: Restore a disk to a previous state if data loss occurs. See Roll back a disk based on a snapshot.