Configure a Google Cloud Platform (GCP) service account key in Alibaba Cloud Security Center to automatically sync your GCP host assets. This lets you centrally manage the security of your multicloud assets and reduces management complexity.
The GCP console operations described in this topic are for reference only. For specific procedures, see the official GCP documentation.
Step 1: Create a service account and obtain a key
Log on to the GCP console. In the upper-left corner of the console, select the target project.
NoteLog on to the GCP console from a network outside the Chinese mainland, such as a network in China (Hong Kong) or Singapore.
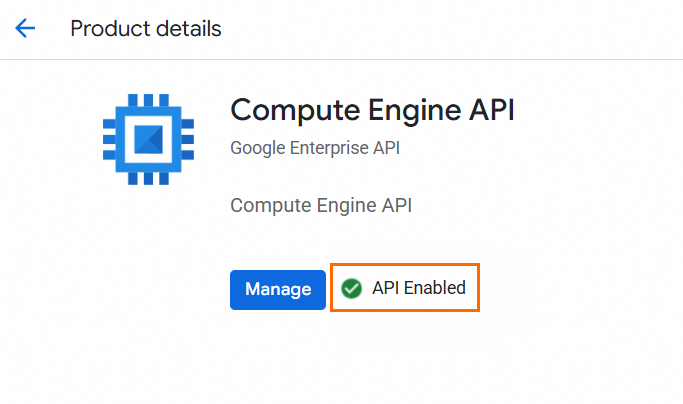
Enable the Compute Engine API.
In the navigation pane on the left, choose .
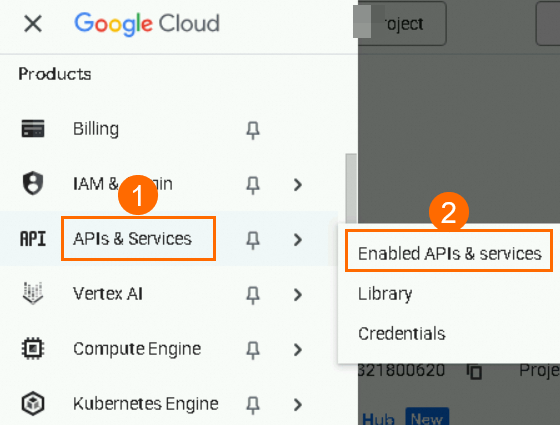
Follow the on-screen instructions to enable the Compute Engine API.
Create a service account and grant permissions.
In the navigation pane on the left, choose .
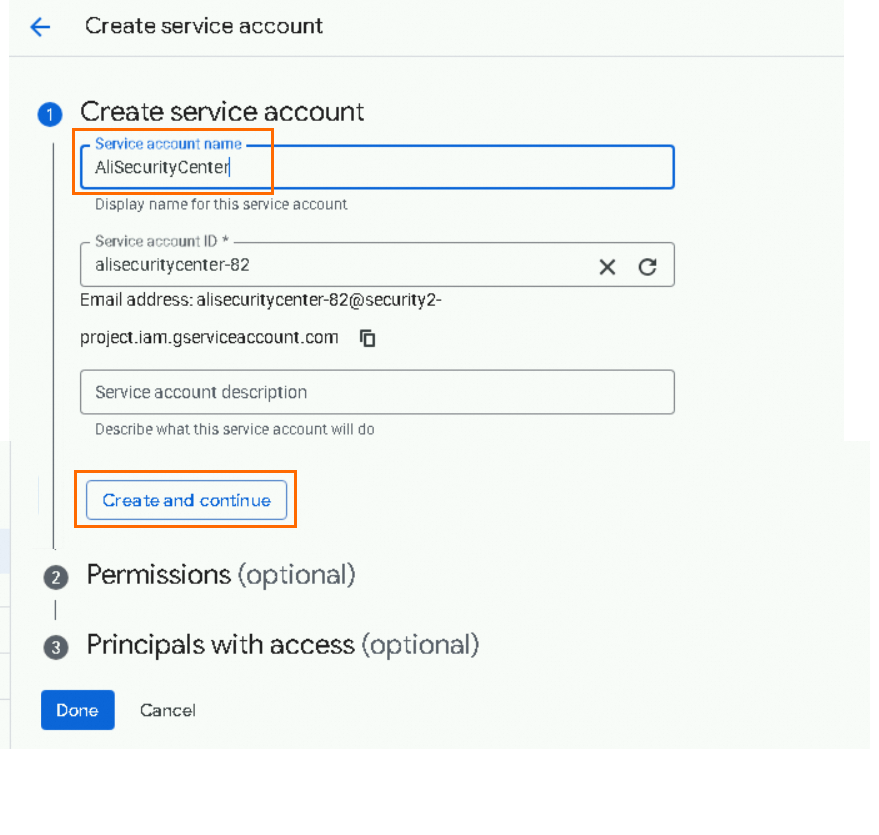
On the Service Accounts page, click Create Service Account.

On the Create Service Account page, enter a service account name and click Create and Continue.
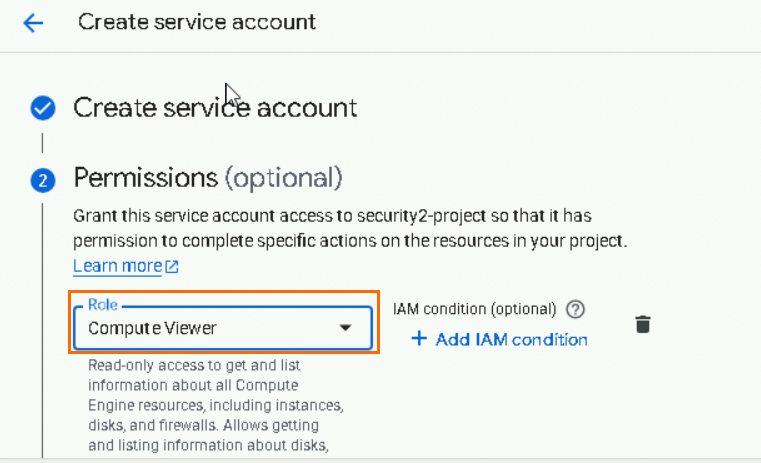
In the Permissions (Optional) section, select the Compute Viewer role, and click Done.
Create a key for the service account.
In the service account list, click the
 icon in the Actions column for the target service account, and then click Manage Keys.
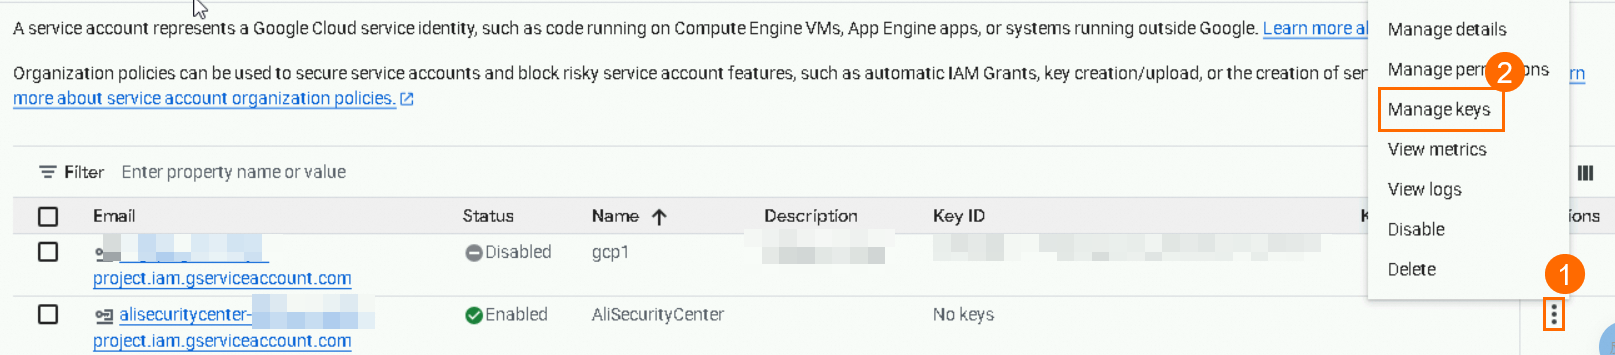
On the Keys tab, choose .
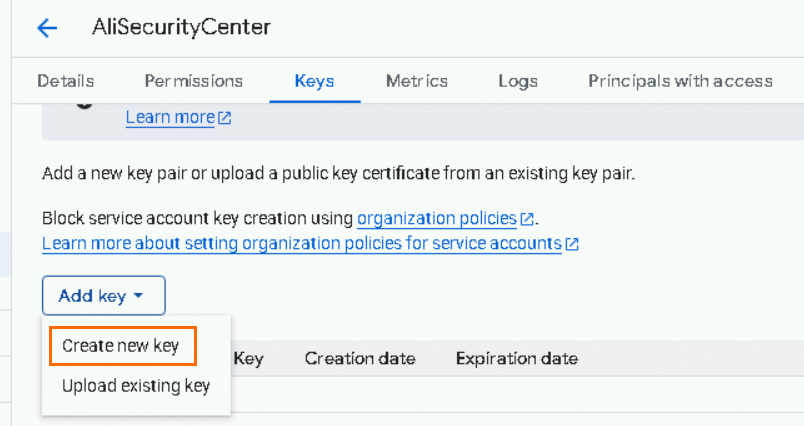
In the Create Private Key dialog box, keep the default Key Type: JSON, and click Create.
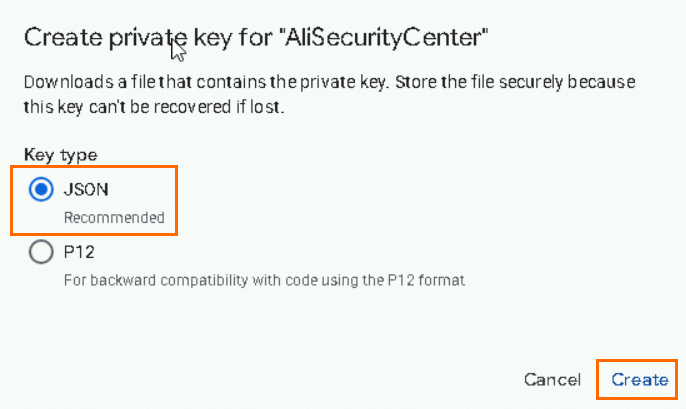
Download and save the private key file.
Step 2: Associate VM instances with the service account
Security Center synchronizes only Google Cloud Platform (GCP) virtual machine (VM) instances that are associated with a service account. You must associate the VM instances that you want to add to Security Center with the service account that you use for provisioning.
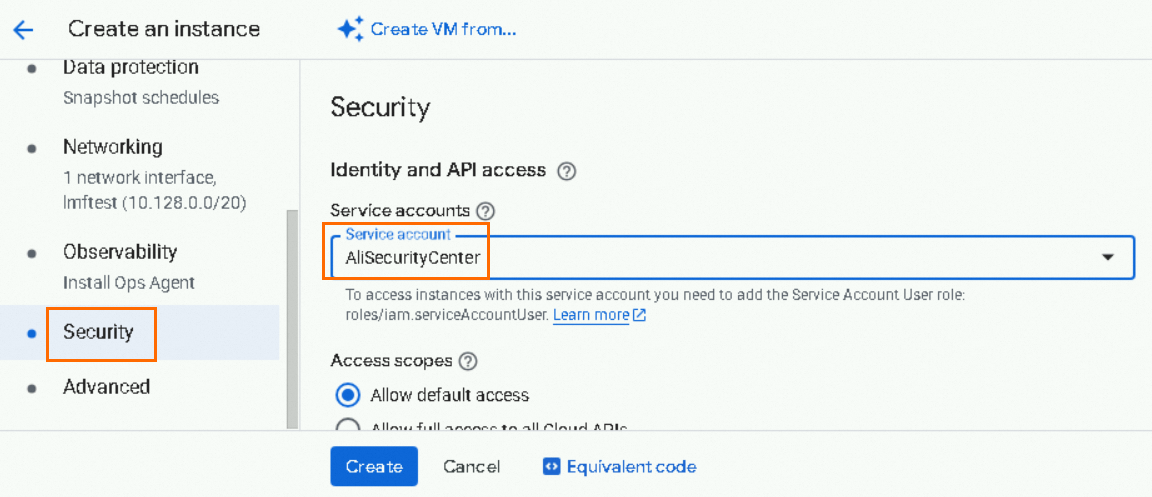
For new VM instances
On the Create an Instance page in the GCP console, click Security in the left navigation pane. For Service account, select the service account that you created in Step 1: Create a service account and obtain a key. Then, create the instance.
For existing VM instances
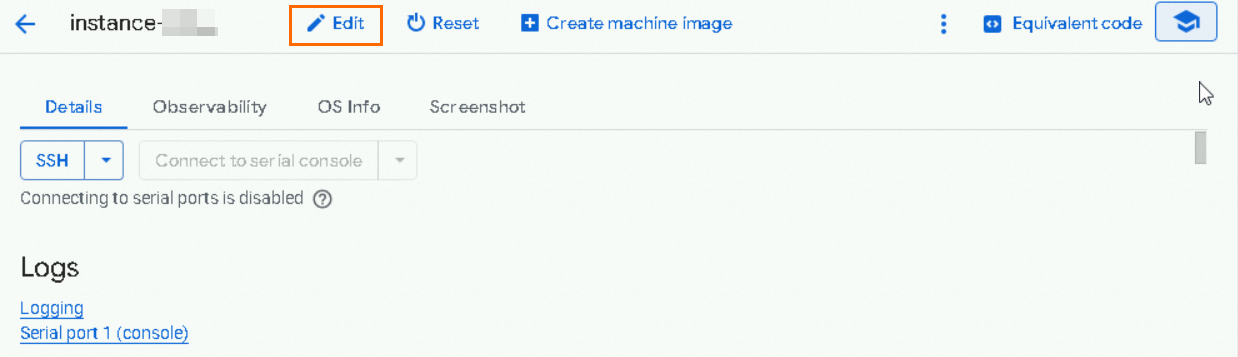
On the VM instance details page, click Edit.
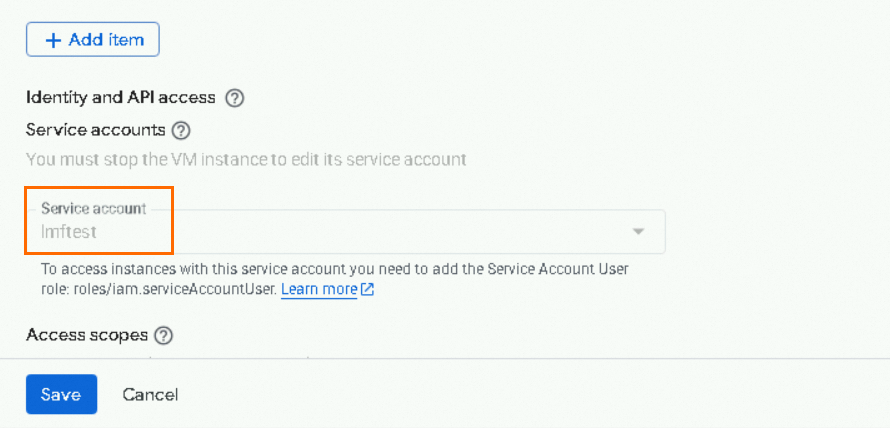
In the Identity and API access section, change the service account to the one that you created in Step 1: Create a service account and obtain a key, and then click Save.
ImportantYou must stop the VM instance to change its service account.
Step 3: Submit the service account key
Log on to the Security Center console.
ImportantYou can add Google Cloud assets only in regions Outside Chinese Mainland due to network restrictions.
In the navigation pane on the left, choose . In the upper-left corner of the console, select the region where your assets are located: Chinese Mainland or Outside Chinese Mainland.
On the tab, click Grant Permission, and select GCP from the drop-down list.
Alternatively, you can go to the page. In the Add Multi-cloud Asset area, hover over the
 icon and click Add below GCP to open the Add Assets Outside Cloud panel.
In the Permission Description section, select Host and click Next.
In the Extended Information section, click Upload File to upload the private key file that you obtained in Step 1: Create a service account and obtain a key.
Enter an Account Name and click Next.
The account name is used to distinguish different accounts of the same cloud provider. We recommend that you specify a descriptive name.
ImportantDo not delete or disable the key. Otherwise, the provisioning of GCP assets may be affected.
Step 4: Configure the provisioning policy
In the Policy Configuration wizard of the Add Assets Outside Cloud panel in the Security Center console, configure the region and data synchronization frequency for the GCP assets, and then click OK.
Configuration Item
Description
Select region
Select the region where the assets that you want to add are located. Security Center adds the assets in the specified region to the Management Center for regions Outside Chinese Mainland.
Region Management
If you select this option, Security Center adds asset data from new regions in the current GCP account to the Data Management center for regions Outside Chinese Mainland by default.
If you do not select this option, new regions are not added to Security Center.
Host Asset Synchronization Frequency
Select the interval at which Security Center automatically synchronizes GCP host assets. Select Shutdown to disable synchronization.
AK Service Status Check
Select the interval at which Security Center automatically checks the validity of the GCP service account key. Select Shutdown to disable the check.
Click Synchronize Assets to synchronize all host assets from the GCP service account to Security Center.
Step 5: Verify the result
In the Security Center console, go to the page. Click the ![]() icon in the Add Multi-cloud Asset section. If the GCP asset list is displayed, the connection is successful. For more information, see Server assets.
icon in the Add Multi-cloud Asset section. If the GCP asset list is displayed, the connection is successful. For more information, see Server assets.
What to do next
Install the Security Center client on your GCP assets.
Attach a Security Center edition to your GCP assets. We recommend that you attach a paid edition of Security Center to obtain security protection and hardening capabilities. The Free Edition is limited to basic detection and does not provide mitigation capabilities. For more information about the differences between editions, see Purchase Security Center.