Security Center sends alert notifications through DingTalk by default. To forward alerts to Lark or WeChat Work, use CloudMonitor event subscriptions.
Overview
Security Center pushes alerts to CloudMonitor, which forwards them to Lark or WeChat Work through event subscriptions. Follow these steps:
-
Enable CloudMonitor push: Turn on the CloudMonitor push switch in Security Center notification settings and select alert types.
-
Create a chatbot: Create a custom chatbot in Lark or WeChat Work and copy its webhook URL.
-
Create a CloudMonitor alert contact group:
-
Create an alert contact in CloudMonitor and bind the webhook URL.
-
Add the alert contact to an alert contact group.
-
-
Create a CloudMonitor notification policy: Create a notification policy and associate it with the alert contact group.
-
Configure a CloudMonitor event subscription: Subscribe to Security Center system events and associate the subscription with the notification policy.
Step 1: Enable CloudMonitor push in Security Center
Enable CloudMonitor push so it can receive and forward Security Center alerts.
CloudMonitor does not receive Security Center alerts until you enable this feature.
-
Go to the Security Center console > System Settings > Notification Settings page. In the upper-left corner of the page, select the region where your assets are located: Chinese Mainland or Outside Chinese Mainland.
-
On the Cloud Monitor Push tab, select the notification items to push. The following table describes these notification items.
Notification item
Push frequency
Description
Security Incident
Push ResultDetails: No limit
Notifications for detected security attacks, such as DDoS attacks and brute-force attacks.
Alert
Push ResultDetails: No limit
Notifications for threats detected on hosts or in containers, such as suspicious logon activity and malicious processes.
Baseline Check
Push ResultOverview: Sent once a week every Thursday.
Notifications for summary reports of security baseline checks.
CSPM
Push ResultOverview: Sent once a week every Thursday.
Notifications for summary reports of cloud platform configuration risk checks.
Agentless Detection
Push ResultDetails: Customizable
Notifications for security scan results that do not require an agent to be installed.
Malicious file
Push ResultDetails: Customizable
Notifications for malicious files detected by the malicious file detection SDK.
Vulnerability
Push ResultOverview: Sent once a week every Thursday.
Push ResultDetails: Customizable
Notifications for detection results and summaries of system and application vulnerabilities.
Application Protection
Push ResultDetails: Customizable
Alert notifications for Runtime Application Self-Protection (RASP).
Step 2: Create a chatbot
Create a custom chatbot in Lark or WeChat Work and copy its webhook URL for use in Step 3.
Lark chatbot
Create a custom chatbot from the Lark desktop client.
-
Open the Lark desktop client and log on. In a group, click the
 icon in the upper-right corner, then click Group Robot.
 -
In the Group Robot panel, click Add Robot and select Custom Robot.
-
On the chatbot configuration page, enter a Robot Name, such as
CloudMonitor Alert, and click Add. -
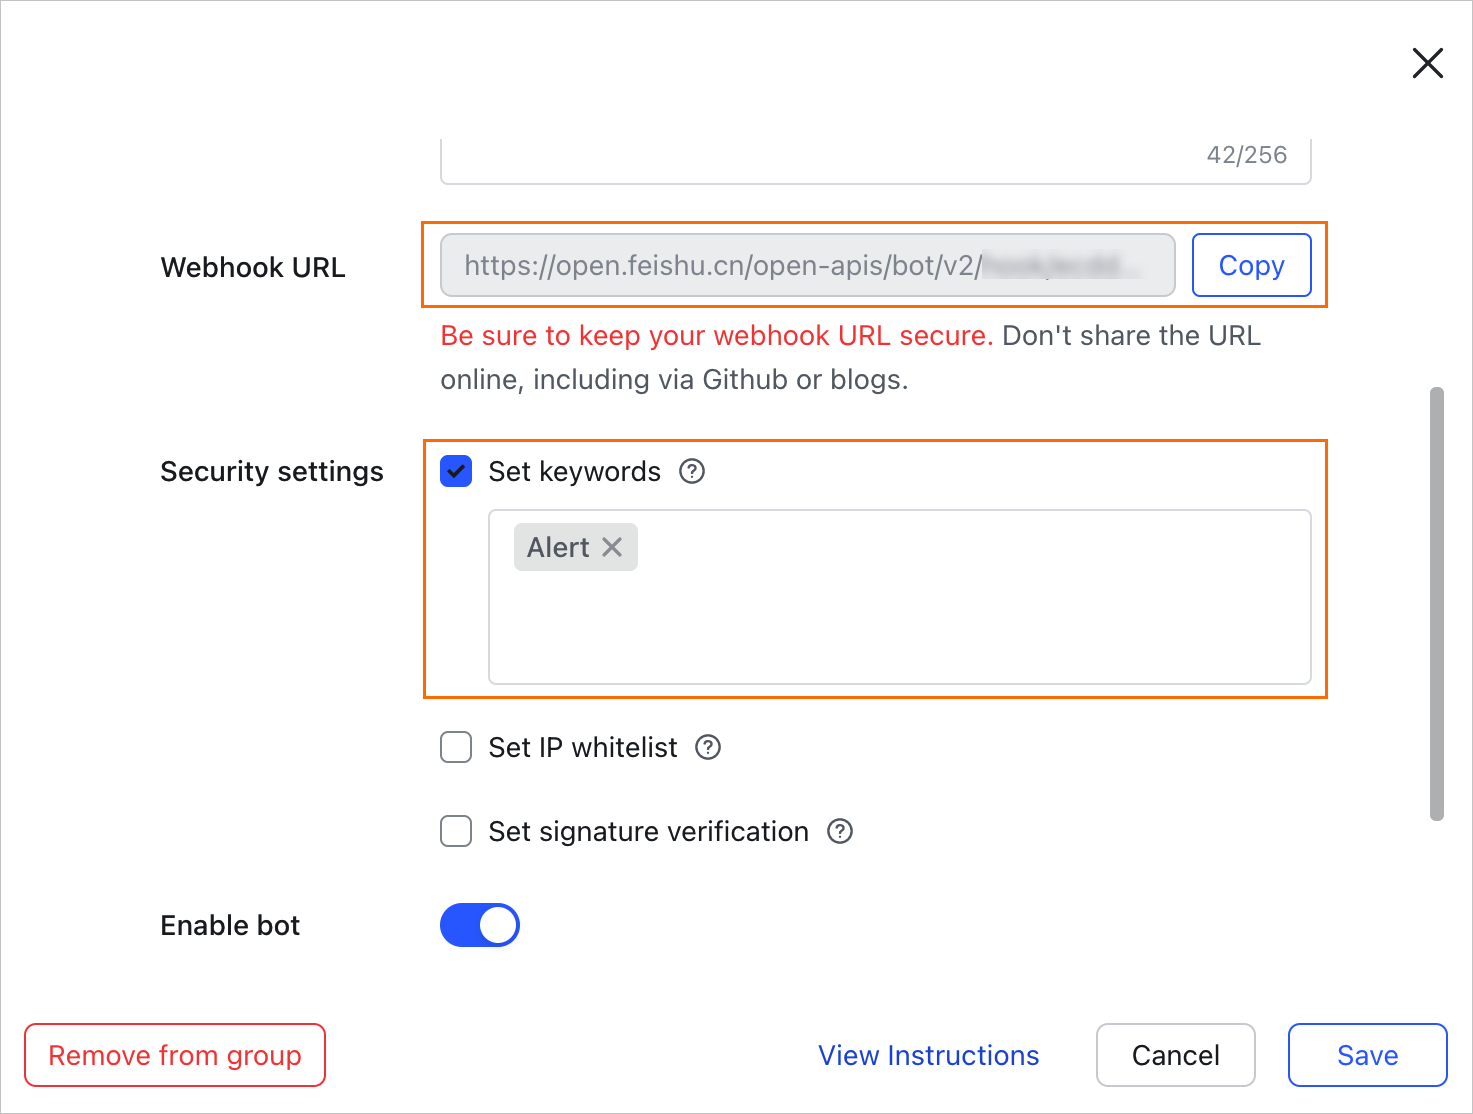
Copy the webhook URL. Then, select Custom Keywords and enter keywords such as
alert,CloudMonitor, orSecurity Center.Important-
Lark blocks messages without a matching keyword. Add multiple general keywords to ensure delivery.
-
Save the webhook URL securely. You need it to configure the CloudMonitor alert contact.
-
Create a WeChat Work bot
Create a custom chatbot from the WeChat Work mobile app.
-
Open and log on to the WeChat Work app.
-
In a WeChat Work group, tap the
 icon in the upper-right corner, then tap Group Robot.
 -
On the Group Robot page, tap Add Robot.
-
On the Add Robot page, enter a Custom Robot Name, such as
CloudMonitor Alert, then tap Add. -
On the confirmation page, tap Copy to save the webhook URL.
ImportantSave the webhook URL securely. You need it to configure the CloudMonitor alert contact.
Step 3: Configure alert contacts and policies
Create an alert contact in CloudMonitor, bind the webhook URL from Step 2, and add the contact to a contact group.
-
Create an alert contact
-
Log on to the CloudMonitor console. In the left-side navigation pane, choose .
-
On the Alert Contacts tab, click Create Alert Contact.
-
In the Set Alert Contact panel, configure the following parameters:
-
Name: Enter a name, such as
Lark chatbotorWeChat Work chatbot. -
DingTalk|Lark|WeCom|Slack Webhook(http|https): Paste the webhook URL from Step 2. This universal webhook field accepts URLs for both Lark and WeChat Work.
-
-
(Optional) Test webhook connectivity: Click Test next to the webhook field. A
200status code confirms a successful connection. -
After you verify the information, click Confirm.
-
-
Create an alert contact group
-
Click the Alert Contact Group tab, and then click Create Alert Contact Group.
-
In the Create Alert Contact Group panel, configure the following parameters and click Confirm.
-
Group Name: Enter a name for the group, such as
Lark chatbot grouporWeChat Work chatbot group. -
Select contacts: Select the alert contact you created in the previous step.
-
-
-
Create a notification policy
-
In the left-side navigation pane, choose .
-
Click Create policy. Configure the following parameters and click OK.
-
Name: Enter a name for the policy. For example,
Security Center Alert Notification. -
Notification Settings: Select Set Notification Group Directly.
-
Contact Group: Select the alert contact group you created in the previous step.
-
-
Step 4: Configure an event subscription
Subscribe to Security Center system events and associate the subscription with the notification policy from Step 3.
-
Log on to the CloudMonitor console. In the left-side navigation pane, choose .
-
On the Subscription Policy tab, click Create Subscription Policy and configure the following parameters.
-
Name: Enter a descriptive name, such as
Security Center Alerts to Lark. -
Subscription Type: Select System Events.
-
Subscription Scope:
-
Products: Select Security Center.
-
Event Type: Select the event type that maps to the Notification Item and Push Content you enabled in Step 1. Mappings:
Security Center
CloudMonitor
Security Incident
Incident
Alert
Suspicious
Baseline Check
System-Baseline-cnt
CSPM
Cspm-cnt
Agentless Detection
Agentless
Malicious file
mfd SDK
Vulnerability
Push Result Overview: Vulnerability-cnt
Push Result Details: Vulnerability
Application Protection
Rasp
-
Event name and Event Level: Select the events you want notifications for.
-
Leave these fields empty to receive notifications for all events.
-
If you select Set as blacklist, the rule inverts: you receive notifications for all events except those matching the specified Event name or Event Level.
-
-
Application grouping, Event Content, and Event Resources: Keep the defaults.
-
-
Combined Noise Reduction: Keep the defaults.
-
Notification Configuration: Select the notification policy from Step 3.
-
Custom Notification Method and Push and Integration: Keep the defaults.
-
-
Click Submit.
FAQ
-
Why am I not receiving alerts after completing the configuration?
Check the following:
-
Security Center push switch: Verify that the Cloud Monitor Push switch is on for the expected alert types in Step 1.
-
Event subscription rule: In Step 4, confirm that the filter conditions (Event Type, event level) match the expected alerts.
-
Lark keywords (most common issue): Ensure the custom keywords match alert message content. Use general keywords like
alertorevent. -
Webhook URL: In CloudMonitor Alert Contacts, use Test to verify the webhook is reachable. Check for incorrect URLs or firewall blocking.
-
CloudMonitor event history: Check Event Center > Event History for received events. Failed pushes show a failure reason.
-
-
How can I avoid alert fatigue?
-
Enable Merge and Reduce Noise: In the event subscription, configure Merge and Reduce Noise to consolidate repeated events within a time window (for example, 1 minute).
-
Filter precisely: Set the event level (for example, high-risk only) or specify particular event name values to reduce noise.
-
-
What should I do if the webhook test returns a non-200 status code?
A non-200 status code means CloudMonitor cannot reach your chatbot. Common causes:
-
Incorrect URL: The webhook URL is incomplete or incorrect.
-
IP whitelist restrictions: Some tools like Lark use IP whitelists. Add CloudMonitor server IPs to the whitelist.
-
Keyword mismatch (Lark): The message lacks a matching keyword, so Lark blocks delivery.
-
Frequency limit exceeded: The bot hit its rate limit. WeChat Work, for example, allows only 15 messages per minute.
-