Install PyCharm on Windows, create a Python project, and make your first Alibaba Cloud API call.
Before you begin
-
A computer running Windows.
-
Python installed on your system.
-
An AccessKey pair from a RAM user. Do not use your Alibaba Cloud account's AccessKey pair.
Install PyCharm and create a project
Step 1: Install PyCharm
-
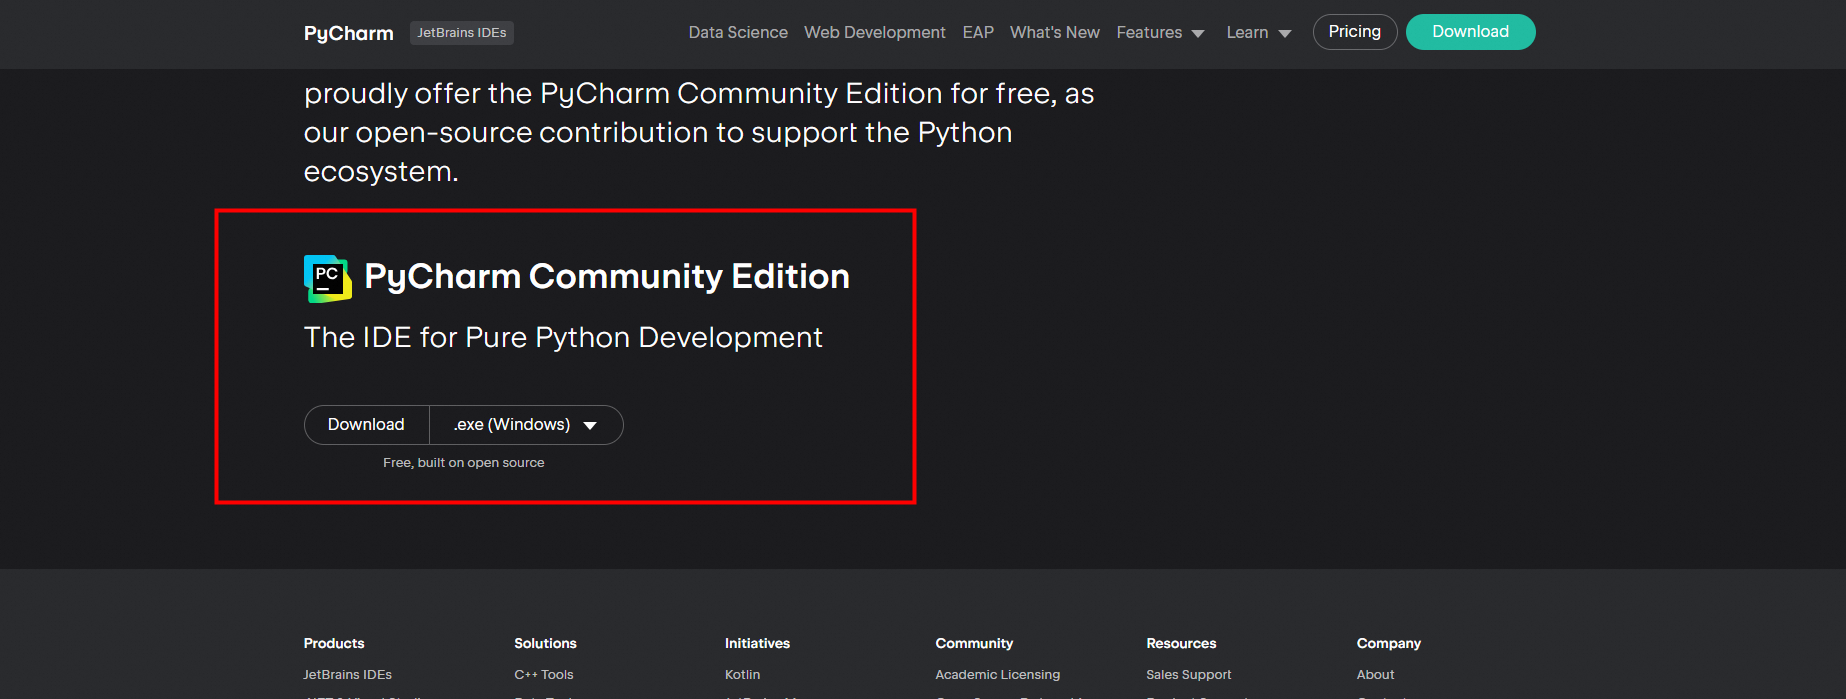
Navigate to the official PyCharm download page.
-
Find the Community Edition and click Download.
-
Run the downloaded installer and follow the setup wizard.
ImportantIn the Installation Options step, select Add "bin" folder to the PATH to enable command-line access to PyCharm.
Step 2: Create a new project
-
Open PyCharm and click New Project.

-
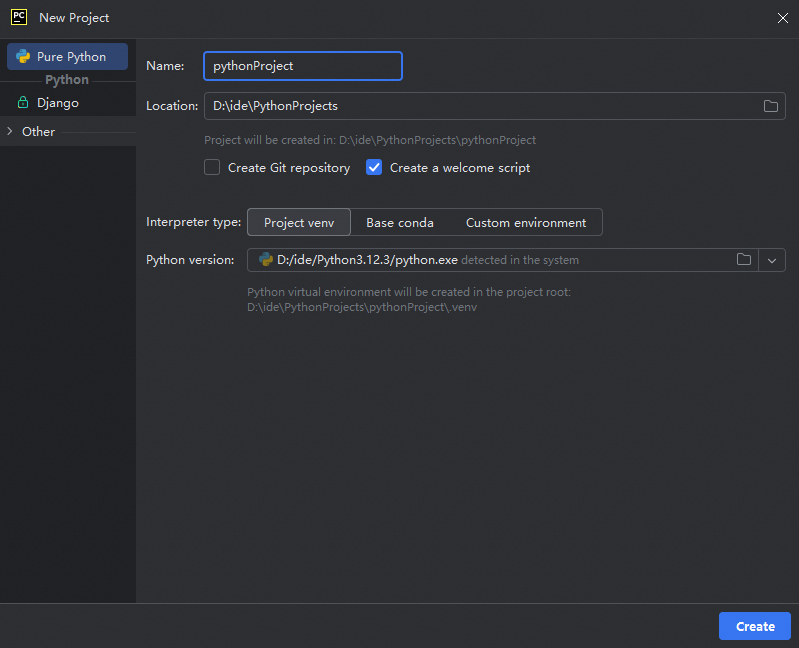
In the New Project dialog box, configure your project:
-
Name: Enter a name for your project, such as
my-first-app. -
Location: The directory for your project files.
-
Interpreter type: The runtime environment for your project.
-
Project venv (Recommended): Creates an isolated virtual environment (
venv) for your project, preventing dependency conflicts between projects.Python version: Defaults to the Python version on your system. Select a different version if multiple are installed.
-
Base conda: Uses the Conda package manager. Suited for data science, scientific computing, and multi-language projects with complex dependencies.
-
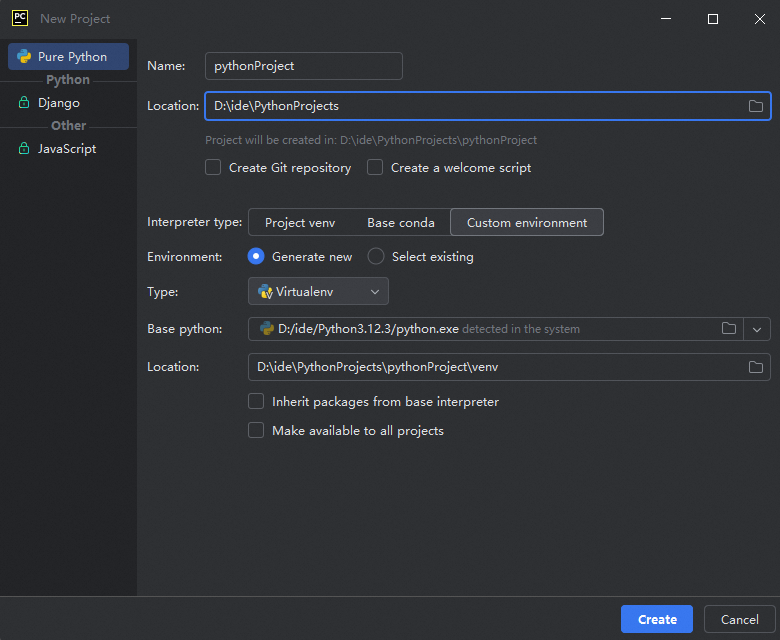
Custom environment: Manually configure the environment.
-
Environment: Create a new environment or use an existing one.
-
Type: The environment tool.
Virtualenvis the default. -
Base python: The Python interpreter version for the environment.
-
Location: The directory for the environment.
-
Inherit packages from base interpreter: Includes packages from the base interpreter.
-
Make available to all projects: Makes this environment accessible to other projects.
-
-
-
-
-
Click Create.
Step 3: Create and run a Python file
-
In the Project tool window on the left, right-click your project's folder (such as
my-first-app) and choose New > Python File.
-
In the dialog box, enter a name for your file, such as
hello_alibabacloud, and press Enter. -
In the editor window for
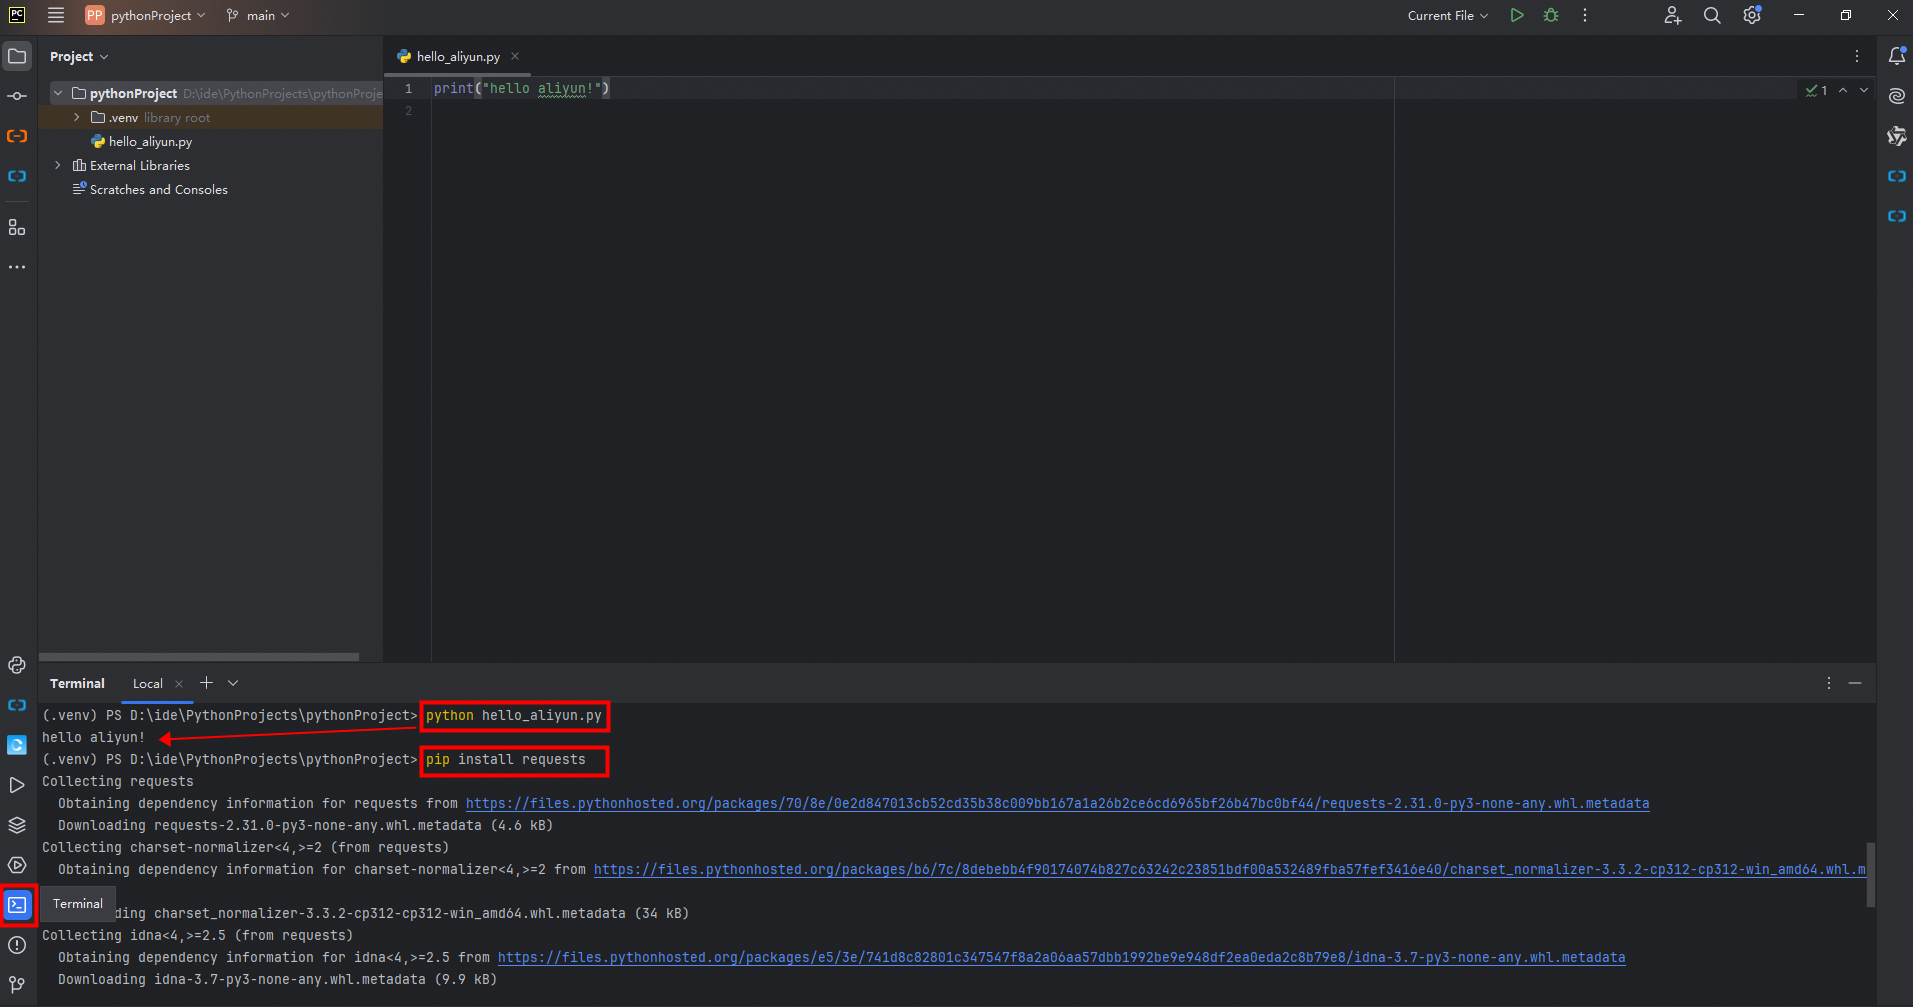
hello_alibabacloud.py, type the following code:print("Hello, Alibaba Cloud!") -
To run the script, click the green Run icon in the upper-right corner of the editor. The output
Hello, Alibaba Cloud!appears in the Run tool window at the bottom.
Use the integrated terminal
PyCharm's integrated terminal uses your project's virtual environment automatically. Click the Terminal tab or press Alt+F12 to open it. Use it to run scripts (python hello_alibabacloud.py) or install packages with pip (pip install requests).
What to do next
Start building applications that interact with Alibaba Cloud services.
Example 1: Call a service API with the Alibaba Cloud SDK
Use the Alibaba Cloud SDK for Python to call the ECS DescribeInstanceTypeFamilies operation.
Set up authentication
API calls require an AccessKey pair from a RAM user. For more information, see Create an AccessKey.
Always store credentials in environment variables, never in code. For instructions, see Configure environment variables in Linux, macOS, and Windows.
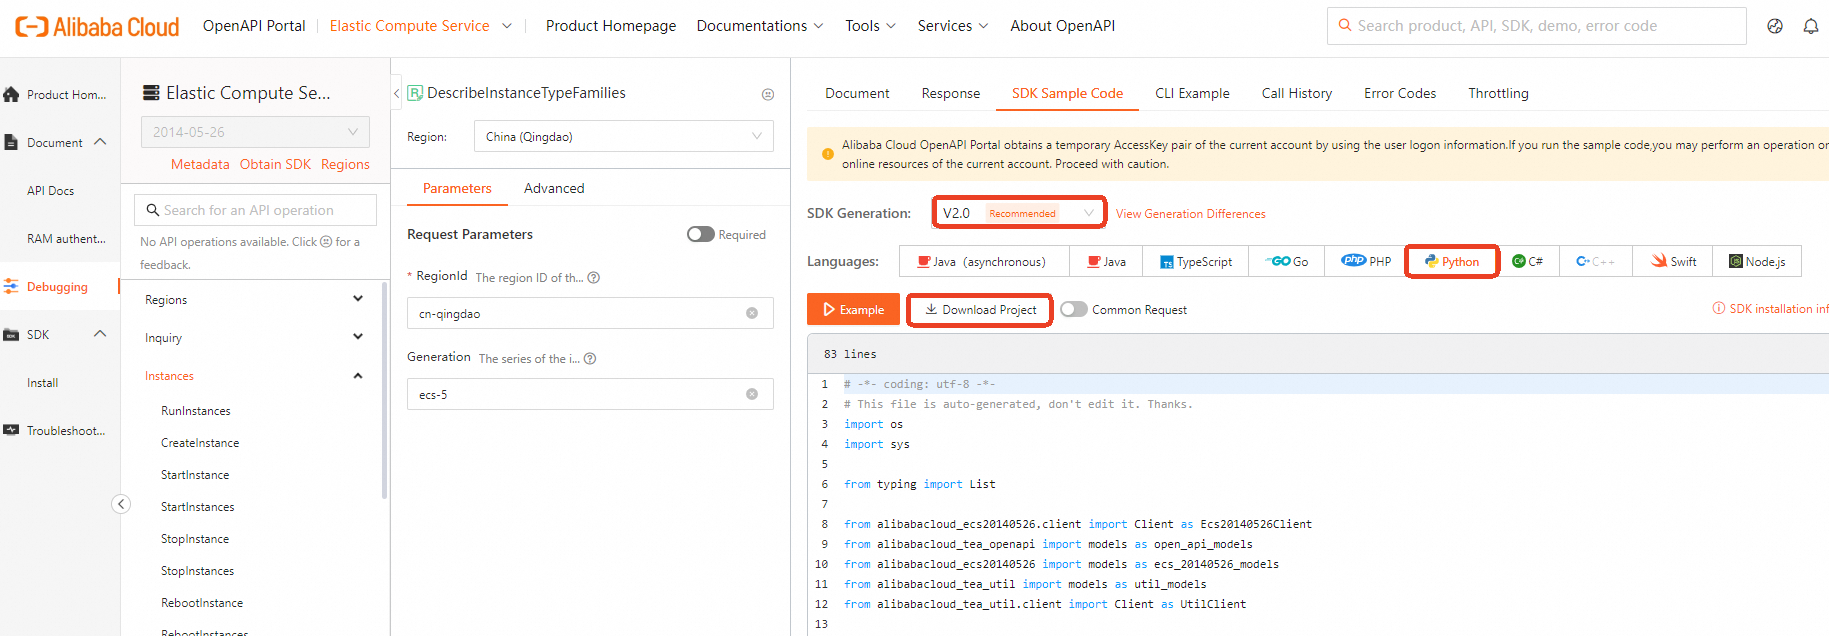
Generate and run the SDK sample code
-
Navigate to the SDK Center.
-
Select the service (such as ECS) and the API operation (such as DescribeInstanceTypeFamilies).
-
On the Parameters tab, fill in the required parameters. For this example, set
RegionIdtocn-qingdaoandGenerationtoecs-5. -
In the rightmost column, click the SDK Sample Code tab, select Python, and click Download Project.
-
Decompress the downloaded package and open the project in PyCharm.
-
Run the script. You should see a response as follows:

For more information, see Use the Alibaba Cloud Python SDK in an IDE.
Example 2: Call a large language model (Qwen)
Call the Qwen large language model (LLM) through the OpenAI-compatible API from Alibaba Cloud Model Studio.
Set up authentication
Activate Model Studio and get an API key. For more information, see Account setup.
Configure your API key as an environment variable named DASHSCOPE_API_KEY. For instructions, see Set your API key as an environment variable.
Install the SDK and run the sample code
-
In the PyCharm terminal, install the OpenAI Python SDK:
pip install -U openaiA
Successfully installed ... openai-x.x.xmessage confirms the installation.
-
Create a new Python file and add the following code:
import os from openai import OpenAI try: client = OpenAI( # Reads the API key from the DASHSCOPE_API_KEY environment variable. api_key=os.getenv("DASHSCOPE_API_KEY"), base_url="https://dashscope.aliyuncs.com/compatible-mode/v1", ) completion = client.chat.completions.create( model="qwen-plus", messages=[ {'role': 'system', 'content': 'You are a helpful assistant.'}, {'role': 'user', 'content': 'Who are you?'} ] ) print(completion.choices[0].message.content) except Exception as e: print(f"An error occurred: {e}") -
Run the script. You should see a response from the Qwen model.

For more information, see the OpenAI Python SDK.