Workflow scheduling
This topic shows you how to use visual workflows to orchestrate jobs with Cron expressions and API calls.
Usage
-
Jobs within a workflow do not have independent schedules. They are triggered based on the workflow's schedule.
-
A workflow must contain at least two jobs with a defined dependency. For tasks involving a single job, use the Task Management feature instead.
-
Workflows allow you to orchestrate jobs across different applications.
Limitations
Currently, data transfer is supported only for Java jobs. For distributed Java jobs, use the MapReduce model for data transfer.
Usage
For detailed instructions, see Manage Workflows.
Upstream and downstream data passing
SchedulerX orchestrates jobs through workflows and supports data passing between them.
Return an execution result
/**
 *
 * @param status
 * @param result, the size should be less than 1000 bytes
 * @throws Exception
 */
public ProcessResult(boolean status, String result) throws Exception;
Call this method at the end of a processor to return an execution result.
The result string cannot exceed 1,000 bytes. This limit applies to the byte size, not the number of characters. Strings that contain multi-byte characters, such as Chinese characters, can exceed this limit, causing the job to fail.
Get upstream data
List<JobInstanceData> upstreamDatas = JobContext.getUpstreamData();In a processor, call this method on JobContext to get data from upstream jobs. This method returns a list because a job can have multiple parent nodes. Each JobInstanceData object contains two properties: JobName (String) and Data (String).
Example
-
First, write three job processors.
public class TestSimpleJobA extends JavaProcessor {
    @Override
    public ProcessResult process(JobContext context) throws Exception {
        System.out.println("TestSimpleJobA " + DateTime.now().toString("yyyy-MM-dd HH:mm:ss"));
        return new ProcessResult(true, String.valueOf(1));
    }
}
public class TestSimpleJobB extends JavaProcessor { @Override public ProcessResult process(JobContext context) throws Exception { System.out.println("TestSimpleJobB " + DateTime.now().toString("yyyy-MM-dd HH:mm:ss")); return new ProcessResult(true, String.valueOf(2)); } }public class TestSimpleJobC extends JavaProcessor { @Override public ProcessResult process(JobContext context) throws Exception { List<JobInstanceData> upstreamDatas = context.getUpstreamData(); int sum = 0; for (JobInstanceData jobInstanceData : upstreamDatas) { System.out.println("jobName=" + jobInstanceData.getJobName() + ", data=" + jobInstanceData.getData()); sum += Integer.valueOf(jobInstanceData.getData()); } System.out.println("TestSimpleJobC sum=" + sum); return new ProcessResult(true, String.valueOf(sum)); } } -
Configure the workflow in the console as shown in the following figure:
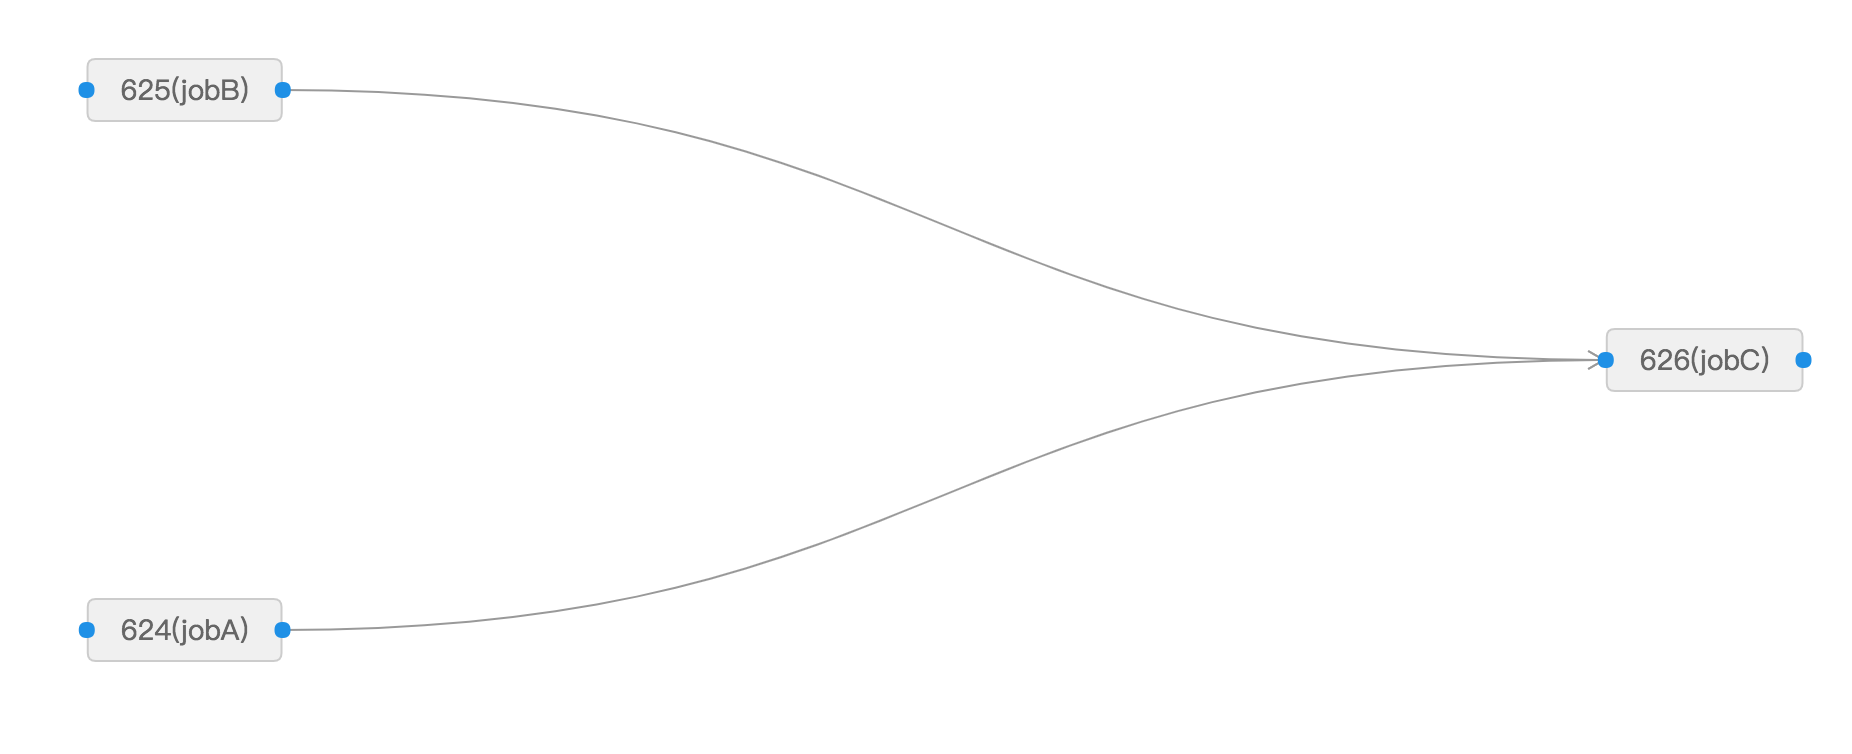
-
After you trigger the workflow, in the left-side navigation pane, choose Execution List > Process Instance List. Find the workflow that you created. Then, click Instance ID/Process Instance Diagram to open the Workflow Instance Details page. Right-click the instance for JobA and select Details. On the Task Instance Details page, the result for the JobA instance is
1.Similarly, the result for the JobB instance is
2, and the result for the JobC instance is3. -
Check the console log output for JobC.
jobName=jobB, data=2
jobName=jobA, data=1
TestSimpleJobC sum=3