This topic describes how to connect a Golang application to SchedulerX by using SDK for Golang.
Procedure
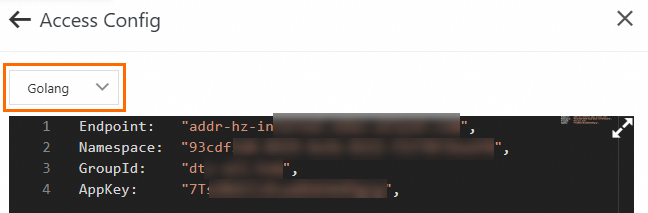
Create a general application and query the configurations. For more information, see the Create an application section of the Application management topic and the Step 2 section of the Connect to SchedulerX over the Internet from an on-premises environment topic.

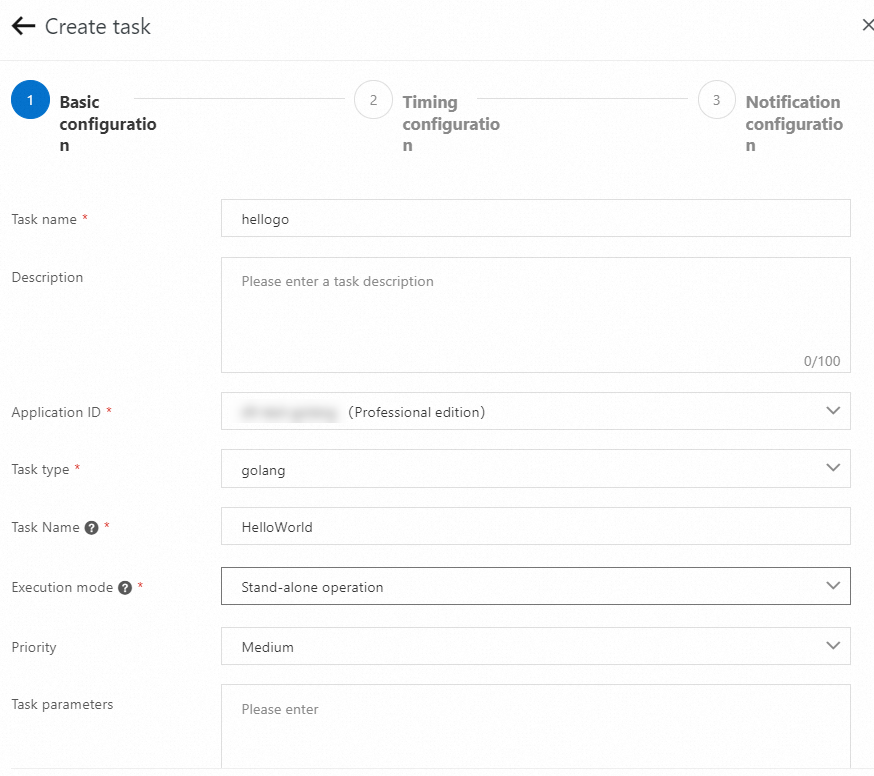
Create a Golang job. For more information, see Job management.
Client access
Run the following command to obtain SchedulerX SDK for Go by using the latest tag:
go get github.com/alibaba/schedulerx-worker-go@{Latest tag}Alternatively, run the following command to obtain an SDK for Golang branch package and its dependencies:
go get github.com/alibaba/schedulerx-worker-go@{Branch name}Write service code to implement the
Processorinterface.type Processor interface { Process(ctx *processor.JobContext) (*ProcessResult, error) }Sample code:
package main

import (
	"fmt"
	"github.com/alibaba/schedulerx-worker-go/processor"
	"github.com/alibaba/schedulerx-worker-go/processor/jobcontext"
	"time"
)

var _ processor.Processor = &HelloWorld{}

type HelloWorld struct{}

func (h *HelloWorld) Process(ctx *jobcontext.JobContext) (*processor.ProcessResult, error) {
	fmt.Println("[Process] Start process my task: Hello world!")
	// mock execute task
	time.Sleep(3 * time.Second)
	ret := new(processor.ProcessResult)
	ret.SetStatus(processor.InstanceStatusSucceed)
	fmt.Println("[Process] End process my task: Hello world!")
	return ret, nil
}
Register the Golang job with the client. The job name must be the same as the one you specified in the console.
package main

import (
	"github.com/alibaba/schedulerx-worker-go"
)

func main() {
	// This is just an example, the real configuration needs to be obtained from the platform
	cfg := &schedulerx.Config{
		Endpoint:  "acm.aliyun.com",
		Namespace: "433d8b23-xxx-xxx-xxx-90d4d1b9a4af",
		GroupId:   "xueren_sub",
		AppKey:    "xxxxxx",
	}
	client, err := schedulerx.GetClient(cfg)
	if err != nil {
		panic(err)
	}
	task := &HelloWorld{}

	// Specify a name for your job and register it with the client. The job name must be the same as the one you specified in the console.
	client.RegisterTask("HelloWorld", task)
	select {}
}
Client parameters
Parameter | Operation | Description |
Custom port | config.WithGrpcPort | Non-standalone jobs that run on multiple workers need to be interconnected. To interconnect the jobs, you must specify a port. If you do not specify a port, the system randomly selects an idle port. |
Custom NIC | config.WithIface | If a worker has multiple network interface controllers (NICs) and you want to use a specific NIC, you can specify a custom name for the NIC to obtain its IP address. |
Custom tag | config.WithLabel | You can add tags to the client and configure job scheduling based on specific tags. Tags are suitable for canary release and testing scenarios. |
Sample code:
func main() {
    // This is just an example, the real configuration needs to be obtained from the platform
    cfg := &schedulerx.Config{
        Endpoint:  "acm.aliyun.com",
        Namespace: "fa6ed99e-xxxxxx-a2bf1659d039",
        GroupId:   "xueren_test_sub",
        AppKey:    "myV5K5Xaf1kxxxxxxxx",
    }
    client, err := schedulerx.GetClient(cfg, schedulerx.WithWorkerConfig(config.NewWorkerConfig(
        config.WithGrpcPort(8001),
        config.WithIface("eth0")))),
        config.WithLabel("test")
    if err != nil {
        panic(err)
    }

    // The name TestMapReduceJob registered here must be consistent with the configured on the platform
    task := &TestMapReduceJob{
        mapjob.NewMapReduceJobProcessor(), // FIXME how define user behavior
    }
    client.RegisterTask("TestMapReduceJob", task)
    select {}
}
Verify the result
Publish the application to Alibaba Cloud after the application is connected to SchedulerX.
Log on to the SchedulerX console.
In the top navigation bar, select a region.
In the left-side navigation pane, click Application Management.
On the Application Management page, view Total number of instances.
If the Total number of instances column displays 0, the application is not connected to SchedulerX. In this case, check and modify the on-premises application.
If the Total number of instances column displays a number other than 0, the application is connected to SchedulerX. Click View instances in the Operation column to view the instances in the Connect to an instance panel.
What to do next
After the application is connected to SchedulerX, you can create jobs in the SchedulerX console. For more information, see the "Create a job" section of the Job management topic.