Install the SAG-1000 device
The SAG-1000 supports two installation options: on an office desk or in a server rack. Choose the option that matches your deployment environment.
Prerequisites
For server rack installation, prepare the following tools:
A cross screwdriver
Anti-static wrist straps
Screws compatible with both the SAG-1000 device and the server rack
Install on an office desk
Before placing the device, verify the following conditions:
Place the device on a stable, grounded surface. An unstable or ungrounded surface can damage the device or create a safety hazard.
The desk is stable and properly grounded.
There is adequate clearance around the device for heat dissipation.
No heavy objects are placed on top of the device.
Once the conditions above are met, place the SAG-1000 device on the desk.
Install in a server rack
Two mounting options are available: using a server rack tray, or mounting directly to the rack with an adapter and mounting bracket.
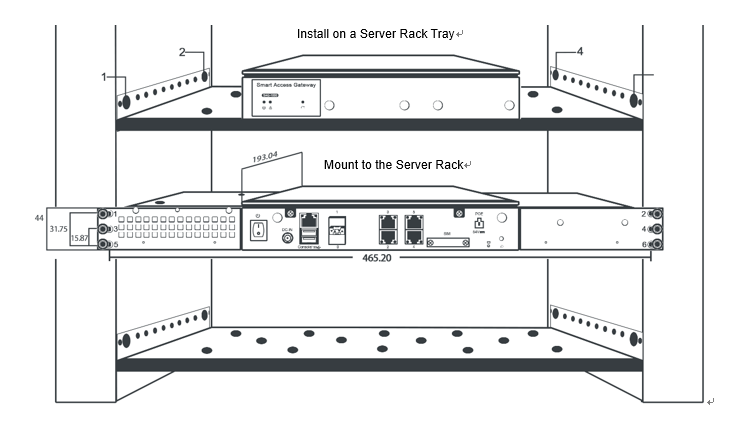
Option 1: Install on a server rack tray
Screw the server rack tray to the server rack.
Place the SAG-1000 device on the server rack tray.
Option 2: Mount directly to the server rack
Use the adapter and mounting bracket to secure the device directly to the rack rails.
Wear anti-static wrist straps throughout this procedure to protect the device from electrostatic discharge.
Screw one side of the adapter to the SAG-1000 device.
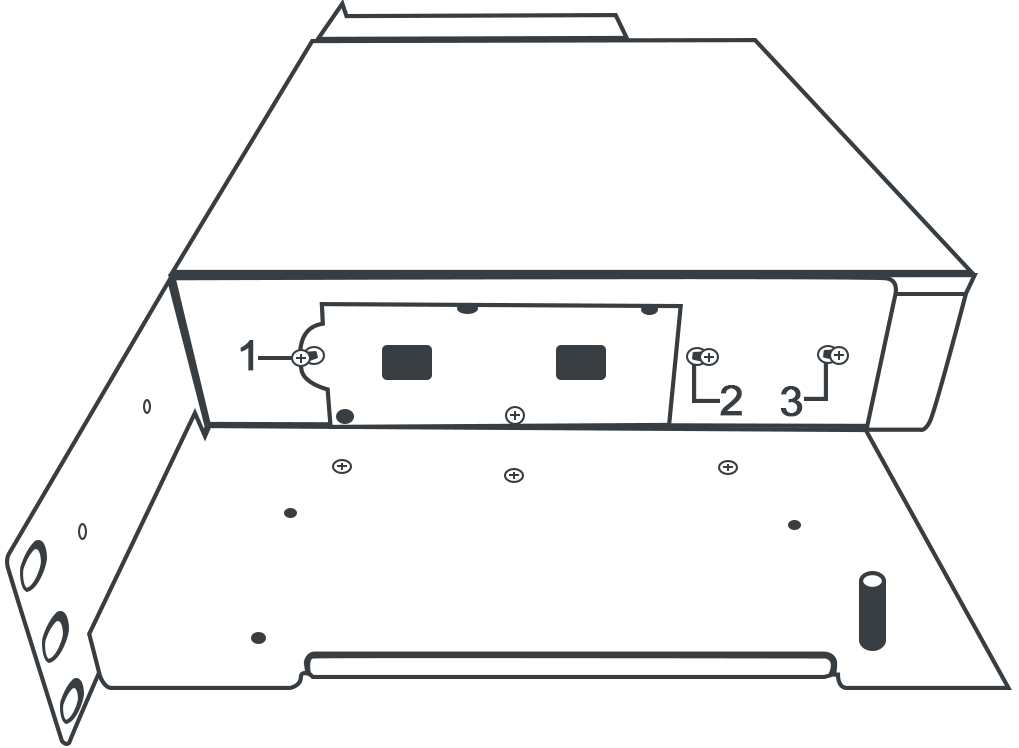
Screw the cover to the adapter.
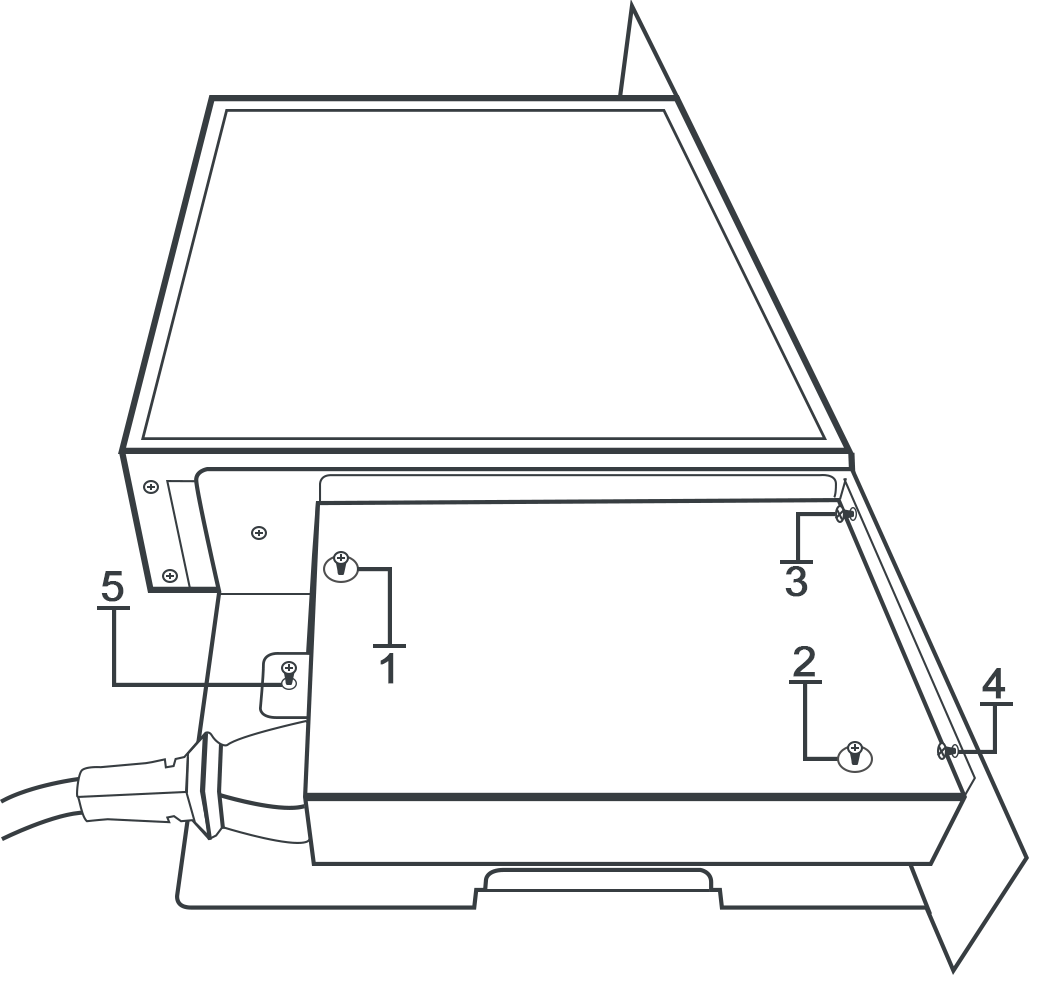
Screw the other side of the adapter to the SAG-1000 device. After this step, both the front panel and the I/O panel are accessible.


Screw the SAG-1000 device to the server rack through the mounting bracket. Confirm the device sits level and is firmly secured before proceeding.