Serverless App Engine (SAE) offers a series of optimizations to improve the startup performance of Java applications at different deployment stages. This topic describes how to configure these settings to accelerate your Java application startup.
Prerequisites
You can configure startup acceleration only for Java applications deployed as a JAR package or a WAR package.
Usage
-
To improve application startup performance, you can select the Dragonwell 11 environment when you create an application and select Enable Application Startup Acceleration (Quickstart) in the startup command settings.
-
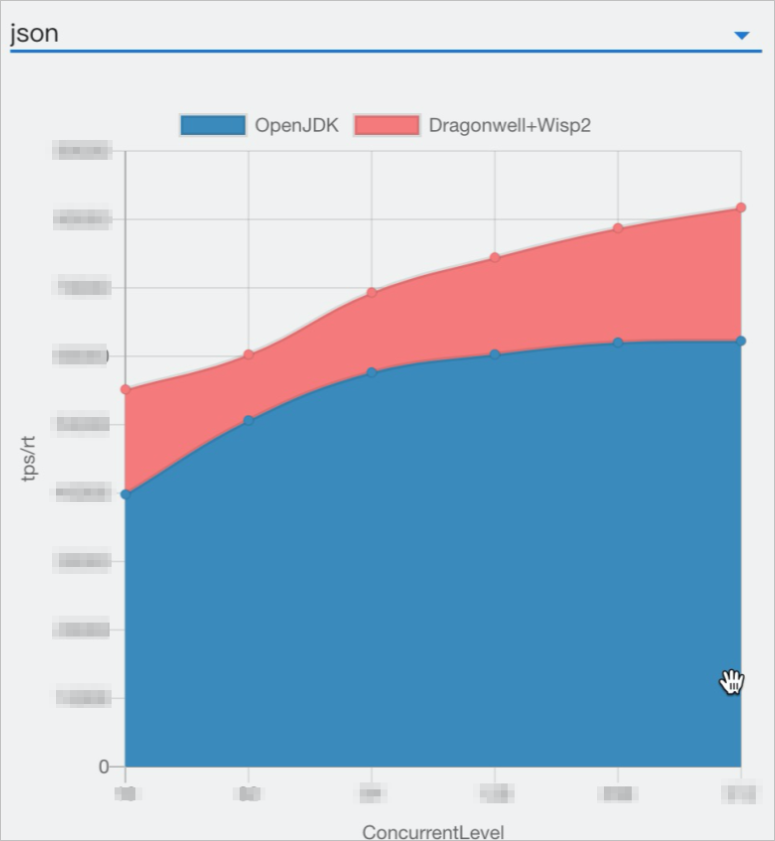
To improve application runtime performance, you can select a Dragonwell environment when you create an application and select Enable Performance Improvement for Microservices (Wisp2 Coroutine) in the startup command settings.
The following table compares application performance with and without these optimizations.
The performance data in this topic is for reference only. Actual results may vary depending on your operating environment.
|
Application startup |
Application runtime |
|
|
|
 For more information, see
  For more information, see
 Improve startup and runtime performance
Step 1: Configure basic application information
-
Log in to the SAE console. In the left-side navigation pane, choose . In the top menu bar, select a region. This topic uses the China (Hangzhou) region as an example. Then, click Create Application.
-
In the Application Basic Information section, configure the following parameters.
-
Configure the parameters in the Basic Information Settings section.
-
Next to Code Package Deployment, click Set Code Package Deployment. In the Set Code Package Deployment panel, set the following parameters and then click OK.
Parameter
Example
Description
Technology stack language
Java
Select Java.
Code package type
WAR Package Deployment
Select WAR Package Deployment or JAR Package Deployment. This topic uses WAR Package Deployment as an example.
Application runtime environment
apache-tomcat-9.0.87
The SAE console supports the following two runtime environments. Select one based on your requirements.
-
apache-tomcat-XXX: Suitable for Spring Boot and Dubbo applications deployed as WAR packages.
-
EDAS-Container-XXX: Suitable for HSF applications deployed as WAR packages.
Java environment
Dragonwell 11
SAE supports the following three Java environments. Select one based on your requirements.
-
Dragonwell X (recommended): Based on OpenJDK. This environment accelerates application startup and runtime, and improves garbage collection (GC) efficiency. For more information, see Configure startup commands.
-
Open JDK X: Based on the CentOS operating system. The base image is large.
-
openjdk-XXXXX-jdk-alpine3.9: Based on the Alpine operating system. The base image is small.
For more information about Java environments, see Java runtime environments.
NoteCompared with the CentOS operating system, the Alpine-based Java environment provides fewer tools and commands. If you select openjdk-XXXXX-jdk-alpine3.9, some commands in the WebShell may fail. Select an environment that meets your needs.
File upload method
Upload WAR package
The following two upload methods are supported:
-
Upload WAR package: If you select this method, you must first download the WAR package to your computer. Then, click the
 icon to upload the package.
 -
WAR package URL: If you select this method, enter the URL of the WAR package.
Version
1737696728895
Set a version number for the application. You can enter a custom version number or click Use Timestamp as Version Number.
Time zone settings
UTC+8
Select the time zone for your application.
Custom configuration
None
(Optional) To set
Java Tomcatparameters, select the Custom Configuration checkbox. For more information, see Configure Java Tomcat parameters. -
-
In the Capacity Settings section, configure the Single Instance Specification and the number of Instances based on your requirements.
-
-
Click Next: Advanced Settings.
Step 2: Configure advanced settings
On the Advanced Settings page, configure the following items:
-
(Optional) Configure persistent storage to maintain acceleration benefits across instances, such as during restarts, scale-outs, and auto-scaling.
NoteEven without persistent storage, you can still perform the next step to accelerate subsequent application startups.
-
Expand the Persistent Storage section, and turn on Enable NAS file storage.
-
From the NAS File System drop-down list, select the NAS file system to mount. Then, configure the Mount Source, Mount Directory, Container Path, Permission, and Mount Parameters.
-
-
Expand the Startup Command Settings section and configure the following parameters:
-
To improve application startup performance: Select Enable Application Startup Acceleration (Quickstart) and set the Persistent Storage Directory.
-
To improve application runtime performance: Select Enable Performance Improvement for Microservices (Wisp2 Coroutine). Selecting Enable Performance Improvement for Microservices (Wisp2 Coroutine) automatically adds the following value to the Options settings field:
-Xquickstart:verbose -Xquickstart:path=/tmp -XX:+UnlockExperimentalVMOptions -XX:+UseWisp2 -Dio.netty.transport.noNative=true. The persistent storage directory is also automatically set to/tmp.
-
Step 3: Verify results
-
Review the configuration fees for your application, and then click Create Application.
-
Use one of the following methods to verify that the configuration has taken effect.
-
Method 1:
On the Basic Information page of the application, click Change History in the left-side navigation pane. On the Change History page, view the details of the change. A status of Succeeded indicates that the application is deployed and the configuration is effective.
-
Method 2:
On the Basic Information page of the application, click the Instance Deployment Information tab. Check the Running Status of the instance. A Running Status of Running confirms that the application is deployed and the configuration is effective.
-