This topic describes how to use Jenkins to build a continuous integration for a Java application in Serverless App Engine (SAE).
Prerequisites
Your code is hosted in GitLab.
Background information
You can use Jenkins to build continuous integration solutions for SAE applications. This topic is intended for developers who are familiar with the following languages or tools.
Tool | Description |
Maven | Maven is an automation tool that is used to automatically build and manage projects. |
Jenkins | Jenkins is a scalable automation server that facilitates continuous integration. |
GitLab | GitLab is an open source, self-hosted software development platform that allows you to access private or public repositories on webpages. GitLab is built by using Ruby on Rails. Similar to GitHub, GitLab allows you to review code, manage defects, and leave comments. |
Step 1: Configure the project
Modify the configurations of a Maven project, and add toolkit-maven-plugin and application deployment information. For more information, see Use a Maven plug-in to automatically deploy applications to SAE.
After you configure the project, we recommend that you use Maven in a data center to verify whether the configuration is valid.
Step 2: Configure Jenkins
In the Jenkins console, choose from the menu to install the Git and GitLab plug-ins.
NoteThe GIT Client plug-in and GIT plug-in fetch code from the Git repository.
The GitLab Hook plug-in enables GitLab webhooks to trigger a build on GitLab projects.

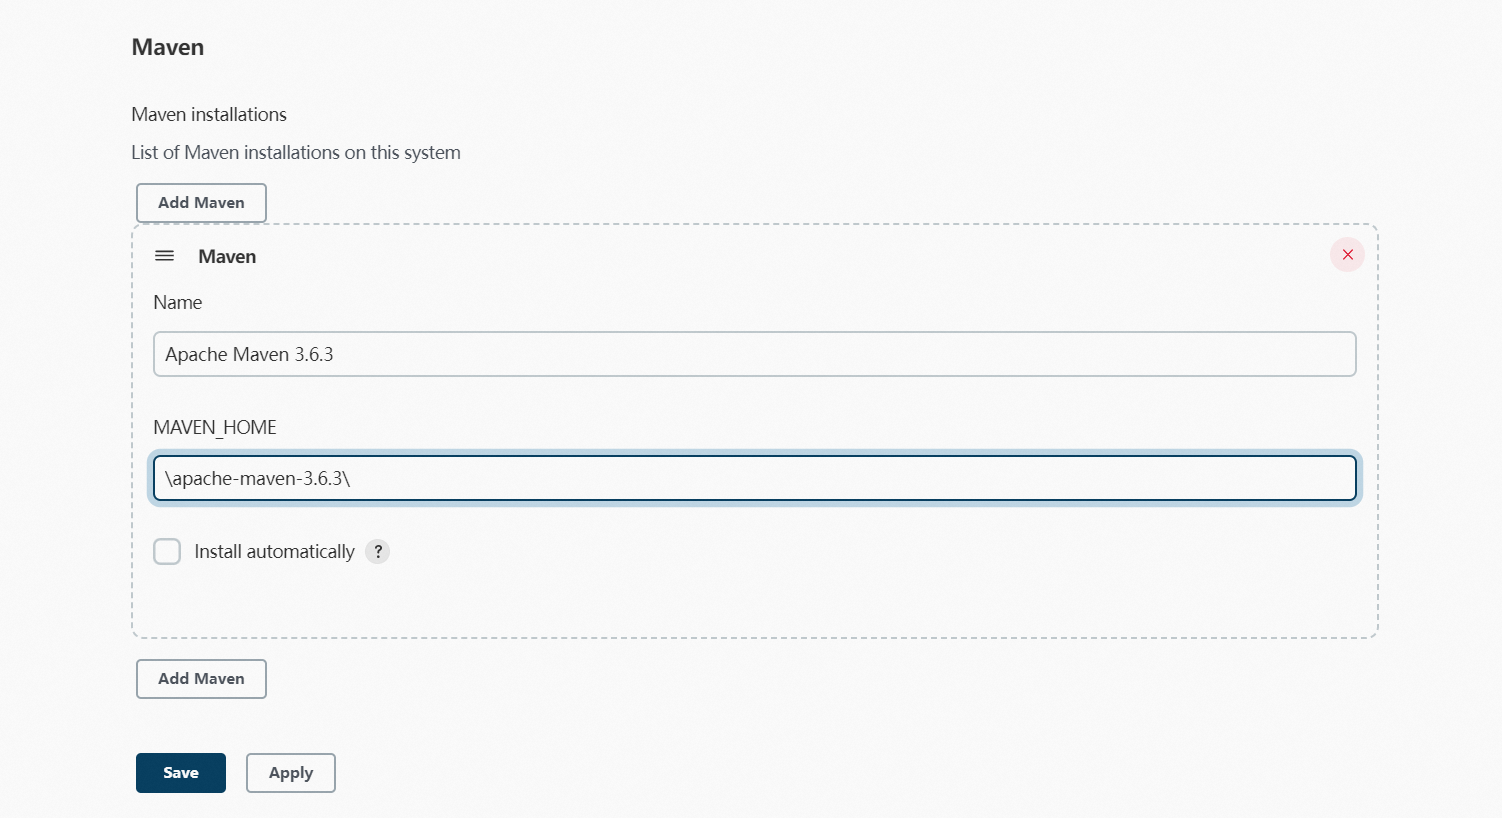
In the Jenkins console, choose from the menu, configure the Maven version name and path, and then click Save.
Generate an SSH RSA key pair on the Jenkins server and import the public key into GitLab. This enables automatic authentication of Jenkins when Jenkins fetches code from GitLab.
Generate an SSH RSA key pair on the Jenkins server.
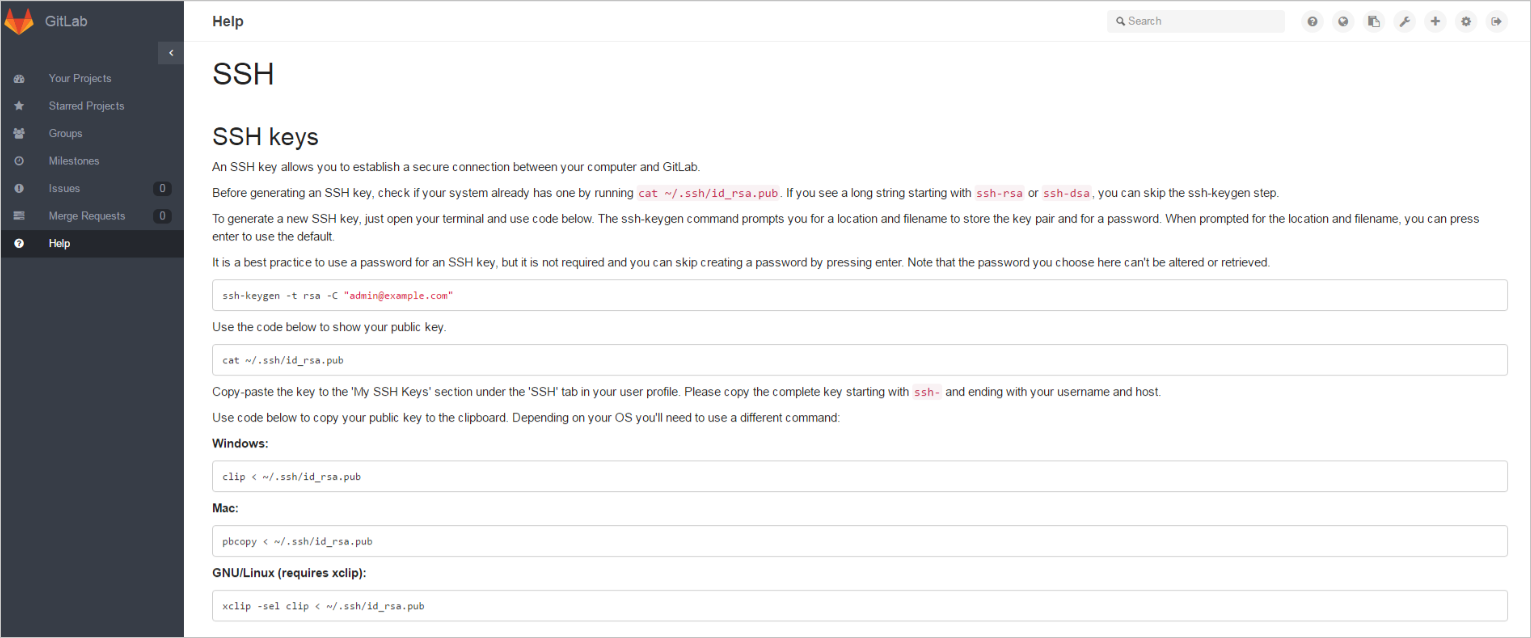
On the GitLab homepage, choose . Click New Deploy Key to add a key, and import the SSH RSA public key you create on the Jenkins server.

Step 3: Create a Jenkins project
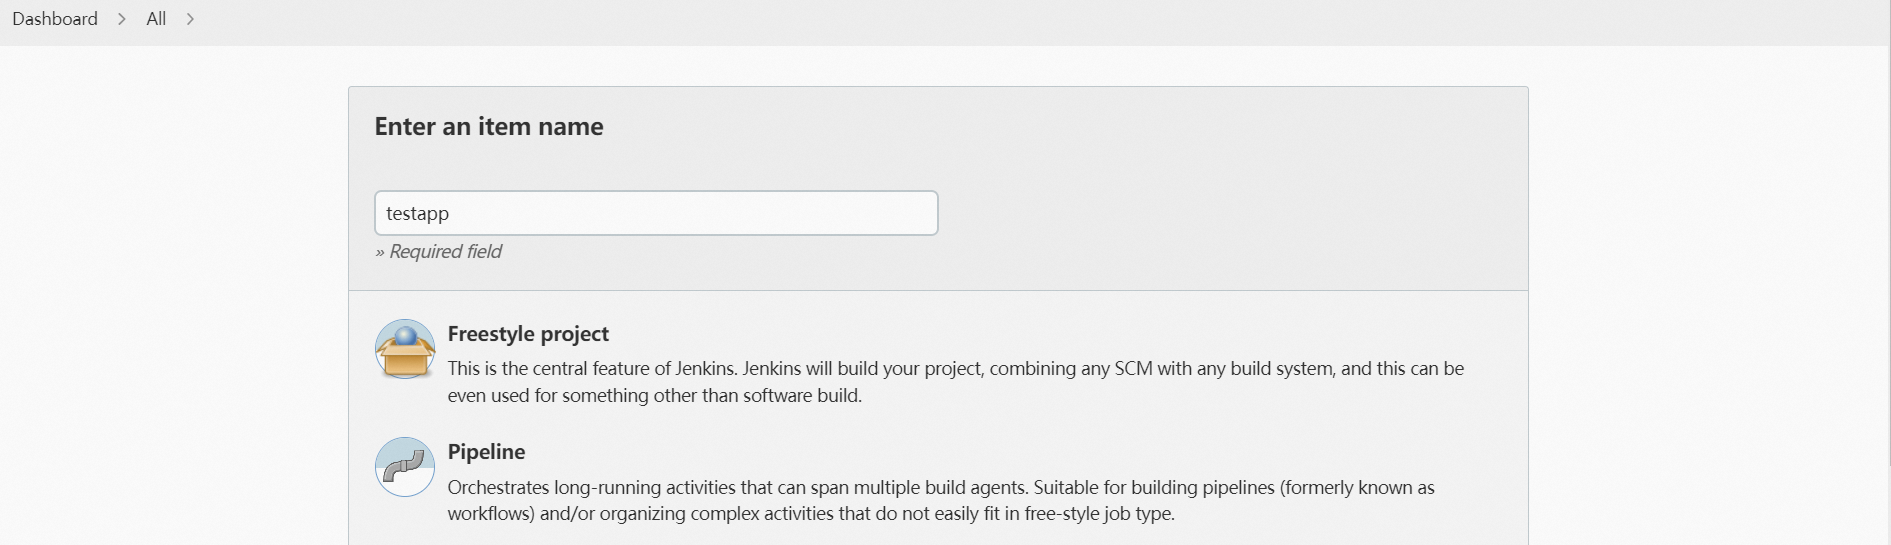
In the left-side navigation pane of the Jenkins homepage, click New Item. Enter an item name, select Freestyle project, and then click OK.
Click the Source Code Management tab. On the Source Code Management tab, select Git and set relevant parameters.
Repository URL: the URL of the Git repository of your project.
Credentials: The credentials. Select none.
ImportantMake sure that your SSH RSA public key is added to the GitLab where the Git project resides. Otherwise, an error is reported.
Click the Build Triggers tab. On the Build Triggers tab, select GitHub hook trigger for GITScm polling.
Click the Build Environment tab. On the Build Environment tab, select Add Timestamps to the Console Output.
Click the Build tab. On the Build tab, click Add build step and select Invoke top-level Maven targets from the drop-down list.
Set Maven Version and Goals in the Invoke top-level Maven targets section. You can also deploy a multi-module project. For more information, see (Optional) Create a Jenkins job for a multi-module project.
Maven Version: Click the drop-down list next to this field and select the Maven Version you configured on the Global Tool Configuration page.
Goals: Enter mvn clean package toolkit:deploy -Dtoolkit_profile=toolkit_profile.yaml -Dtoolkit_package=toolkit_package.yaml -Dtoolkit_deploy=toolkit_deploy.yaml. You can configure more parameters based on your business requirements.
 Note
NoteAfter you complete Maven configurations, you can use the SAE POP API to trigger application deployment in Step 5: Submit the changes to GitLab.
Step 4: Configure a GitLab webhook
Right-click the GitLab project and choose Setting > Web Hooks.
On the Web Hooks page, enter
http://Jenkins sever address:Listening port of the Jenkins server/git/notifyCommit?url=Git repository address of your projectin the URL field.Then, click Test Hook.

Step 5: Submit the changes to GitLab
If the preceding configurations are valid, a GitLab hook is triggered. After the hook is received, Jenkins builds your Maven project and then calls the SAE POP API and a script to trigger deployment.
A script that is used to deploy the application with the SAE POP API is configured in the Maven project.
After the project is deployed, you can choose to view the output logs.
15:58:51 [INFO] Deploy application successfully!
15:58:51 [INFO] ------------------------------------------------------------------------
15:58:51 [INFO] BUILD SUCCESS
15:58:51 [INFO] ------------------------------------------------------------------------
15:58:51 [INFO] Total time: 24.330 s
15:58:51 [INFO] Finished at: 2018-12-25T15:58:51+08:00
15:58:51 [INFO] Final Memory: 23M/443M
15:58:51 [INFO] ------------------------------------------------------------------------
15:58:51 Finished: SUCCESS
If the deployment fails, you can log on to the SAE console to view the deployment process. For more information, see View change records.
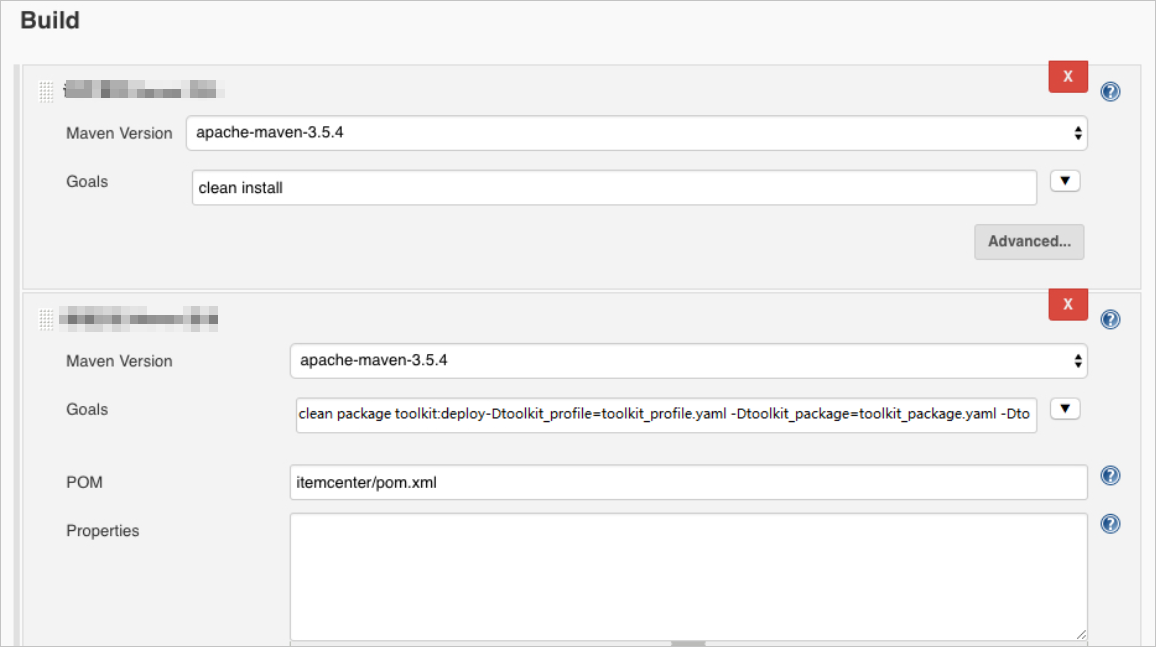
(Optional) Create a Jenkins job for a multi-module project
If you need to create a Jenkins job for a multi-module project, you can perform the following operations.
The procedure used to create a Jenkins job for a multi-module project is the same as Step 5. You only need to adjust the Invoke top-level Maven targets parameter. To deploy a submodule in Jenkins, you must run the mvn clean install command in the parent module and then call the mvn clean package toolkit:deploy -Dtoolkit_profile=toolkit_profile.yaml -Dtoolkit_package=toolkit_package.yaml -Dtoolkit_deploy=toolkit_deploy.yaml command in the submodule. For more information about the parameters, see Use a Maven plug-in to automatically deploy applications to SAE.
Structure of the sample project:
sh-3.2# tree -L 1 carshop
carshop
├── detail
├── itemcenter
├── itemcenter-api
└── pom.xml
In the preceding structure, detail, itemcenter, and itemcenter-api modules are submodules. When you deploy the itemcenter submodule, you must set a clean install target in the parent module and then set clean package toolkit:deploy -Dtoolkit_profile=toolkit_profile.yaml -Dtoolkit_package=toolkit_package.yaml -Dtoolkit_deploy=toolkit_deploy.yaml target in the itemcenter submodule.