Tags let you categorize ECI resources for enterprise cost allocation. After you tag resources, you can view split bills and analyze costs by tag or cost center.
Add tags to ECI resources
Tags mark ECI resources that share management or business requirements, making them easier to categorize and filter. The following table lists the ECI resource types that support tags.
|
Scenario |
Resource type |
References |
|
Use the ECI console or call an API operation |
ECI instance |
|
|
image cache |
||
|
virtual node |
||
|
Use annotations to add tags to ECI instances in a Kubernetes cluster |
ECI instance |
By default, ECI instances that are created in Container Service for Kubernetes (ACK) have the following tags:
-
ManagedBy: The cluster type.
-
ClusterId: The cluster ID.
-
NameSpace: The namespace of the cluster.
-
OwnerReferenceKind: The workload type created in the cluster, such as Deployment or Job.
-
OwnerReferenceName: The workload name created in the cluster, such as a Deployment name or a Job name.
-
PodName: The pod name.
Query split bills based on tags
-
Log on to the Elastic Container Instance console.
-
In the top navigation bar, click Billing & Cost Management to go to the Expenses and Costs page.
-
In the left-side navigation pane, choose .
-
Enable cost allocation tags.
First-time enable
-
On the Cost allocation tags page, read the instructions and click Next.
-
Select the tags that you want to enable, move them to the Selected Tags list on the right, then click Next.
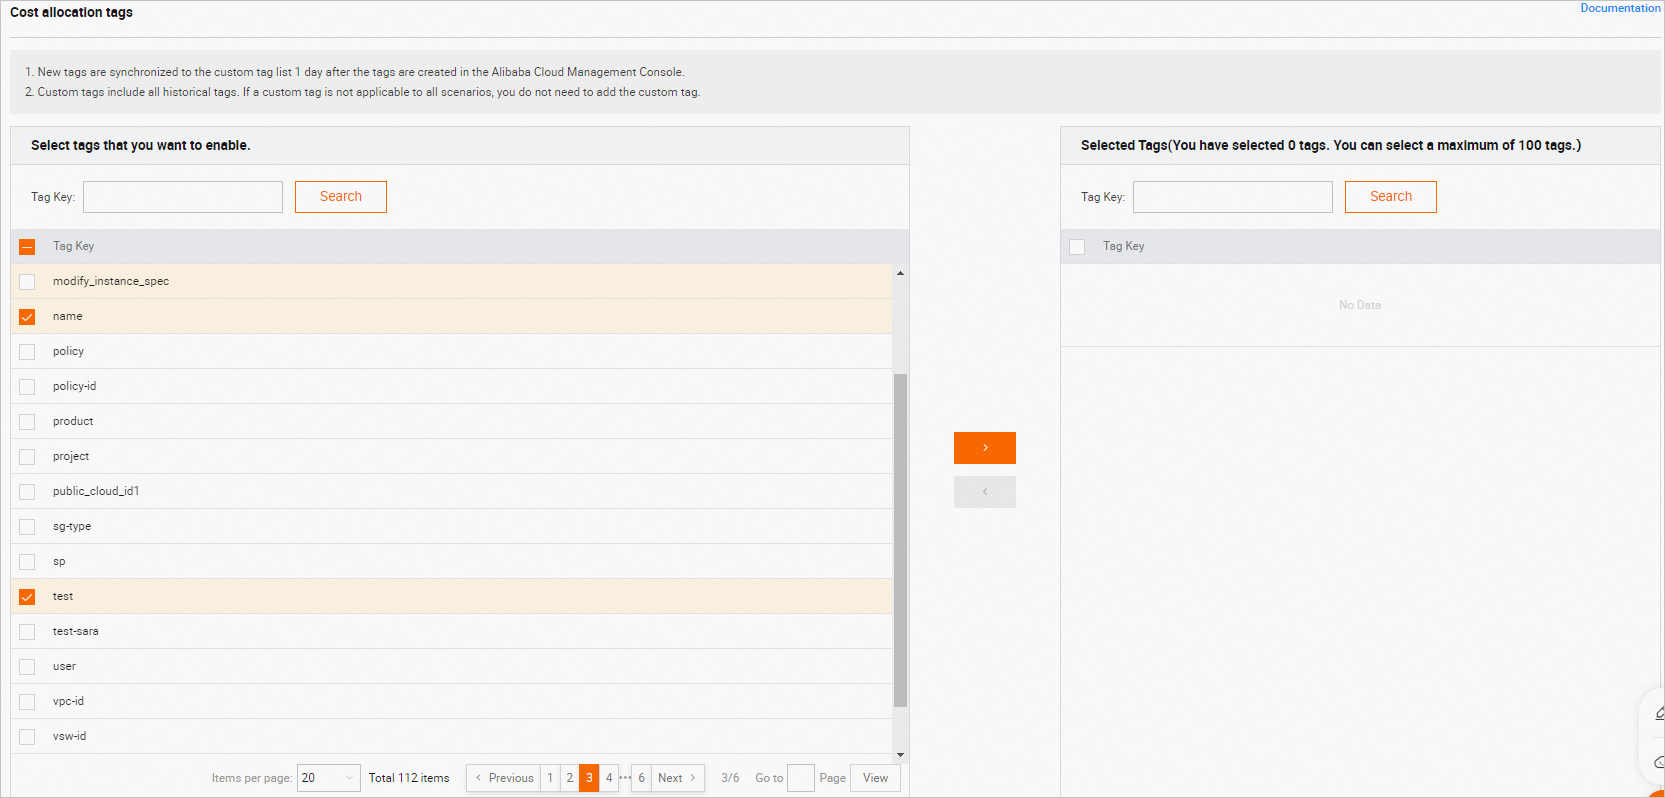
Click Enable to complete the process.
Previously enabled
-
To enable a single tag: In the tag list, find the tag that you want to enable and click Enable in the Actions column.
-
To enable multiple tags: In the tag list, select the tags that you want to enable and click Batch Enable at the bottom of the page.
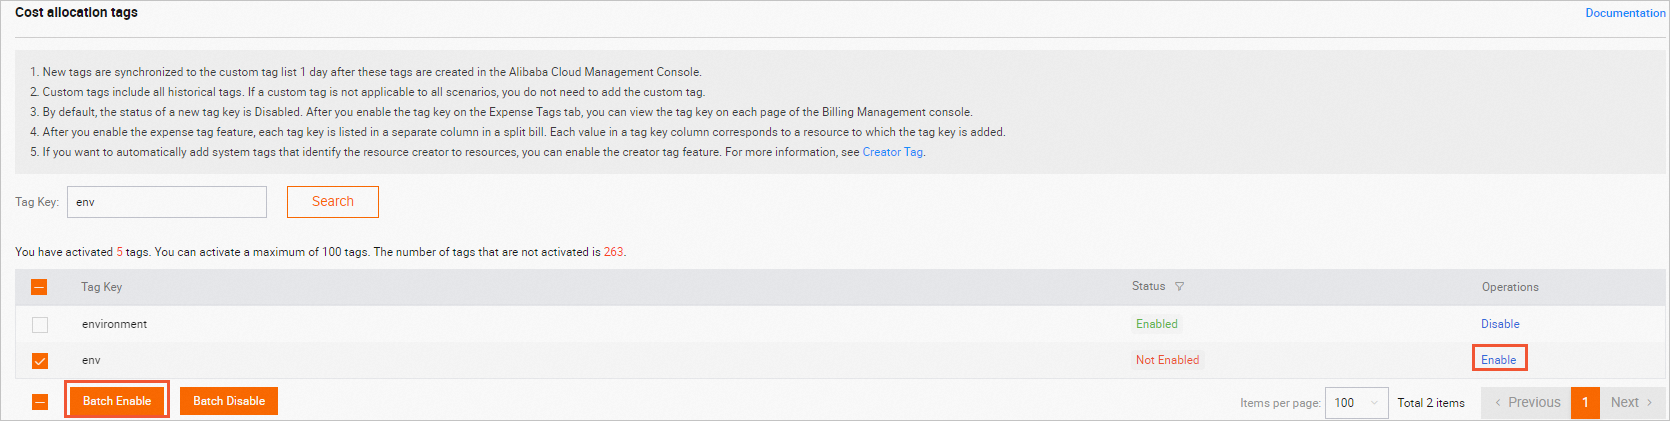
NoteTags are case-sensitive. If the list contains many tags, you can perform a fuzzy search by tag key to find the tags that you want to enable.
-
-
In the left-side navigation pane, choose . Then, allocate resources to cost centers based on their tags.
-
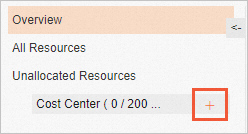
Add a cost center.
-
In the left-side navigation pane of the Cost Center page, click the plus sign (+) to the right of Cost Centers.
-
In the dialog box that appears, enter a name for the cost center and click OK.
-
-
Allocate resources to a cost center.
-
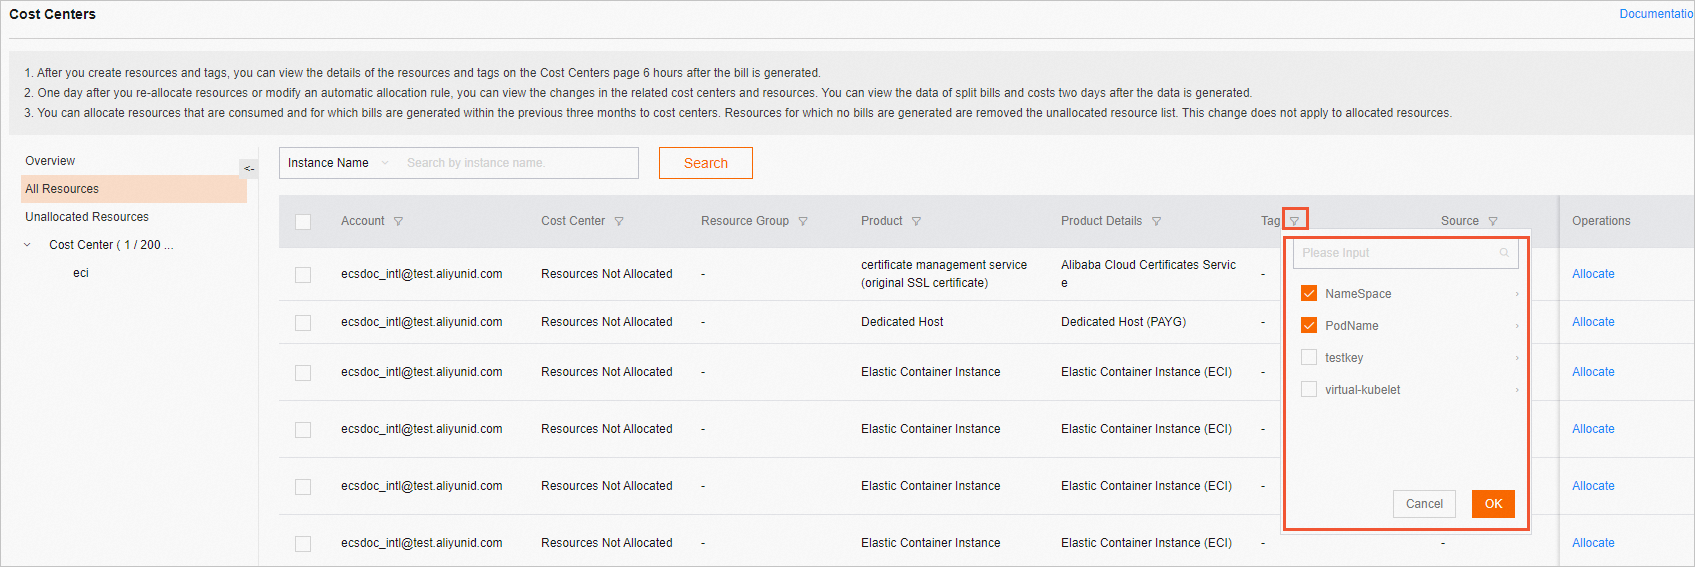
In the left-side navigation pane of the Cost Center page, select All Resources.
-
In the resource list on the right, click the filter icon in the Tag column. In the dialog box that appears, select the enabled tags and click OK.
-
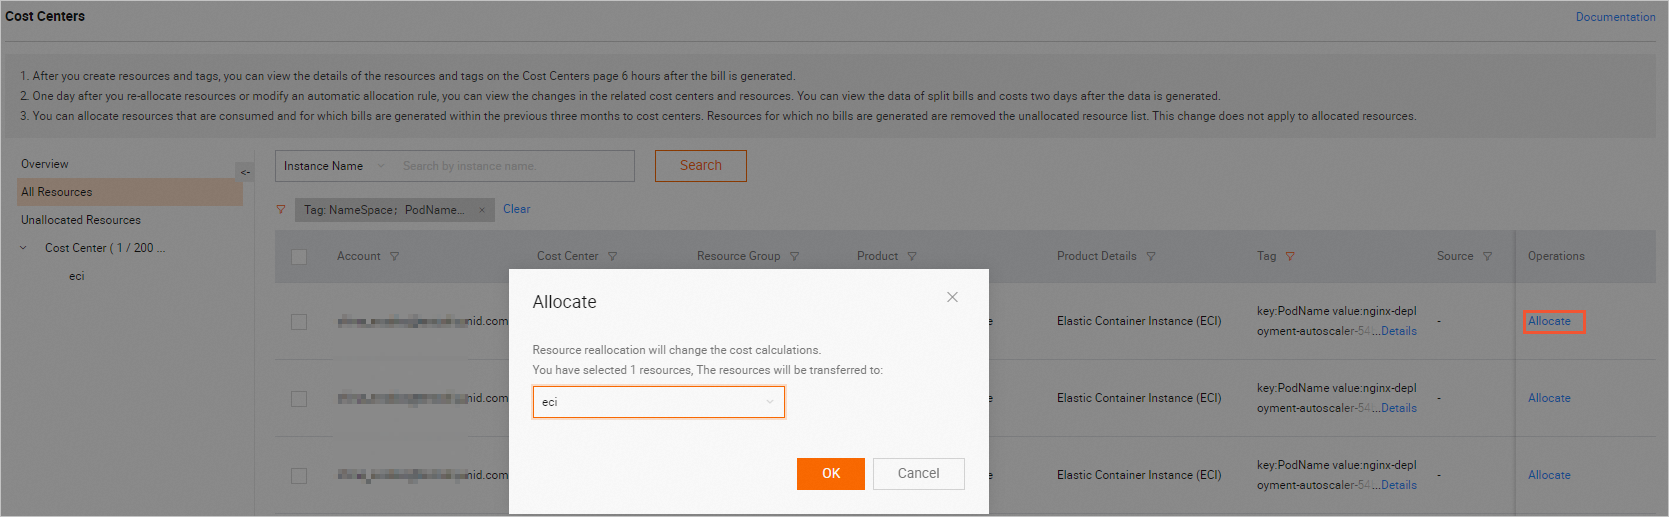
In the filtered results, select the ECI resources and click Allocate. In the dialog box that appears, select a cost center and click OK.
-
-
-
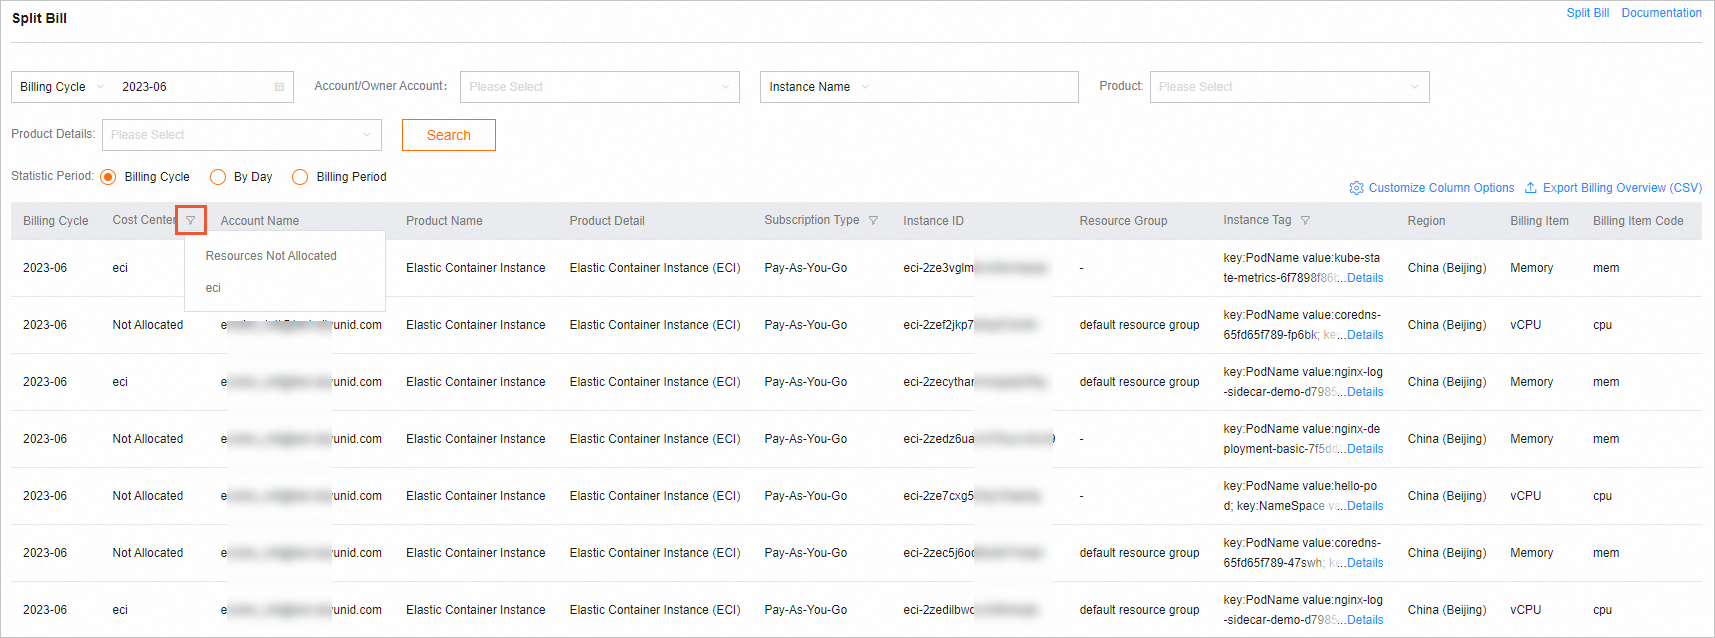
In the left-side navigation pane, choose . You can then filter and view split bills by cost center.
NoteIf you are using this feature for the first time, follow the on-screen instructions to enable split bills.
-
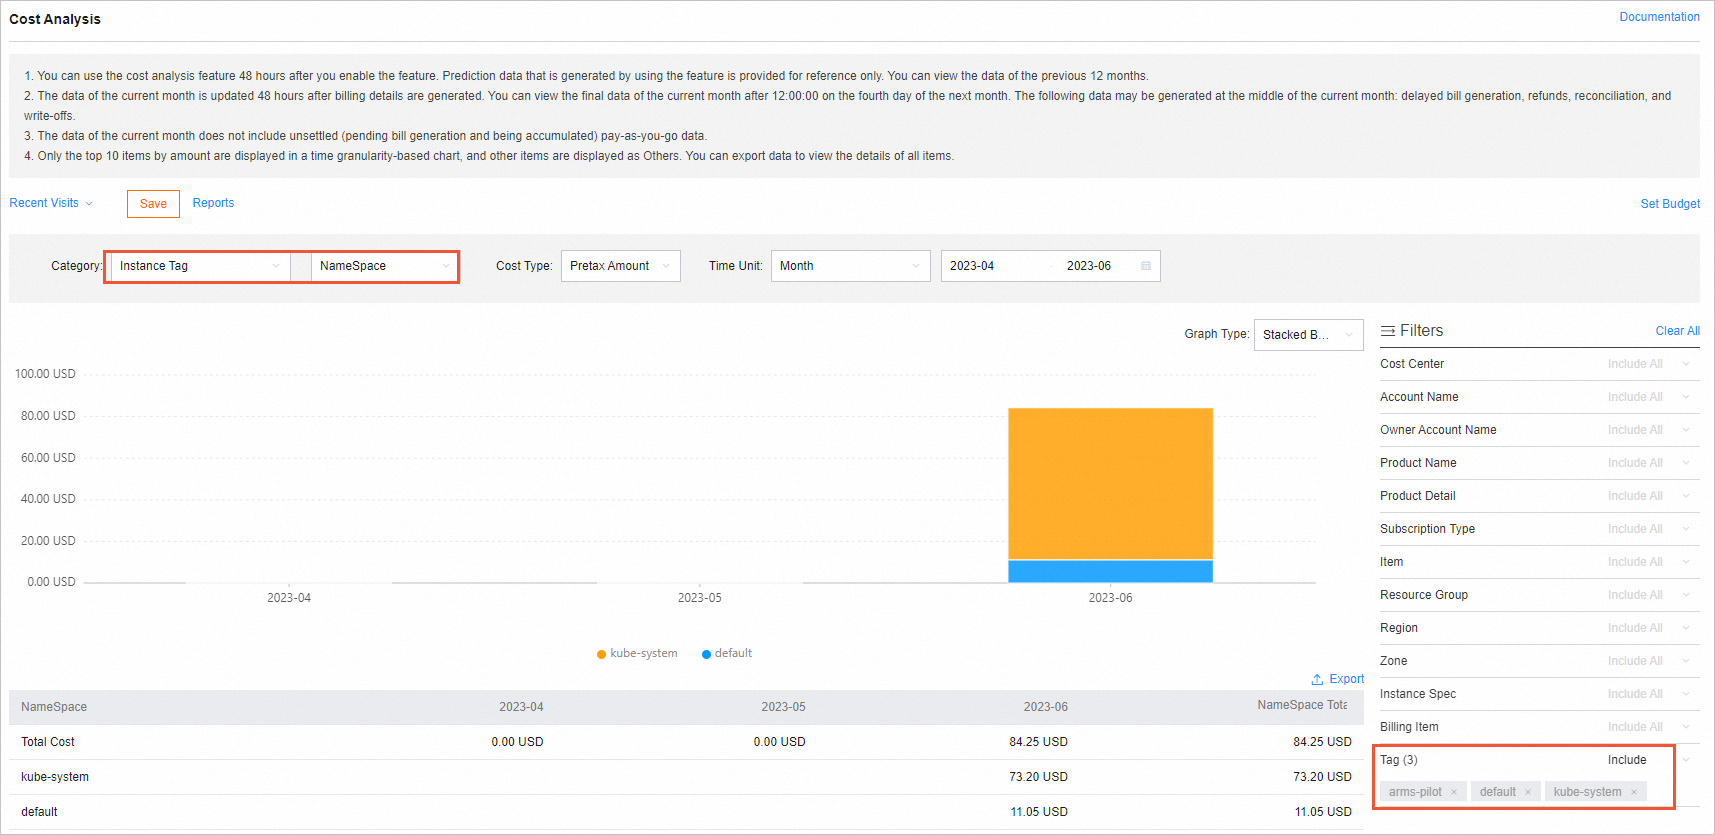
In the left-side navigation pane, choose Cost Analysis > Cost Analysis. You can then filter and view your cost analysis by cost center and tag.
NoteIf you are using this feature for the first time, follow the on-screen instructions to enable cost analysis.
On the Cost Analysis page, use options such as Category at the top to configure chart display, and use the filters on the right to narrow results. For example, select Instance Tag for Category and specify tags in the filter conditions to view cost details for resources with those tags.