This quick start walks you through configuring role-based single sign-on (SSO) from Microsoft Entra ID (formerly Azure AD) to Alibaba Cloud. Once configured, users in your Microsoft Entra ID tenant can use SAML-based SSO to log on to Alibaba Cloud and temporarily assume a Resource Access Management (RAM) role.
Before you begin, ensure that the Alibaba Cloud services you intend to access support Security Token Service (STS).
Background information
In this example, an enterprise has one Alibaba Cloud account and one Microsoft Entra ID tenant. The Microsoft Entra ID tenant contains an administrator with global administrator permissions and an employee user with the User Principal Name (UPN) ssotest01@example.onmicrosoft.com. You want to configure role-based SSO to allow the employee user (ssotest01@example.onmicrosoft.com) to access Alibaba Cloud after logging on to Microsoft Entra ID.
Configuring role-based SSO does not affect standard logon for RAM users. This means users can either use credentials from the identity provider (IdP) to log on to Alibaba Cloud via role-based SSO or continue to log on to Alibaba Cloud as a RAM user by using a password, user-based SSO, or other methods. To log on using role-based SSO, you must initiate the logon from the IdP. This is known as IdP-initiated SSO. Role-based SSO does not support logon initiated from the service provider (SP), which is Alibaba Cloud.
Also, note that you do not need to create a matching user in Alibaba Cloud for each user in the IdP. When a user initiates an SSO from the IdP, Alibaba Cloud lets the user temporarily assume the RAM role specified in the SAML assertion to access resources.
For a detailed comparison of user-based SSO and role-based SSO, see SSO overview.
Prerequisites
A Resource Access Management (RAM) administrator with the AliyunRAMFullAccess policy attached. For information about how to create a RAM user and grant permissions, see Create a RAM user and Grant permissions to a RAM user.
A Microsoft Entra ID user the Global Administrator role. For information about how to create a user and assign it the administrator role, see the official Microsoft Entra ID documentation.
Procedure
In this example, Microsoft Entra ID is the IdP and Alibaba Cloud is the SP. The following steps let you establish a mutual trust relationship between the IdP and the SP, and maps an app role in Microsoft Entra ID to a RAM role in Alibaba Cloud.
Step 1: Create an enterprise application in Microsoft Entra ID: Create an enterprise application from the Microsoft Entra App Gallery by using the Alibaba Cloud Service (Role-based SSO) template.
Step 2: Configure SAML in Microsoft Entra ID: Configure Alibaba Cloud role-based SSO as a trusted SAML SP in Microsoft Entra ID.
Step 3: Create an IdP in Alibaba Cloud: Configure Microsoft Entra ID as a trusted SAML IdP in Alibaba Cloud RAM.
Step 4: Create a RAM role in Alibaba Cloud: Create a RAM role in Alibaba Cloud RAM and set its principal type to Identity Provider.
Step 5: Create an app role and assign users in Microsoft Entra ID: Create and configure an app role for the Alibaba Cloud Service (Role-based SSO) application in Microsoft Entra ID, and assign enterprise users to the application.
Verify SSO: Verify that role-based SSO works as expected.
Step 1: Create an enterprise application in Microsoft Entra ID
Log on to the Azure portal as the global administrator of Microsoft Entra ID.
In the upper-left corner of the homepage, click the
 icon.
icon. In the left-side navigation pane, choose .
Click New application.
Search for and select Alibaba Cloud Service (Role-based SSO).
Enter a name for the application, then click Create.
This example uses the default name
Alibaba Cloud Service (Role-based SSO). You can also specify a custom name.
Step 2: Configure SAML in Microsoft Entra ID
On the Alibaba Cloud Service (Role-based SSO) details page, in the left-side navigation pane, choose .
Click SAML.
Configure SSO settings.
In the upper-left corner, click Upload metadata file, select the metadata file for Alibaba Cloud role-based SSO, then click Add.
NoteTo get the metadata file, open
https://signin.alibabacloud.com/saml-role/sp-metadata.xmlin a browser and save the XML file to your computer.On the Basic SAML Configuration page, configure the following parameters, then click Save.
Identifier (Entity ID): The system automatically reads this value from the
entityIDattribute in the metadata file.Reply URL (Assertion Consumer Service URL): The system automatically reads this value from the
Locationattribute in the metadata file.Relay State (optional): Specifies the page to which the user is redirected after they logs on to the Alibaba Cloud Management Console via SSO.
NoteFor security reasons, you can only enter a URL for an Alibaba-owned domain name as the value of Relay State, such as *.aliyun.com, *.hichina.com, *.yunos.com, *.taobao.com, *.tmall.com, *.alibabacloud.com, or *.alipay.com. Otherwise, the configuration is invalid. If you do not set this parameter, the system redirects the user to the Alibaba Cloud Management Console homepage by default.
In the Attributes & Claims section, click the
 icon to verify that the following two claims exist.
If they do not exist, click Add new claim and add them by using the information in the following table.
Name
Namespace
Source
Source attribute
Rolehttps://www.aliyun.com/SAML-Role/AttributesAttribute
user.assignedroles
RoleSessionNamehttps://www.aliyun.com/SAML-Role/AttributesAttribute
user.userprincipalname
In the SAML Certificates section, click Download on the right of Federation Metadata XML to download the IdP metadata file.
Step 3: Create an IdP in Alibaba Cloud
Log on to the RAM console as a RAM administrator.
In the left-side navigation pane, choose .
On the Role-based SSO tab, click the SAML subtab and click Create IdP.
On the Create IdP page, enter
AADfor IdP Name.Click Upload Metadata File and select the Federation Metadata XML file that you downloaded in Step 2.
Click Create IdP.
Click the
AADIdP you created. In the Basic Information section, copy the IdP's ARN for later use.
Step 4: Create a RAM role in Alibaba Cloud
Log on to the RAM console. In the left-side navigation pane, choose .
On the Roles page, click Create Role.
In the upper-right corner of the Create Role page, click Switch to Policy Editor.
Specify a SAML IdP in the editor.
The editor supports a visual editor and a JSON script editor. You can use either one. This example uses the visual editor. For Principal, select Identity Provider and click Edit. Then, specify AAD as the IdP and select SAML for Identity Provider Type.
In the Create Role dialog box, enter a role name (such as AADrole), then click OK.
Click the RAM role you created. In the Basic Information section, copy the role's ARN for later use.
You can grant permissions to the RAM role as needed. For more information, see Grant permissions to a RAM role.
Step 5: Create an app role and assign users in Microsoft Entra ID
Create an app role in Microsoft Entra ID.
Log on to the Azure portal as an administrator.
In the left-side navigation pane, choose .
Click the All applications tab, then click Alibaba Cloud Service (Role-based SSO).
In the left-side navigation pane, choose .
On the page that appears, click Create app role.
In the Create app role panel, configure the following parameters and click Apply.
Display name: In this example, enter
Admin.Allowed member types: In this example, select Both (Users/Groups + Applications).
Value: Enter the ARN of the RAM role and the ARN of the IdP. Separate the ARNs with commas (,). In this example, enter
acs:ram::187125022722****:role/aadrole,acs:ram::187125022722****:saml-provider/AAD.NoteThe value must use the format
RAM role ARN,IdP ARN. An incorrect order will cause the SSO to fail.Description: Enter a description for the app role.
Select Do you want to enable this app role?
NoteIf you need to create multiple app roles in Microsoft Entra ID, repeat the preceding steps and set different display names and application role values.
Assign a user to the enterprise application and specify an app role.
In the left-side navigation pane, choose .
In the Name column, click Alibaba Cloud Service (Role-based SSO).
In the left-side navigation pane, choose .
On the page that appears, click Add user/group.
On the Add Assignment page, select a user and click Select.
Check whether the selected role is Admin. If not, change the role to Admin. Then, click Assign.
NoteIt is a best practice to add users to groups in Microsoft Entra ID and then assign the groups to the enterprise application.
If you have configured multiple app roles, you can associate different user groups with different roles (for example, associate the ecs-admin group with the ecs-admin role and the oss-admin group with the oss-admin role). This enables finer-grained access control and more efficient user management.
Verify SSO
Role-based SSO supports only IdP-initiated SSO. Therefore, you must log on from Microsoft Entra ID to verify the configuration.
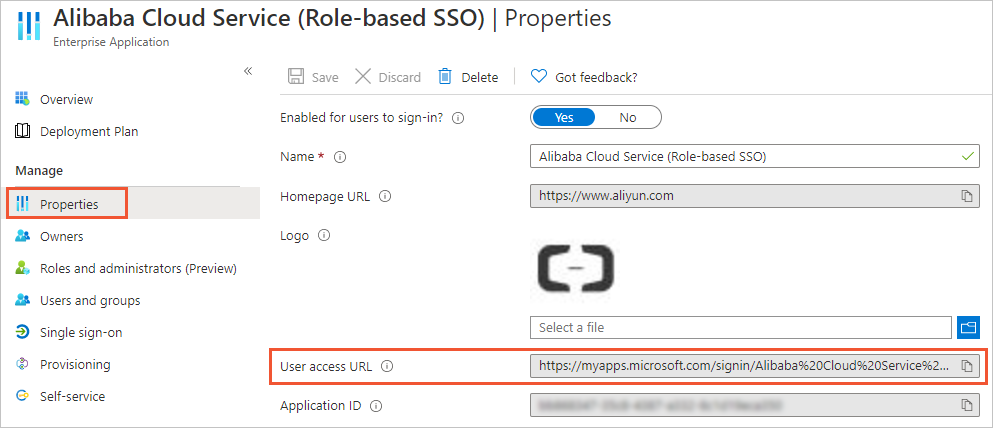
Obtain the user access URL.
Log on to the Azure portal as an administrator.
In the left-side navigation pane, choose .
In the Name column, click Alibaba Cloud Service (Role-based SSO).
In the left-side navigation pane of the page that appears, choose and obtain the value of User access URL.
The user (ssotest01@example.onmicrosoft.com) gets the User access URL from the administrator. In a browser, the user enters the URL and logs on with their account. After a successful logon, they are redirected to the Alibaba Cloud Management Console by default. The RAM role (
aadrole) that you defined appears before the account name.
The system automatically performs SSO and redirects you to the page specified for Relay State. If Relay State is not specified or its value is not a URL for an Alibaba-owned domain name, the system redirects you to the Alibaba Cloud Management Console homepage.
Advanced: Configure role-based SSO between Microsoft Entra ID and multiple Alibaba Cloud accounts
Assume you have two Alibaba Cloud accounts (Account1 and Account2). You want to configure SSO so that an employee user (ssotest01@example.onmicrosoft.com) can log on to Microsoft Entra ID and use role-based SSO to access both Account1 and Account2.
In the Microsoft Entra App Gallery, add the
Alibaba Cloud Service (Role-based SSO)applicationFor more information, see Step 1: Create an enterprise application in Microsoft Entra ID.
Configure Microsoft Entra ID SSO.
For more information, see Step 2: Configure SAML in Microsoft Entra ID.
Create IdPs in Alibaba Cloud.
You must create an IdP named
AADin each of the two Alibaba Cloud accounts (Account1 and Account2).For more information, see Step 3: Create an IdP in Alibaba Cloud.
Create RAM roles in Alibaba Cloud.
You must create RAM roles in each of the two Alibaba Cloud accounts. For this example, assume you create two RAM roles in Account1 and one RAM role in Account2. The details are as follows:
RAM roles for Account1:
adminaadandreadaad.RAM role for Account2:
financeaad.
For more information, see Step 4: Create a RAM role in Alibaba Cloud.
Associate the Alibaba Cloud RAM roles with the Microsoft Entra ID user.
Create three app roles in Microsoft Entra ID and assign them to the user (ssotest01@example.onmicrosoft.com). The values for the three roles are:
acs:ram::<Account1_ID>:role/adminaad,acs:ram::<Account1_ID>:saml-provider/AADacs:ram::<Account1_ID>:role/readaad,acs:ram::<Account1_ID>:saml-provider/AADacs:ram::<Account2_ID>:role/financeaad,acs:ram::<Account2_ID>:saml-provider/AAD
For more information, see Step 5: Create an app role and assign users in Microsoft Entra ID.
Access Alibaba Cloud by using role-based SSO as a Microsoft Entra ID user.
The user (ssotest01@example.onmicrosoft.com) logs on to the My Apps page in Azure and clicks the Alibaba Cloud Service (Role-based SSO) application. On the Alibaba Cloud page, the system prompts the user to select the Alibaba Cloud account (Account1 or Account2) and the role to assume. The user can then access Alibaba Cloud Management Console via role-based SSO.
Troubleshooting
See SSO FAQ.