Resource Access Management (RAM) provides multiple methods for fine-grained authorization, such as ARN-based authorization, resource group-based authorization, and tag-based authorization. This topic provides examples of how to use these methods to grant a RAM user read-only permissions on a specific ApsaraDB RDS instance.
Prerequisites
A RAM user is created. For more information, see Create a RAM user.
How to choose an authorization method
ARN-based authorization
Features: Allows you to grant read-only permissions to specific ApsaraDB RDS instances with high precision.
Scenarios: Suitable for fine-grained permission control over a single or a small number of specific ApsaraDB RDS instances.
Example: A specific database instance in a development environment.
Resource group-based authorization
Features: Allows you to group multiple ApsaraDB RDS instances. You can grant the same permissions to multiple ApsaraDB RDS instances in a resource group in a single operation.
Scenarios: Suitable for granting permissions in batches to a group of ApsaraDB RDS instances that have similar features.
Example: If multiple ApsaraDB RDS instances are in different regions or projects but require the same security policy, you can add these instances to a resource group. Then, you can grant read-only permissions to all instances in that group.
Tag-based authorization
Features: Allows you to dynamically grant permissions based on tag key-value pairs.
Scenarios: Suitable for flexible permission management of ApsaraDB RDS instances based on tags. This method is ideal for controlling permissions based on business properties or other metadata.
Example: Suppose you have multiple ApsaraDB RDS instances with different tags, such as
env=prod,env=test, andproject=finance. You can use tag-based authorization rules to allow certain users to access only the ApsaraDB RDS instances with specific tags. You do not need to configure permissions for each instance one by one.
Procedure
Perform the following operations using your Alibaba Cloud account.
Method 1: ARN-based authorization
With ARN-based authorization, you use an Alibaba Cloud Resource Name (ARN) in an access policy to specify the resources that you want to authorize. This provides precise access control over specific resources. For more information about the basic elements of an access policy, see Basic elements of an access policy.
Create an access policy.
Log on to the RAM console.
In the navigation pane on the left, choose Permissions > Policies.
Click Create Policy.
Click the Visual editor tab or the JSON tab.
Visual Editor
Set Effect to Allow and Service to ApsaraDB RDS / RDS.
For Action, select the Describe-related permissions under Read action. You can search for Describe and select all related permissions.
ImportantIf you select too many permissions and the policy document exceeds the length limit, you can submit a ticket to increase the limit.
For Resource, select Specified resource(s). The ARN is in the format
acs:rds:{#regionId}:{#accountId}:dbinstance/{#dbinstanceId}. This ARN defines the Resource as the instance to which you want to grant permissions. Leave the Condition field empty.Click Add Statement. Set Effect to Allow and Service to ApsaraDB RDS / RDS.
Set Action to rds:DescribeDBInstances. Set Resource to All resource(s)(*). Leave the Condition field empty.
JSON
In the script editor, enter the following content:
{
  "Statement": [
    {
      "Effect": "Allow",
      "Action": "rds:Describe*",
      "Resource": "acs:rds:*:*:dbinstance/Instance ID"
    },
    {
      "Effect": "Allow",
      "Action": "rds:DescribeDBInstances",
      "Resource": "*"
    }
  ],
  "Version": "1"
}
Click OK. In the Create Policy dialog box, enter a Policy Name and Description. Confirm the policy content and click OK again.
Attach the custom policy to the RAM user.
In the navigation pane on the left, choose Identities > Users.
Find the target user and click Add Permissions in the Actions column.
For Resource Scope, select the resource group for this example. In the Policy section, click Custom Policy. Then, search for and select the policy that you created.
Click Grant permissions.
Log on to the ApsaraDB RDS console as the RAM user and view the instance.
Go to the ApsaraDB RDS instance list. Select a region in the top navigation bar to view the instance list.
Click the authorized instance to view its details.
NoteWith this authorization method, the RAM user can see all instances in the instance list but can view the details of only the authorized instance. If the user tries to view other unauthorized instances, an "insufficient permissions" message is displayed.
The configuration is complete. You have granted the RAM user read-only permissions on the specified ApsaraDB RDS instance. You can also grant other permissions to the RAM user as needed.
Method 2: Resource group-based authorization
With resource group-based authorization, you place the resources to be authorized into the same resource group. Then, when you grant permissions to a RAM user, you specify that resource group. This provides precise authorization for all resources within the group.
Create a resource group.
Log on to the Resource Management console. In the navigation pane on the left, click Resource Group.
Click Create Resource Group. Set the Resource Group Identifier and Resource Group Name, and then click OK.
Transfer the instance to the new resource group.
Find the target instance in its current resource group. For example, if the target instance is in the Default Resource Group, click Manage Resource in the Actions column for that group.
Search for the target instance by its instance ID. Select the instance and click Transfer.

In the Transfer Resource Group window, select the resource group that you created in Step 1, and then click Confirm.
In the success window, click Confirm.
The transfer is successful if you can see the target instance in the new resource group.
Create an access policy.
Log on to the RAM console.
In the navigation pane on the left, choose Permissions > Policies.
Click Create Policy.
Click the Visual editor tab or the JSON tab.
Visual Editor
Set Effect to Allow and Service to ApsaraDB RDS / RDS.
For Action, select the Describe-related permissions under Read action. You can search for Describe and select all related permissions.
ImportantIf you select too many permissions and the policy document exceeds the length limit, you can submit a ticket to increase the limit.
Set Resource to All resource(s)(*). Leave the Condition field empty.
JSON
In the script editor, enter the following content:
{
    "Version": "1",
    "Statement": [
        {
            "Effect": "Allow",
            "Action": [
                "rds:Describe*"
            ],
            "Resource": "*"
        }
    ]
}
Click OK. In the Create Policy dialog box, enter a Policy Name and Description. Confirm the policy content and click OK again.
Attach the custom policy to the RAM user.
In the navigation pane on the left, choose Identities > Users.
Find the target user and click Add Permissions in the Actions column.
For Resource Scope, select the resource group that you created. In the Policy section, click Custom Policy. Search for and select the policy that you created.
Click Grant permissions.
Log on to the ApsaraDB RDS console as the RAM user and view the instance.
Go to the ApsaraDB RDS instance list and select a region in the top navigation bar.
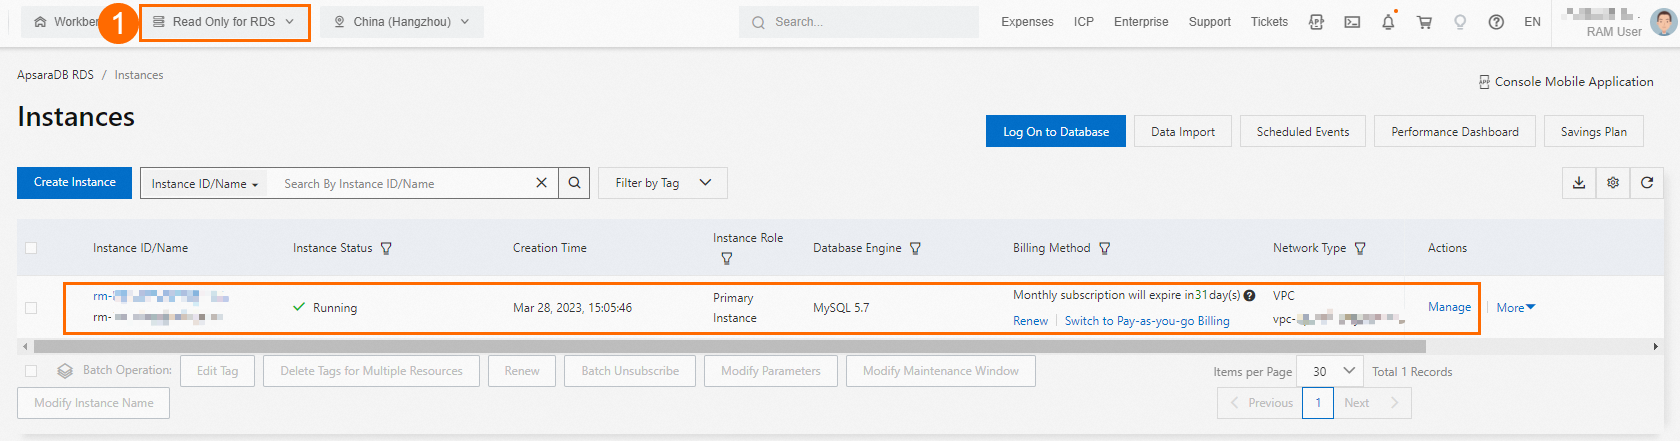
Select the resource group that you created in Step 1, as shown by ① in the following figure, to see the target instance.
The configuration is complete. You have granted the RAM user read-only permissions on the specified ApsaraDB RDS instance. You can also grant other permissions to the RAM user as needed.
Method 3: Tag-based authorization
With tag-based authorization, you attach the same tag to the resources that you want to authorize. When you create an access policy, the policy applies only to resources with that specific tag. This provides precise authorization for all resources that share the tag.
Attach a custom tag to the ApsaraDB RDS instance.
Go to the ApsaraDB RDS instance list. Select a region and find the target instance.
In the Tags column, click the
 icon, and then click Edit.
Set the tag key and tag value, and then click OK.
In this example, the tag key is set to
test-ramand the tag value is set tords-mysql. When you configure the tag, use a meaningful key and value.The custom tag is attached successfully if you can see the tag in the Tags column, as shown in the following figure.

Create an access policy.
Log on to the RAM console.
In the navigation pane on the left, choose Permissions > Policies.
Click Create Policy.
Click the Visual editor tab or the JSON tab.
Visual Editor
Set Effect to Allow and Service to ApsaraDB RDS / RDS.
For Action, select the Describe-related permissions under Read action. You can search for Describe and select all related permissions.
ImportantIf you select too many permissions and the policy document exceeds the length limit, you can submit a ticket to increase the limit.
Set Resource to All resource(s)(*). Click Add condition. Set the Key, Operator, and Value.
NoteFor the Condition parameters, the Key must be
rds:ResourceTag, and the Operator must beStringEquals. For Value, enter the Tag Key and Tag Value that you attached to the ApsaraDB RDS instance in Step 1.
JSON
In the script editor, enter the following content:
NoteIn the following script,
test-ramandrds-mysqlare examples. Replace them with the tag key and tag value that you attached to the ApsaraDB RDS instance in Step 1.{ "Version": "1", "Statement": [ { "Effect": "Allow", "Action": [ "rds:Describe*" ], "Resource": [ "*" ], "Condition": { "StringEquals": { "rds:ResourceTag/test-ram": [ "rds-mysql" ] } } } ] }Click OK. In the Create Policy dialog box, enter a Policy Name and Description. Confirm the policy content and click OK again.
Attach the custom policy to the RAM user.
In the navigation pane on the left, choose Identities > Users.
Find the target user and click Add Permissions in the Actions column.
For Resource Scope, select the resource group that you created for this example. In the Policy section, select Custom Policy. Search for and select the policy that you created.
Click Grant permissions.
Log on to the ApsaraDB RDS console as the RAM user and view the instance.
Go to the ApsaraDB RDS instance list and select a region in the top navigation bar.
Use the Filter By Tag feature to filter by the tag that you attached in Step 1. The target instance is displayed.

The configuration is complete. You have granted the RAM user read-only permissions on the specified ApsaraDB RDS instance. You can also grant other permissions to the RAM user as needed.