Resource Access Management (RAM) supports three methods for granting a RAM user read-only permissions on a specific ApsaraDB RDS instance: ARN-based authorization, resource group-based authorization, and tag-based authorization. Each method targets a different permission management scenario.
Perform all operations using your Alibaba Cloud account.
Prerequisites
Before you begin, ensure that you have:
A RAM user. For more information, see Create a RAM user.
Choose an authorization method
| Method | How it works | Best for |
|---|---|---|
| ARN-based | Specifies individual instances by ARN in the policy | Single or a small number of specific instances |
| Resource group-based | Groups instances and grants permissions at the resource group scope | Multiple instances that share the same permission requirements |
| Tag-based | Applies permissions to all instances that carry a specific tag | Dynamic, business-property-driven permission management |
Method 1: ARN-based authorization
ARN-based authorization uses an Alibaba Cloud Resource Name (ARN) in the policy to target a specific instance. This gives you precise access control at the individual instance level. For details about policy elements, see Basic elements of an access policy.
Step 1: Create an access policy
Log on to the RAM console.
In the navigation pane, choose Permissions > Policies.
Click Create Policy.
Click the Visual editor tab or the JSON tab and configure the policy. Visual editor The ARN format for an RDS instance is:
Visual Editor
Set Effect to Allow and Service to ApsaraDB RDS / RDS.
For Action, select the Describe-related permissions under Read action. You can search for Describe and select all related permissions.
ImportantIf you select too many permissions and the policy document exceeds the length limit, you can submit a ticket to increase the limit.
For Resource, select Specified resource(s). The ARN is in the format
acs:rds:{#regionId}:{#accountId}:dbinstance/{#dbinstanceId}. This ARN defines the Resource as the instance to which you want to grant permissions. Leave the Condition field empty.Click Add Statement. Set Effect to Allow and Service to ApsaraDB RDS / RDS.
Set Action to
rds:DescribeDBInstancesand Resource to **All resource(s)(*). Leave Condition** blank.
ImportantIf the selected permissions cause the policy document to exceed the length limit, submit a ticketsubmit a ticketsubmit a ticket to increase the limit.
This second statement lets the RAM user see the instance list. Without it, the user cannot navigate to the authorized instance in the console.
acs:rds:{#regionId}:{#accountId}:dbinstance/{#dbinstanceId}For example, to target instance
rm-bp1xxxxxxxxxin regioncn-hangzhouunder account123456789012:acs:rds:cn-hangzhou:123456789012:dbinstance/rm-bp1xxxxxxxxxJSON
JSON In the script editor, enter:
{
  "Statement": [
    {
      "Effect": "Allow",
      "Action": "rds:Describe*",
      "Resource": "acs:rds:*:*:dbinstance/Instance ID"
    },
    {
      "Effect": "Allow",
      "Action": "rds:DescribeDBInstances",
      "Resource": "*"
    }
  ],
  "Version": "1"
}
Replace
Instance IDwith the actual instance ID.Click OK. In the Create Policy dialog box, enter a Policy Name and Description, then click OK.
Step 2: Attach the policy to the RAM user
In the navigation pane, choose Identities > Users.
Find the target user and click Add Permissions in the Actions column.
For Resource Scope, select the appropriate resource group. In the Policy section, click Custom Policy, then search for and select the policy you created.
Click Grant permissions.
Step 3: Verify as the RAM user
Log on to the ApsaraDB RDS console as the RAM user. Select a region in the top navigation bar.
Click the authorized instance to view its details.
With this method, the RAM user can see all instances in the list but can view details only for the authorized instance. Attempting to access an unauthorized instance shows an "insufficient permissions" message.
Method 2: Resource group-based authorization
Resource group-based authorization places the target instance in a dedicated resource group, then scopes the policy to that group. All instances in the group inherit the same permissions in a single grant operation.
Step 1: Create a resource group
Log on to the Resource Management console. In the navigation pane, click Resource Group.
Click Create Resource Group. Set the Resource Group Identifier and Resource Group Name, then click OK.
Step 2: Transfer the instance to the resource group
Find the target instance in its current resource group. For example, if it is in the Default Resource Group, click Manage Resource in the Actions column for that group.
Search for the instance by ID, select it, and click Transfer.

In the Transfer Resource Group window, select the resource group you created, then click Confirm.
In the success window, click Confirm.
The transfer is complete when the instance appears in the new resource group.
Step 3: Create an access policy
Log on to the RAM console.
In the navigation pane, choose Permissions > Policies.
Click Create Policy.
Click the Visual editor tab or the JSON tab and configure the policy. Visual editor JSON In the script editor, enter:
Visual Editor
Set Effect to Allow and Service to ApsaraDB RDS / RDS.
For Action, select the Describe-related permissions under Read action. You can search for Describe and select all related permissions.
ImportantIf you select too many permissions and the policy document exceeds the length limit, you can submit a ticket to increase the limit.
Set Resource to **All resource(s)(*). Leave Condition** blank.
ImportantIf the selected permissions cause the policy document to exceed the length limit, submit a ticketsubmit a ticketsubmit a ticket to increase the limit.
JSON
{
  "Version": "1",
  "Statement": [
    {
      "Effect": "Allow",
      "Action": [
        "rds:Describe*"
      ],
      "Resource": "*"
    }
  ]
}
Click OK. In the Create Policy dialog box, enter a Policy Name and Description, then click OK.
Step 4: Attach the policy to the RAM user
In the navigation pane, choose Identities > Users.
Find the target user and click Add Permissions in the Actions column.
For Resource Scope, select the resource group you created. In the Policy section, click Custom Policy, then search for and select the policy you created.
Click Grant permissions.
Step 5: Verify as the RAM user
Log on to the ApsaraDB RDS console as the RAM user. Select a region in the top navigation bar.
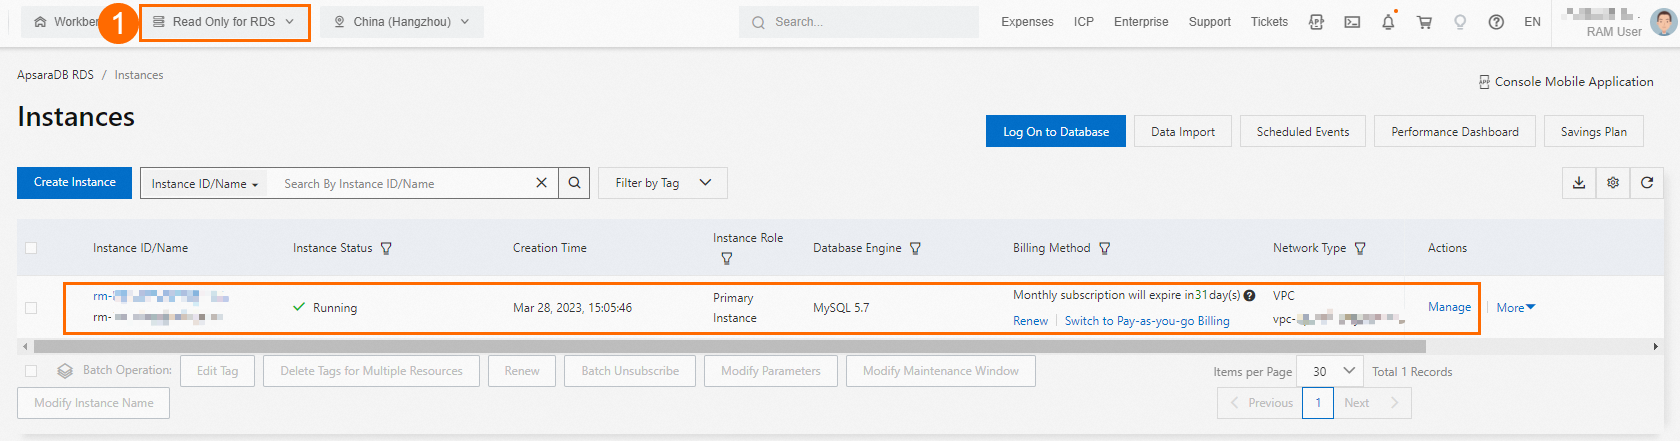
Select the resource group you created (① in the figure below) to see the target instance.
Method 3: Tag-based authorization
Tag-based authorization attaches a tag to the target instance and adds a tag condition to the policy. The policy applies only to instances that carry the specified tag, giving you flexible, metadata-driven permission management.
Step 1: Attach a tag to the instance
Go to the ApsaraDB RDS instance list. Select a region and find the target instance.
In the Tags column, click the
 icon, then click Edit.
Enter a tag key and tag value, then click OK. In this example, the tag key is
test-ramand the tag value isrds-mysql. Use values that reflect your access control requirements.
The tag is attached when it appears in the Tags column.
Step 2: Create an access policy
Log on to the RAM console.
In the navigation pane, choose Permissions > Policies.
Click Create Policy.
Click the Visual editor tab or the JSON tab and configure the policy. Visual editor JSON In the script editor, enter:
Visual Editor
Set Effect to Allow and Service to ApsaraDB RDS / RDS.
For Action, select the Describe-related permissions under Read action. You can search for Describe and select all related permissions.
ImportantIf you select too many permissions and the policy document exceeds the length limit, you can submit a ticket to increase the limit.
Set Resource to **All resource(s)(*). Click Add condition** and set the condition parameters:
ImportantIf the selected permissions cause the policy document to exceed the length limit, submit a ticketsubmit a ticketsubmit a ticket to increase the limit.
Replace
test-ramandrds-mysqlwith the tag key and tag value you attached to the instance in Step 1.Parameter Value Key rds:ResourceTagOperator StringEqualsValue The tag key and tag value you attached in Step 1 JSON
{
  "Version": "1",
  "Statement": [
    {
      "Effect": "Allow",
      "Action": [
        "rds:Describe*"
      ],
      "Resource": [
        "*"
      ],
      "Condition": {
        "StringEquals": {
          "rds:ResourceTag/test-ram": [
            "rds-mysql"
          ]
        }
      }
    }
  ]
}
Click OK. In the Create Policy dialog box, enter a Policy Name and Description, then click OK.
Step 3: Attach the policy to the RAM user
In the navigation pane, choose Identities > Users.
Find the target user and click Add Permissions in the Actions column.
For Resource Scope, select the resource group you created for this example. In the Policy section, click Custom Policy, then search for and select the policy you created.
Click Grant permissions.
Step 4: Verify as the RAM user
Log on to the ApsaraDB RDS console as the RAM user. Select a region in the top navigation bar.
Use Filter By Tag to filter by the tag attached in Step 1. The target instance appears in the list.

What's next
The RAM user now has read-only permissions on the specified ApsaraDB RDS instance. To grant additional permissions, repeat the steps above and add the required actions to the policy.