Custom policies in Resource Access Management (RAM) allow you to define granular permissions that are tailored to your specific security requirements. You can create custom policies using several methods depending on your needs and familiarity with policy syntax.
Policy creation methods
You can create a custom policy in the RAM console using one of the following methods:
The visual editor provides a guided, form-based interface for building a policy. You select elements such as the effect, service, actions, and resources from dropdown lists. This is the easiest method and is recommended for most users as it helps prevent syntax errors.
The JSON editor allows you to write the policy document directly in JSON format. This method offers the most flexibility and is suitable for users who are familiar with RAM policy syntax or need to copy and paste an existing policy.
You can create a policy by importing and customizing a predefined template, system policy, or your custom policy. RAM provides scenario-specific policy templates for different groups of users (such as administrator, financial, or network roles). This method provides a solid starting point for creating complex policies.
Use the visual editor
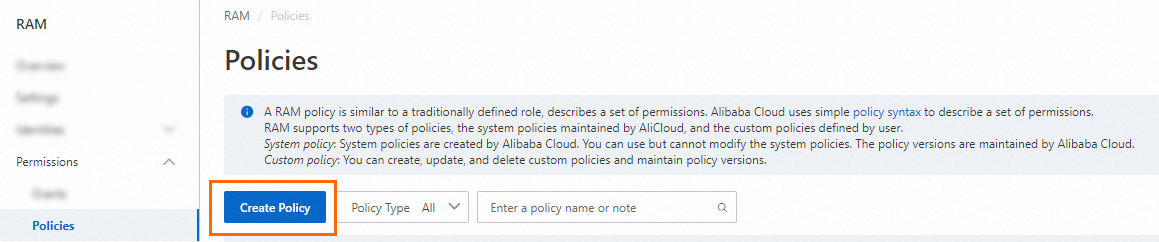
Log on to the RAM console as a RAM administrator.
In the left-side navigation pane, choose .
On the Policies page, click Create Policy.
On the Create Policy page, select the Visual Editor tab.
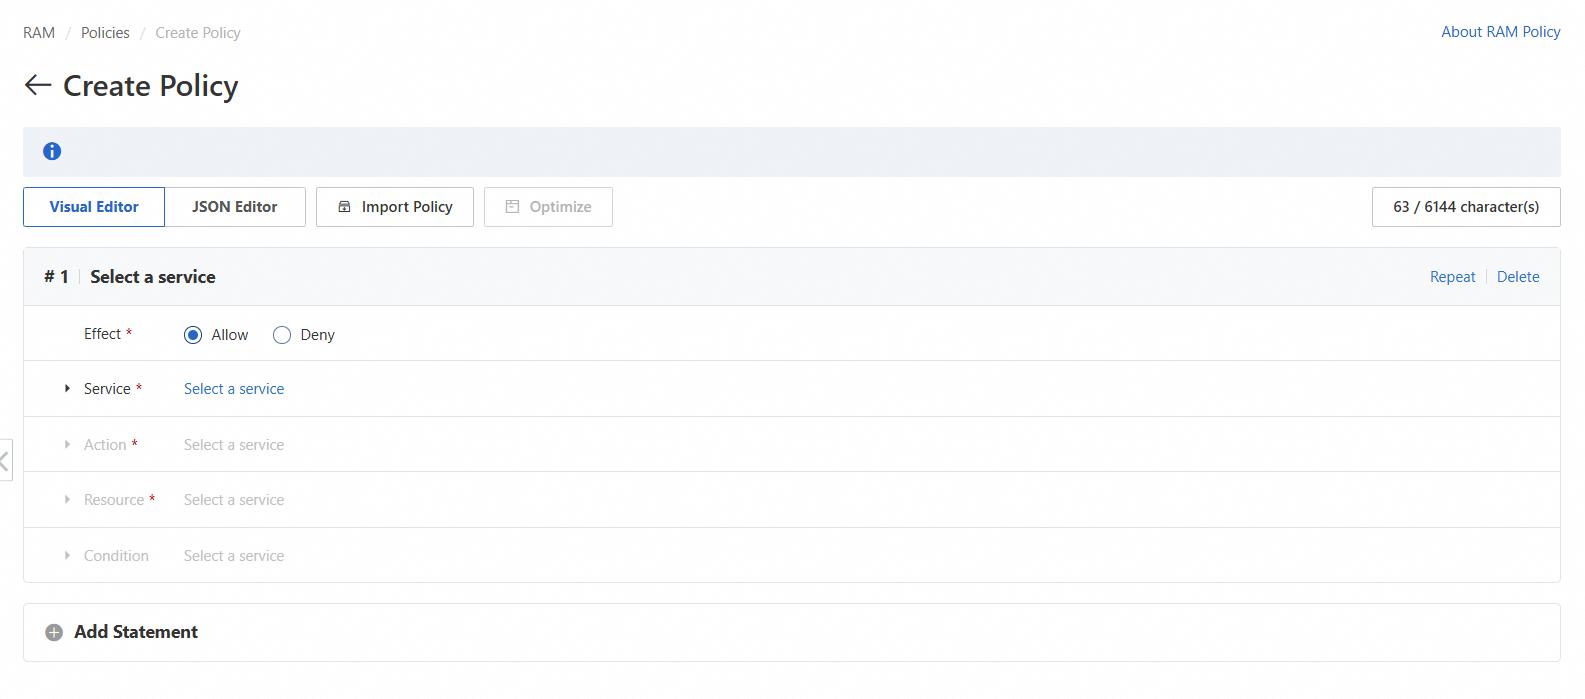
Build the policy by configuring each statement. A statement defines a single permission.
For more information about the policy components, see Policy elements.
For Effect, select Allow or Deny.
For Service, select the target Alibaba Cloud service.
For Action, select the specific actions you want to allow or deny. You can select All Actions or choose individual actions.
For Resource, define the resources that the action applies to. You can select All Resources or specify individual resources by their Alibaba Cloud Resource Name (ARN).
NoteIf a resource is marked as Required for a selected action, we strongly recommend specifying it to ensure the policy functions as expected.
(Optional) For Condition, click Add Condition to specify when the policy is in effect. You can add conditions based on the request time, IP address, and other factors.
(Optional) Click Add Statement to add and configure more permission statements within the same policy.
(Optional) Click Optimize at the top of the editor. In the confirmation dialog box, click Perform. This feature cleans up your policy by merging statements, removing redundant elements, and narrowing resource scopes.
Click OK.
Enter a Policy Name and an optional Description, and click OK.
Use the JSON editor
Log on to the RAM console as a RAM administrator.
In the left-side navigation pane, choose .
On the Policies page, click Create Policy.
On the Create Policy page, select the JSON Editor tab.
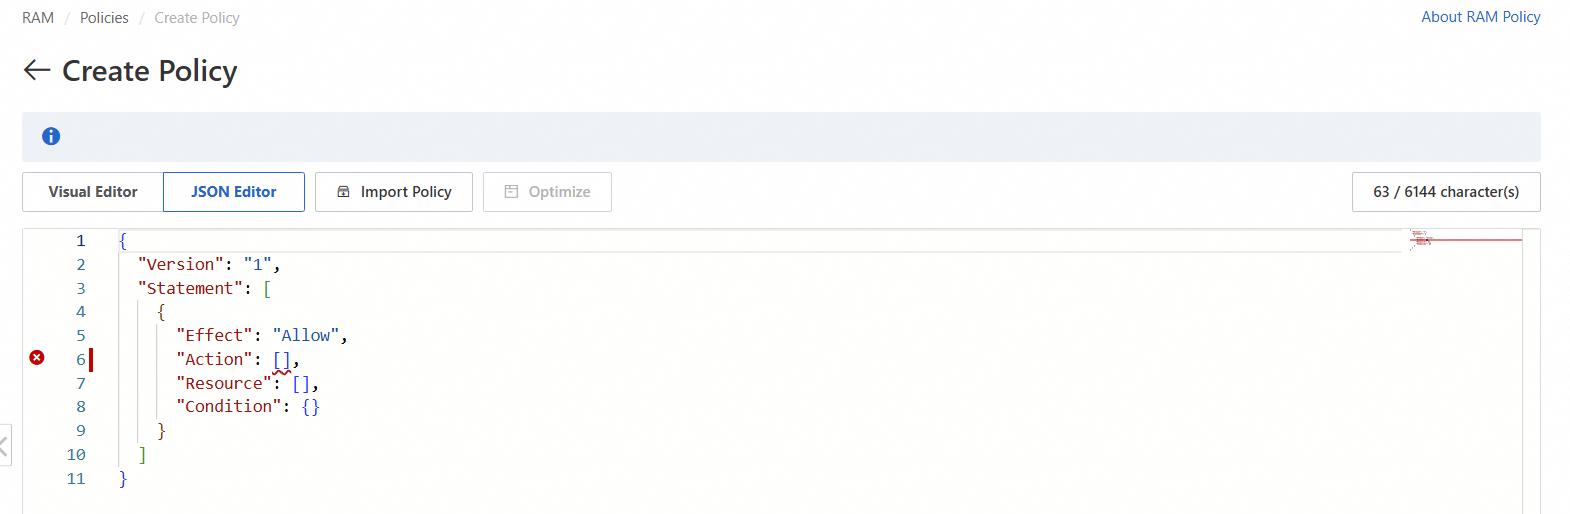
Enter your policy document in the editor.
For more information about the required syntax and structure, see Policy structure and syntax.
(Optional) Click Optimize at the top of the editor. In the confirmation dialog box, click Perform. This feature cleans up your policy by merging statements, removing redundant elements, and narrowing resource scopes.
Click OK.
Enter a Policy Name and an optional Description, and click OK.
Create a policy from a template
Log on to the RAM console as a RAM administrator.
In the left-side navigation pane, choose .
On the Policies page, click Create Policy.
On the Create Policy page, click Import Policy.
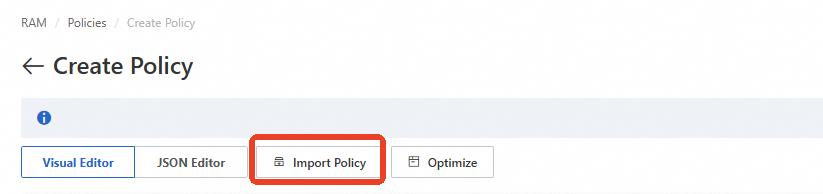
In the Import Policy dialog box, select either Policy Template, System Policy, or Custom Policy from the dropdown list.
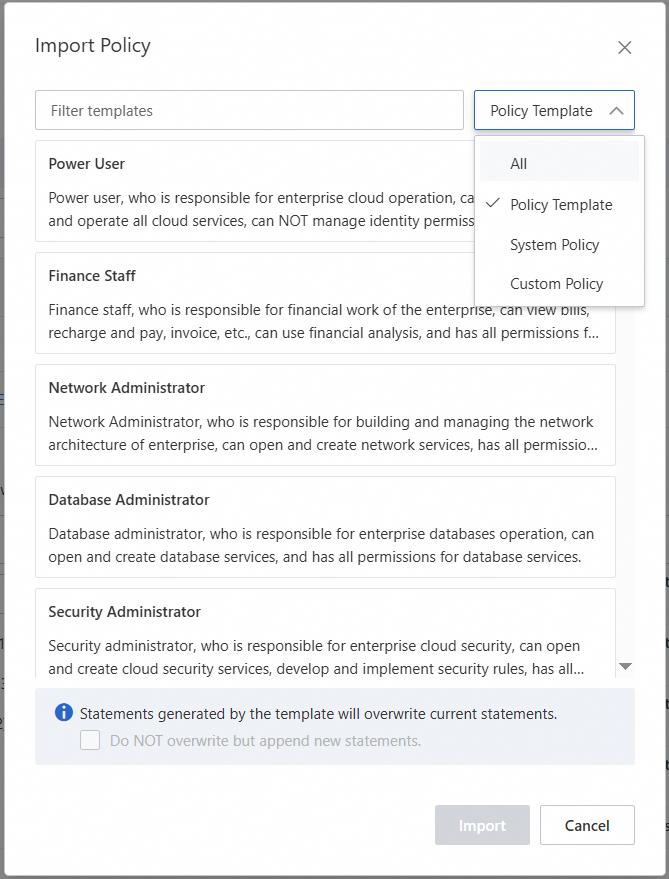
Select a template, system policy, or custom policy from the list.
If the template requires parameters, configure them as needed.
Choose whether to overwrite the current content in the policy editor or append the template's content.
Click Import.
The imported policy content appears in the editor. You can now modify it as needed.
(Optional) Click Optimize at the top of the editor. In the confirmation dialog box, click Perform. This feature cleans up your policy by merging statements, removing redundant elements, and narrowing resource scopes.
Click OK.
Enter a Policy Name and an optional Description, and click OK.