Feature overview
to accurately describe the business scenario, you need to add event-related attributes to an event to help you obtain complete event information, such as the product id, product title, and product unit price.
Operating Instructions
1. Page composition
"Attribute management" is mainly composed of the following parts: 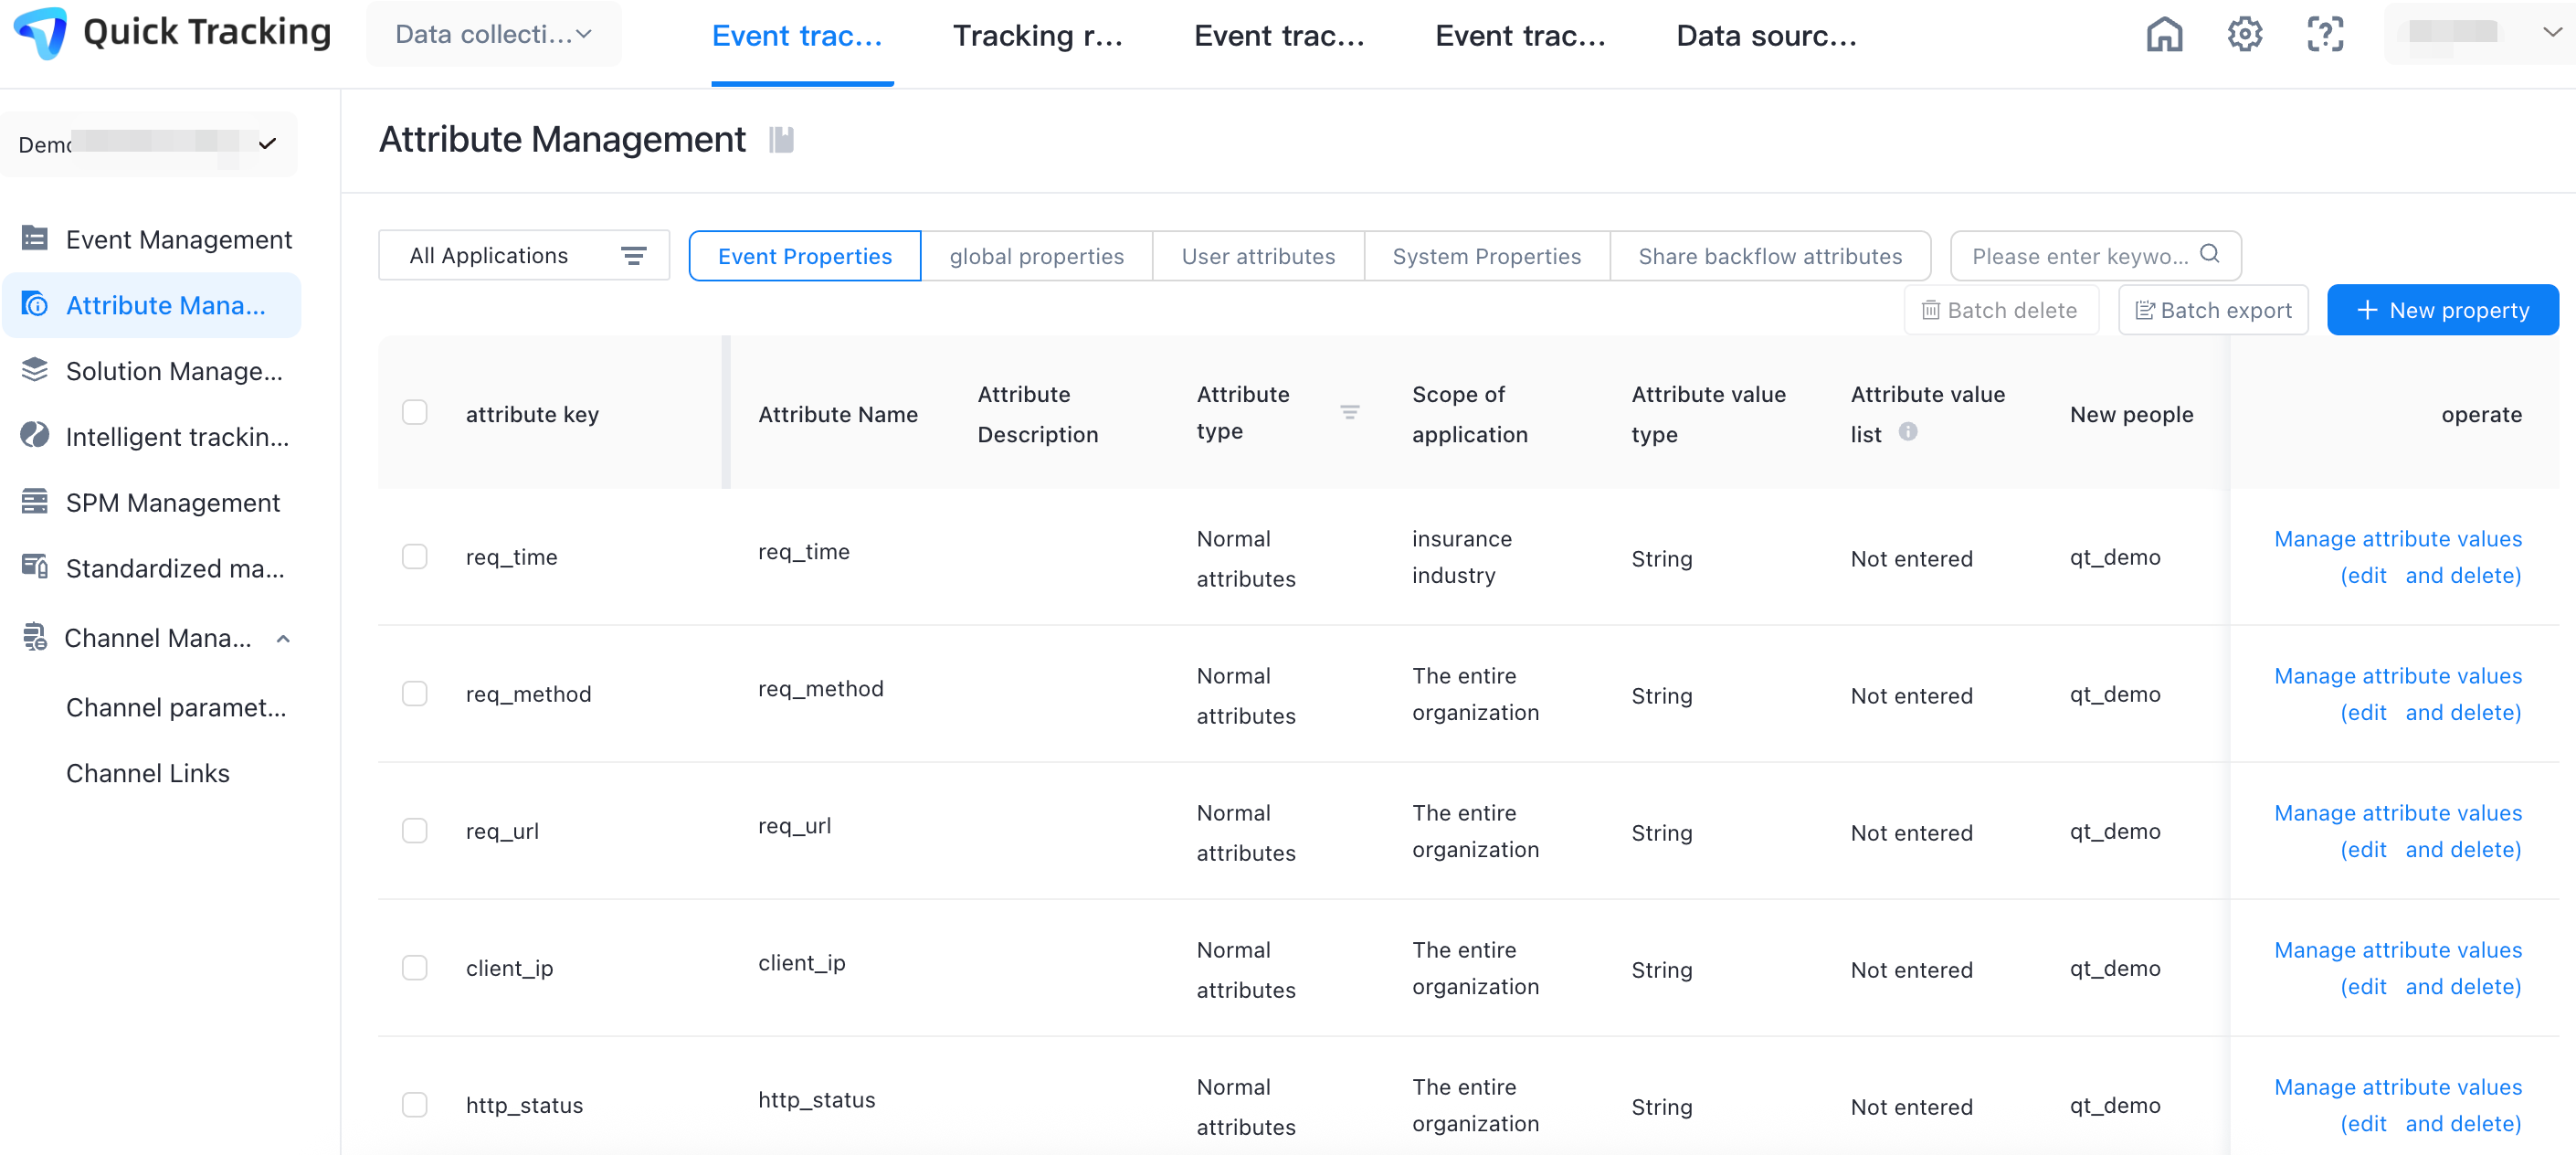
1. Application filter box: displays the properties of all applications in the current organization by default. You can also filter applications and view the properties of an application separately.
2. Property switching box: contains "event properties", "global properties", "user properties", "system properties" and channel properties, where you can switch to view these types of properties;
"event attribute" The custom attribute passed in by the user in the event;
"global attribute" calls the global attribute set by the global attribute interface. After the global attribute is set once, it will be automatically carried in subsequent events.
"user attributes" User attributes reported through specific events or server APIs. User attributes are usually some tag information of users and take effect only for members (logged-on users);
"System Properties" The properties preset by the system are automatically collected by the integrated SDK.
Channel Attributes allows you to filter channel parameters to view the behavior characteristics of users from each channel in the application and their contributions to a metric to determine the delivery quality of each channel. The system presets five channel attributes: utm_source, utm_campaign, utm_medium, utm_term, and utm_content. You can also create channel attributes based on your needs.
3. Property search box: You can search for properties by keyword;
4. Property operation area: here you can create, import, export and delete properties;
5. Property display area: displays the information of all properties. You can click the "Select Display Columns" button above to select the displayed fields.
2. Functional operations
2.1 New General Attribute
Place the mouse over the "New Attribute" box, and an operation button for creating a new common attribute will appear.
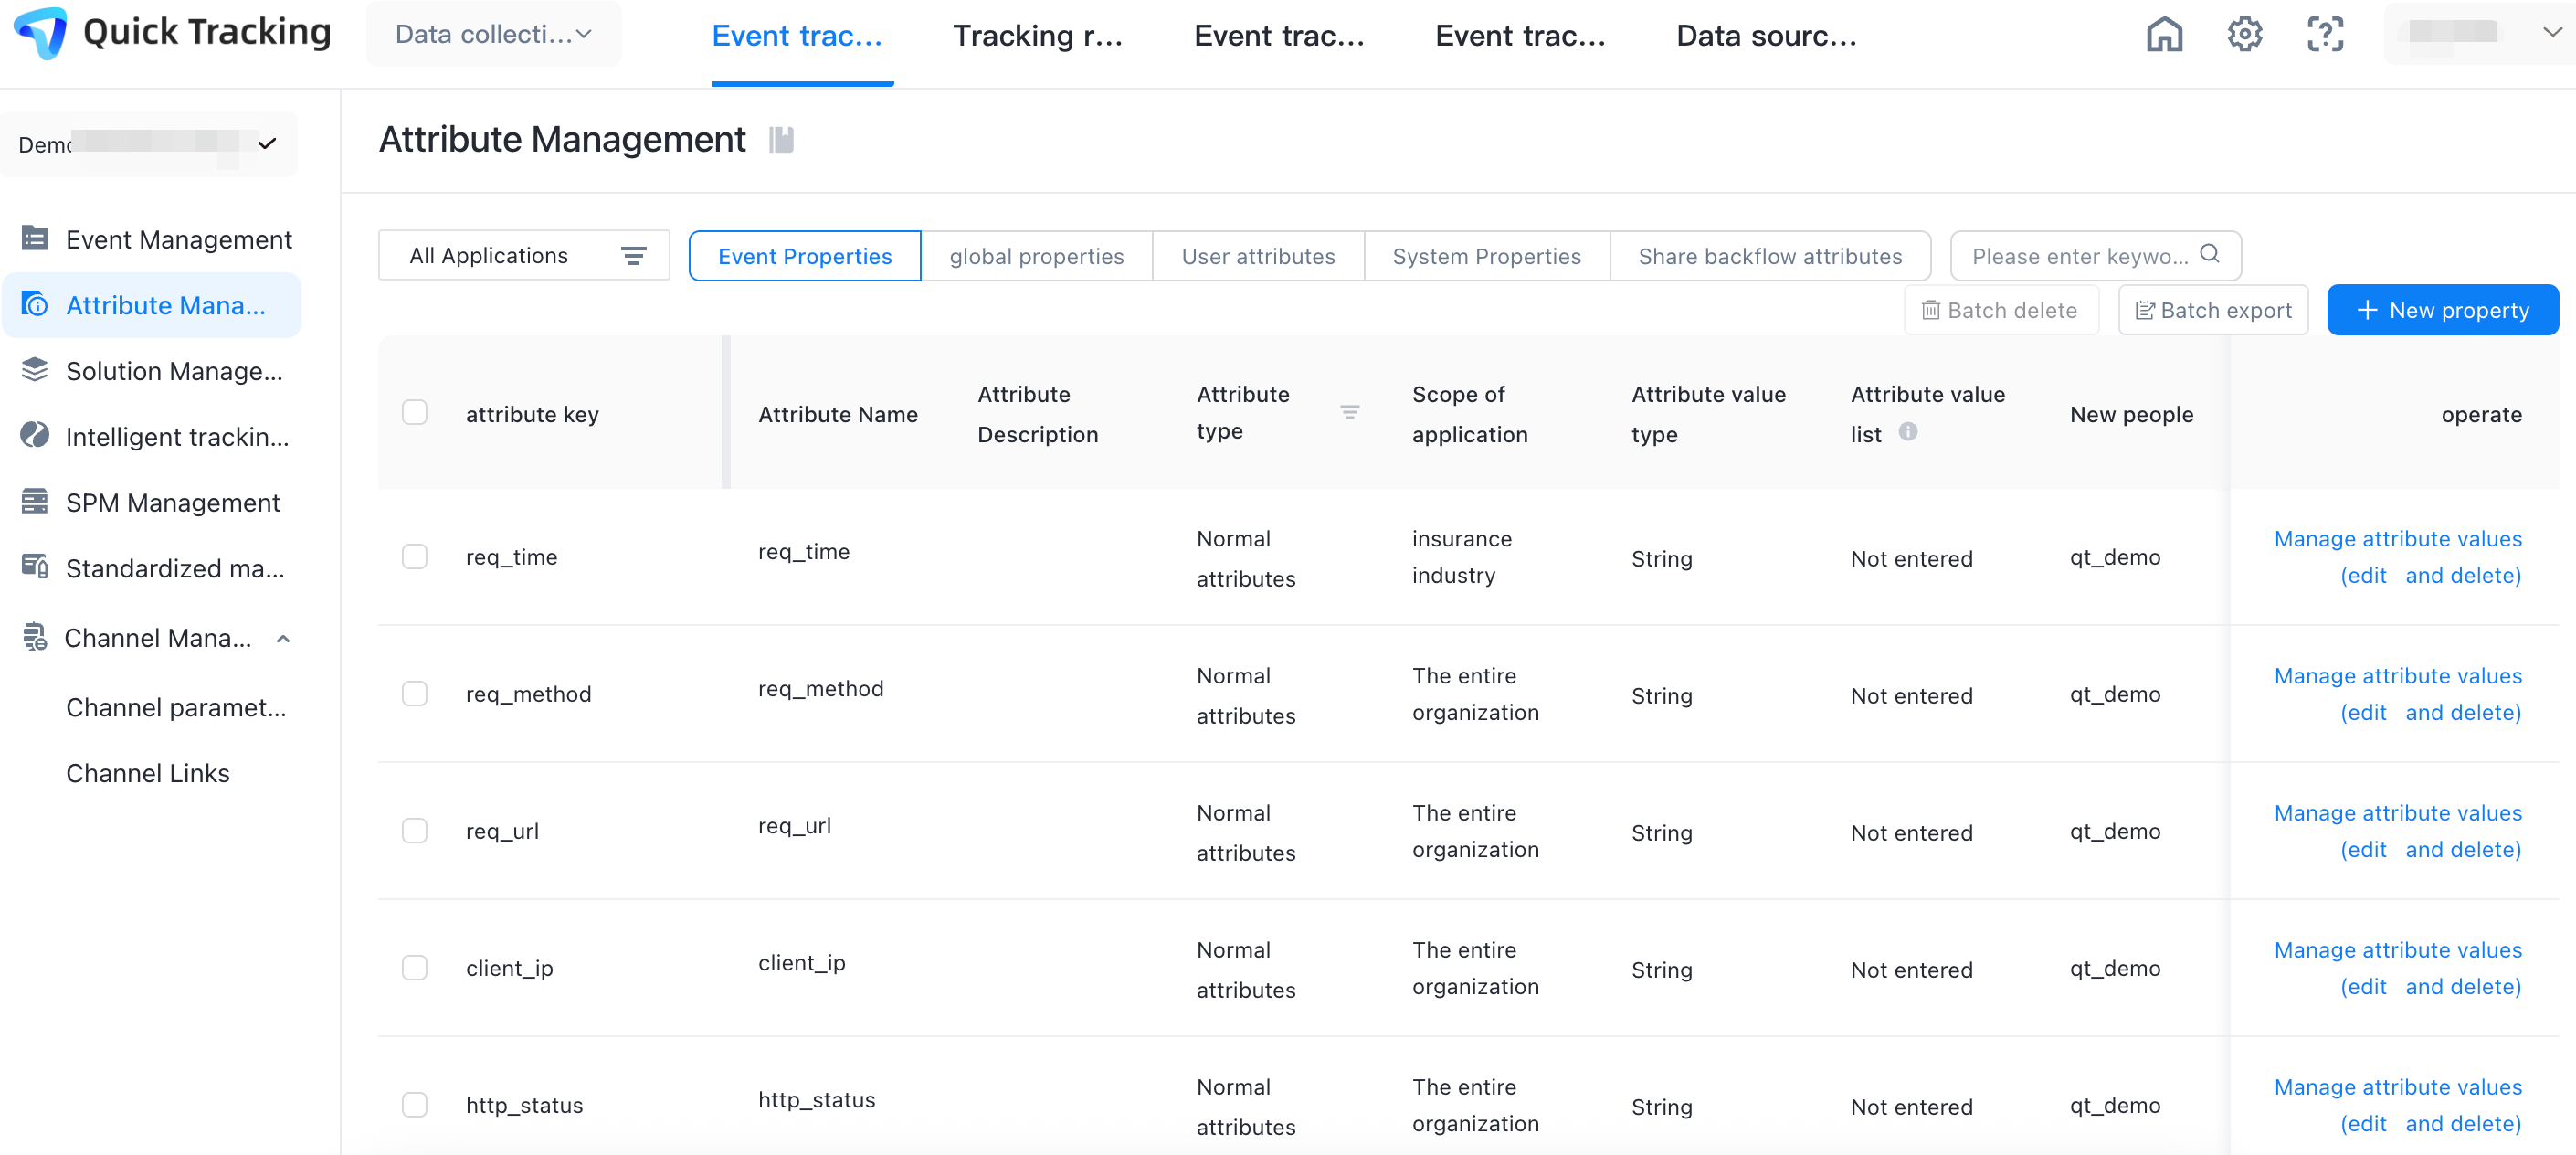
Click the "New Common Attribute" button, and a page for filling in attribute information will pop up. The following describes the key information
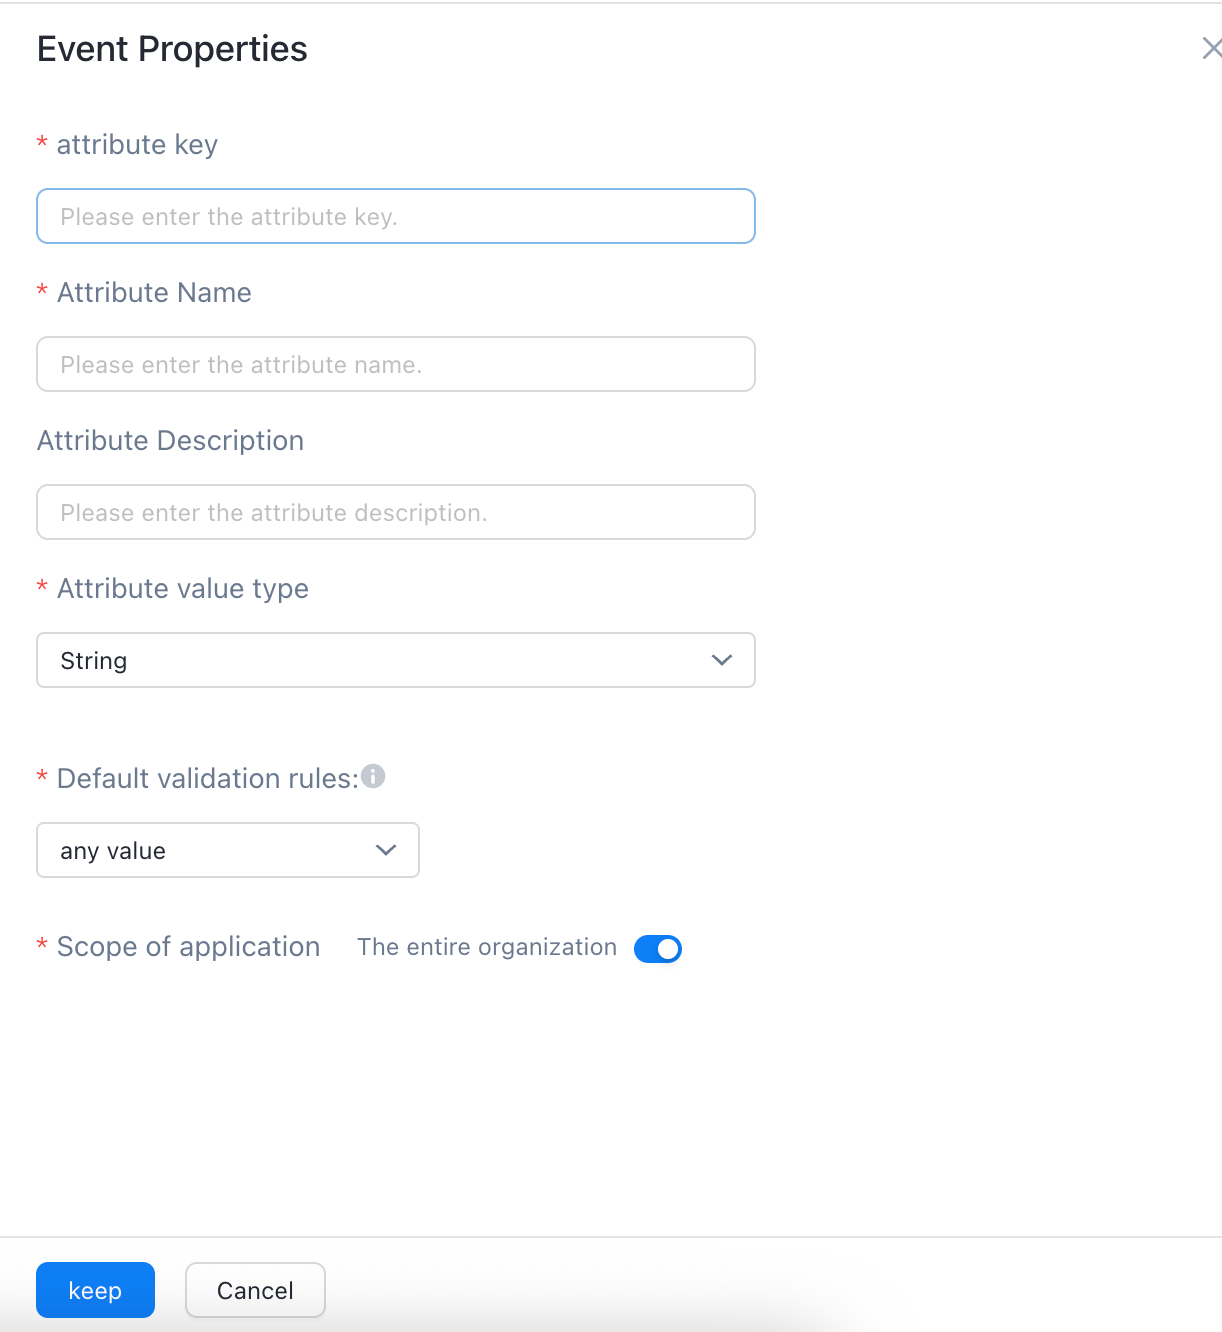 to be filled in for new common attributes.
1. Basic information: it contains the attribute key, attribute name and attribute description, which can be filled in by custom;
2. Attribute value type: there are several types of string, numerical value, string group, Boolean and timestamp, which can be selected according to the actual situation;
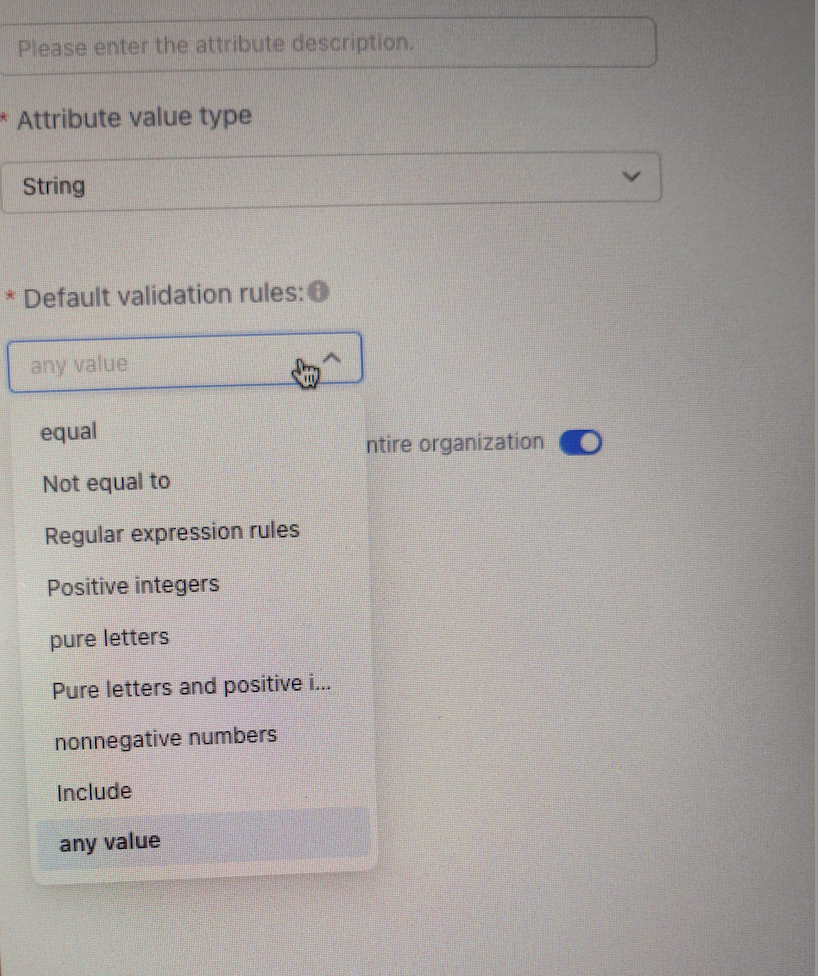
3. Verification rules: The following figure shows the currently supported rules. The rules entered here will take effect in the later tracking point verification-scheme verification, helping users quickly verify whether the actual tracking point meets the entered rules.
4. Effective Scope: The default value is the entire organization. After you disable it, all applications in the current organization are displayed. You can select an application.
When the above information is completed, click the "Save" button below and a property will be created.
2.2 Bulk Import
Click the "Create Virtual Property" button, and the page for filling in the property information will pop up. The following describes the key information to be filled in for creating a virtual property.
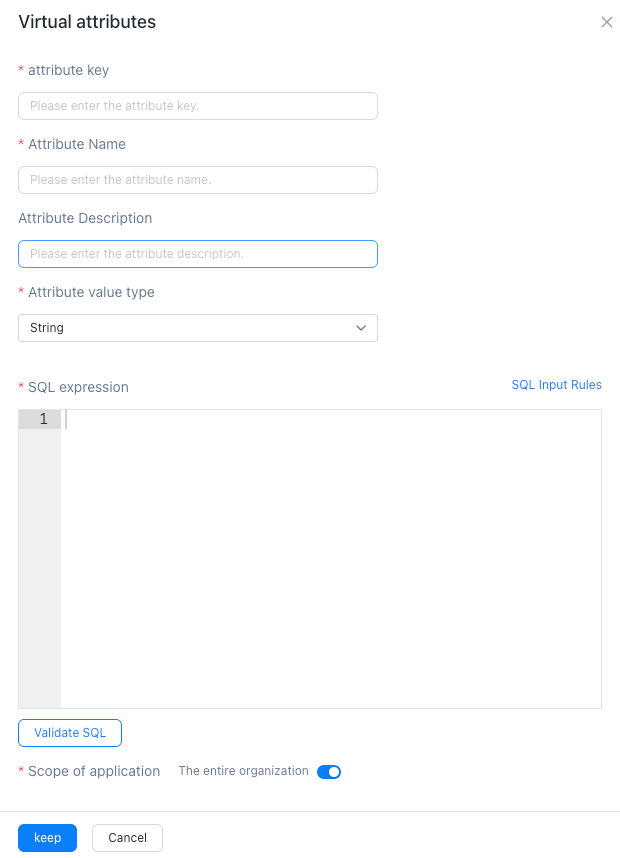
Basic Information: It contains the property key, property name, and property description.
Attribute value type: The value type returned by an expression of three types: numeric value, string, and string group must be the same as the configuration
Click Verify SQL to verify the expression. Click Save to automatically verify the SQL statement. If the verification passes, the SQL statement is successfully saved. If the verification fails, the SQL statement cannot be saved. For more information about the verification rules, see SQL Input Rules in the New Virtual Attribute dialog box.
The default value is the entire organization. After you turn off the switch, all applications in the current organization are displayed. You can select an application.
When the above information is completed, click the "Save" button below and a virtual attribute will be created.
After the virtual property is created, it does not take effect immediately. After the verification is completed, the verification icon "!" Disappear before taking effect.
2.3 Bulk Import
In addition to the above-mentioned new common attributes and new virtual attributes, if we need to maintain attributes in large quantities, we can also use tables for batch import to improve the efficiency of user maintenance events.
Click Batch Import Create to open the Batch Import page, where you can download the maintenance attribute template;
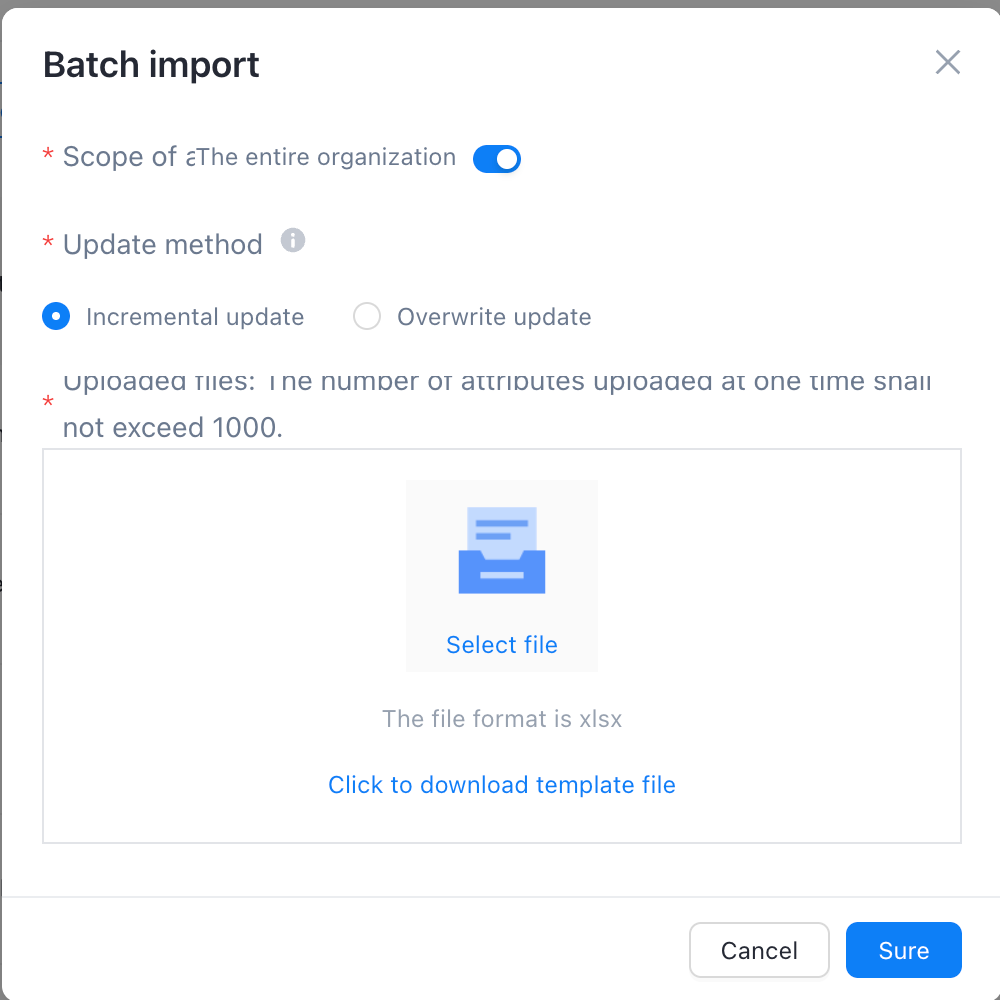
Fill in the attribute information in the template, and the content to be filled in is the same as that of manual creation. The following figure shows the form template:

When the information is completed, you can directly import the form, then select the effective range, and click the "OK" button to import the attributes into the system.
Update Method: Update methods are divided into "Incremental Update" and "Overwrite Update";
Incremental update: If the uploaded properties are duplicated with the managed properties and the effective range is inconsistent, add the effective range to the original one.
Overwrite Update: If the uploaded property is duplicate with the managed property and the effective range is inconsistent, the current effective range overwrites the original effective range.